
Oct
09
09

by praveen @ circuitstoday.com:
Ultrasonic range finder using 8051 microcontroller has been already published by me in this website. This time it is an ultrasonic range finder using arduino. HC-SR04 ultrasonic range finder module is used as the sensor here. The display consists of a three digit multiplexed seven segment display. This range finder can measure up to 200 cm and has an accuracy of 1cm. There is an option for displaying the distance in inch also. Typical applications of this range finder are parking sensors, obstacle warning system, level controllers, terrain monitoring devices etc. Lets have a look at the HC-SR04 ultrasonic module first.
Ultrasonic range finder using arduino - [Link]

Jan_Henrik @ instructables.com writes:
In this project i want to show and explain you a range sensor with ultrasonic and a 20×04 lcd screen. I wrote the code for this project myself and added lots of comments, so that everybody can understand it and use it for other projects (maybe a light range sensor?!). It is easy to build and much more easier to program, it just requires a few cheap parts and can run on battery, for a portable rangefinder.
The maximum rated range is 500 cm, the range is measured 20 times per seccond. It is Displayed on a lcd screen which is 20×4 chars big, it has a custom start message, and it can have a custom design while measuring. It will have a backlight LED and can run on every arduino, which has I²C communication. That mean you can run it on an Arduino nano, which is very small. It also requires 5V so it has to be a 5V version of an Arduino.
Arduino ultrasonic range finder - [Link]

[Klaus] wanted some sort of aid for parking his car, and after running across a $4 ultrasonic sensor, decided to build his own speaking distance sensor (.de, Google Translation).
Inside [Klaus]‘ device is an Arduino Uno, an HC-SR04 ultrasonic distance sensor, and an Adafruit Wave Shield. Originally, this parking/distance sensor used a small TFT to display the distance to an object, but after a few revisions, [Klaus] redesigned the device to speak the current distance, courtesy of an SD card and a soothing female voice.
Right now, the voice is set up to speak the distance from an object to the sensor from 10 cm to 1 m in 5cm increments. This isn’t the limit of the sensor, though, and the device can be easily reconfigured to sense a distance up to four meters.
The board doesn’t have an amplifier or speaker, but with the addition of a small amplifier, [Klaus]‘ device is loud enough to be heard in even the noisiest environments.
Video demo below.

 Ultrasonic range finder mounted on a servo motor controlled by an Arduino with a Processing Radar-like visualisation.
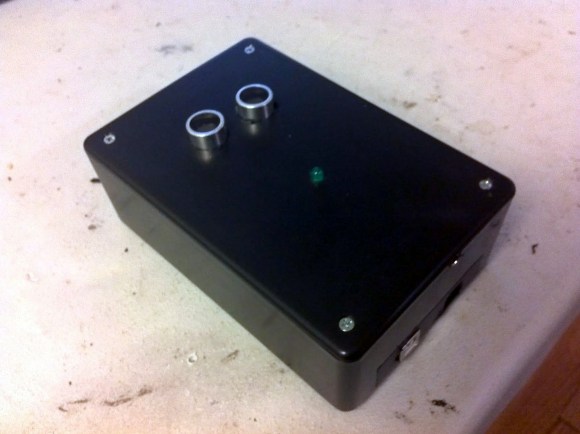
This little box not only plays tunes, but it lets you control several aspects of playback without touching a thing. [Thomas Clauser] calls it the LighTouch and we like it because it uses inaudible sound to control audible sound.
We think the pair of cylinders sticking up through the top of this project enclosure will be recognized by most readers as the business end of an ultrasonic rangefinder. This is the only control interface which [Thomas] chose to use. Although he didn’t write very extensively about the specific control scheme he implemented, the video embedded in his post shows some of the gestures that cause the Arduino inside to change its behavior. For instance, a swipe of the hand at higher level starts playback, swiping at a lower level pauses it. When adjusting the volume the box responds to how close his hand is to that sensor. With this control in place, the music side of these things is simply handled by a music shield he is using.

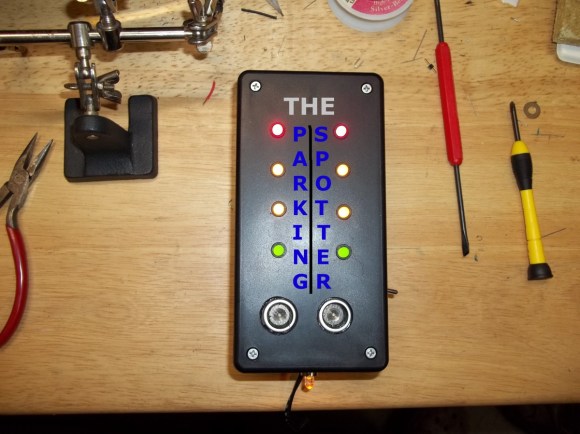
The live Adafruit Show and Tell stream from last weekend featured this project put together by [Silent Jeff]. He’s called “Silent” because when it came time to present his project on the show his microphone wasn’t working. As you can see in the video after the break, [PT] and [Ladyada] worked together to explain the project (of which they had no prior knowledge) using a game of charades. This is one of the follow-up images he sent them which details his parking spotter project.
[Ladyada] compliments [Jeff] on the finished look of the device and we agree. Not only does this do a great job of letting a driver know if they have pulled far enough into the garage, but it’s finished appearance ensures it won’t ever look out-of-place. The two silver discs near the lower end of the box are the sensors of an ultrasonic rangefinder. You mount this box so that the sensor is measuring distance between itself and the bumper of your vehicle. As the distance decreases the LEDs change to let you know when to stop. Inside the case you’ll find a voltage regulator and single-chip running the Arduino bootloader. [Jeff] says this is just his second Arduino project and we hope that at this rate we’ll be looking for big things from him in the not too distant future!
This is basically the same idea as cars that use parking assist sensors in the bumper. It’s just attached to the building instead of to the vehicle itself.
[Jeff's] part of the show starts at the 17:46 mark of this video:

Planet Arduino is, or at the moment is wishing to become, an aggregation of public weblogs from around the world written by people who develop, play, think on Arduino platform and his son. The opinions expressed in those weblogs and hence this aggregation are those of the original authors. Entries on this page are owned by their authors. We do not edit, endorse or vouch for the contents of individual posts. For more information about Arduino please visit www.arduino.cc
You are currently browsing the archives for the ultrasonic category.
 Arduino Blog Make Magazine Blog Hackaday Electronics-Lab Noel Portugal CNX-Software Matthew Rollings Chris Debenham Techatronic Giasone John Boxall Arduino++ Adafruit Blog EngineeringException Mamaus's Blog Tinker Hobby Bits and Pieces Wayne and Layne NerdyTechy Liudr's Blog Steve Marple b7arduino Chipwired Embedded-Lab
