Posts | Comments

Planet Arduino

Archive for the ‘pong’ Category

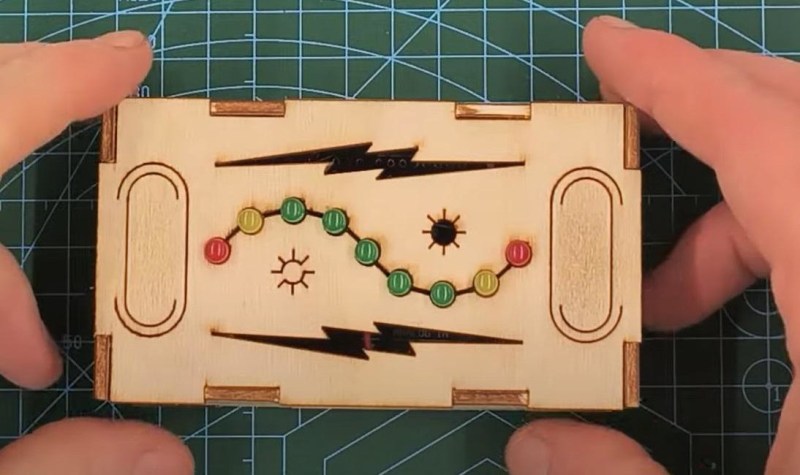
Maybe it’s just us, but isn’t it kind of amazing that in a world of pretty darn realistic games, PONG is still thrilling to play? This 1D implementation by [newsonator] is about as exciting as it gets.
It works like you’d probably expect — the light moves back and forth between the two players. Keep it in the green and you have a nice, gentle volley going. Let it hit your red LED and you’ve lost a point. But if you can push your button while your yellow LED is lit, the light speeds up tremendously until the next button press in the green.

Our only wish is that subsequent yellow-light button presses would make it speed up even more. But there are really just the two speeds with the current programming.

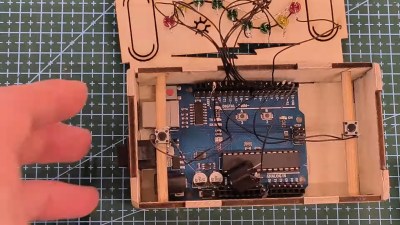
Inside the cool laser-cut box is an Arduino Uno and a 9V battery, plus a current-limiting resistor and the all-important buzzer. We like how [newsonator] wired up the LEDs to the Arduino by soldering them to a row of header pins and sticking that into the Arduino so it can be used in other projects down the line. We also like how [newsonator] shoved a couple of dowels through the box to ultimately support the two buttons.

Check out the intro video after the break for the overall details. The build is done over a few different short videos which follow.

Although this is pretty small, it isn’t quite the minimum viable.


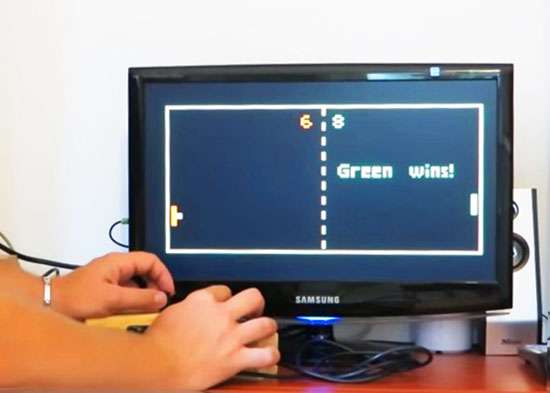
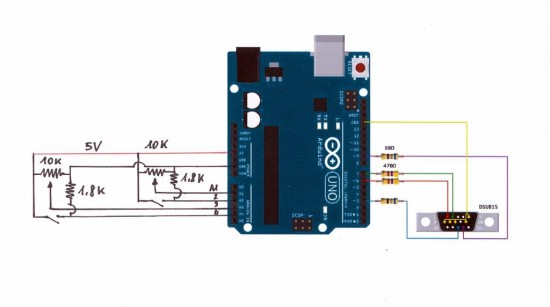
We hate to break it to [Rob Cai], but he’s built a VGA drawing toy, not an Etch-a-Sketch. How do we know? Simple, Etch-a-Sketch is a registered trademark. Regardless, his project shows how an Arduino can drive a VGA monitor using the VGAx library. Sure, you can only do four colors with a 120×60 resolution, but on the other hand, it requires almost no hardware other than the Arduino (you do need four resistors).

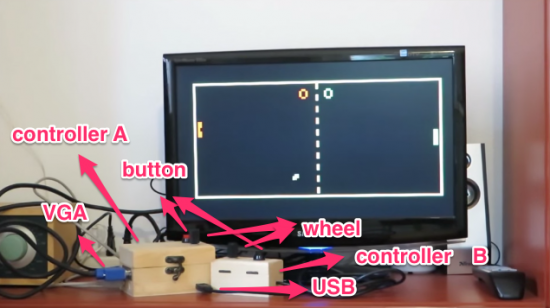
The hardware includes two pots and with the right firmware, it can also play pong, if you don’t want to give bent your artistic side. You can see videos of both the art toy and the pong game, below.

Because the device started as a pong game, [Rob’s] version has two boxes, each with a pot and a button. Of course, if you were really building it just for the drawing toy, you’d probably put it all in a box. Maybe even a red box. If we were building it, we’d be tempted to put a tilt sensor or an accelerometer in the box so you could shake it to erase the picture. Just saying.

If you want 640×480 resolution from an Arduino, it can be done, but it takes more hardware. If you were trying to get a kid interested in Arduino, you could do worse than start with two projects with video that are fun, use a handful of easy-to-source parts, and shares hardware. Then again, if you are in the “go big or go home” camp, we’d redirect to this pong game, instead.


Filed under: Arduino Hacks

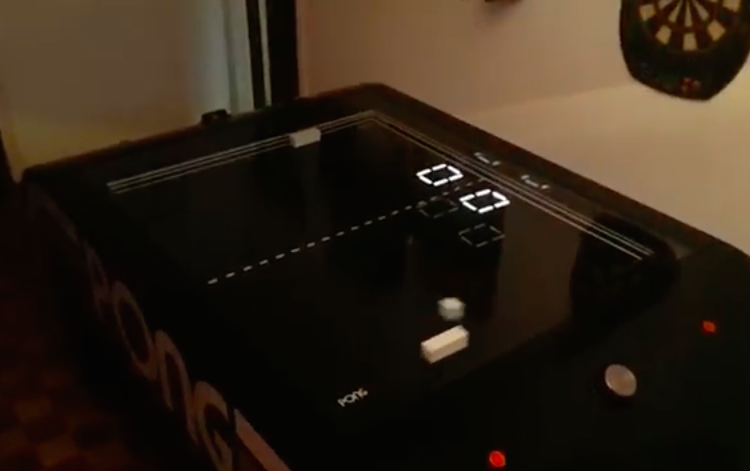
Released in 1972, Pong was one of the earliest arcade video games to hit the scene and has since claimed its place in pop culture history. Whereas the Atari classic took the sport of tennis and brought it into the virtual world, a team of Makers led by Daniel Perdomo are taking it back to into the real world with an air hockey-like tabletop version.

As you can see in the video below, the “Pong Project” uses knobs similar to familiar arcade controls to move the paddles, which just like in the original, change the ball’s trajectory as it makes its way over to the opponent. The only difference is that it’s happening on a table instead of a screen. From the looks of it, there may even be a single-player mode with the other paddle seemingly moving all by itself.

To pay homage to the game, its creators gave the Pong Project some ‘70s flair with the iconic logo and play area, as well as neon lights along the sides that illuminate whenever the ball bounces off. Score is kept on seven-segment displays, while it would appear that at least a pair of Arduino boards are helping to drive the system. The team is currently seeking a hardware incubator and other Makers who may be interested in turning this into a final product. You can follow along with the project’s progress on Facebook.

pong

Everyone knows Pong, the first commercially successful arcade video game machine  originally release by Atari in 1972. In those years the game helped to establish the video game industry and nowadays is often used by makers to experiment with creating game consoles with Arduino.

Roberto Melzi recently shared on the Arduino forum a new version of Pong made with Arduino Uno:

Thanks to the VGAx library done by Smaffer, based on the previous work done by Nick Gammon, I have done a little color game for an Arduino Uno working for a VGA monitor. See for details here:

The target was to use an Arduino Uno board without special shields and supporting IC.
the fundamental components are a button, a potentiometer, few resistors and DSUB15 connector.

vga_pong_on_arduino_uno__youtube

Tale a look at the video to see it in action:

pongschematic

Follow the step-by-step guide on Instructables to build one yourself.

Jul
05

HammerPong Game Takes Pong to New Heights

arduino due, arduino hacks, ARM, led strip, pong Comments Off on HammerPong Game Takes Pong to New Heights 

large scoreboard with lots of flashy lights

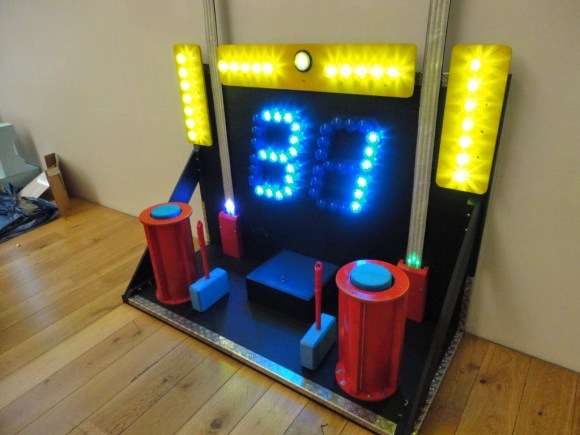
[Jason] is back at it again with another new twist on the technically sophisticated and advanced game of Pong. Fashioned in a ‘Chuck E. Cheese’ style platform, the two players stand side by side each other with large foam hammers. A wack sends the 32 bit ARM powered dot skyward and then back down to the other player, where another wack will send the dot back whence it came. A brightly lit scoreboard keeps track of how many dots slip by.

[Jason] is a veteran of pong inspired games, but putting the HammerPong game together brought with it some new challenges. After being unable to squeeze a few MDF panels into his car, and fighting off flies, yard debris and pet dander that were trying to attach themselves to his freshly painted artwork, [Jason] managed to get his project completed.

The HammerPong is powered by an Arduino Due that controls six WS2812 LED strips and runs the background code. Various latches, shift registers and power transistors control the lights and scoreboard. Be sure to check out the linked project for more detail, and take a look at the video demonstration after the break.


Filed under: Arduino Hacks, ARM
Jul
06

LED strip Pong as an Arduino shield

arduino hacks, led hacks, pong, WS2801 Comments Off on LED strip Pong as an Arduino shield 

led-pong-strip

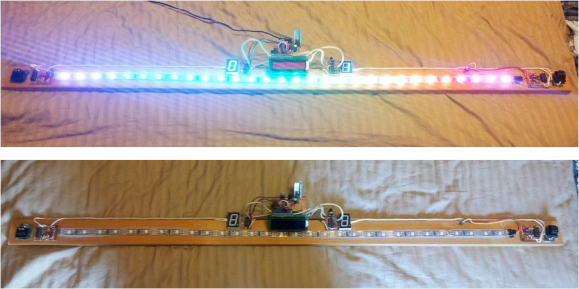
[Schuyler Sowa] has been hard at work on his own version of LED strip Pong. We’d say his work has really paid off. The game is robust and full of features.

Unlike the original Pong video game LED pong only has one axis on which the ball travels. The ball will bounce back if the button at the end of the strip is pressed when either of the last two LED pixels are illuminated. To add in a difficulty adjustment [Schuyler] included a poteniometer which alters the speed.

The game board is one meter of LED strip with individually addressable pixels. It cost a whopping $28 and was the second kind he tried after having trouble with the WS2801 based version (which often come as strings of lights). An Arduino board controls the game, with a shield made from protoboard to connect the components. In addition to the two user buttons — which were hacked out of a computer keyboard — you’ll notice a pair of seven segment displays acting as a scoreboard and an HD44780 character LCD rounding out the user interface.


Filed under: Arduino Hacks, led hacks
Jul
04

How To Recreate The Classic Pong Game Using Arduino

arduino, pong, videogame Comments Off on How To Recreate The Classic Pong Game Using Arduino 

pong-finished

Pong was the first ever videogame that reached the mass market. For the first time in history, the concept of a “video game” was brought into the family home, thanks to the Atari 2600 – so it’s only right that we pay a little homage to this historical gem. Now, you can re-live that (admittedly somewhat boring gameplay) using an Arduino and some common components.

I won’t lie – it’s unlikely your daughter will be giving up her Nintendo DS, and this isn’t going to provide hours of fun for the whole family – but it is an awesome and easy project to improve your Arduino coding.

How To Recreate The Classic Pong Game Using Arduino - [Link]

May
22

Introducing the Arduino TFT LCD screen

Esplora, Hardware, LCD, pong, Processing, Robot, TFT Comments Off on Introducing the Arduino TFT LCD screen 

LCD_blog


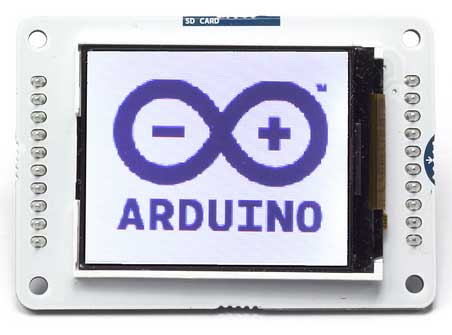
In conjunction with the release of the new version of the Arduino IDE and the Arduino Robot, we’re also putting out a TCT LCD screen. The screen was developed in conjunction with Complubot and the library relies on the Adafruit GFX and ST7735 libraries.

The screen lets you do all sorts of fun things, like play games or lose the serial monitor to see the values from sensors.

The Arduino specific library, named TFT, extends the Adafruit libraries to support  more Processing-like methods. You can write text, draw shapes, and show bitmap images on the screen in a way that should be familiar to users of Processing.

The screen works well with all types of Arduinos with a little bit of wiring, and fits perfectly in the Esplora and Robot sockets. In addition to all this other goodness, there’s a SD card slot on the back for storing pictures and other data.

If you want to learn more about the screen and what it’s capable of, check out the TFT library page, getting started guide, and product page.

You can buy the TFT screen from the Arduino store now!

If you have something cool you’ve made with this, let us know!

Apr
05

MaKey MaKey Banana Pong

arduino, bananas, Electronics, Food & Beverage, Makey Makey, pong Comments Off on MaKey MaKey Banana Pong 

8605560001_e72a7d391a_bPete Prodoehl’s beautiful MaKey MaKey Banana Pong controls a Processing pong game with game paddles made from bananas. Of course, the MaKey MaKey handles the banana inputs — that’s kind of what it does. Inspired? You can pick up a MaKey MaKey Standard Kit from the Maker Shed. Filed under: [...]

Read the full article on MAKE

Jan
22

Gaming system inside an Atari joystick

arduino hacks, ardweeny, atari, joystick, pocket, pong Comments Off on Gaming system inside an Atari joystick 

gaming-system-inside-an-atari-controller

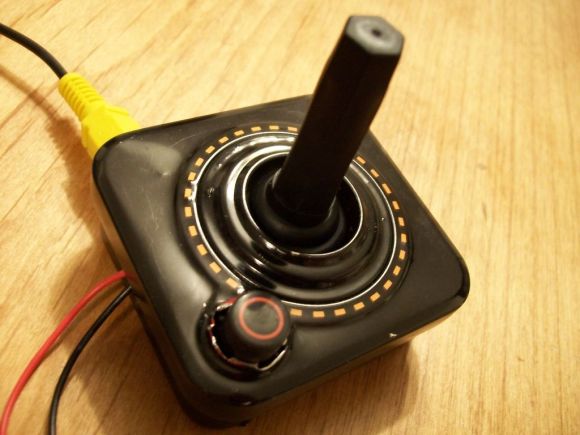
This original Atari controller is pretty small (take a look at that RCA cable for a sense of scale). Despite it’s size, [Kyle Brinkerhoff] managed to fit a complete gaming system inside the controller. This Pocket Sized Atari is a follow-up to another project he did called ArduPong which let him play Pong using a joystick and an Arduino. This rendition takes the external project box from that build and moves everything into one tight little package.

In the video after the break [Kyle] gives us a tour of the internals. The Arduino board he went with is an Ardweeny which is no bigger than the ATmega328 footprint so it can be easily mounted off to one side. The joystick internals have been replaced with the analog stick module from a PlayStation controller. That is where the button came from as well. Just connect this to a 9V battery and the composite video input of a TV and you’re ready to do some gaming!

Now if you just want that retro look for your Xbox Live games check out this Xbox 360 controller in an Atari joystick.


Filed under: arduino hacks


  • Newsletter

    Sign up for the PlanetArduino Newsletter, which delivers the most popular articles via e-mail to your inbox every week. Just fill in the information below and submit.

  • Like Us on Facebook