Posts | Comments

Planet Arduino

Archive for the ‘peripherals hacks’ Category

A 3D-printed macropad that needs no solder or screws.

Maybe we’re biased, but we think everyone has a use for a macropad. It’s just a matter of time before a highly personalized set of speed controls starts to sound like a great time-saving device to have around.
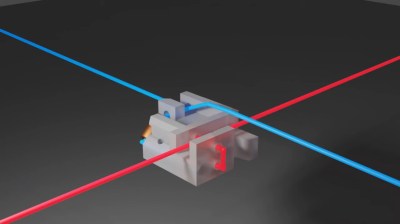
The column wire is red, and the row wire is blue. A printed clip snaps on to separate the two.Trouble is, macropads are usually kind of expensive to buy outright, and not everyone feels comfortable building keyboards. Okay, so what if you didn’t even have to solder anything? That’s the idea behind [Jan Lunge]’s hand-wired macropad.

You will still want to open a window for ventilation if you build this one, because this macropad requires a lot of 3D printing. What it doesn’t require is glue or screws, because everything snaps together.

Of course, the star of this build is [Jan]’s hot swap socket design. We especially love the little clip that holds the column wires in place while also providing a spacer between those and the row wires. Everything is connected up to a Pro Micro with non-insulated wire and held in place with bends at the ends and the magic of tension. Be sure to check out the build video after the break.

Thirsty for more than a six pack of switches? This design is easy to scale up until you run out of microcontroller inputs. At that point, you might want to add screens to keep track of all your macros.

Thanks for the tip, [BaldPower]!

Controlling your computer with a wave of the hand seems like something from science fiction, and for good reason. From Minority Report to Iron Man, we’ve seen plenty of famous actors controlling their high-tech computer systems by wildly gesticulating in the air. Meanwhile, we’re all stuck using keyboards and mice like a bunch of chumps.

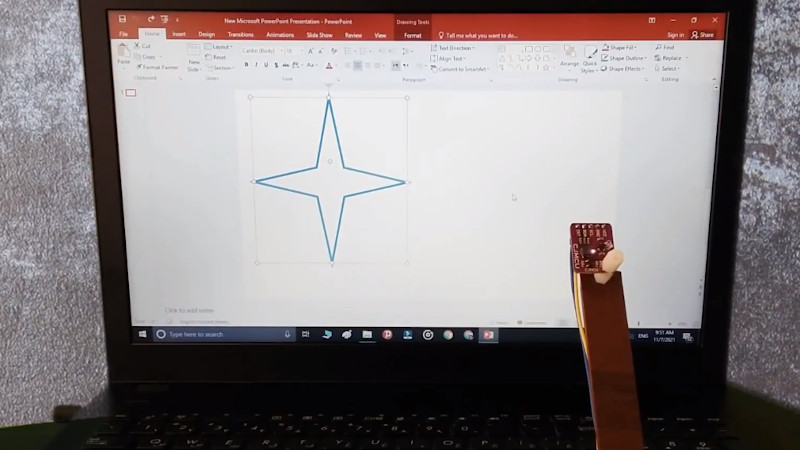
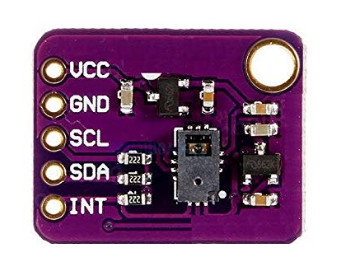
But it doesn’t have to be that way. As [Norbert Zare] demonstrates in his latest project, you can actually achieve some fairly impressive gesture control on your computer using a $10 USD PAJ7620U2 sensor. Well not just the sensor, of course. You need some way to convert the output from the I2C-enabled sensor into something your computer will understand, which is where the microcontroller comes in.

Looking through the provided source code, you can see just how easy it is to talk to the PAJ7620U2. With nothing more exotic than a switch case statement, [Norbert] is able to pick up on the gesture flags coming from the sensor. From there, it’s just a matter of using the Arduino Keyboard library to fire off the appropriate keycodes. If you’re looking to recreate this we’d go with a microcontroller that supports native USB, but technically this could be done on pretty much any Arduino. In fact, in this case he’s actually using the ATtiny85-based Digispark.

This actually isn’t the first time we’ve seen somebody use a similar sensor to pull off low-cost gesture control, but so far, none of these projects have really taken off. It seems like it works well enough in the video after the break, but looks can be deceiving. Have any Hackaday readers actually tried to use one of these modules for their day-to-day futuristic computing?

When building your own homebrew computer, everything is a challenge. Ultimately, that’s kind of the point. If you didn’t want to really get your hands dirty with the nuts and bolts of the thing, you wouldn’t have built it in the first place. For example, take the lengths to which [rehsd] was willing to go in order to support standard USB mice on their 6502 machine.

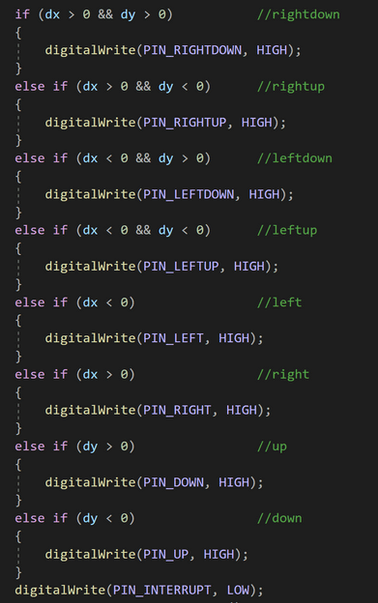
Code for mapping mouse movement to digital output.

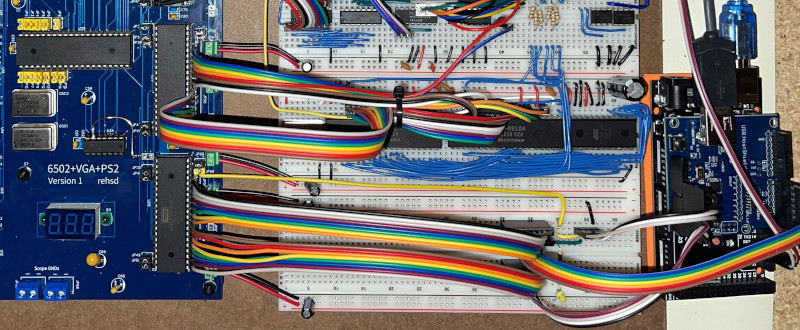
The idea early on was to leverage existing Arduino libraries to connect with a standard USB mouse, specifically, the hardware would take the form of an Arduino Mega 2560 with a USB Host Shield. There was plenty of code and examples that showed how you could read the mouse position and clicks from the Arduino, but [rehsd] still had to figure out a way to get that information into the 6502.

In the end, [rehsd] connected one of the digital pins from the Arduino to an interrupt pin on the computer’s W65C22 versatile interface adapter (VIA). Then eleven more digital pins were connected to the computer, each one representing a state for the mouse and buttons, such as MOUSE_CLICK_RIGHT and MOUSE_LEFT_DOWN.

Admittedly, [rehsd] says the mouse action is far from perfect. But as you can see in the video after the break, it’s at least functional. While the code could likely be tightened up, there’s obviously some improvements to be made in terms of the electrical interface. The use of shift registers could reduce the number of wires between the Arduino and VIA, which would be a start. It’s also possible a chip like the CH375 could be used, taking the microcontroller out of the equation entirely.

From classic breadboard builds to some impressively practical portable machines, we’ve seen our fair share of 6502 computers over the years. Despite the incredible variation to be found in these homebrew systems, one thing is always the same: they’re built by some of the most passionate folks out there.

[Thanks to Jim for the tip.]

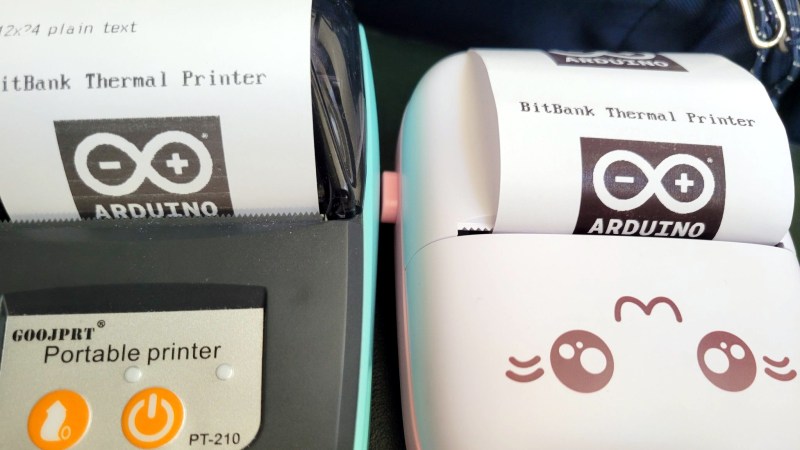
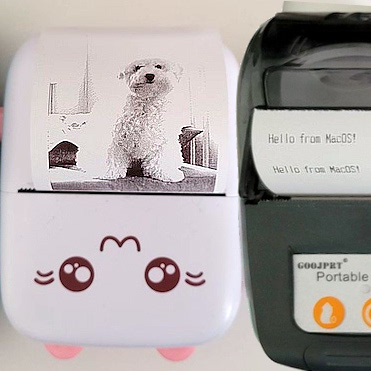
[Larry Bank]’s Arduino library to print text and graphics on BLE (Bluetooth Low Energy) thermal printers has some excellent features, and makes sending wireless print jobs to a number of common models about as easy as can be. These printers are small, inexpensive, and wireless. That’s a great mix that makes them attractive for projects that would benefit from printing out a hardcopy.

It’s not limited to simple default text, either. Fancier output can be done using Adafruit_GFX library-style fonts and options, which sends the formatted text as graphics. You can read all about what the library can do in this succinct list of concise functions.

But [Larry] hasn’t stopped there. While experimenting with microcontrollers and BLE thermal printers, he also wanted to explore talking to these printers from his Mac using BLE directly. Print2BLE is a MacOS application that allows dragging image files into the application’s window, and if the preview looks good, the print button makes it come out of the printer as a 1-bpp dithered image.

Small thermal printers make for neat projects, like this retrofitted Polaroid camera, and now that these little printers are both wireless and economical, things can only get easier with the help of a library like this. Of course, if that’s all starting to look a little too easy, one can always put the thermal back in thermal printing by using plasma, instead.

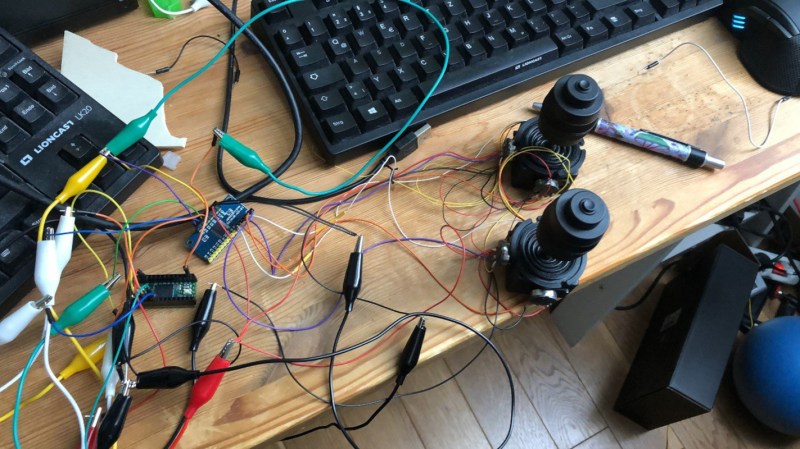
A couple of joysticks wired up to a Teensy for prototyping.

Over the last two years, [benkster] has been perfecting their ideal flight controller. Like many people, they started out with a keyboard and mouse and eventually moved on to a joystick. While a HOTAS (hands on throttle-and-stick — e.g. a yoke controller with inputs right there on the sides) might have been the next logical step, those things cost too much. Naturally, the answer is to build one, ideally for less money. Hey, it could happen.

The design went from just an idea to a cardboard prototype, and then to a wooden enclosure and later, a 3D-printed case. Since [benkster] learned a great deal along the way, they want to give back to the community with a comprehensive joystick design/build guide so that others don’t have to start from zero, overwhelmed with information.

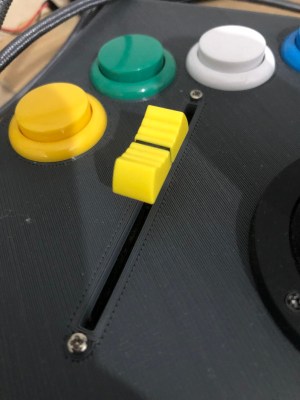
[benkster] wanted three joysticks, a bunch of big buttons, a throttle, a display to show component status (as in, is joystick #3 a joystick right now or a WASD keyboard?), and immersive details everywhere — you know, a million buttons and switches to give it that cockpit feel. [benkster] is using a Teensy 4 to control two 3-axis joysticks and one 2-axis stick. Since this adds up to too many axes for Windows/DirectX to read in, the 2-axis stick is used as a WASD keyboard.

This guide is a great place to start, especially for folks who may be newer to electronics. There are nice introductions to many types of components and tidbits that are relevant outside the world of joysticks.

You want immersive flight simulation away from the PC? Here’s a printable flexure-based ‘stick that snaps right on your Xbox controller and pushes the buttons.

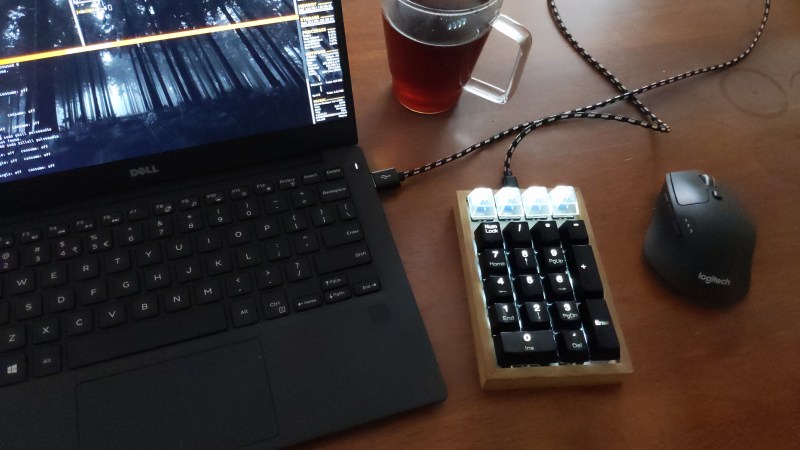
Why buy a num pad or a macropad when you can build something new and beautiful, open source that bad boy, and be a hero to the community? We think that should be all the justification you ever need to build instead of buy, even if you think your thing is Just Another Keypad [JAnK] as [Clewsy] claims.

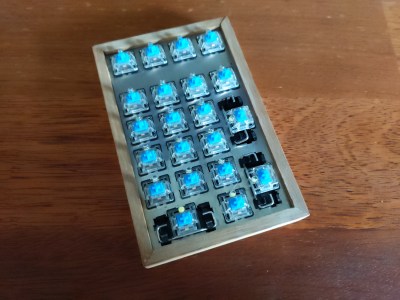
At first glance, JAnK appears to be a standard number pad with four macro keys across the top. But when you roll your own ‘board, all the keys are programmable. [Clewsy] took advantage of this by adding a second layer that’s accessible with (what else?) the Num Lock key. This switches JAnK over to 21-key macro pad mode.

[Clewsy] rolled their own PCB for this and used the venerable ATMega32u4 because of its HID and USB host capabilities. Every key is backlit, and these LEDs are driven by an MP3202 LED driver and PWM from the AVR. [Clewsy] was able to build a prototype by sawing the num pad off of a stainless steel key switch plate from another build, but eventually ordered JAnK its own custom, laser-cut, stainless steel plate. The lovely enclosure is made of spotted gum wood and an acrylic base.

Putting it all together proved to be a bit problematic. [Clewsy] soldered up the minimum viable components for testing and discovered that the ATMega’s VCC and GND pins were both shorted. This killed the AVR programmer, but not the chip itself, and [Clewsy] happened to have a spare. To add insult to injury, the Num Lock light didn’t work, but [Clewsy] was able to simply reverse the LED instead of ordering a new pile of boards. Check out the detailed write-up with code and tons of pictures over on [Clewsy]’s personal site.

One of the awesome things about this build is that [Clewsy] was able to re-use the code from macr0, which began life as a proof of concept for scanning key matrices, and retired to become a music and media controller.

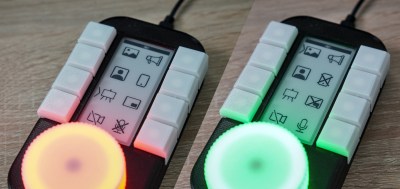
Keyboard shortcuts are great. Even so, a person can only be expected to remember so many shortcuts and hit them accurately while giving a presentation over Zoom. [Sebastian] needed a good set of of shortcuts for OBS and decided to make a macro keyboard to help out. By the time he was finished, [Sebastian] had macro’d all the things and built a beautiful and smart peripheral that anyone with a pulse would likely love to have gracing their desk.

The design started with OBS, but this slick little keyboard turned into a system-wide assistant. It assigns the eight keys dynamically based on the program that has focus, and even updates the icon to show changes like the microphone status.

This is done with a Python script on the PC that monitors the running programs and updates the macro keeb accordingly using a serial protocol that [Sebastian] wrote. Thanks to the flexibility of this design, [Sebastian] can even use it to control the office light over MQTT and make the CO2 monitor send a color-coded warning to the jog wheel when there’s trouble in the air.

This project is wide open with fabulous documentation, and [Sebastian] is eager to see what improvements and alternative enclosure materials people come up with. Be sure to check out the walk-through/build video after the break.

Inspired to make your own, but want to start smaller? There are plenty to admire around here.

[memestra] is a teacher whose life has become a series of videoconferences over the last year or so. With all the classes and meetings, they spend the whole day switching between either Zoom, Teams, or Meet. If anyone needs a single piece of hardware to control them all, it’s [memestra]. Well, and every other teacher out there.

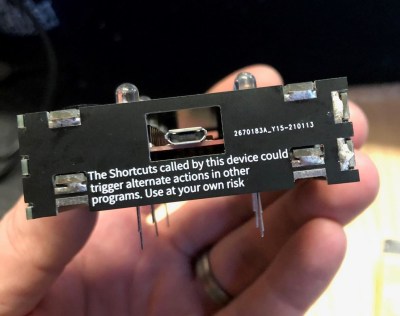
The hardware — an Arduino Pro Micro and some buttons — should come as no surprise, except for maybe [memstra]’s use of a resistor network for the LEDs. Still, there’s a lot to like about this little box, starting with the enclosure. That’s not milled or laser-cut metal — each side is a PCB, and they’re all soldered together into a box.

We especially like the top panel, which fits down over the PCB that all the components are soldered to. Each of the non-volume buttons has multiple functions that are accessed by pressing, long pressing, or double pressing. But even the volume buttons do double duty: press them together to mute and un-mute. If [memestra] ever forgets which button does what and how, there’s a handy reference table silkscreened on the bottom panel.

In true teacher fashion, [memestra] has written comprehensive instructions for anyone looking to build a similar device. The heavily-commented code should make it a cinch to drop in keyboard shortcuts for Discord or anything else you might be using, though it’s worth noting that this box is optimized for the desktop apps and not the browser-based versions.

Just looking for a fun way to end video calls? Pull chains are pretty fun.

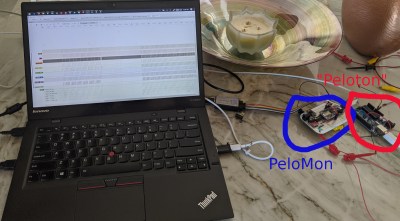
Recently [Imran Haque]’s family bought the quite popular Peloton bike. After his initial skepticism melted to a quiet enthusiasm, [Imran] felt his hacker curiosity begin to probe the head unit on the bike. Which despite being a lightly skinned android tablet, has a reputation for being rather locked down. The Peloton bike will happily collect data such as heart rate from other devices but is rather reticent to broadcast any data it generates such as cadence and power. [Imran] set out to decode and liberate the Peleton’s data by creating a device he has dubbed PeloMon. He credits the inspiration for his journey to another hacker who connected a Raspberry Pi to their bricked exercise bike.

As a first step, [Imran] step began with decoding the TRRS connector that connects the bike to the head unit. With the help of a multi-meter and a logic analyzer, two 19200bps 8N1 RS-323 channels (TX and RX) were identified. Once the basic transport layer was established, he next set to work decoding the packets. By plotting the bytes in the packets and applying deductive reasoning, a rough spec was defined. The head unit requested updates every 100ms and the bike responded with cadence, power, and resistance data depending on the request type (the head unit did a round-robin through the three data types).

Once the protocol was decoded, the next step for [Imran] was to code up an emulator. It seems a strange decision to write an emulator for a device with a simple protocol, but the reasoning is quite sound. It avoids a 20-minute bike ride every time a code change needs to be tested. [Imran] wrote both an event-driven and a timing-accurate emulator. The former runs on the same board as the PeloMon and the latter runs on a separate board (an Arduino).

The hardware chosen for the PeloMon was an Adafruit Feather 32u4 Bluefruit LE. It was chosen for supporting Bluetooth LE as well as having onboard EEPROM. A level shifter allows the microcontroller to talk directly to the RS-323 on the bike. After a few pull requests to the Adafruit Bluetooth libraries and a fair bit of head-banging, [Imran] has code that advertises two Bluetooth services, one for speed and another for power. A Bluetooth serial console is also included for debugging without having to pull the circuit out.

The code, schematics, emulators, and research notes are all available on GitHub.

[Christofer Hiitti] found himself with the latest Microsoft Flight Simulator on his PC, but the joystick he ordered was still a few weeks out. So he grabbed an Arduino, potentiometers and a button and hacked together what a joke-yoke.

The genius part of this hack is the way [Christopher] used his desk drawer for pitch control. One side of a plastic hinge is attached to a potentiometer inside a drawer, while the other side is taped to the top of the desk. The second pot is taped to the front of the drawer for pitch control and the third pot is the throttle. It works remarkably well, as shown in the demo video below.

The linearity of the drawer mechanism probably isn’t great, but it was good enough for a temporary solution. The Arduino Leonardo he used is based on the ATmega32u4 which has a built-in USB, and with libraries like ArduinoJoystickLibrary the computer interface very simple. When [Christopher]’s real joystick finally arrived he augmented it with a button box built using the joke-yoke components.

We’ve seen There is no doubt that Microsoft Flight Simulator 2020 will spawn a lot of great controller and cockpit builds over the next few years. We’ve already covered a new joystick build, and a 3D printed frame to turn an Xbox controller into a joystick.


  • Newsletter

    Sign up for the PlanetArduino Newsletter, which delivers the most popular articles via e-mail to your inbox every week. Just fill in the information below and submit.

  • Like Us on Facebook