Posts | Comments

Planet Arduino

Archive for the ‘game’ Category

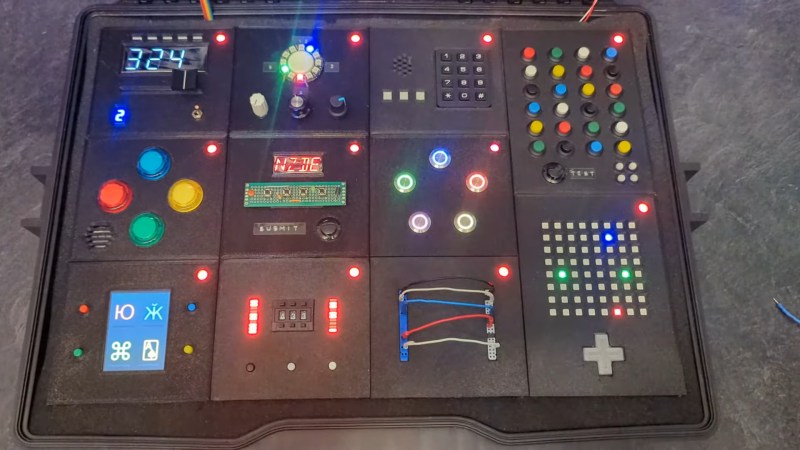
[Heath Paddock] wanted to confound his friends with a game that mimics an escape room in a box. About six months after starting, he had this glorious thing completed. It’s a hardware version of a game called Keep Talking and Nobody Explodes where players have five minutes to defuse a suitcase bomb. This implementation requires at least two players, one with the box-bomb itself, and one who holds all the knowledge but can’t see the box-bomb to defuse it.
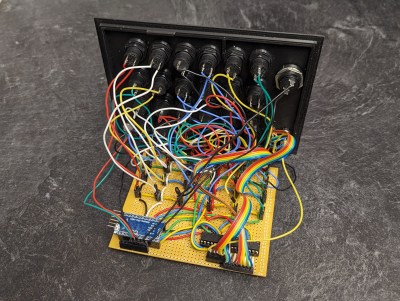
The wiring of the Mastermind module.

[Heath]’s version has twice as many modules as the original game, each hand-wired one driven by an Arduino. One of the modules is an LED maze. There are two green anchor LEDs in one of six configurations, and and blue and a red LED.

The object is to move the blue LED next to the red one without touching any walls. Of course, the box-holder can’t see the walls and must describe the configuration of the anchor LEDs to their partner in order to get started.

All of the modules are quite different, which likely makes for an extremely fun and challenging five minutes. [Heath] reports that getting inter-module communication down was a long road. Eventually, [Heath] settled on a mesh network configuration and connected everything in a big loop. Be sure to check out the walk-through video after the break.

This isn’t the first time we’ve seen a hardware implementation of this game. Here’s one that uses a Raspberry Pi.
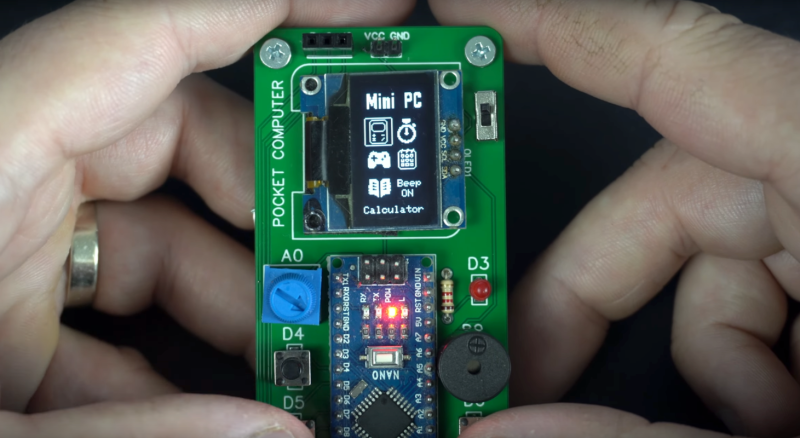

Before smartphones exploded on the scene in the late 00s, there was still a reasonable demand for pocket-sized computers that could do relatively simple computing tasks. Palm Pilots and other PDAs (Personal Digital Assistants) were all the rage in the ’90s and early ’00s, although for cutting-edge tech from that era plenty of these devices had astronomical price tags. This Arduino-based PDA hearkens back to that era, albeit with a much more accessible parts list.

The build is based around an Arudino Nano with an OLED screen and has the five necessary functions for a PDA: calculator, stopwatch, games, phonebook, and a calendar. With all of these components on such a small microcontroller, memory quickly became an issue when using the default libraries. [Danko] uses his own custom libraries in order to make the best use of memory which are all available on the project’s GitHub page. The build also includes a custom PCB to keep the entire pocket computer pocket-sized.

There are some other features packed into this tiny build as well, like the breakout game that can be played with a potentiometer. It’s an impressive build that makes as much use of the microcontroller’s capabilities as is possible, and if you enjoy projects where a microcontroller is used as if it is a PC take a look at this Arduino build with its own command-line interface.

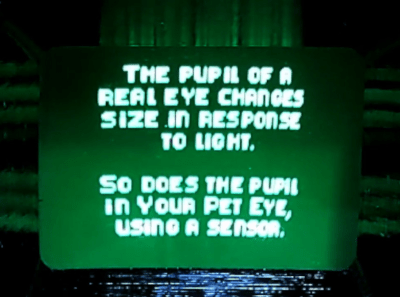
Like many of us, [Emily’s Electric Oddities] has had a lot of time for projects over the past year or so, including one that had been kicking around since late 2018. It all started at the Hackaday Superconference, when [Emily] encountered the Adafruit Hallowing board in the swag bag. Since that time, [Emily] has wanted to display the example code eyeball movement on a CRT, but didn’t really know how to go about it. Spoiler alert: it works now.

See? It’s educational.

Eventually, [Emily] learned about the TV out library for Arduino and got everything working properly — the eyeball would move around with the joystick, blink when the button is pressed, and the pupil would respond visually to changes in ambient light. The only problem was that the animation moved at a lousy four frames per second. Well, until she got Hackaday’s own [Roger Cheng] involved.

[Roger] was able to streamline the code to align with [Emily]’s dreams, and then it was on to our favorite part of this build — the cabinet design. Since the TV out library is limited to black and white output without shades of gray, Emily took design cues from the late 70s/early 80s, particularly the yellow and wood of the classic PONG cabinet. We love it!

Is Your Pet Eye the worst video game ever, as [Emily] proclaims it to be? Not a chance, and we’re pretty sure that the title still rests with Desert Bus, anyway. Even though the game only lasts until the eye gets tired and goes to sleep, it’s way more fun than Your Pet Rock. Don’t miss the infomercial/explanation/demonstration video after the break. If one video is just not enough, learn more about [Emily’s] philosophy of building weird projects from the Supercon talk she presented. It’s also worth mentioning that this one fits right into the Reinvented Retro contest.

Why are eyeballs so compelling? We can’t say for sure, but boy, this eyeball web cam sure is disconcerting.

Thanks for the tip, [Jake_of_All_Trades]!

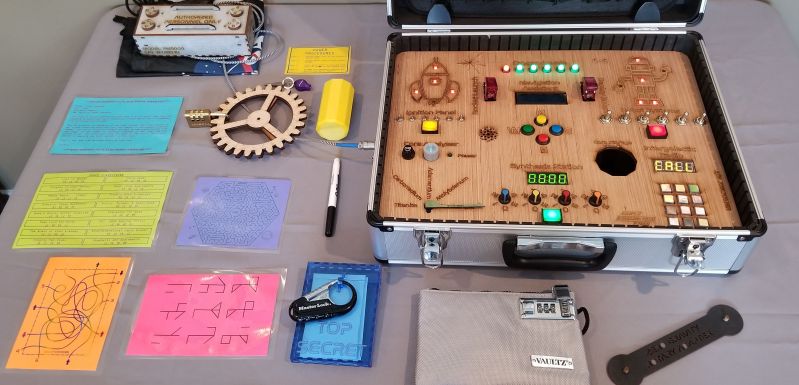
The trick to a fun escape room is layers. For [doktorinjh]’s Spacecase, you start with an enigmatic aluminum briefcase and a NASA drawstring backpack. A gamemaster reads the intro speech to set the mood, and you’re ready to start your escape from the planet. The first layer is the backpack with puzzles you need to solve to get into the briefcase. In there, you discover a hidden compartment and enough sci-fi references to put goofy smiles on our faces. We love to see tools reused as they are in one early puzzle, you use a UV LED to reveal a hidden message, but that light also illuminates puzzle clues later.

All the tech in Spacecase makes it a wonder of mixed media. The physical layer has laser engraved wood featuring the font from the 1975 NASA logo, buttons, knobs, LEDs, toggle switches, and a servo. Beneath the visible faceplate is an RGB sensor, audio player, speaker, and at the center is an Arduino MEGA. We’d love to get our hands on Spacecase for a game, and we’re inspired to pull out all the stops and build games with our personal touches. Maybe something with a mousetrap.

This isn’t the first escape room hardware we’ve seen and [doktorinjh] similarly made a bomb diffusing game.

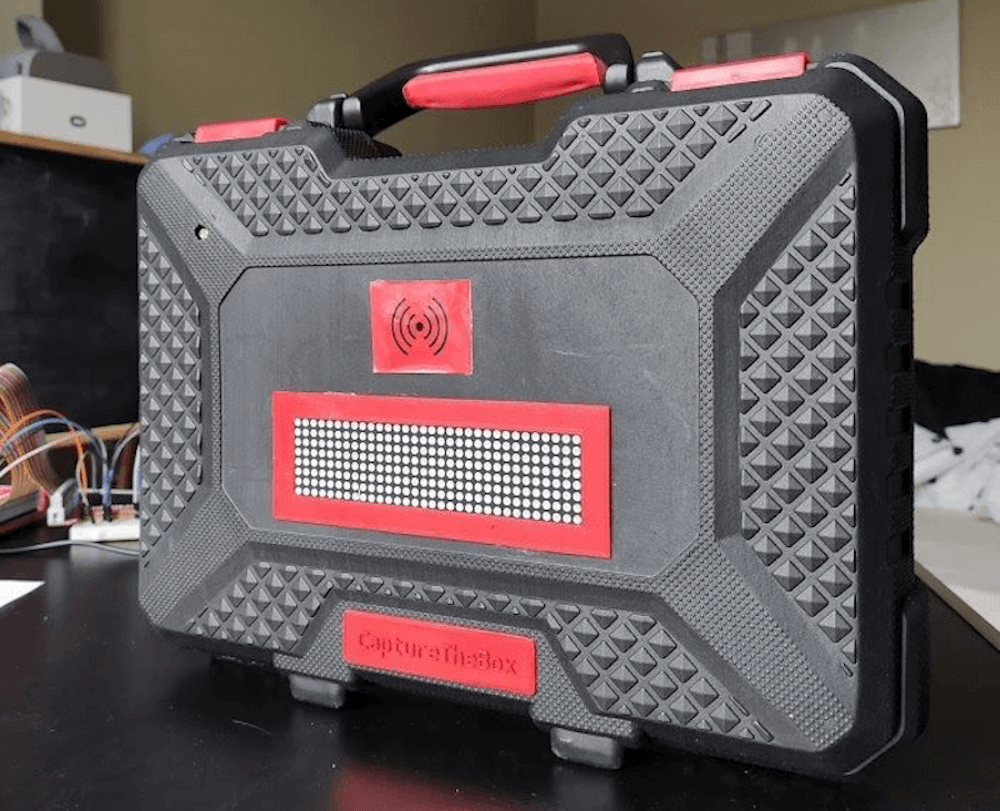
Capture the flag can be fun, but Karel Bousson has put a new spin on the game that allows you to compete against neighbors over who can keep a single item — a modified tool case — in their possession the longest.

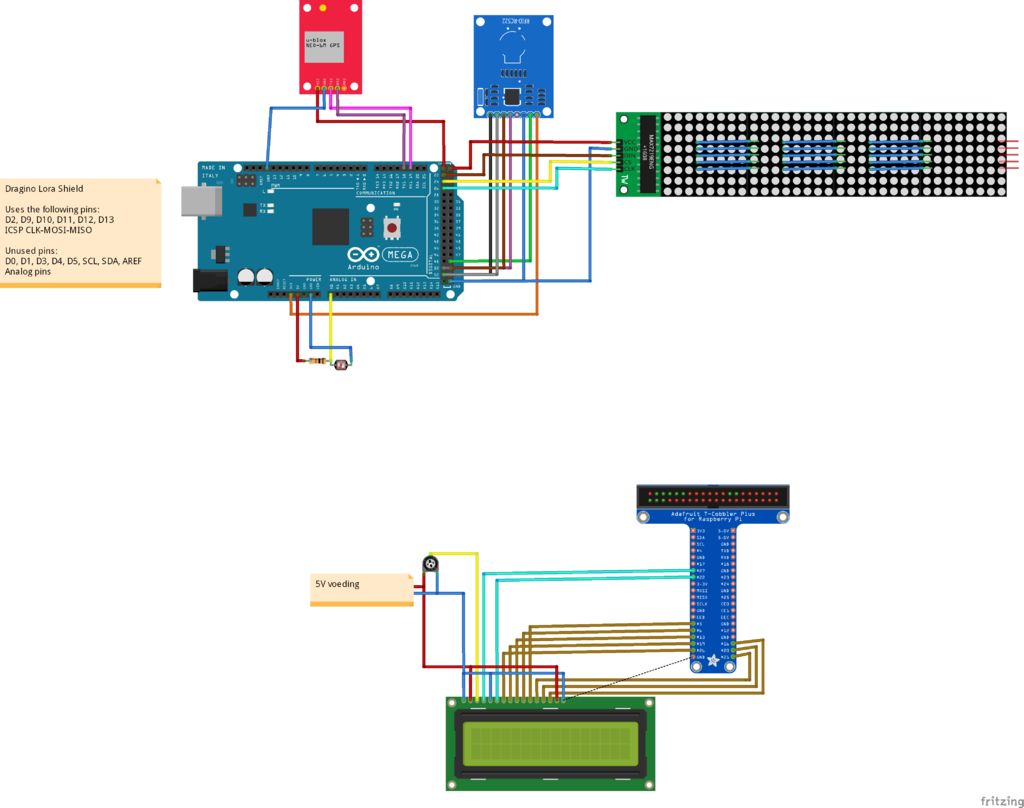
The box contains an Arduino Mega that interfaces with an RFID reader to enable the current owner to scan in, plus a GPS module for location data. Additionally, an LDR sensor can be incorporated to set the brightness of an LED matrix on the outside.

Data passed along to a Raspberry Pi for time of possession tracking via LoRa with The Things Network. This also runs a server that shows game info to others playing, meaning that you’ll have to be very careful to keep it around!

Code for the project is available on GitHub.

In the early ’90s, Sega shipped its Game Gear console with a falling-block puzzle game called Columns. This Tetris-like game invited users to match colored “jewels” on the ground with lines of three new colors that drop from above. Michael A. Maynard envisioned building his own portable version of Columns at the time, but without electronics like Arduino boards and addressable RGB LEDs, the project just wasn’t in the cards.

Nonetheless, after years of consideration, he’s finally been able to create such a handheld. He used an Uno for development, which was replaced by a Nano in the current iteration. 

His system manipulates the falling jewels through a 6×13 LED matrix, with a three-LED preview display, seeven-segment LEDs for game stats, and dual-motor haptic feedback. The game even features stereo sound, with effects, and music produced via dual MP3 player modules.

[Michael Pick] calls himself the casual engineer, though we don’t know whether he is referring to his work clothes or his laid back attitude. However, he does like to show quick and easy projects. His latest? A little portable Tetris game for $9 worth of parts. There is an Arduino Pro Mini and a tiny display along with a few switches and things on a prototyping PC board. [Michael] claims it is a one day build, and we imagine it wouldn’t even be that much.

Our only complaint is that there isn’t a clear bill of material or the code. However, we think you could figure out the parts pretty easy and there are bound to be plenty of games including Tetris that you could adapt to the hardware.

The display looks suspiciously like an SSD1306 display which is commonly cloned. so that answers one question. These are just less than an inch of screen, but if you buy them from China that eats up almost half of the $9 budget. The Arduino is probably another $3. The other parts are cheap, but it is easy to imagine you might exceed $9 by a bit if you try to duplicate this.

Just from looking at the video, the code looks a lot like Tiny Tetris by [AJRussel], though there are a few others out there if you look. The rest should be pretty easy to puzzle out. Maybe [Michael] will add a link to the code, a bill of materials, and some specific wiring instructions.

Of course, if you just want Tetris, grab your transistor tester. We’ve even seen smaller versions of Tetris given away as business cards.

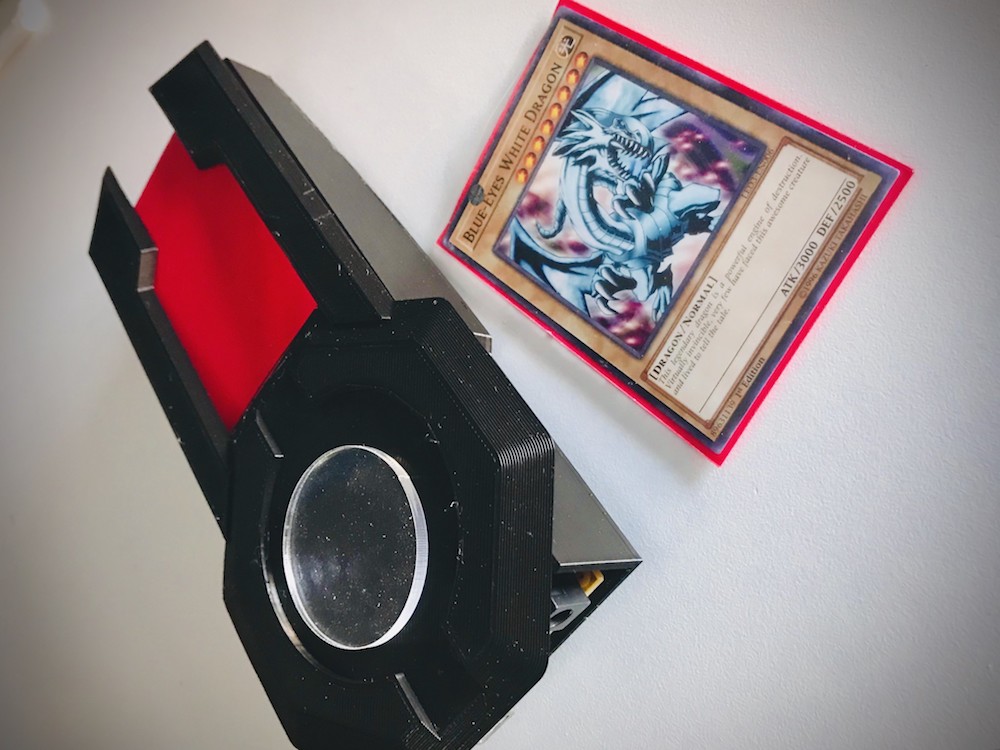
Yu-Gi-Oh! and other similar card games can be quite popular, but actually finding a group to play with can be challenging. Online games, on the other hand, have their advantages yet render your deck pretty much useless. As a way to combine these two worlds, Augusto Masetti has created a prototype Dual Disk System that will allow you to play with real cards in a virtual playfield.

To play, participants attach NFC stickers inside a card sleeve, which are scanned by an NFC reader controlled by an Arduino Uno. The card ID is then compared to the YGOProDeck API database via a computer, giving players a tactile element to this virtual competition.

Masetti’s project is still a work in progress, though we can’t wait to see the final version!

Bob Clagett likes making holiday decorations. This year, however, he wanted to create something that didn’t just look nice, but was also interactive. What he came up with is a giant Christmas tree that is actually a video game!

His tree-shaped matrix uses seven rows of RGB LEDs attached to the top of the structure to drop simulated snowflakes, represented by white lights. The player moves a dot on the bottom right and left to dodge these falling flakes via a pair of large arcade-style buttons. When the controlling Arduino Mega sees that the player’s position is the same as a snowflake, the game ends.

As Clagett’s community can attest, the project looks like a lot of fun! Code for the build is available on GitHub.

To make our Christmas tree game light up in the way that we intend, we have to be able to control each LED in an entire strand of lights. Traditional lights just have power run to colored bulbs, which blink or stay lit all together. We found a strand of individually addressable LEDs that are made for outdoor use. This means that each light has a small circuit board attached to each bulb that will receive power and a data signal from a micro-controller. I’m using an Arduino as the micro-controller to send out a signal to each specific light among the many strands.

Our game is very simple, there is a “player” that is restrained to the lowest level of lights in our tree-shaped matrix. That “player” can move left or right to avoid falling “snow.” When the game is played, the player will move while white “snow” lights fall randomly from the top of the tree-shaped matrix. If the “player” and the “snow” occupy the same space on the matrix in the arduino code, you lose. When the game isn’t being played, I used a simple LED flash library to create a Christmasy-looking color series that flashes until someone activates the game.

Now that the game code is working, the lights are blinking appropriately, and the control buttons are moving the “player” around, it’s time to make it look like a tree. To do this, Josh and I drilled holes at even space along some thin PVC material and fed in the lights. Covering those light boards with ping pong balls will help diffuse the LED light and give the whole tree a polished and clean look. These seven LED light boards are then connected to a hub at the top of a 10-foot metal pole. To keep the pole firmly planted on the ground, I poured a bucket of concrete and fixed a pole holder into it.


  • Newsletter

    Sign up for the PlanetArduino Newsletter, which delivers the most popular articles via e-mail to your inbox every week. Just fill in the information below and submit.

  • Like Us on Facebook