Posts | Comments

Planet Arduino

Archive for the ‘port’ Category

Historically, there have been a few cases of useful wireless power transmission over great distances, like a team at MIT that was able to light up a 60 W bulb at several meters, and of course Nikola Tesla had grand dreams of drawing energy from the atmosphere. But for most of us wireless power is limited to small, short-range devices like cellphone chargers. While it’s not a lot of work to plug in a phone when it needs a charge, even this small task can be automated.

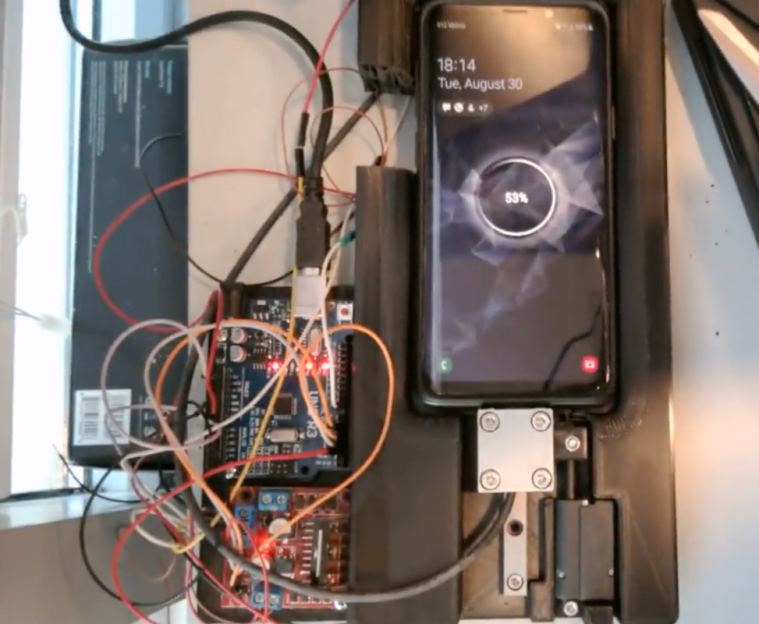
This build begins with a 3D printed cradle for the smartphone to sit in. When the device detects that the phone has been placed in the cradle, it uses a linear actuator to drive a custom-built charging cable into the phone’s USB port. Similarly, when the phone is lifted from the cradle the cable is automatically removed. It appears that there is some play in the phone’s position that lets the charger be plugged in smoothly, and the project’s creator [Larpushka] points out that the linear actuator is not particularly strong so we don’t imagine the risk of damage is very high.

While wireless charging still may have the edge when it comes to keeping debris out of the port, we still really enjoy a project like this that seems to be done for its own sake. There are some improvements that [Larpushka] plans to make, but for now we’re delighted by this build. For anyone looking to add true wireless charging to any phone that doesn’t have it, though, it’s not too difficult to accomplish either.

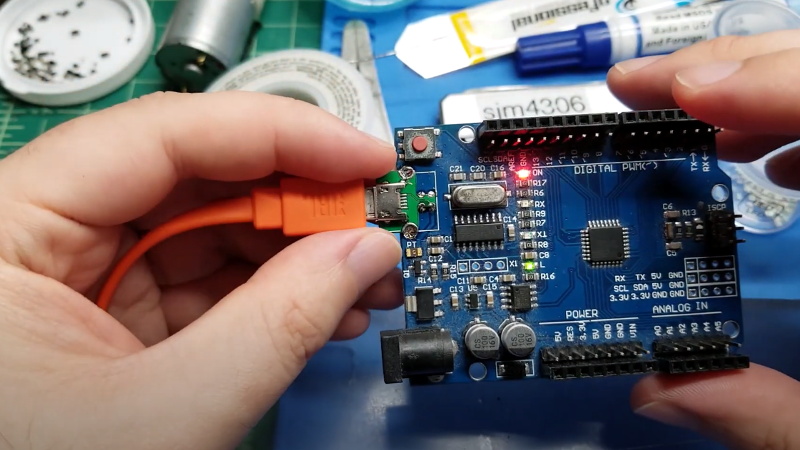
Even with more and more devices making the leap to USB-C, the Arduino Uno still proudly sports a comparatively ancient Type-B port. It wouldn’t be a stretch to say that many Hackaday readers only keep one of these cables around because they’ve still got an Uno or two they need to plug in occasionally.

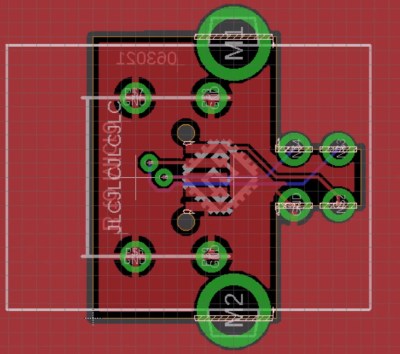
Looking to at least move things in the right direction, [sjm4306] recently set out to create a simple board that would let him mount a micro USB connector in place of the Uno’s original Type-B. Naturally there are no components on the PCB, it simply adapts the original through-hole footprint to the tight grouping of surface mount pads necessary to mount a female micro USB port.

Making castellated holes on the cheap.

The design is simple enough, but as [sjm4306] explains in the video below, there’s actually a bit more to the story than you might think. Looking to avoid the premium he’d pay to have the board house do castellated holes, he cheated the system a bit by having the board outline go right through the center of the standard pads.

Under a microscope, you can see the downside of this approach. Some of the holes got pretty tore up as the bit routed out the edges of the board, with a few of them so bad [sjm4306] mentions there might not be enough of the pad left to actually use. But while they may not be terribly attractive, most of them were serviceable. To be safe, he says anyone looking to use his trick with their own designs should order more boards than they think they’ll actually need.

Of course you could go all the way and retrofit the Uno with a USB-C port, as we’ve seen done with devices in the past. But the latest-and-greatest USB interface can be a bit fiddly, especially with DIY gadgets, so we can’t blame him for going with the more reliable approach.

[Piotr] was working on a recent Arduino project when he ran into a problem. He was having trouble getting his Arduino Pro Mini to communicate with an ESP8266 module. He needed a way to snoop on the back and forth serial communications. Since he didn’t have a specialized tool for this task, [Piotr] ended up building his own.

The setup is pretty simple. You start with a standard serial cable containing the TX, RX, DTR, and GND wires. This cable connects the Arduino to the ESP8266 WiFi module. The TX and RX lines are then tapped into. Each wire is routed to the RX pin of two different serial to USB adapters. This way, the data being sent from the Arduino shows up on one COM port and the data being transmitted from the module shows up on the other.

The next piece of the puzzle was coming up with a way to see the data more clearly. [Piotr] could have opened two serial terminals simultaneously, but this wasn’t ideal because it would be difficult to compare the timing of the data. Instead, [Piotr] spent less than an hour writing his own simple serial terminal. This one connects to two COM ports at the same time and prints the data on the same screen. The data from each COM port is displayed in a separate color to make it easy to differentiate. The schematic and source code to this project can be found on [Piotr’s] website.


Filed under: Arduino Hacks, Microcontrollers
Feb
15

Showcase your project: ListComPorts per Windows

com, port, serial, Software Comments Off on Showcase your project: ListComPorts per Windows 

Marco Lai ci propone un software da lui sviluppato per semplificare la gestione delle porte COM su di un sistema Windows, nel caso vengano utilizzate differenti schede Arduino in una volta sola:

Spesso mi capita di usare diversi tipi di Arduino collegati allo stesso pc e diventa abbastanza frustrante capire quale sia la relativa porta COM, dato che nell’IDE viene elencato il nome della porta senza la descrizione del tipo di dispositivo associato.
Quindi devo accedere a gestione dispositivi e controllare nella voce Port (COM e LPT) quale sia questa associazione, in modo da caricare gli sketch sui giusto relativi dispositivi.
Il problema poi aumenta quando collego e scollego le schede dalla porta usb, magari invertendo l’ordine sulle porte, ottenendo così nuovi assegnamenti di COM che mi costringono a tenere aperta la finestra gestione dispositivi.
Ho scritto una piccola utility che elenca le porte COM con la descrizione del dispositivo collegato, in questo modo lavoro meglio e quando ricollego le schede posso cliccare sul pulsante aggiorna per ottenere la nuova lista aggiornata.

Maggiori informazioni, così come il link per scaricare ListComPorts, possono essere trovate qui.


  • Newsletter

    Sign up for the PlanetArduino Newsletter, which delivers the most popular articles via e-mail to your inbox every week. Just fill in the information below and submit.

  • Like Us on Facebook