Posts | Comments

Planet Arduino

Archive for the ‘games’ Category

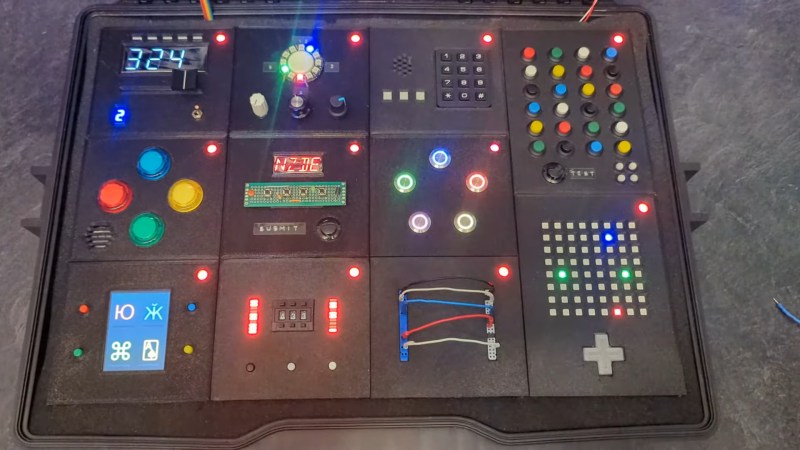
[Heath Paddock] wanted to confound his friends with a game that mimics an escape room in a box. About six months after starting, he had this glorious thing completed. It’s a hardware version of a game called Keep Talking and Nobody Explodes where players have five minutes to defuse a suitcase bomb. This implementation requires at least two players, one with the box-bomb itself, and one who holds all the knowledge but can’t see the box-bomb to defuse it.
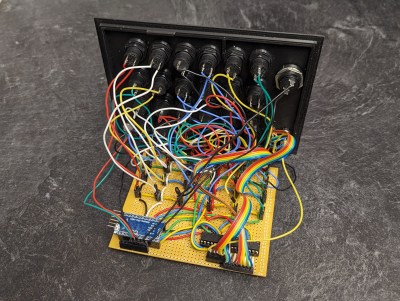
The wiring of the Mastermind module.

[Heath]’s version has twice as many modules as the original game, each hand-wired one driven by an Arduino. One of the modules is an LED maze. There are two green anchor LEDs in one of six configurations, and and blue and a red LED.

The object is to move the blue LED next to the red one without touching any walls. Of course, the box-holder can’t see the walls and must describe the configuration of the anchor LEDs to their partner in order to get started.

All of the modules are quite different, which likely makes for an extremely fun and challenging five minutes. [Heath] reports that getting inter-module communication down was a long road. Eventually, [Heath] settled on a mesh network configuration and connected everything in a big loop. Be sure to check out the walk-through video after the break.

This isn’t the first time we’ve seen a hardware implementation of this game. Here’s one that uses a Raspberry Pi.
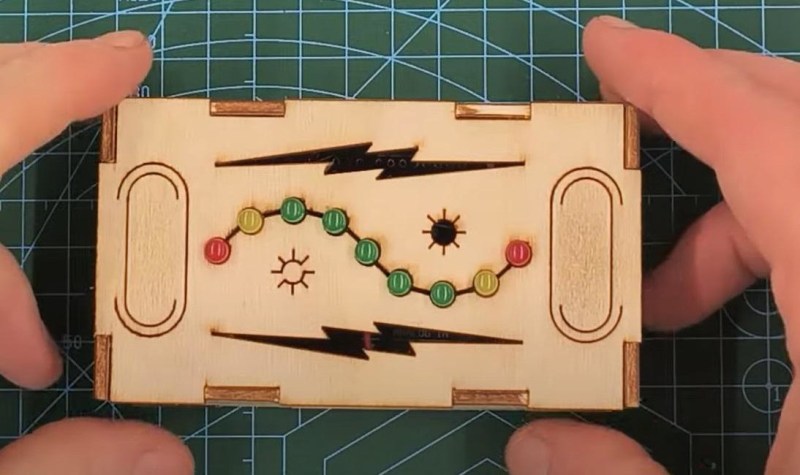
Maybe it’s just us, but isn’t it kind of amazing that in a world of pretty darn realistic games, PONG is still thrilling to play? This 1D implementation by [newsonator] is about as exciting as it gets.

It works like you’d probably expect — the light moves back and forth between the two players. Keep it in the green and you have a nice, gentle volley going. Let it hit your red LED and you’ve lost a point. But if you can push your button while your yellow LED is lit, the light speeds up tremendously until the next button press in the green.

Our only wish is that subsequent yellow-light button presses would make it speed up even more. But there are really just the two speeds with the current programming.

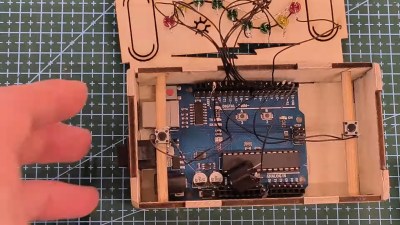
Inside the cool laser-cut box is an Arduino Uno and a 9V battery, plus a current-limiting resistor and the all-important buzzer. We like how [newsonator] wired up the LEDs to the Arduino by soldering them to a row of header pins and sticking that into the Arduino so it can be used in other projects down the line. We also like how [newsonator] shoved a couple of dowels through the box to ultimately support the two buttons.

Check out the intro video after the break for the overall details. The build is done over a few different short videos which follow.

Although this is pretty small, it isn’t quite the minimum viable.


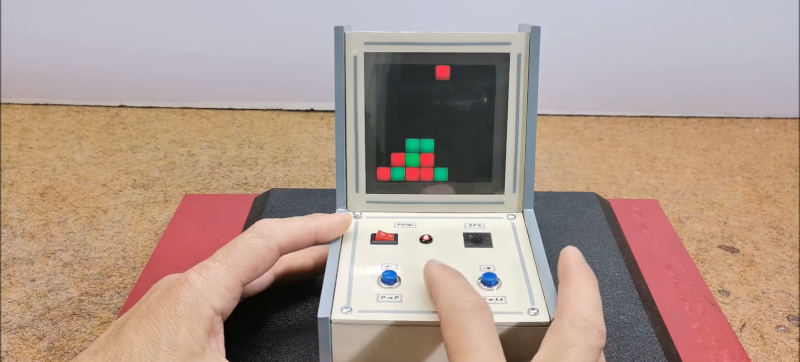
You might think that making your own electronic games would require some kind of LCD, but lately, [Mirko Pavleski] has been making his using inexpensive 8X8 WS2812B LED panels. This lets even a modest microcontroller easily control a 64-pixel “screen.” In this case, [Mirko] uses an Arduino Nano, 3 switches, and a buzzer along with some 3D printed components to make a good-looking game. You can see it in action in the video below.

The WS2812B panels are easy to use since the devices have a simple protocol where you only talk to the first LED. You send pulses to determine each LED’s color. The first LED changes color and then starts repeating what you send to the next LED, which, of course, does the same thing. When you pause a bit, the array decides you are done, and the next train of pulses will start back at the first LED.

It looks like the project is based on a German project from [Bernd Albrecht], but our German isn’t up to snuff, and machine translation always leaves something to be desired. Another developer added a play against the computer mode. This is a simple program and would be easy to port to the microcontroller of your choice. [Mirko]’s execution of it looks like it could be a commercial product. If you made one as a gift, we bet no one would guess you built it yourself.

Of course, you could play a real robot. You could probably repurpose this hardware for many different games, too.

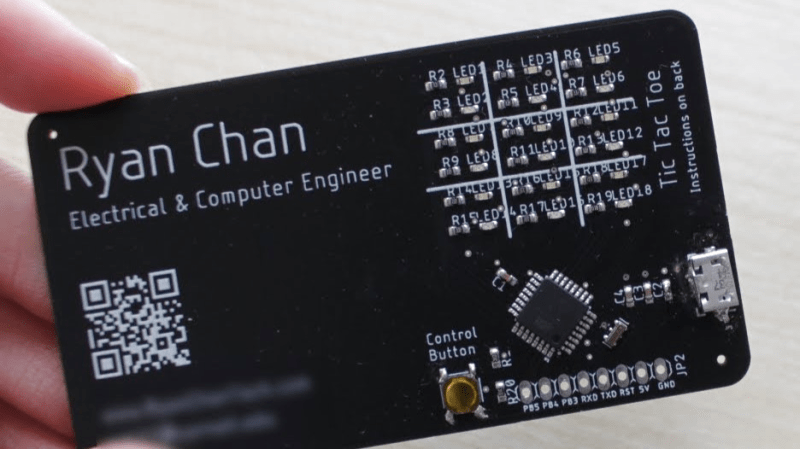
The PCB business card has long been a way for the aspiring electronics engineer to set themself apart from their peers. Handing out a card that is also a two player game is a great way to secure a couple minutes of a recruiter’s time, so [Ryan Chan] designed a business card that, in addition to his contact information, also has a complete Tic-Tac-Toe game built in.

[Ryan] decided that an OLED display was too expensive for something to hand out and an LED matrix too thick, so he decided to keep it simple and use an array of 18 LEDs—9 in each of two colors laid out in a familiar 3×3 grid. An ATmega328p running the Arduino bootloader serves as the brains of the operation. To achieve a truly minimal design [Ryan] uses a single SMD pushbutton for control: a short press moves your selection, a longer press finalizes your move, and a several-second press switches the game to a single-player mode, complete with AI.

If you’d like to design a Tic-Tac-Toe business card for yourself, [Ryan] was kind enough to upload the schematics and code for his card. If you’re still pondering what kind of PCB business card best represents you, it’s worth checking out cards with an updatable ePaper display or a tiny Tetris game.

Thanks to [Abe] for the tip!

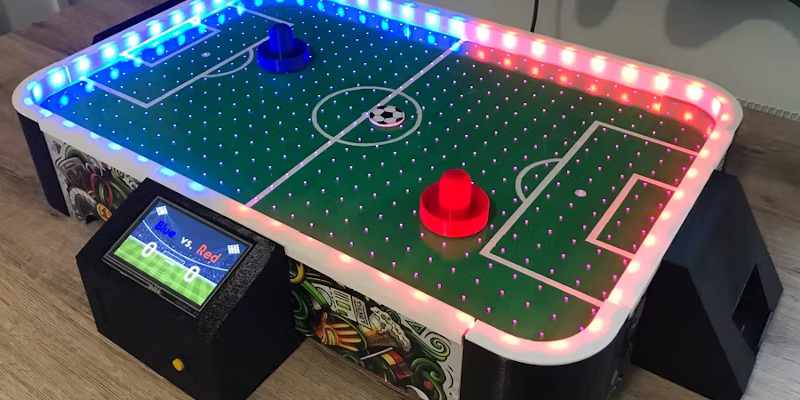
If you are an American, you’d probably think of [Silas Hansen’s] project as “air soccer” but most people will prefer air football. Either way, it is like air hockey but more of a football field feel. The project looks great — if you saw this on the shelves of the local toy store, you wouldn’t think anything of it. You can see a video of the game in action, below.

Unsurprisingly, the brains of the game are an Arduino. The case looks good thanks to laser cutting and 3D printing. A Roland printer produced the stickers that really dress the case up, but you could find another artistic way to do the decoration.

You could probably pull this off without all the fancy fabrication gear, but hand drilling all those air holes would be a pain. The air is from a 3,000 RPM brushless fan and a pair of line trackers are repurposed to sense when the puck — er, ball — reach the goals. A touch display handles the scorekeeping.

Overall, a great-looking project and one of those things that doesn’t use anything too high-tech, but still looks great and seems to work well.

We’ve seen hockey tables before, of course. If you are too antisocial to have an opponent, you can always build one.

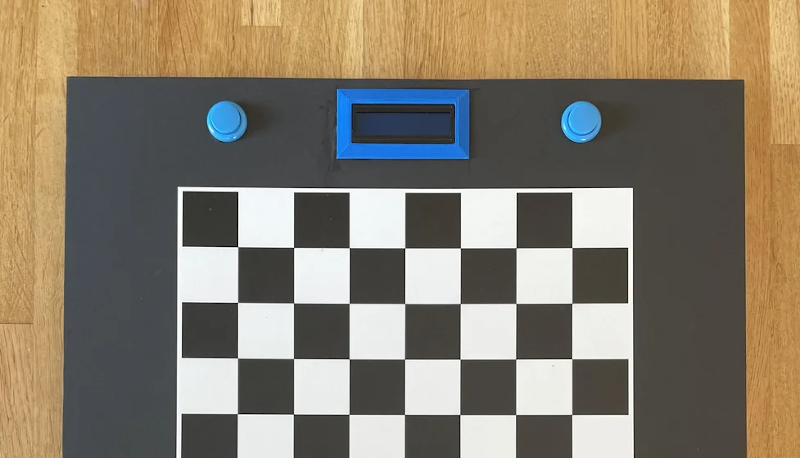
If you’ve ever played chess or even checkers, you’ve probably thought about making a board that lets a computer play you without having to enter your moves and look at the board on a screen. [Greg06] not only thought about it, but he built it.

The board looks great and uses foamboard which makes it easy to reproduce. Each piece has a small magnet within and an electromagnet on an XY motion system can selectively pick up and move pieces. In addition, a reed switch under each square can tell if a square is occupied or not.

This system is pretty simple, but it is effective. After all, you know the position of the pieces at the start. So if a bishop leaves a square and a new square gets a piece, you can assume it is the bishop. There is no need to actually distinguish the pieces.

An LCD and some buttons act as a chess clock, and note if a move is illegal. The Arduino has a pretty basic chess algorithm known as Micro Max that runs on the Arduino, but we wondered if you couldn’t connect to a remote computer to get more sophisticated gameplay or even interface to the Internet to play remote humans, something we’ve seen before. You could even adapt it for other input methods.

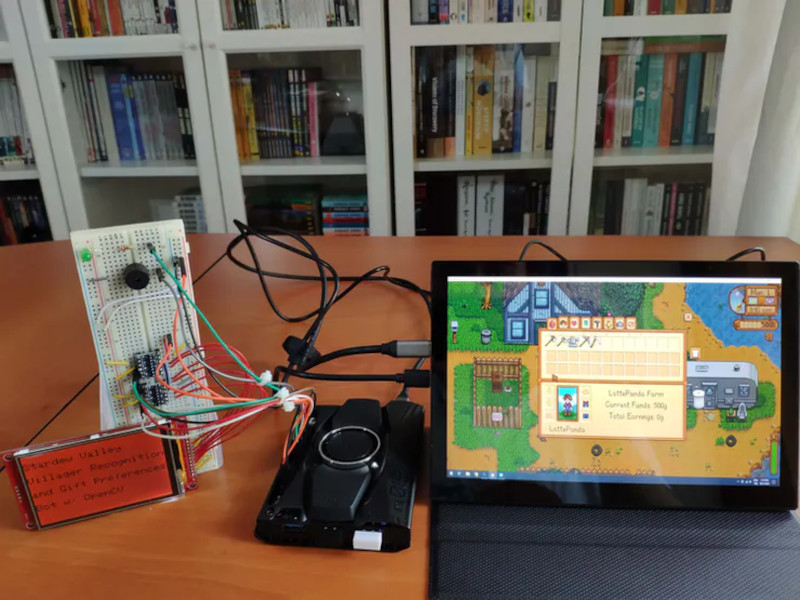
A robot that uses CV to detect villagers in Stardew Valley and display their gift preferences on a screen.

It seems like most narrative games have some kind of drudgery built in. You know, some tedious and repetitious task that you absolutely must do if you want to succeed. In Stardew Valley, that thing is gift giving, which earns you friendship points just like in real life. More important than the giving itself is that each villager has preferences — things they love, like, and hate to receive as gifts. It’s a lot to remember, and most people don’t bother trying and just look it up in the wiki. Well, except for Abigail, who seems to like certain gemstones so much that she must be eating them. She’s hard to forget.

[kutluhan_aktar]’s villager gift preferences bot is a fun and fantastic use of OpenCV. This bot uses a LattePanda Alpha 864s, which is a single-board computer with an Arduino Leonardo built in. It works using template matching, which is basically a game of Where’s Waldo? for computers.

Given a screenshot of each villager in various positions, the LattePanda recognizes them among a given game scene, then does a lookup of their birthday and preferences which the Leonardo prints on a 3.5″ LCD screen. At the same time, it alerts the player with a buzz and big green LED. Be sure to check it out in action after the break.

In Animal Crossing, the drudgery amounts to pressing the A button while catching shooting stars. That’s not a huge problem for a Teensy.

A game board with five LEDs and a hand shining a laser pointer at it

Video games are great and all, but sometimes you just want the thrill of manipulating actual objects in addition to watching action on a screen. This must have been the reason why Nintendo’s Duck Hunt became so popular despite the simplicity of its gameplay. Prolific hacker [mircemk] similarly made a computer-plus-physical game called “Laser Shooter“, which somehow reminds us of the good old NES game.

The game is based on an Arduino Nano, to which five LEDs as well as five photoresistors (LDRs) are connected. When the game is started, the LEDs light up at random and the player has a limited time to “shoot” the corresponding LDR with a laser pointer. This time limit is decreased as the game progresses, and the game is over once the player fails to hit the target on time. The “Game Over” message is accompanied by a sad tune, but luckily no giggling dog.

Complete schematics and code are available for anyone willing to try their hand at replicating or improving this game. And no, you can’t simply sweep your laser across the five LDRs all the time, because you lose if you shoot at the wrong target. For more laser pointer-based games, try this Laser Command clone or this laser tag badge system.

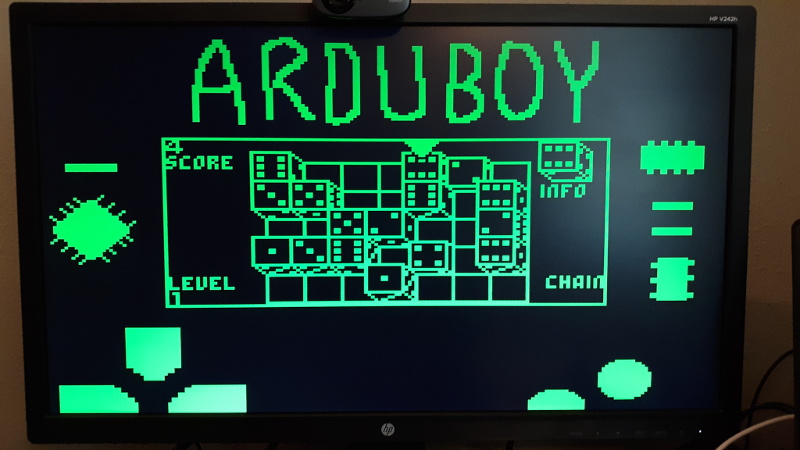
We’re big fans of the Arduboy here at Hackaday, but we’ll admit its tiny screen isn’t exactly ideal for long gaming sessions. There are some DIY builds of the open source handheld that use a larger SPI OLED display, though you’re relatively limited on what kind of changes can be made to the hardware before the games start balking. But as [Nick Bild] shows with his Arduboy home console, hacking the core system library opens up a lot of interesting possibilities.

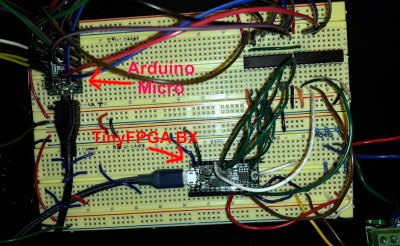
Games written for the Arduboy make use of a common library that handles all the low-level hardware stuff, which includes a display() function to push the graphical data out to an SPI-connected OLED display. What [Nick] has done is re-write that function to instead output to a custom VGA generator running on the TinyFPGA BX. He had to delete support for the Arduboy’s RGB LEDs because he needed the extra pins, but that shouldn’t cause much of a problem in terms of software support.

This does mean that games need to be recompiled against the modified library to work on his hardware, but as the vast majority of Arduboy software is open source anyway, that’s not much of a problem. We particularly like the Super Game Boy style border  you get around the display at no extra cost.

At this point the hardware looks less like a console and more like a breadboard filled with jumpers, so we’re interested in seeing this project taken to its logical conclusion. A custom PCB, enclosure, and possibly even support for using the original NES controllers would turn this into proper system worthy of any hacker’s game room. You could even put the games on custom cartridges if you wanted, though a flash chip that holds the system’s entire library would be quite a bit more convenient.


  • Newsletter

    Sign up for the PlanetArduino Newsletter, which delivers the most popular articles via e-mail to your inbox every week. Just fill in the information below and submit.

  • Like Us on Facebook