Posts | Comments

Planet Arduino

Archive for the ‘Touch’ Category

Learn how to use an inexpensive TFT colour  touch LCD shield with your Arduino. This is chapter twenty-nine of our huge Arduino tutorial series.

Updated 07/02/2014

There are many colour LCDs on the market that can be used with an Arduino, and in this tutorial we’ll explain how to use a model that is easy to use, has a touch screen, doesn’t waste all your digital output pins – and won’t break the bank. It’s the 2.8″ TFT colour touch screen shield from Tronixlabs:

Arduino TFT colour touch shield front

And upside down:

Arduino TFT colour touch shield back

As you can imagine, it completely covers an Arduino Uno or compatible board, and offers a neat way to create a large display or user-interface.  The display has a resolution of 320 x 240 pixels, supports up to 65536 colours and draws around 250mA of current from the Arduino’s internal 5V supply. 

And unlike other colour LCDs, this one doesn’t eat up all your digital output pins – it uses the SPI bus for the display (D10~D13), and four analogue pins (A0~A3) if you use the touch sensor. However if you also use the onboard microSD socket more pins will be required. 

With some imagination, existing Arduino knowledge and the explanation within you’ll be creating all sorts of displays and interfaces in a short period of time. Don’t be afraid to experiment!

Getting started

Setting up the hardware is easy – just plug the shield on your Arduino. Next, download the library bundle from here. Inside the .zip file is two folders – both which need to be copied into your …Arduino-1.0.xlibraries folder. Then you will need to rename the folder “TFT_Touch” to “TFT”. You will notice that the Arduino IDE already contains a library folder called TFT, so rename or move it.

Now let’s test the shield so you know it works, and also to have some quick fun. Upload the paint example included in the TFT library – then with a stylus or non-destructive pointer, you can select colour and draw on the LCD – as shown in this video. At this point we’d like to note that you should be careful with the screen – it doesn’t have a protective layer.

Afraid the quality of our camera doesn’t do the screen any justice, however the still image looks better:

Arduino TFT colour touch shield paint demonstration

Using the LCD 

Moving on, let’s start with using the display. In your sketches the following libraries need to be included using the following lines before void setup():

#include <stdint.h>
#include <TFTv2.h>
#include <SPI.h>

… and then the TFT library is initialised in void setup()

Tft.TFTinit();

Now you can use the various functions to display text and graphics. However you first need to understand how to define colours.

Defining colours

Functions with a colour parameter can accept one of the ten ten predefined colours – RED, GREEN, BLUE, BLACK, YELLOW, WHITE, CYAN, BRIGHT_RED, GRAY1 and GRAY2, or you can create your own colour value. Colours are defined with 16-but numbers in hexadecimal form, with 5 bits for red, 6 for green and 5 for blue – all packed together. For example – in binary:

MSB > RRRRRGGGGGGRRRRR < LSB

These are called RGB565-formatted numbers – and we use these in hexadecimal format with our display. So black will be all zeros, then converted to hexadecimal; white all ones, etc. The process of converting normal RGB values to RGB565 would give an aspirin a headache, but instead thanks to Henning Karlsen you can use his conversion tool to do the work for you. Consider giving Henning a donation for his efforts.

Displaying text

There are functions to display characters, strings of text, integers and float variables:

  Tft.drawChar(char, x, y, size, colour);          // displays single character variables
  Tft.drawString(string, x, y, size, colour);      // displays arrays of characters
  Tft.drawNumber(integer, x, y, size, colour);     // displays integers
  Tft.drawFloat(float, x, y, size, colour);        // displays floating-point numbers

In each of the functions, the first parameter is the variable or data to display; x and y are the coordinates of the top-left of the first character being displayed; and colour is either the predefined colour as explained previously, or the hexadecimal value for the colour you would like the text to be displayed in – e.g. 0xFFE0 is yellow.

The drawFloat() function is limited to two decimal places, however you can increase this if necessary. To do so, close the Arduino IDE if running, open the file TFTv2.cpp located in the TFT library folder – and search for the line:

INT8U decimal=2;

… then change the value to the number of decimal places you require. We have set ours to four with success, and the library will round out any more decimal places. To see these text display functions in action,  upload the following sketch:

#include <stdint.h>
#include <TFTv2.h>
#include <SPI.h>

char ascii = 'a';
char h1[] = "Hello";
char h2[] = "world";
float f1 = 3.12345678;

void setup()
{
  Tft.TFTinit(); 
}

void loop()
{
  Tft.drawNumber(12345678, 0, 0, 1, 0xF800);
  Tft.drawChar(ascii,0, 20,2, BLUE);
  Tft.drawString(h1,0, 50,3,YELLOW);
  Tft.drawString(h2,0, 90,4,RED);  
  Tft.drawFloat(f1, 4, 0, 140, 2, BLUE);      
}

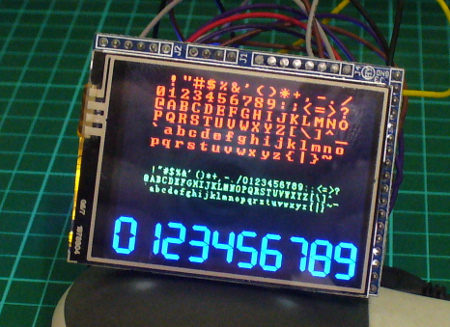
… which should result in the following:

Arduino TFT colour touch shield text

To clear the screen

To set the screen back to all black, use:

Tft.fillScreen();

Graphics functions

There are functions to draw individual pixels, circles, filled circles, lines, rectangles and filled rectangles. With these and a little planning you can create all sorts of images and diagrams. The functions are:

Tft.setPixel(x, y, COLOUR);                  
// set a pixel at x,y of colour COLOUR

Tft.drawLine(x1, y1, x2, y2, COLOUR);        
// draw a line from x1, y1 to x2, y2 of colour COLOUR

Tft.drawCircle(x, y, r, COLOUR);             
// draw a circle with centre at x, y and radius r of colour COLOUR

Tft.fillCircle(x, y, r, COLOUR);             
// draw a filled circle with centre at x, y and radius r of colour COLOUR

Tft.drawRectangle(x1, y1, x2, y2 ,COLOUR);   
// draw a rectangle from x1, y1 (top-left corner) to x2, y2 (bottom-right corner) of colour COLOUR

Tft.Tft.fillRectangle(x1, y1, x2, y2 ,COLOUR);   
// draw a filled rectangle from x1, y1 (top-left corner) to x2, y2 (bottom-right corner) of colour COLOUR

The following sketch demonstrates the functions listed above:

#include <stdint.h>
#include <TFTv2.h>
#include <SPI.h>

int x, y, x1, x2, y1, y2, r;

void setup()
{
  randomSeed(analogRead(0));
  Tft.TFTinit(); 
}
void loop()
{
  // random pixels
  for (int i=0; i<500; i++)
  {
    y=random(320);
    x=random(240);
    Tft.setPixel(x, y, YELLOW);
    delay(5);
  }
  delay(1000); 
  Tft.fillScreen(); // clear screen

    // random lines
  for (int i=0; i<50; i++)
  {
    y1=random(320);
    y2=random(320);    
    x1=random(240);
    x2=random(240);    
    Tft.drawLine(x1, y1, x2, y2, RED);   
    delay(10);
  }
  delay(1000); 
  Tft.fillScreen(); // clear screen

    // random circles
  for (int i=0; i<50; i++)
  {
    y=random(320);
    x=random(240);
    r=random(50);
    Tft.drawCircle(x, y, r, BLUE); 
    delay(10);
  }
  delay(1000); 
  Tft.fillScreen(); // clear screen

    // random filled circles
  for (int i=0; i<10; i++)
  {
    y=random(320);
    x=random(240);
    r=random(50);
    Tft.fillCircle(x, y, r, GREEN); 
    delay(250);
    Tft.fillCircle(x, y, r, BLACK);     
  }
  delay(1000); 
  Tft.fillScreen(); // clear screen

    // random rectangles
  for (int i=0; i<50; i++)
  {
    y1=random(320);
    y2=random(320);    
    x1=random(240);
    x2=random(240);    
    Tft.drawRectangle(x1, y1, x2, y2, WHITE);   
    delay(10);
  }
  delay(1000); 
  Tft.fillScreen(); // clear screen

    // random filled rectangles
  for (int i=0; i<10; i++)
  {
    y1=random(320);
    y2=random(320);    
    x1=random(240);
    x2=random(240);    
    Tft.fillRectangle(x1, y1, x2, y2, RED);   
    delay(250);
    Tft.fillRectangle(x1, y1, x2, y2, BLACK);       
  }
  delay(1000); 
  Tft.fillScreen(); // clear screen
}

… with the results shown in this video.

Using the touch screen

The touch screen operates in a similar manner to the other version documented earlier, in that it is a resistive touch screen and we very quickly apply voltage to one axis then measure the value with an analogue pin, then repeat the process for the other axis.

You can use the method in that chapter, however with our model you can use a touch screen library, and this is included with the library .zip file you downloaded at the start of this tutorial.

The library does simplify things somewhat, so without further ado upload the touchScreen example sketch included with the library. Open the serial monitor then start touching the screen. The coordinates of the area over a pixel being touch will be returned, along with the pressure – as shown in this video.

Take note of the pressure values, as these need to be considered when creating projects. If you don’t take pressure into account, there could be false positive touches detected which could cause mayhem in your project.

Now that you have a very simple method to determine the results of which part of the screen is being touched – you can create sketches to take action depending on the touch area. Recall from the example touch sketch that the x and y coordinates were mapped into the variables p.x and p.y, with the pressure mapped to p.z. You should experiment with your screen to determine which pressure values work for you.

In the following example, we don’t trigger a touch unless the pressure value p.z is greater than 300. Let’s create a simple touch-switch, with one half of the screen for ON and the other half for OFF. Here is the sketch:

#include <stdint.h>
#include <TFTv2.h>
#include <SPI.h>
#include <TouchScreen.h> 

// determine the pins connected to the touch screen hardware
// A0~A3
#define YP A2   // must be an analog pin, use "An" notation!
#define XM A1   // must be an analog pin, use "An" notation!
#define YM 14   // can be a digital pin, this is A0
#define XP 17   // can be a digital pin, this is A3 

#define TS_MINX 116*2
#define TS_MAXX 890*2
#define TS_MINY 83*2
#define TS_MAXY 913*2

// For better pressure precision, we need to know the resistance
// between X+ and X- Use any multimeter to read it
// The 2.8" TFT Touch shield has 300 ohms across the X plate
TouchScreen ts = TouchScreen(XP, YP, XM, YM);

void setup() 
{
  Serial.begin(9600);
  Tft.TFTinit(); 
  Tft.fillScreen(); // clear screen
}

void loop() 
{
  // a point object holds x y and z coordinates
  Point p = ts.getPoint();
  p.x = map(p.x, TS_MINX, TS_MAXX, 0, 240);
  p.y = map(p.y, TS_MINY, TS_MAXY, 0, 320);
  Serial.println(p.y);
  if (p.y < 160 && p.z > 300) // top half of screen?
  {
    // off
    Tft.fillCircle(120, 160, 100, BLACK);     
    Tft.drawCircle(120, 160, 100, BLUE); 
  } else if (p.y >= 160 && p.z > 300)
  {
    // on
    Tft.fillCircle(120, 160, 100, BLUE); 
  }
}

What’s happening here? We divided the screen into two halves (well not physically…) and consider any touch with a y-value of less than 160 to be the off area, and the rest of the screen to be the on area. This is tested in the two if functions – which also use an and (“&&”) to check the pressure. If the pressure is over 300 (remember, this could be different for you) – the touch is real and the switch is turned on or off.

… and a quick demonstration video of this in action.

Displaying images from a memory card

We feel this warrants a separate tutorial, however if you can’t wait – check out the demo sketch which includes some example image files to use.

Conclusion

By now I hope you have the answer to “how do you use a touch screen LCD with Arduino?” and had some fun learning with us. You can get your LCD from Tronixlabs. And if you enjoyed this article, or want to introduce someone else to the interesting world of Arduino – check out my book (now in a third printing!) “Arduino Workshop”.

visit tronixlabs.com

Have fun and keep checking into tronixstuff.com. Why not follow things on twitterGoogle+, subscribe  for email updates or RSS using the links on the right-hand column, or join our forum – dedicated to the projects and related items on this website. Sign up – it’s free, helpful to each other –  and we can all learn something.
Jan
30

An award-winning LCD with an Arduino built-in (using only 2 pins!)

arduino, ArduinoAtHeart, LCD, screen, Touch Comments Off on An award-winning LCD with an Arduino built-in (using only 2 pins!) 

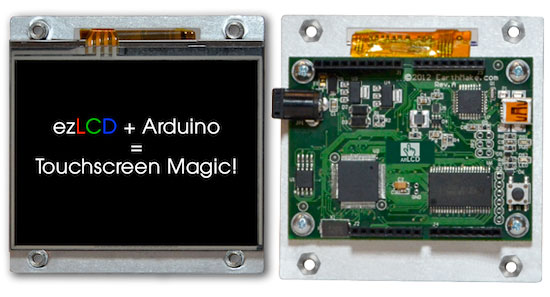
arLCD


We are happy to announce a new entry in the Arduino At Heart program. It’s called arLCD by EarthMake, an US based company with the mission to introduce ezLCD technology produced by its sister company EarthLCD to the Maker Market through special products.

The new Arduino at Heart is not just an LCD and you should not confuse it with a snails pace 2.8 LCD shield that uses almost all your I/O pins!

arLCD is a full smart ezLCD GPU with the Arduino Uno R3 on the same PCB in a thin, easy to integrate package with a panel mount bezel available in the near future.

The 3.5 has 64% more display area than a 2.8 LCD. The arLCD combines the Arduino and the award winning ezLCD into a single product, ready to accept all Arduino compatible shields. The arLCD can be used in many applications such as thermostat control, lighting controls, home security, audio control, water level gauge, robotics, operational control, and button switches.

In the video demo you can see how it works. Jazz shows us how to switch screens and display different programs. The first sketch is an design tool for choosing the colors for the screen layout, the second app explores a thermostat prototyped on a breadboard using a thermistor to read the current temperature and turn on/off an led.

Want to learn more? Take a look at the documentation, download the library and then check the introductory video below:


If you’re interested add your email on this page and get notified when available in the Arduino Store.

Oct
29

Touch Board brings Interactivity Everywhere

ArduinoAtHeart, conductive, ink, kickstarter, Touch Comments Off on Touch Board brings Interactivity Everywhere 

Touch Board


We’re proud to announce that the Touch Board by BareConductive is one of the first projects to be selected for our new Arduino At Heart program and it’s launching today on Kickstarter!

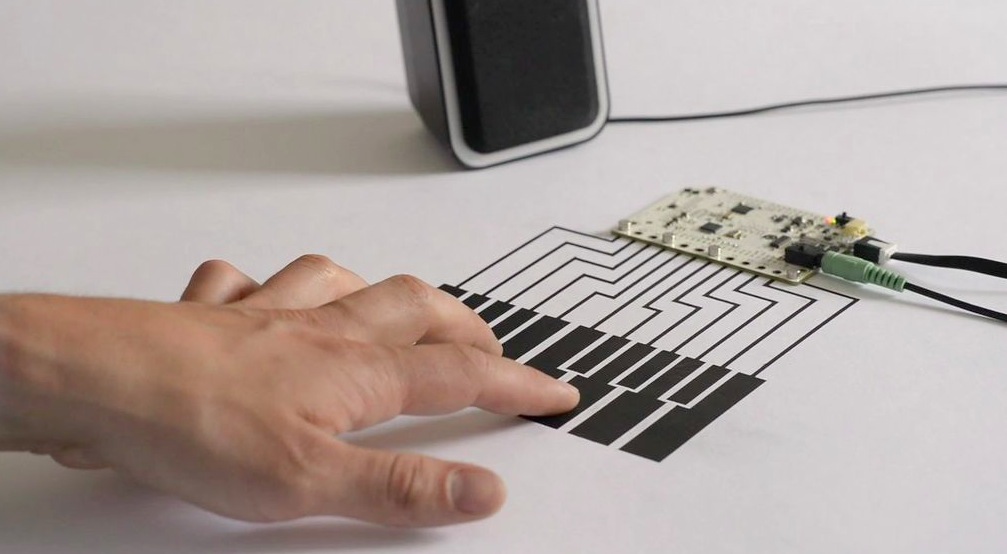
The Touch Board is a way to turn almost any surface into an interface. As many of you know, the last two years of Electric Paint have shown us that there is a real interest in developing unexpected interactions.

That’s why BareConductive team decided to develop a board able to do a ton of cool stuff but focused on 3 main points. Here’s how Becky, one of the founders, described it to us:


  • Radical Interfaces – The Touch Board uses capacitive sensing to turn any conductive material into an interface. Imagine light switches painted on the wall with  Electric Paint, interactive books or hidden sensors that can detect a whole person. The Touch board can also be used to create distance sensors which work from up to 20cm away – which is as cool as it sounds.
  • No Programming Required – We’ll be shipping the Touch Boards pre-programmed to turn touch into sound so all you’ll need to do is plug in a micro USB cable or LiPo (we’ve built in onboard charging) and a speaker and you’re ready to go. Touch any one of the electrodes and the MP3/MIDI player will play the associated track from the supplied microSD card. Changing the sounds is as simple as changing the card.
  • Arduino-compatible - We wanted to make sure that this board was easy to use and had as wide an audience as possible so we based it off an Arduino Leonardo (and recognised as an Arduino Leonardo in IDE). It can be programmed in the Arduino IDE, it works with most shields and it can act as an HID. We’re proud to say that we’re part of the new Arduino at Heart program. Working with Arduino has been great and they’re fully behind the Touch Board.

Take a look at the video and support them now:

And don’t forget to take a look at the Arduino at Heart products and program, designed for makers and companies wanting to make their products easily recognizable as based on the Arduino technology!

Apr
26

Learn how to use inexpensive ILI9325 colour TFT LCD modules in chapter fifty of a series originally titled “Getting Started/Moving Forward with Arduino!” by John Boxall – A tutorial on the Arduino universe. The first chapter is here, the complete series is detailed here.

Introduction

Colour TFT LCD modules just keep getting cheaper, so in this tutorial we’ll show you how to get going with some of the most inexpensive modules we could find. The subject of our tutorial is a 2.8″ 240 x 320 TFT module with the ILI9325 LCD controller chip. If you look in ebay this example should appear pretty easily, here’s a photo of the front and back to help identify it:

There is also the line “HY-TFT240_262k HEYAODZ110510″ printed on the back of the module. They should cost less than US$10 plus shipping. Build quality may not be job number one at the factory so order a few, however considering the cost of something similar from other retailers it’s cheap insurance. You’ll also want sixteen male to female jumper wires to connect the module to your Arduino.

Getting started

To make life easier we’ll use an Arduino library “UTFT” written for this and other LCD modules. It has been created by Henning Karlsen and can be downloaded from his website. If you can, send him a donation – this library is well worth it. Once you’ve downloaded and installed the UTFT library, the next step is to wire up the LCD for a test.

Run a jumper from the following LCD module pins to your Arduino Uno (or compatible):

  • DB0 to DB7 > Arduino D0 to D7 respectively
  • RD > 3.3 V
  • RSET > A2
  • CS > A3
  • RW > A4
  • RS > A5
  • backlight 5V > 5V
  • backlight GND > GND

Then upload the following sketch – Example 50.1. You should be presented with the following on your display:

If you’re curious, the LCD module and my Eleven board draws 225 mA of current. If that didn’t work for you, double-check the wiring against the list provided earlier. Now we’ll move forward and learn how to display text and graphics.

Sketch preparation

You will always need the following before void setup():

#include "UTFT.h"
UTFT myGLCD(ILI9325C,19,18,17,16); // for Arduino Uno

and in void setup():

myGLCD.InitLCD(orientation); 
myGLCD.clrScr();

with the former command, change orientation to either LANDSCAPE to PORTRAIT depending on how you’ll view the screen. You may need further commands however these are specific to features that will be described below. The function .clrScr() will clear the screen.

Displaying Text

There are three different fonts available with the library. To use them add the following three lines before void setup():

extern uint8_t SmallFont[];
extern uint8_t BigFont[];
extern uint8_t SevenSegNumFont[];

When displaying text you’ll need to define the foreground and background colours with the following:

myGLCD.setColor(red, green, blue); 
myGLCD.setBackColor(red, green, blue);

Where red, green and blue are values between zero and 255. So if you want white use 255,255,255 etc. For some named colours and their RGB values, click here. To select the required font, use one of the following:

  myGLCD.setFont(SmallFont); // Allows 20 rows of 40 characters
  myGLCD.setFont(BigFont); // Allows 15 rows of 20 characters
  myGLCD.setFont(SevenSegNumFont); // allows display of 0 to 9 over four rows

Now to display the text use the function:

 myGLCD.print("text to display",x, y);

where text is what you’d like to display, x is the horizontal alignment (LEFT, CENTER, RIGHT) or position in pixels from the left-hand side of the screen and y is the starting point of the top-left of the text. For example, to start at the top-left of the display y would be zero. You can also display a string variable instead of text in inverted commas.

You can see all this in action with the following sketch – Example 50.2, which is demonstrated in the following video:

Furthremore, you can also specify the angle of display, which gives a simple way of displaying text on different slopes. Simply add the angle as an extra parameter at the end:

  myGLCD.print(“Hello, world”, 20, 20, angle);

Again, see the following sketch – Example 50.2a, and the results below:

Displaying Numbers

Although you can display numbers with the text functions explained previously, there are two functions specifically for displaying integers and floats.

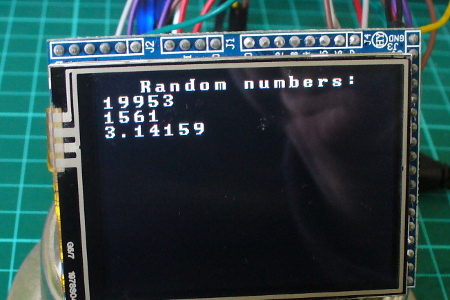
You can see these functions in action with the following sketch – Example 50.3, with an example of the results below:

example50p3

Displaying Graphics

There’s a few graphic functions that can be used to create required images. The first is:

myGLCD.fillScr(red, green, blue);

which is used the fill the screen with a certain colour. The next simply draws a pixel at a specified x,y location:

myGLCD.drawPixel(x,y);

Remember that the top-left of the screen is 0,0. Moving on, to draw a single line, use:

myGLCD.drawLine(x1,0,x2,239);

where the line starts at x1,y1 and finishes at x2,y2. Need a rectangle? Use:

myGLCD.drawRect(x1,y2,x2,y2); // for open rectangles
myGLCD.fillRect(x1,y2,x2,y2); // for filled rectangles

where the top-left of the rectangle is x1,y1 and the bottom-right is x2, y2. You can also have rectangles with rounded corners, just use:

myGLCD.drawRoundRect(x1,y2,x2,y2); // for open rectangles
myGLCD.fillRoundRect(x1,y2,x2,y2); // for filled rectangles

instead. And finally, circles – which are quite easy. Just use:

myGLCD.drawCircle(x,y,r); // draws open circle
myGLCD.fillCircle(x,y,r); // draws a filled circle

where x,y are the coordinates for the centre of the circle, and r is the radius. For a quick demonstration of all the graphic functions mentioned so far, see Example 50.4 – and the following video:

Displaying bitmap images

If you already have an image in .gif, .jpg or .png format that’s less than 300 KB in size, this can be displayed on the LCD. To do so, the file needs to be converted to an array which is inserted into your sketch. Let’s work with a simple example to explain the process. Below is our example image:

jrt3030

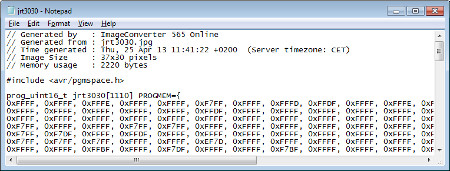
Save the image of the puppy somewhere convenient, then visit this page. Select the downloaded file, and select the .c and Arduino radio buttons, then click “make file”. After a moment or two a new file will start downloading. When it arrives, open it with a text editor – you’ll see it contains a huge array and another #include statement – for example:

cfile

Past the #include statement and the array into your sketch above void setup(). After doing that, don’t be tempted to “autoformat” the sketch in the Arduino IDE. Now you can use the following function to display the bitmap on the LCD:

myGLCD.drawBitmap(x,y,width,height, name, scale);

Where x and y are the top-left coordinates of the image, width and height are the … width and height of the image, and name is the name of the array. Scale is optional – you can double the size of the image with this parameter. For example a value of two will double the size, three triples it – etc. The function uses simple interpolation to enlarge the image, and can be a clever way of displaying larger images without using extra memory. Finally, you can also display the bitmap on an angle – using:

myGLCD.drawBitmap(x,y,width,height, name, angle, cx, cy);

where angle is the angle of rotation and cx/cy are the coordinates for the rotational centre of the image.

The bitmap functions using the example image have been used in the following sketch – Example 50.5, with the results in the following video:

Unfortunately the camera doesn’t really do the screen justice, it looks much better with the naked eye.

What about the SD card socket and touch screen?

The SD socket didn’t work, and I won’t be working with the touch screen at this time.

Conclusion

So there you have it – an incredibly inexpensive and possibly useful LCD module. Thank you to Henning Karlsen for his useful library, and if you found it useful – send him a donation via his page.

In the meanwhile have fun and keep checking into tronixstuff.com. Why not follow things on twitterGoogle+, subscribe  for email updates or RSS using the links on the right-hand column? And join our friendly Google Group – dedicated to the projects and related items on this website. Sign up – it’s free, helpful to each other –  and we can all learn something.


Learn how to use inexpensive ILI9325 colour TFT LCD modules in chapter fifty of a series originally titled “Getting Started/Moving Forward with Arduino!” by John Boxall – A tutorial on the Arduino universe. The first chapter is here, the complete series is detailed here.

Introduction

Colour TFT LCD modules just keep getting cheaper, so in this tutorial we’ll show you how to get going with some of the most inexpensive modules we could find. The subject of our tutorial is a 2.8″ 240 x 320 TFT module with the ILI9325 LCD controller chip. If you look in ebay this example should appear pretty easily, here’s a photo of the front and back to help identify it:

There is also the line “HY-TFT240_262k HEYAODZ110510″ printed on the back of the module. They should cost less than US$10 plus shipping. Build quality may not be job number one at the factory so order a few, however considering the cost of something similar from other retailers it’s cheap insurance. You’ll also want sixteen male to female jumper wires to connect the module to your Arduino.

Getting started

To make life easier we’ll use an Arduino library “UTFT” written for this and other LCD modules. It has been created by Henning Karlsen and can be downloaded from his website. If you can, send him a donation – this library is well worth it. Once you’ve downloaded and installed the UTFT library, the next step is to wire up the LCD for a test.

Run a jumper from the following LCD module pins to your Arduino Uno (or compatible):

  • DB0 to DB7 > Arduino D0 to D7 respectively
  • RD > 3.3 V
  • RSET > A2
  • CS > A3
  • RW > A4
  • RS > A5
  • backlight 5V > 5V
  • backlight GND > GND

Then upload the following sketch – Example 50.1. You should be presented with the following on your display:

If you’re curious, the LCD module and my Eleven board draws 225 mA of current. If that didn’t work for you, double-check the wiring against the list provided earlier. Now we’ll move forward and learn how to display text and graphics.

Sketch preparation

You will always need the following before void setup():

#include "UTFT.h"
UTFT myGLCD(ILI9325C,19,18,17,16); // for Arduino Uno

and in void setup():

myGLCD.InitLCD(orientation); 
myGLCD.clrScr();

with the former command, change orientation to either LANDSCAPE to PORTRAIT depending on how you’ll view the screen. You may need further commands however these are specific to features that will be described below. The function .clrScr() will clear the screen.

Displaying Text

There are three different fonts available with the library. To use them add the following three lines before void setup():

extern uint8_t SmallFont[];
extern uint8_t BigFont[];
extern uint8_t SevenSegNumFont[];

When displaying text you’ll need to define the foreground and background colours with the following:

myGLCD.setColor(red, green, blue); 
myGLCD.setBackColor(red, green, blue);

Where red, green and blue are values between zero and 255. So if you want white use 255,255,255 etc. For some named colours and their RGB values, click here. To select the required font, use one of the following:

myGLCD.setFont(SmallFont); // Allows 20 rows of 40 characters
myGLCD.setFont(BigFont); // Allows 15 rows of 20 characters
myGLCD.setFont(SevenSegNumFont); // allows display of 0 to 9 over four rows

Now to display the text use the function:

myGLCD.print("text to display",x, y);

where text is what you’d like to display, x is the horizontal alignment (LEFT, CENTER, RIGHT) or position in pixels from the left-hand side of the screen and y is the starting point of the top-left of the text. For example, to start at the top-left of the display y would be zero. You can also display a string variable instead of text in inverted commas.

You can see all this in action with the following sketch – Example 50.2, which is demonstrated in the following video:

Furthremore, you can also specify the angle of display, which gives a simple way of displaying text on different slopes. Simply add the angle as an extra parameter at the end:

myGLCD.print("Hello, world", 20, 20, angle);

Again, see the following sketch – Example 50.2a, and the results below:

Displaying Numbers

Although you can display numbers with the text functions explained previously, there are two functions specifically for displaying integers and floats.

You can see these functions in action with the following sketch – Example 50.3, with an example of the results below:

example50p3

Displaying Graphics

There’s a few graphic functions that can be used to create required images. The first is:.

myGLCD.fillScr(red, green, blue);

which is used the fill the screen with a certain colour. The next simply draws a pixel at a specified x,y location:

myGLCD.drawPixel(x,y);

Remember that the top-left of the screen is 0,0. Moving on, to draw a single line, use:

myGLCD.drawLine(x1,0,x2,239);

where the line starts at x1,y1 and finishes at x2,y2. Need a rectangle? Use:

myGLCD.drawRect(x1,y2,x2,y2); // for open rectangles
myGLCD.fillRect(x1,y2,x2,y2); // for filled rectangles

where the top-left of the rectangle is x1,y1 and the bottom-right is x2, y2. You can also have rectangles with rounded corners, just use:

myGLCD.drawRoundRect(x1,y2,x2,y2); // for open rectangles
myGLCD.fillRoundRect(x1,y2,x2,y2); // for filled rectangles

instead. And finally, circles – which are quite easy. Just use:

myGLCD.drawCircle(x,y,r); // draws open circle
myGLCD.fillCircle(x,y,r); // draws a filled circle

where x,y are the coordinates for the centre of the circle, and r is the radius. For a quick demonstration of all the graphic functions mentioned so far, see Example 50.4 – and the following video:

Displaying bitmap images

If you already have an image in .gif, .jpg or .png format that’s less than 300 KB in size, this can be displayed on the LCD. To do so, the file needs to be converted to an array which is inserted into your sketch. Let’s work with a simple example to explain the process. Below is our example image:

jrt3030

Save the image of the puppy somewhere convenient, then visit this page. Select the downloaded file, and select the .c and Arduino radio buttons, then click “make file”. After a moment or two a new file will start downloading. When it arrives, open it with a text editor – you’ll see it contains a huge array and another #include statement – for example:

cfile

Past the #include statement and the array into your sketch above void setup(). After doing that, don’t be tempted to “autoformat” the sketch in the Arduino IDE. Now you can use the following function to display the bitmap on the LCD:

myGLCD.drawBitmap(x,y,width,height, name, scale);

Where x and y are the top-left coordinates of the image, width and height are the … width and height of the image, and name is the name of the array. Scale is optional – you can double the size of the image with this parameter. For example a value of two will double the size, three triples it – etc. The function uses simple interpolation to enlarge the image, and can be a clever way of displaying larger images without using extra memory. Finally, you can also display the bitmap on an angle – using:

myGLCD.drawBitmap(x,y,width,height, name, angle, cx, cy);

where angle is the angle of rotation and cx/cy are the coordinates for the rotational centre of the image.

The bitmap functions using the example image have been used in the following sketch – Example 50.5, with the results in the following video:

Unfortunately the camera doesn’t really do the screen justice, it looks much better with the naked eye.

What about the SD card socket and touch screen?

The SD socket didn’t work, and I won’t be working with the touch screen at this time.

Conclusion

So there you have it – an incredibly inexpensive and possibly useful LCD module. Thank you to Henning Karlsen for his useful library, and if you found it useful – send him a donation via his page.

LEDborder

In the meanwhile have fun and keep checking into tronixstuff.com. Why not follow things on twitterGoogle+, subscribe  for email updates or RSS using the links on the right-hand column? And join our friendly Google Group – dedicated to the projects and related items on this website. Sign up – it’s free, helpful to each other –  and we can all learn something.

The post Tutorial – Arduino and ILI9325 colour TFT LCD modules appeared first on tronixstuff.

In this article we examine the mbed rapid prototyping platform with the Freescale FRDM-KL25Z ARM® Cortex™-M0+ development board.

Introduction

A while ago we looked at the mbed rapid prototyping environment for microcontrollers with the cloud-based IDE and the NXP LPC1768 development board, and to be honest we left it at that as I wasn’t a fan of cloud-based IDEs. Nevertheless, over the last two or so years the mbed platform has grown and developed well – however without too much news on the hardware side of things. Which was a pity as the matching development boards usually retailed for around $50 … and most likely half the reason why mbed didn’t become as popular as other rapid development platforms.

Also – a few months ago – we received the new Freescale Freedom FRDM-KL25Z development board from element14. I started to write about using the board but frankly it did my head in, as at the time the IDE was almost a one gigabyte download and the learning curve too steep for the time I had available. Which was a pity as the board is inexpensive and quite powerful. So the board went into the “miscellaneous dev kit” box graveyard. Until now. Why?

You can now use the Freedom board with mbed. 

It isn’t perfect – yet – but it’s a move in the right direction for both mbed and Freescale. It allows educators and interested persons access to a very user-friendly IDE and dirt-cheap development boards.

What is mbed anyway?

mbed is a completely online development environment. That is, in a manner very similar to cloud computing services such as Google Docs or Zoho Office. However there are some pros and cons of this method. The pros include not having to install any software on the PC – as long as you have a web browser and a USB port you should be fine; any new libraries or IDE updates are handled on the server leaving you to not worry about staying up to date; and the online environment can monitor and update your MCU firmware if necessary. However the cons are that you cannot work with your code off-line, and there may be some possible privacy issues. Here’s an example of the environment (click to enlarge):

As you can see the IDE is quite straight-forward. All your projects can be found on the left column, the editor in the main window and compiler and other messages in the bottom window. There’s also an online support forum, an official mbed library and user-submitted library database, help files and so on – so there’s plenty of support. Code is written in C/C++ style and doesn’t present any major hurdles. When it comes time to run the code, the online compiler creates a downloadable binary file which is copied over to the hardware via USB.

And what’s a Freedom board?

It’s a very inexpensive development board based on the Freescale ARM® Cortex™-M0+ MKL25Z128VLK4 microcontroller. How inexpensive? In Australia it’s $9 plus GST and delivery.

Features include  (from the product website):

  • MKL25Z128VLK4 MCU – 48 MHz, 128 KB flash, 16 KB SRAM, USB OTG (FS), 80LQFP
  • Capacitive touch “slider,” MMA8451Q accelerometer, tri-color LED
  • Easy access to MCU I/O
  • Sophisticated OpenSDA debug interface
  • Mass storage device flash programming interface (default) – no tool installation required to evaluate demo apps
  • P&E Multilink interface provides run-control debugging and compatibility with IDE tools
  • Open-source data logging application provides an example for customer, partner and enthusiast development on the OpenSDA circuit

And here it is:

In a lot of literature about the board it’s mentioned as being “Arduino compatible”. This is due to the layout of the GPIO pins – so if you have a 3.3 V-compatible Arduino shield you may be able to use it – but note that the I/O pins can only sink or source 3 mA (from what I can tell) – so be careful with the GPIO . However on a positive side the board has the accelerometer and an RGB LED which are handy for various uses. Note that the board ships without any stacking header sockets, but element14 have a starter pack with those and a USB cable for $16.38++.

Getting started

Now we”ll run through the process of getting a Freedom board working with mbed and creating a first program. You’ll need a computer (any OS) with USB, an Internet connection and a web browser, a USB cable (mini-A to A) and a Freedom board. The procedure is simple:

  1. Download and install the USB drivers for Windows or Linux from here.
  2. Visit mbed.org and create a user account. Check your email for the confirmation link and follow the instructions within.
  3. Plug in your Freedom board – using the USB socket labelled “OpenSDA”. It will appear as a disk called “bootloader”
  4. Download this file and copy it onto the “bootloader” drive
  5. Unplug the Freedom board, wait a moment – then plug it back in. It should now appear as a disk called “MBED”, for example (click to enlarge):

There will be a file called ‘mbed’ on the mbed drive – double-click this to open it in a web browser. This process activates the board on your mbed account – as shown below (click to enlarge):

Now you’re ready to write your code and upload it to the Freedom board. Click “Compiler” at the top-right to enter the IDE.

Creating and uploading code

Now to create a simple program to check all is well. When you entered the IDE in the previous step, it should have presented you with the “Guide to mbed Online Compiler”. Have a read, then click “New” at the top left. Give your program a name and click OK. You will then be presented with a basic “hello world” program that blinks the blue LED in the RGB module. Adjust the delays to your liking then click “Compile” in the toolbar.

If all is well, your web browser will present you with a .bin file that has been downloaded to the default download directory. (If not, see the error messages in the area below the editor pane). Now copy this .bin file to the mbed drive, then press the reset button (between the USB sockets) on the Freedom board. Your blue LED should now be blinking.

Moving forward

You can find some code examples that demonstrate the use of the accelerometer, RGB LED and touch sensor here. Here’s a quick video of the touch sensor in action:

So which pin is what on the Freedom board with respect to the mbed IDE? Review the following map:

All the pins in blue – such as PTxx can be referred to in your code. For example, to pulse PTA13 on and off every second, use:

#include "mbed.h"
DigitalOut pulsepin(PTA13);
int main() {
 while(1) {
 pulsepin = 1;
 wait(1);
 pulsepin = 0;
 wait(1);
 }
}

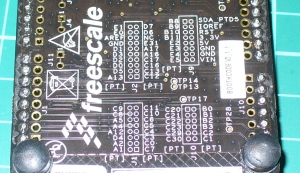
The pin reference is inserted in the DigitalOut assignment and thus “pulsepin” refers to PTA13. If you don’t have the map handy, just turn the board over for a quick-reference (click to enlarge):

Just add “PT” to the pin number. Note that the LEDs are connected to existing GPIO pins: green – PTB19, red – PTB18 and blue – PTB.

Where to from here? 

It’s up to you. Review the Freedom board manual (from here) and the documentation on the mbed website, create new things and possibly share them with others via the mbed environment. For more technical details review the MCU data sheet.

Conclusion

The Freedom board offers a very low cost way to get into microcontrollers and programming. You don’t have to worry about IDE or firmware revisions, installing software on locked-down computers, or losing files. You could teach a classroom full of children embedded programming for around $20 a head (a board and some basic components). Hopefully this short tutorial was of interest. We haven’t explored every minute detail – but you now have the basic understanding to move forward with your own explorations.

The Freescale Freedom FRDM-KL25Z development board used in this article was a promotional consideration supplied by element14.

Have fun and keep checking into tronixstuff.com. Why not follow things on twitterGoogle+, subscribe  for email updates or RSS using the links on the right-hand column, or join our Google Group – dedicated to the projects and related items on this website. Sign up – it’s free, helpful to each other –  and we can all learn something.

In this article we examine the mbed rapid prototyping platform with the Freescale FRDM-KL25Z ARM® Cortex™-M0+ development board.

Introduction

A while ago we looked at the mbed rapid prototyping environment for microcontrollers with the cloud-based IDE and the NXP LPC1768 development board, and to be honest we left it at that as I wasn’t a fan of cloud-based IDEs. Nevertheless, over the last two or so years the mbed platform has grown and developed well – however without too much news on the hardware side of things. Which was a pity as the matching development boards usually retailed for around $50 … and most likely half the reason why mbed didn’t become as popular as other rapid development platforms.

Also – a few months ago – we received the new Freescale Freedom FRDM-KL25Z development board from element14. I started to write about using the board but frankly it did my head in, as at the time the IDE was almost a one gigabyte download and the learning curve too steep for the time I had available. Which was a pity as the board is inexpensive and quite powerful. So the board went into the “miscellaneous dev kit” box graveyard. Until now. Why?

You can now use the Freedom board with mbed. 

It isn’t perfect – yet – but it’s a move in the right direction for both mbed and Freescale. It allows educators and interested persons access to a very user-friendly IDE and dirt-cheap development boards.

What is mbed anyway?

mbed is a completely online development environment. That is, in a manner very similar to cloud computing services such as Google Docs or Zoho Office. However there are some pros and cons of this method. The pros include not having to install any software on the PC – as long as you have a web browser and a USB port you should be fine; any new libraries or IDE updates are handled on the server leaving you to not worry about staying up to date; and the online environment can monitor and update your MCU firmware if necessary. However the cons are that you cannot work with your code off-line, and there may be some possible privacy issues. Here’s an example of the environment:

mbedcompiler

As you can see the IDE is quite straight-forward. All your projects can be found on the left column, the editor in the main window and compiler and other messages in the bottom window. There’s also an online support forum, an official mbed library and user-submitted library database, help files and so on – so there’s plenty of support. Code is written in C/C++ style and doesn’t present any major hurdles. When it comes time to run the code, the online compiler creates a downloadable binary file which is copied over to the hardware via USB.

And what’s a Freedom board?

It’s a very inexpensive development board based on the Freescale ARM® Cortex™-M0+ MKL25Z128VLK4 microcontroller. How inexpensive? In Australia it’s $9 plus GST and delivery.

Features include  (from the product website):

  • MKL25Z128VLK4 MCU – 48 MHz, 128 KB flash, 16 KB SRAM, USB OTG (FS), 80LQFP
  • Capacitive touch “slider,” MMA8451Q accelerometer, tri-color LED
  • Easy access to MCU I/O
  • Sophisticated OpenSDA debug interface
  • Mass storage device flash programming interface (default) – no tool installation required to evaluate demo apps
  • P&E Multilink interface provides run-control debugging and compatibility with IDE tools
  • Open-source data logging application provides an example for customer, partner and enthusiast development on the OpenSDA circuit

And here it is:

topside

In a lot of literature about the board it’s mentioned as being “Arduino compatible”. This is due to the layout of the GPIO pins – so if you have a 3.3 V-compatible Arduino shield you may be able to use it – but note that the I/O pins can only sink or source 3 mA (from what I can tell) – so be careful with the GPIO . However on a positive side the board has the accelerometer and an RGB LED which are handy for various uses. Note that the board ships without any stacking header sockets, but element14 have a starter pack with those and a USB cable for $16.38++.

Getting started

Now we”ll run through the process of getting a Freedom board working with mbed and creating a first program. You’ll need a computer (any OS) with USB, an Internet connection and a web browser, a USB cable (mini-A to A) and a Freedom board. The procedure is simple:

  1. Download and install the USB drivers for Windows or Linux from here.
  2. Visit mbed.org and create a user account. Check your email for the confirmation link and follow the instructions within.
  3. Plug in your Freedom board – using the USB socket labelled “OpenSDA”. It will appear as a disk called “bootloader”
  4. Download this file and copy it onto the “bootloader” drive
  5. Unplug the Freedom board, wait a moment – then plug it back in. It should now appear as a disk called “MBED”, for example :

mbeddrive

There will be a file called ‘mbed’ on the mbed drive – double-click this to open it in a web browser. This process activates the board on your mbed account – as shown below:

registered

Now you’re ready to write your code and upload it to the Freedom board. Click “Compiler” at the top-right to enter the IDE.

Creating and uploading code

Now to create a simple program to check all is well. When you entered the IDE in the previous step, it should have presented you with the “Guide to mbed Online Compiler”. Have a read, then click “New” at the top left. Give your program a name and click OK. You will then be presented with a basic “hello world” program that blinks the blue LED in the RGB module. Adjust the delays to your liking then click “Compile” in the toolbar.

If all is well, your web browser will present you with a .bin file that has been downloaded to the default download directory. (If not, see the error messages in the area below the editor pane). Now copy this .bin file to the mbed drive, then press the reset button (between the USB sockets) on the Freedom board. Your blue LED should now be blinking.

Moving forward

You can find some code examples that demonstrate the use of the accelerometer, RGB LED and touch sensor here. Here’s a quick video of the touch sensor in action:

So which pin is what on the Freedom board with respect to the mbed IDE? Review the following map:

frdm-kl25z-pinout-final1

All the pins in blue – such as PTxx can be referred to in your code. For example, to pulse PTA13 on and off every second, use:

#include "mbed.h"
DigitalOut pulsepin(PTA13);
int main() {
 while(1) {
 pulsepin = 1;
 wait(1);
 pulsepin = 0;
 wait(1);
 }
}

The pin reference is inserted in the DigitalOut assignment and thus “pulsepin” refers to PTA13. If you don’t have the map handy, just turn the board over for a quick-reference:

theback

Just add “PT” to the pin number. Note that the LEDs are connected to existing GPIO pins: green – PTB19, red – PTB18 and blue – PTB.

Where to from here? 

It’s up to you. Review the Freedom board manual (from here) and the documentation on the mbed website, create new things and possibly share them with others via the mbed environment. For more technical details review the MCU data sheet.

Conclusion

The Freedom board offers a very low cost way to get into microcontrollers and programming. You don’t have to worry about IDE or firmware revisions, installing software on locked-down computers, or losing files. You could teach a classroom full of children embedded programming for around $20 a head (a board and some basic components). Hopefully this short tutorial was of interest. We haven’t explored every minute detail – but you now have the basic understanding to move forward with your own explorations.

The Freescale Freedom FRDM-KL25Z development board used in this article was a promotional consideration supplied by element14.

Have fun and keep checking into tronixstuff.com. Why not follow things on twitterGoogle+, subscribe  for email updates or RSS using the links on the right-hand column, or join our Google Group – dedicated to the projects and related items on this website. Sign up – it’s free, helpful to each other –  and we can all learn something.

The post mbed and the Freescale FRDM-KL25Z development board appeared first on tronixstuff.

Nov
26

Touch Sliders With A Softpot + Arduino

arduino, softpot, Touch Comments Off on Touch Sliders With A Softpot + Arduino 

You all know the potentiometer, you turn it, and you can read on your arduino where it was turned to. Well 3M makes a product called the softpot that is a linear touch potentiometer. So instead of turning a knob, you touch it.

The really nice thing about these is that they are great for prototypes because you can tell where someone touched it. So if you place a piece of paper with some printed buttons over it, you can mock up surface touch buttons. Or if you need to prototype a rotary touch wheel like the old ipods, but don’t want to get involved with complex capitative sensors, you can do that too.

There are a million uses for these, and they come in a few sizes, shapes, and even offer high temperature versions.

Hooking it up

The softpot sensors change their resistance depending on where they are touched. And because they work just like potentiometers you don’t need any extra parts to use them with your arduino. We can just plug in the middle pin to an analog in pin on the arduino and we are ready to go.

The arduino analogRead will vary between 0 and 1023 depending on where you touch it, (1023 when not being touched) and is linear, so it will be about 512 if touched in the middle.

WARNING!!!!!

If you touch the softpot at the top and the bottom at the same time, it will get really hot, really quick, and if you leave it for more than a second, you may burn it up. I have no clue why. But beware!

This is especially an issue on the round version. If you press down dead center on the bottom (where the straight parts come off of), you will be pressing on both sides of the pot and it will again get super hot and melt. SO DONT PRESS IT IN THE MIDDLE BOTTOM

Code

The arduino code for this just could not be easier. We are adding some serial prints and delays to it just so you can easily see the readings, but they dont need to be there if you dont need them.

int softpotPin = A0; //analog pin 0

void setup(){
  digitalWrite(softpotPin, HIGH); //enable pullup resistor
  Serial.begin(9600);
}

void loop(){
  int softpotReading = analogRead(softpotPin); 

  Serial.println(softpotReading);
  delay(250); //just here to slow down the output for easier reading
}
Unless otherwise stated, this code is released under the MIT License – Please use, change and share it.


  • Newsletter

    Sign up for the PlanetArduino Newsletter, which delivers the most popular articles via e-mail to your inbox every week. Just fill in the information below and submit.

  • Like Us on Facebook