Posts | Comments

Planet Arduino

Archive for the ‘clocks’ Category

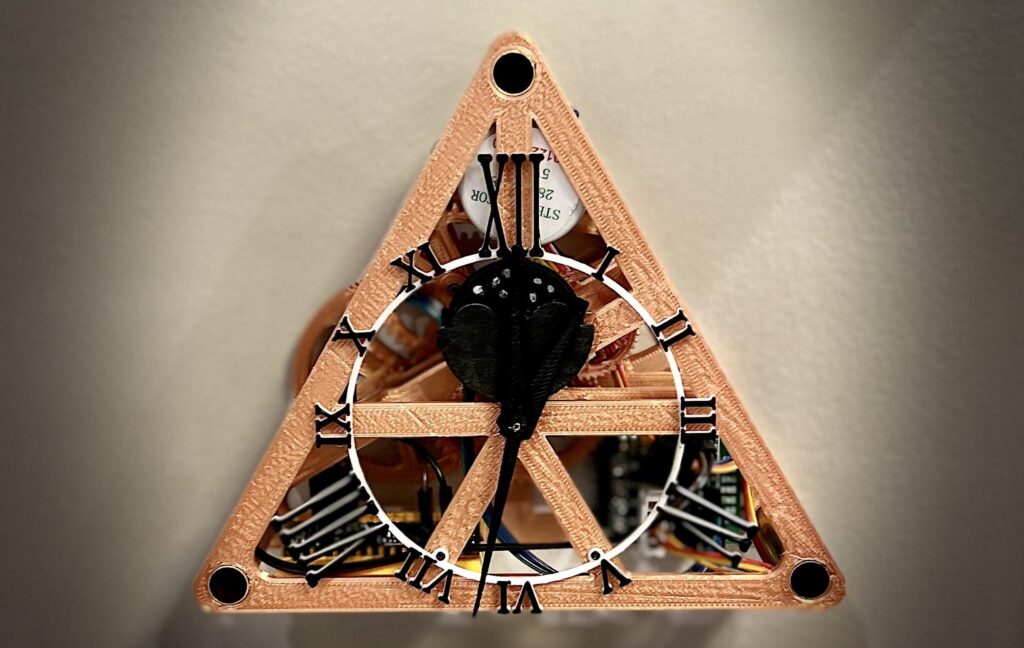
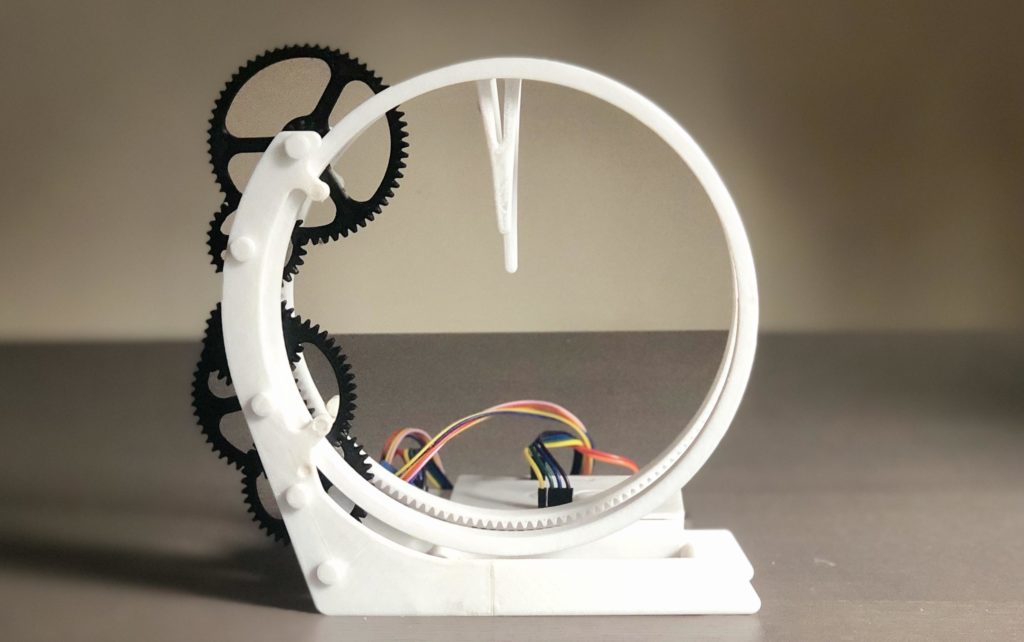
Back in April 2021, Instructables user saulemmetquinn had the idea to build a fully 3D-printed clock that was based on the Triangulum constellation, which as the name implies, is a triangle. But it wouldn’t only tell the time using the typical set of hands and numbers, but also the current phase of the moon to stick with the astronomical theme. 

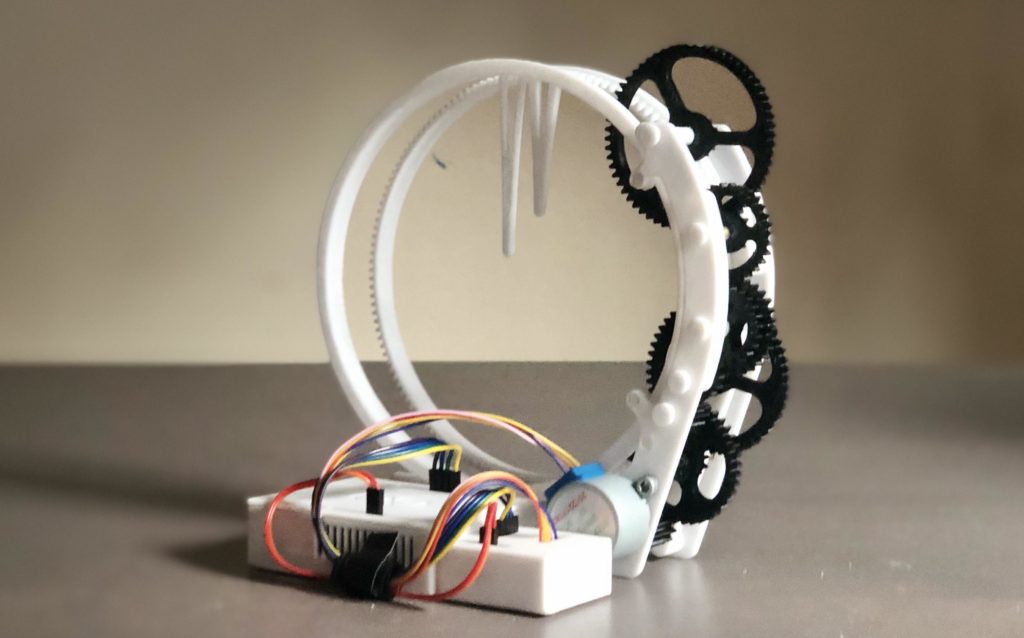
To begin, Saul made a detailed mechanical model in CAD, complete with every facet and gear necessary for it to run. In short, the clock contains a spinning stepper motor that completes one rotation every 15 seconds (a ratio of 1:15). When combined with a series of reduction gears, this rate slows all the way down to 1:43200 for a single hour. In addition to the second, minute, and hour hands, an extra set of gears were added with a collective ratio of 99:2924 that keep track of the current moon phase. 

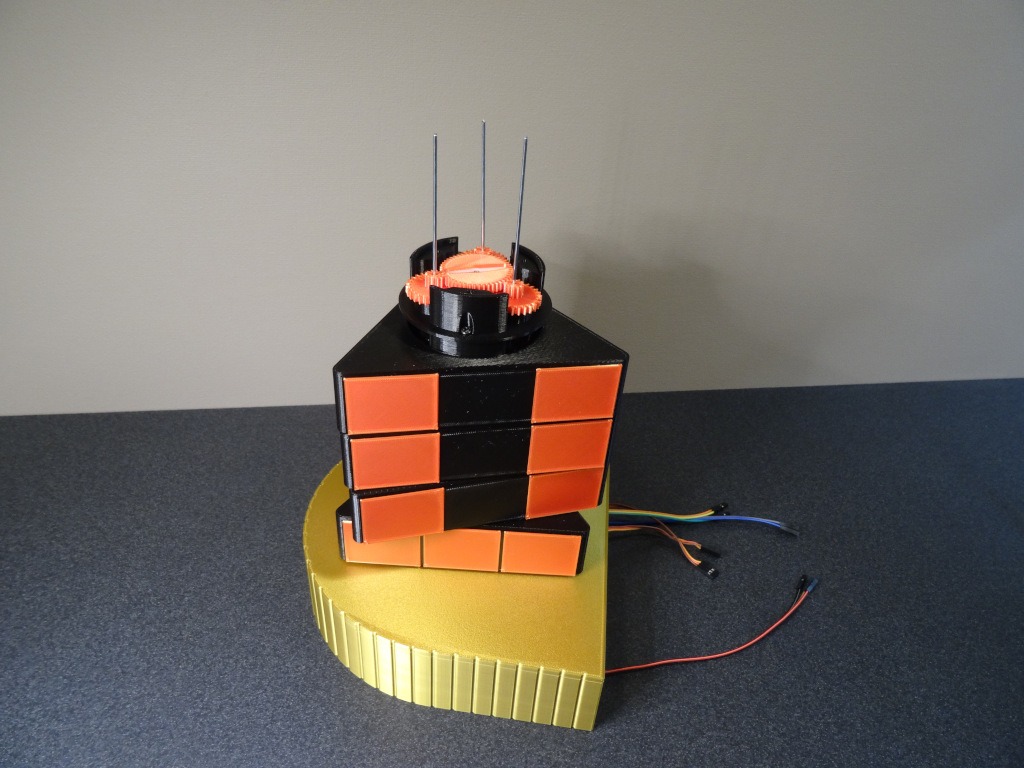
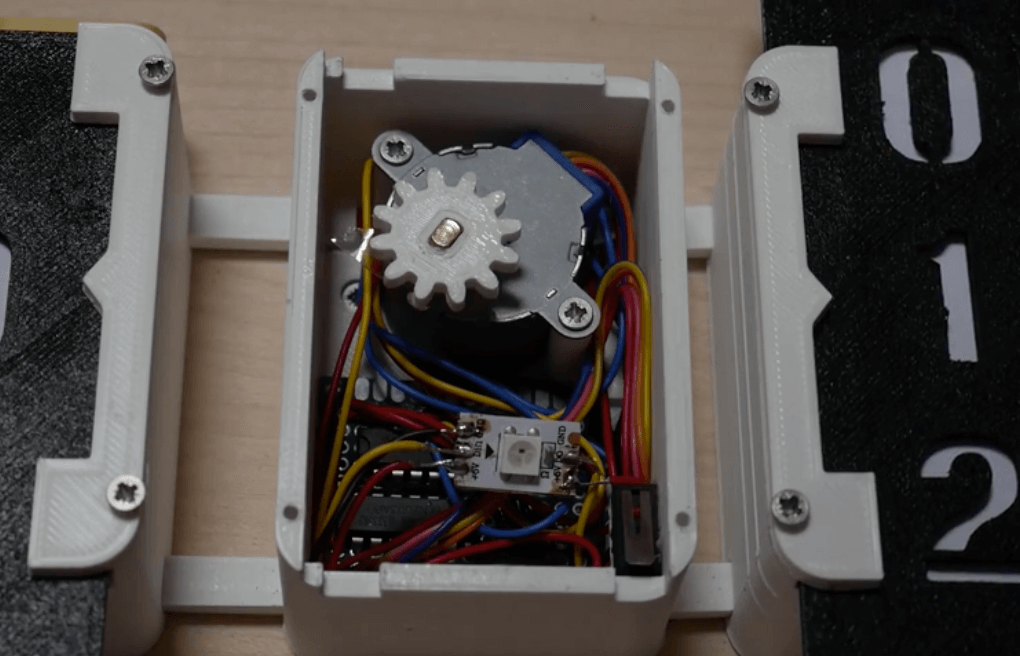
After carefully assembling the clock by hand after printing each part, the ubiquitous ULN2003 stepper motor driver and 5V 28BYJ-48 were added to an inner panel along with an Arduino Nano Every. This board was selected due to its small size and larger memory footprint, which made running the Holo Clock firmware simple.

To read more about this project, you can visit Saul’s write-up here on Instructables.

The post This 3D-printed, three-sided clock tells time with three hands appeared first on Arduino Blog.

For most people, the idea of retiring is a very exciting thought. Finally, after decades of hard work, you can clock out for the last time and spend the rest of your life relaxing and enjoying your leisure years. RdRnr318’s coworker updates her whiteboard every day to countdown the number of days until she gets to retire. To save Martha some effort and reduce the office’s marker budget, RdRnr318 built this “Nearly-Autonomous Retirement Countdown Display” to replace the whiteboard.

This device does exactly what it says on the tin: it shows a countdown timer with the number of days until Martha reaches her retirement. It also displays the countdown in seconds, minutes, and hours, so Martha can get granular with her retirement daydreams. This device needs no buttons for setting the time, because RdRnr318 programmed it specifically for Martha. Her retirement date is hardcoded and there is a real-time clock with a battery backup, so it can automatically calculate the countdown even after losing power.

An Arduino Uno board controls the device. It monitors the current time using a SparkFun DeadOn DS3234 RTC Breakout and displays the countdown on a simple 20×4 character LCD screen. Power comes from a wall wart or, in case of a power outage, a CR2032 battery backup. The case is a standard prefabricated enclosure box. The sketch is straightforward and pulls the current time from the RTC. It then subtracts that from Martha’s retirement date to get the remaining time. It even accounts for the differing number of days in each month and leap years!

The post This clock counts down to retirement appeared first on Arduino Blog.

The digital clock has existed in its current form for decades at this point, so it’s quite exciting to see when a new take on the classic design comes along. The Time Twister 5, created by Hans Andersson, is a fully 3D-printed electromechanical clock that twists certain blocks into place, which make up digits to display the current time.

Each block consists of five distinct layers, where each layer is a triangular prism with three outer faces. These faces come in a total of five different patterns and are arranged in such a way that any digit from zero up to nine can be represented by simply turning the correct layer(s) a certain amount. The internal electronics — including the Arduino Mega, DS3231 real-time clock module, sensor shield, and power circuitry — are all housed in the gold-colored base. Each layer is stacked upon three metal rods for support and contains a single micro servo that twists planetary gears to move the outside while keeping the inside stationary.

While watching Andersson’ demonstration video below, it is tough to not become entranced by the synchronous movements the digits all rotating into place within the timespan of a second. To read more about his project or to download the files to build one yourself, you can visit his website here.

The post A DIY digital clock with a twist appeared first on Arduino Blog.

Simply looking at a traditional analog clock sitting on a wall somewhere got pretty boring for one Instructables user who goes by saulemmetquinn, which is partially why they wanted to create a novel design instead. Their device uses almost entirely 3D-printed components that come together to form the “Holo Clock,” since it seems holographic with its floating minute and hour hands.

The Holo Clock project started with a surprisingly complex design in CAD software. There are two rings that are lined with teeth that sit stacked horizontally. The back ring is the minute hand, and because it is moved almost directly by the stepper motor, it spins more quickly. The hour hand is driven by a set of gears that reduce the output of the minute hand’s cogs by a factor of 60, thus making it turn at the correct rate. 

The electronics for the clock are extremely simple. It uses an Arduino Uno with a set of four output wires, along with power and ground, to control a ULN2003 stepper motor driver. This in turn outputs current to a generic 5V stepper motor that spins the first drive gear at a known, precise rate for consistent timing. Likewise, the code is also straightforward, as all it must do is step the motor a certain amount depending on how many steps are left within the loop. 

You can read more about the project in saulemmetquinn’s tutorial, which was recently recognized as a runner-up in the Instructables Arduino Contest.

The post Holo Clock is a novel 3D-printed clock that tells time using a pair of rings appeared first on Arduino Blog.

Seven-segment displays have been around for ages, and they have a really cool retro aesthetic about them. Over on Instructables, user alstroemeria (known as Jacky Mok in real life) decided to build a different kind of display that utilizes individual servo motors to slide the segments out, thus creating a 3D clock. The main board in this project was the Arduino Mega, which was selected due to its large number of digital GPIO pins that can set all 28 of the servos to the correct positions. 

The current time was tracked using the DS3231 RTC module that stores the time and can keep it even if power is removed. The program Mok wrote first initializes the servos and sets them in the “off” position. Within the main loop, the time is retrieved from the RTC module and converted into digits. From here each digit is mapped to a series of segments which are then moved into the correct spot with the corresponding motor. 

The clock enclosure Mok designed is quite elegant and captures the feeling of a classic seven-segment display. As seen in the accompanying video, watching the digits slowly move and morph into various shapes can be mesmerizing. More details on the concept and its construction can be found on Instructables

The post Kinetic digital clock takes 7-segment displays to another dimension appeared first on Arduino Blog.

Way back in the 13th century, an order of monks known as the Cistercians created a unique numbering system that used a series figures and rotations to represent numbers up to 9,999 in just a single character. Because these numerals are so great in compact displays, using them in a dot matrix to show the current date and time was a no-brainer for danjovic.

For the aptly named MonKlock, Danjovic combined a DS3231 real-time clock with an Arduino Nano to keep track of the current time, plus a large 4″ 5×7 LED matrix. All of these components were placed onto a custom PCB, along with two buttons that cycle between various modes and the time, day, month, and year. Finally, he made a wooden base that props up the PCB vertically and provides a convenient path to run the USB cable. 

In order to translate a given decimal number into a Cistercian numeral, danjovic designed a custom font that maps the figure to an array of pixels. When it’s time to display a number, the required numerals are added on top of each other using some simple arithmetic, and then the final result is sent to the LED matrix. 

As seen in Danjovic’s video below, the clock looks really cool while powered on, and the additional functionality from the two buttons adds even more fun. Even though it can take a while to learn what each numeral represents, this project is still a great showcase of using clever math to fit dense information in a small space. 

The post The MonKlock tells time using the Cistercian numeral system appeared first on Arduino Blog.

After being inspired by a beautiful, if rather expensive timepiece, Ira Hart decided to make a 3D-printed clock with 24 analog faces that combine to form a single digital display. The overall device is controlled by a single Arduino Nano, which keeps track of the time using a RTC module. This unit coordinates 24 other Nanos on custom carrier boards, which in turn drive their own little clock face via a pair of steppers and a gear system.

When working together, these 24 clocks can tell the time in very large characters, and even show a variety of kinetic art as it changes from one minute to the next. It looks awesome in the video below, and build info is available in Hart’s project write-up.

After observing a bicycle chain lying on the street in a random pattern, Ekaggrat Singh Kalsi was inspired to make a unique clock that morphs chains to tell time. The clock, known as “GETULA,” consists of four independent modules that work together to reveal the hour and minutes.

Each GETULA module uses two stepper motors to advance a couple of custom 3D-printed chains out of the device’s structure. As they are pushed forward, a pair of servos bend the links left and right, incrementally creating numbers when fully formed.

Control is accomplished via an Arduino, along with some A4988 stepper drivers. As of now, only one number is animated, but the other three digits can still be positioned to simulate how the full four-digit device will look.

You can see a nice demo of GETULA the first video below as well as a clip of it advancing from the year 2020 to 2021 in the second.

Kaleb Clark, like many of us, works with others from all around the globe. While he could view any number of websites or commercial options to see what time it is for these other people, he decided to make a world clock to get this info at a glance.

What he came up with uses a 3.5″ SPI TFT screen to show eight time zones in the device’s main section, plus a pair of 7-segment displays for two more “slots.” The unit runs on an Arduino Nano 33 IoT, which checks the time over WiFi via the Network Time Protocol, or NTP.

In theory, Clark will never have to set this clock, but user interface is provided by an encoder to select the times on display, and whether they are shown in a 12 or 24-hour format.

While dial clocks are functional and well-understood, for something a bit more uniquely styled, Luuk Esselbrugge has created a 3D-printed timekeeping unit with four rows of sliding numbers.

As seen here, each digit moves up and down to show the appropriate hour and minutes under the power of a stepper. A rack system is integrated into the number-slider itself, with a printed driving gear affixed to the small motor. A WS2812B LED shines through the proper number on display, with red representing time and green indicating that it’s instead in temperature mode.

The device is controlled by an Arduino Nano, with time obtained via a GPS module. More info — including Arduino code, print files, and necessary parts — is available on GitHub.


  • Newsletter

    Sign up for the PlanetArduino Newsletter, which delivers the most popular articles via e-mail to your inbox every week. Just fill in the information below and submit.

  • Like Us on Facebook