Posts | Comments

Planet Arduino

Archive for the ‘color sensor’ Category

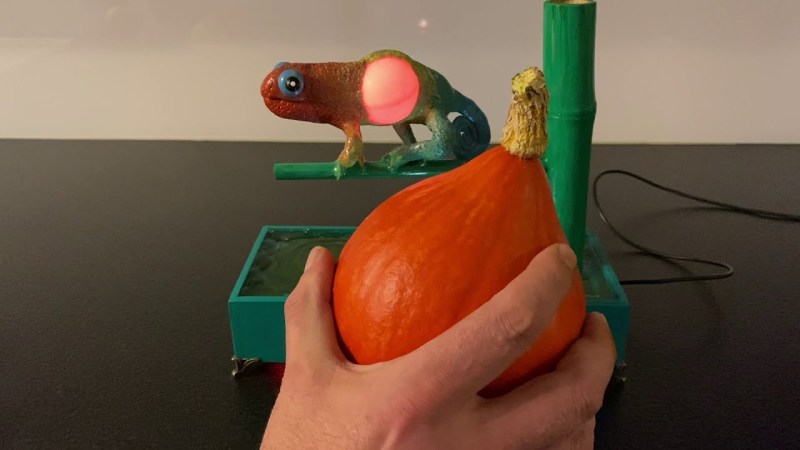
You never forget your first diorama, especially when it’s interactive. Although admittely a bit late to celebrate Erntedankfest (Germanic Thanksgiving), [Markus Bindhammer] is ahead of the curve when it comes to the American version.

This interactive diorama lamp features a cute chameleon that [Markus sculpted from a wire frame and a lump of clay]. In the chameleon’s midsection is a ping pong ball that does the work of diffusing an RGB LED. Wires run out the far side and through the bamboo stand and connect to a TCS34725 RGB color sensor and an Arduino Pro Micro.

The lamp does what you think — hold any colored object up to the color sensor, and the chameleon will change colors to match. When no one is interacting with the lamp, it slowly runs through a rainbow of colors. Be sure to check out the build video after the break.

Don’t have a color sensor? You can roll your own with an RGB LED, a photocell, and not much else. If you’re wondering how they work, we’ve seen the color sensor demystified.

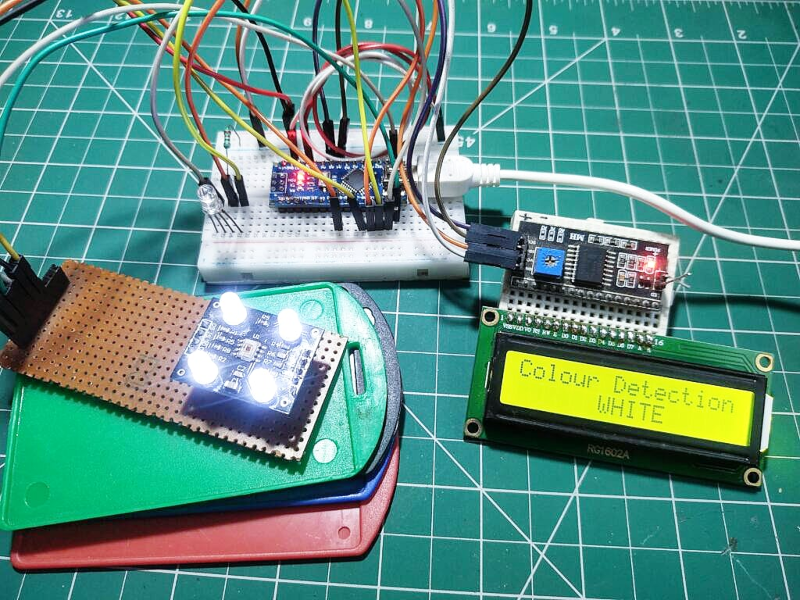
You can sense a lot of things with the right sensor, and [Nikhil Nailwal] is here to show us how to sense colors using a TCS230. The project is a simple demo. It displays the color and lights up an LED to correspond to the detected color.

If you haven’t seen the TCS230 before, it is a chip with an array of photosensors, for different light wavelengths. The controlling chip — an Arduino, in this case — can read the intensity of the selected color.

The TCS230 uses a 4 x 4 array of photodiodes, along with a Bayer filter. That is, there are four detectors for red, four for green, and four for blue. There are also four unfiltered detectors that aid in low lighting detection.

The host computer controls two lines to select which group of four detectors to read. The output is a frequency from around 2 to 500 kHz that indicates the intensity. You can scale the output frequency if you don’t want to deal with higher frequencies.

From what we understand, the sensor’s resolution isn’t that great. But for simple color detection, it is easy to use and effective. There are very similar chips like the TCS3200 that have more sensors, but work in the same way.

We’ve seen similar projects, but we are always struck how simple this sensor is to use. Combine these with an RGB LED and you can make a chameleon.

You don’t have to be an extinct mammal or a Millennial to enjoy the smooth, buttery taste of an avocado. Being psychic on the other hand is definitely an advantage to catch that small, perfect window between raw and rotten of this divaesque fruit. But don’t worry, as modern problems require modern solutions, [Eden Bar-Tov], [Elan Goldberg], and [Mizpe Ramon] built the AvoRipe, a device to notify you when your next avocado has reached that window.

Taking both the firmness and color of an avocado as indicators of its ripeness into account, the team built a dome holding a TCS3200 color sensor as stand for the avocado itself, and 3D printed a servo-controlled gripper with a force sensor attached to it. Closing the gripper’s arms step by step and reading the force sensor’s value will determine the softness the avocado has reached. Using an ESP8266 as centerpiece, the AvoRipe is turned into a full-blown IoT device, reporting the sensor readings to a smartphone app, and collecting the avocado’s data history on an Adafruit.IO dashboard.

There is unfortunately one big drawback: to calibrate the sensors, a set of nicely, ripe avocados are required, turning the device into somewhat of a chicken and egg situation. Nevertheless, it’s a nice showcase of tying together different platforms available for widescale hobbyist projects. Sure, it doesn’t hurt to know how to do each part from scratch on your own, but on the other hand, why not use the shortcuts that are at our disposal to remove some obstacles — which sometimes might include programming itself.

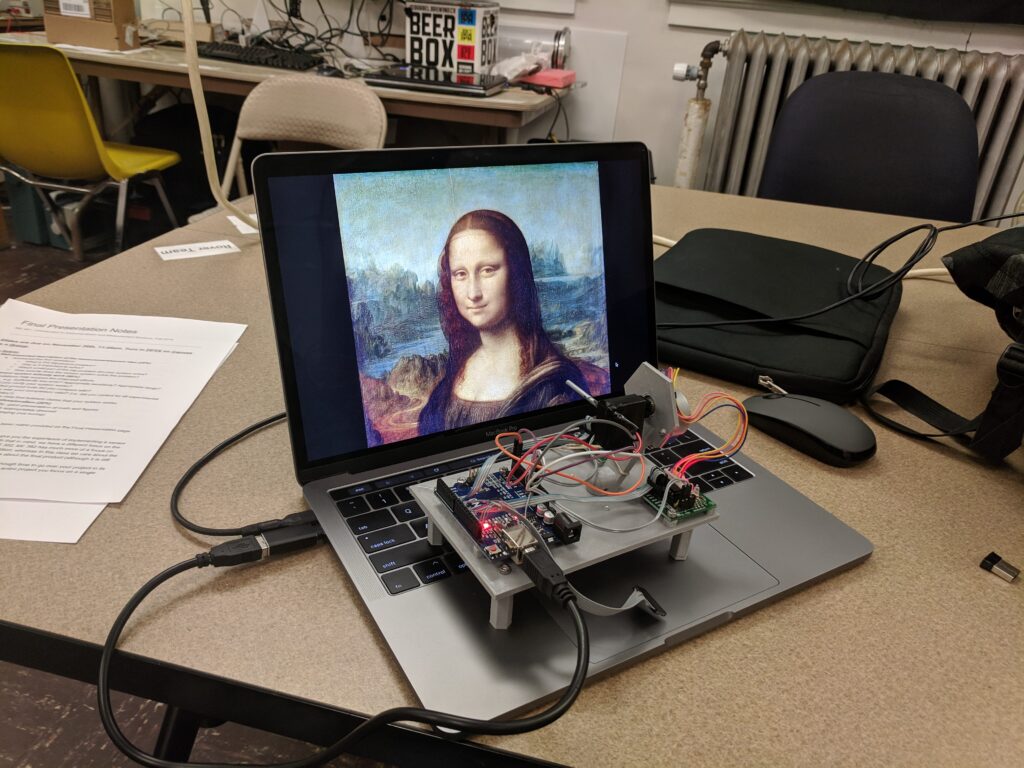
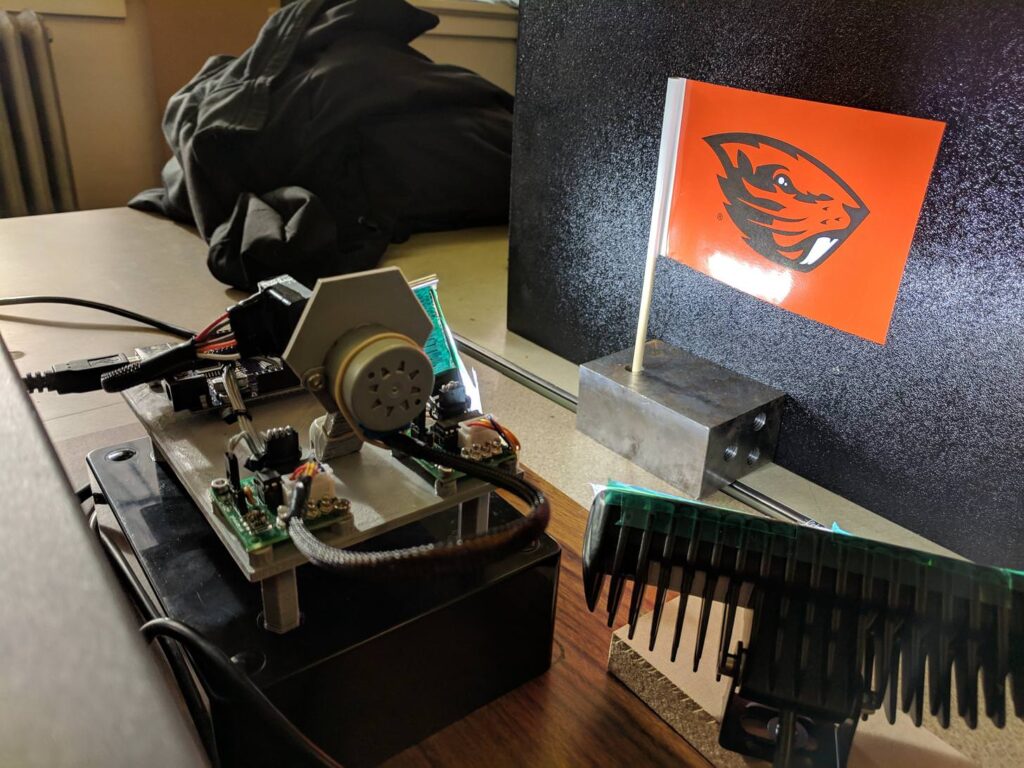
Sensors like the TCS34725 from Adafruit can detect a single color. It stands to reason then, that if you were to aim this sensor at a multitude of points and record the resulting data, you could have a one-pixel camera. As seen here, Tucker Shannon decided to take this concept and run with it, constructing his own with an Arduino Uno and a pair of stepper motors.

The device looks like something akin to some sort of auto-turret, and directs the sensor in a square spiral for image acquisition. The resulting pictures are certainly low-res, but good enough to pick out recognizable forms with a little imagination. 

The color sensor tells the Arduino what color it “sees” at any given time. By pointing it at every single point within a field of view, I can record these colors and use them later to reconstruct an image.

Using two stepper motors, the camera points the sensor at every “pixel” within the photo and records what it sees. It uses these values to “paint” a picture of whats in front of it!

Components include: 1x Arduino Uno, 1x Adafruit RGB Color Sensor TCS34725, x2 BYJ-48 Stepper motor with drivers, x1 3mm OD aluminum tube, x20 M3x6mm fasteners. Alternatively a photoresistor can be used in place of the RGB sensor for black and white photos!

Code for the project can be found on GitHub, and print files are on Thingiverse if you’d like to build your own!

[Paul] participated in a hackathon at work and created a hack to help solve what was ultimately a people problem. A soda fridge at work wasn’t getting refilled when empty. Instead of trying to make people less lazy, [Paul] went with making the fridge more needy.

The first thing [Paul] did was make a soda fridge refill sensor from a scale. As the fridge got emptier, it got lighter. The scale senses that and can decide it’s time for a refill. The only part missing was how to read the output from the scale. To do that, he took an unusual approach.

Soda Fridge on Hacked Scale
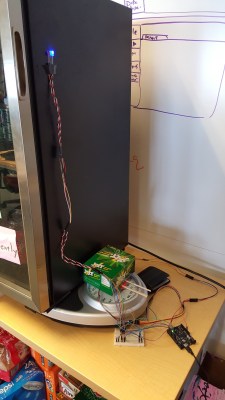
Soda fridge on an analog scale with color sensor reading the dial

The soda fridge sits on an analog scale with a dial. [Paul] saw there was no need to measure the exact weight of the fridge, only to detect a refill threshold. He came up with a simple hack: colored paper attached to the scale’s dial and an Arduino with an OSEPP COLOR‑01 color sensor pointed at the paper. The dial moves in response to the fridge’s changing weight, and the color sensor reads the color of the paper as it moves under the sensor. With a little bit of trial-and-error calibration and some barely modified sample code for the sensor, it was possible to reliably detect when the fridge required refilling. With the sensor done, it was time to use it to solve the lazy people problem.

In a way, the root problem wasn’t that people couldn’t be bothered to check if the fridge needed a refill – it was that the right people weren’t finding out at the right times. This resulted in spotty refilling as well as soda not being ordered when needed. This hack means that the fridge can now actively announce its state, which now allows things like notifying people via email that it is their turn to refill and re-order. It turns out that a fridge that can tell people what it needs has a much better chance of being serviced, compared to a one that has to wait for people to check up on it.

We’ve seen people interface directly to the load sensors in weight scales before, but this hack took a completely different approach.

Thanks to [Paul] for sharing.


Filed under: Arduino Hacks

Are you a bit obsessive compulsive with lots of certain things? We are too. Like Skittles! If you’re the kind of person who likes to sort their Skittles, you should seriously look into making your own 3D printed Skittles Sorter.

Built more to challenge his new 3D printer, [MrPrezident] was looking for a project to combine mechanical design with a bit of image recognition prowess — so he came up with this clever, and compact, Skittle sorting machine.

It uses an Arduino Uno with a ZITRADES color sensor module to identify the color of each candy. A small LED helps illuminate the Skittles to ensure an accurate color reading. Then, depending on the color, a series of gears rotate the Skittles piece to its designated color repository.

Theoretically it should also work with M&M’s (which are a bit smaller) but unfortunately, there are 6 colors of M&M’s and only 5 colors of Skittles. What would the machine do then!? We don’t see a reject bin!

Regardless, we’re quite impressed with how compact he ended up making it — [MrPrezident] has certainly been keeping up with his STEM promises!

And if you need something a bit faster to satiate your OCD… try this one instead. It’s capable of sorting Skittles or M&M’s at a rate of 80 pieces per minute!


Filed under: 3d Printer hacks, Arduino Hacks
Img_9095bHow to make an basic electronic color sensor and how to use it to make a color activated lock box

Read more on MAKE

Mar
16

Color Swatches Displayed with RGB LEDs

arduino, color sensor, Electronics, leds Comments Off on Color Swatches Displayed with RGB LEDs 

08Adrien Baptiste’s Arduino-controlled color sensor (Google translated) detects the color of a Pantone swatch and displays it on four RGB LEDs. Adrien has all the files in his GitHub depository. Filed under: Arduino, Electronics

Read the full article on MAKE


  • Newsletter

    Sign up for the PlanetArduino Newsletter, which delivers the most popular articles via e-mail to your inbox every week. Just fill in the information below and submit.

  • Like Us on Facebook