Posts | Comments

Planet Arduino

Archive for the ‘drone hacks’ Category

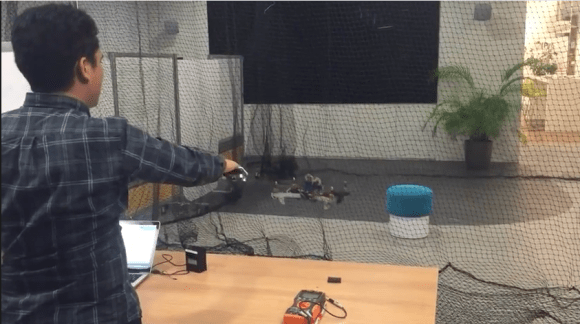
We have to admit, we like airships. There’s something about the image of a stately zeppelin floating over Manhattan that just makes us imagine the future. There are not many airships anymore, but you can always build your own. [Crafty Robot] shows how to use one of their boards to make a simple and easy controlled balloon. Honestly, they don’t give you many details, but we know how to turn motors and servos. We loved their construction with hot glue and bamboo. Effective, and fun to say.

The bamboo skewers are easy to find and make a lightweight frame. Some drone motors provide thrust and some simple RC servos control the angle of the props. Nice and simple.

We really liked how the frame was so minimal and was something you could put on just about any kind of controller board in just a few minutes. The helium baloons are easy to get, too. You can even get the goop to put in them (or have it put in them) that makes them last a lot longer than they used to.

If you wanted to fly autonmously, any controller board would get you there. The video uses a phone app which we assume is part of the Smartibot they are promoting, but honestly, there are a lot of other ways you can get there.

Blynk comes to mind. Or roll your own with websockets. We were thinking if you mounted three motors 60 degrees apart, you might be able to get really nice control, especially if you had an optical flow sensor or something similar to close the loop.

Drone racing is nifty as heck, and a need all races share is a way to track lap times. One way to do it is to use transponders attached to each racer, and use a receiver unit of some kind to clock them as they pass by. People have rolled their own transponder designs with some success, but the next step is ditching add-on transponders entirely, and that’s exactly what the Delta 5 Race Timer project does.

A sample Delta 5 Race Timer build (Source: ET Heli)

The open-sourced design has a clever approach. In drone racing, each aircraft is remotely piloted over a wireless video link. Since every drone in a race already requires a video transmitter and its own channel on which to broadcast, the idea is to use the video signal as the transponder. As a result, no external hardware needs to be added to the aircraft. The tradeoff is that using the video signal in this way is trickier than a purpose-made transponder, but the hardware to do it is economical, accessible, and the design is well documented on GitHub.

The hardware consists of RX508 video receiver PCBs modified slightly to enable them to communicate over SPI. Each RX508 is attached to its own Arduino, which takes care of low-level communications. The Arduinos are themselves connected to a Raspberry Pi over I2C, allowing the Pi high-level control over the receivers while it serves up a web-enabled user interface. As a bonus, the Pi can do much more than simply act as a fancy stopwatch. The races themselves can be entirely organized and run through the web interface. The system is useful enough that other projects using its framework have popped up, such as the RotorHazard project by [PropWashed] which uses the same hardware design.

While rolling one’s own transponders is a good solution for getting your race on, using the video transmission signal to avoid transponders entirely is super clever. The fact that it can be done with inexpensive, off the shelf hardware is just icing on the cake.

We always think that crossing the Atlantic in a blimp would be very serene — at least once they put heaters on board. The Hindenburg, the R-101, and the Shenandoah put an end to the age of the airship, at least for commercial passenger travel. But you can still fly your own with a helium balloon and some electronics. One notable project — the Blimpduino — has evolved into the Blimpduino 2. The open-source software is on GitHub. We couldn’t find the PCB layout, so we aren’t sure if it is or will be open. The 3D printed parts are available, though.

The PCB is the heart of the matter, a four-layer board with an ARM M0 processor, an ESP8266 WiFi module, four motor outputs, two motor outputs, a 9-axis inertial navigation system, an altimeter, and a forward object detection system. There’s also a battery charger onboard.

The standard set up uses three props: two for thrust and one for altitude. There’s a smartphone app and apparently, you can even have a copilot with a second phone. The lifting body is a mylar balloon with helium and they say the control is suitable even for a very large balloon. The altimeter data is from a time-of-flight sensor and there’s also a pressure transducer with temperature sensor if you want to measure higher altitudes.

We couldn’t embed the video, but there’s one of people flying the things through hoops on the website. You can, however, see a promotional video, below. As you might expect, payload capability is very low and so 3D printed parts have low infill and the board is made to be light.

Of course, our own [Sophi Kravitz] has been building her drone blimp army for some time and we are waiting for her attempt at world domination any day now. If you are in the mood for something lower tech, you can always rip apart a toy car and add your own balloon.


If you’re going to be flying around a FPV-capable aircraft, be it a quadcopter or a fixed-wing plane, you shouldn’t be surprised if bystanders want to take a turn wearing your googles. Of course we hope that you’re good enough flying line of sight that you don’t need to be wearing the googles to stay airborne, but it does make it harder to pull off the sort of tricks and maneuvers that your audience wants to see. So if you want to put on a good show, the audience really needs their own display.

Unfortunately, as avid FPV flier [Michael Delaney] discovered, even the “cheap” ones will run you at least $100 USD. So he did what any self-respecting hacker would do, he set out to build his own. Using a collection of off the shelf components he was able to build a very impressive monitor that lets the viewer see through the eyes of his quadcopter at less than half the cost of commercially available offerings. Though even if he hadn’t manged to beat the cost of a turn-key monitor, we think it would have been more than worth it for this piece of highly customized gear.

At the heart of the monitor is a Boscam RX5808 5.8 GHz receiver, which is controlled by an Arduino Pro Mini. The video output from the receiver is sent to a 4.2″ TFT screen intended for the Raspberry Pi, and on the backside of the laser-cut wooden enclosure there’s a 128 x 64 I2C OLED to display the currently selected channel and diagnostic information.

An especially nice touch for this project is the custom PCB used to tie all the components together. [Michael] could have taken the easy route and sent the design out for fabrication, but instead went with the traditional method of etching his own board in acid. Though he did modernize the process a bit by using a laser and pre-sensitized copper clad board, a method that seems to be gaining in popularity as laser engravers become a more common component of the hacker’s arsenal.

We’ve previously covered using the RX5808 and Arduino combo to create a spectrum analyzer, in case you want to do more than just watch your friends do powerloops.

Drone racing is a very exciting sport, in which there is a lot of room for hackers and makers to add that special sauce into the mix. Usually the aerial finish line requires special race-timing hardware to do the lap counting, and there are timing gate transponders available for around $40. In his project CoreIR and CoreIR-Uplink, [Michael Rickert] decided to reverse engineer the IR Protocol that goes into these beacons and made a homebrew version that mimics the original. The transponders send a 7-digit number out repeatedly to a receiver at the finish line as the UAV passes by and that helps track how fast drone pilots flew around a race track. The hack involves flipping an IR LED ON and OFF with the correct timing, and [Michael Rickert] confesses that it was not as easy as he had imagined.

Using a logic analyser he was able to capture the modulated 38Khz carrier signal and extract the timing from the original beacon, but it took a number of iterations to get the code just right. The IRRemote library has a ‘sendRaw’ function which is quite helpful in these situations and was employed for the task. He experimented with a number of Arduino boards to power the project, before finally going with the Arduino Pro Mini. He has shared the code on github, along with photos of the finished hack which replaces the original circuit. The final sketches include functions to generate the 7-digit code to uniquely identify the quadcopter, which completes the hack in itself.

If that was not enough, he’s gone a step further by coding and sharing a desktop client as well, which turns this hack into a full-fledged project and should prove quite useful for drone racers on a budget. The app is written in NodeJS and packaged using the electron framework, a choice that makes for a very simple way to create cross-platform desktop applications.

A build tutorial is available for you to get started, and if drone racing seems a bit tame, check out Drone Wars for a little more carnage.


Filed under: Arduino Hacks, drone hacks

Flying a drone usually leads to–sooner or later–crashing a drone. If you are lucky, you’ll see where it crashes and it won’t be out of reach. If you aren’t lucky, you’ll know where it is, but it will be too high to easily reach. The worst case is when it just falls out of the sky and you aren’t entirely sure where. [Just4funmedia] faced this problem and decided to use some piezo buzzers and an Arduino to solve it.

Yeah, yeah, we know. You don’t really need an Arduino to do this, although it does make it easy to add some flexibility. You can pick two tones that are easy to hear and turn on the buzzers with a spare channel or sense a loss of signal or power.

The device has its own battery so it will work even if the drone’s power depletes. Apparently, the 9V battery will run the whole thing for over 20 hours. Pulsing the audio would probably push that number even higher. Of course, the downside is the drone has to carry the extra weight, but if you recover an otherwise lost drone, that might be a small price to pay.

This might be more practical than a calculus-based approach. Maybe like a tightrope walker, you’d rather use a net.


Filed under: Arduino Hacks, drone hacks

[Joop Brokking] wanted to know where his quadcopter was and had been. He thought about Google Earth, but assumed it would be difficult to get the GPS data and integrate it with Google’s imagery. But he discovered it was easier than he thought. He wound up spending around $10, although if his ‘copter didn’t already have GPS, it would have been more.

Hardware-wise, [Joop] made a pretty straightforward data logger using a small Arduino (a Pro Mini) and an SD Card (along with an SD breakout board). With this setup, NEMA data from the GPS comes in the Arduino’s serial port and winds up on the SD Card.

gearthThe interesting part, though, is the visualization of the captured data. [Joop] uses u-Center from uBlox. This Windows software can read the NEMA data from the logger and provides several ways to view it, including a Google Earth view of the flight track played back at different speeds and in 2D or 3D views (see picture to the right).

We’ve seen uBlox hardware used in automotive applications. We’ve even seen the hardware flying and collecting WiFi information. But if your flying vehicle already has GPS, this is a pretty easy way to get some very cool post flight data interpretation. You can see [Joop’s] creation in action in the video below.


Filed under: Arduino Hacks, drone hacks, gps hacks

Gesture Controlled Quadcopter

[grassjelly] has been hard at work building a wearable device that uses gestures to control quadcopter motion. The goal of the project is to design a controller that allows the user to intuitively control the motion of a quadcopter. Based on the demonstration video below, we’d say they hit the nail on the head. The controller runs off an Arduino Pro Mini-5v powered by two small coin cell batteries. It contains an accelerometer and an ultrasonic distance sensor.

The controller allows the quadcopter to mimic the orientation of the user’s hand. The user holds their hand out in front of them, parallel to the floor. When the hand is tilted in any direction, the quadcopter copies the motion and will tilt the same way. The amount of pitch and roll is limited by software, likely preventing the user from over-correcting and crashing the machine. The user can also raise or lower their hand to control the altitude of the copter.

[grassjelly] has made all of the code and schematics available via github.


Filed under: Arduino Hacks, drone hacks


We spent a little bit of time at the TI booth at Maker Faire to film a pair of interviews. The first is with [Bill Esposito] who is grinding away on his PhD. at Stanford. He’s showing off an Analog Shield for Arduino. He describes it as “an attempt to bring the analog bench to an Arduino shield”. We think this is a fantastic idea as most who are learning digital electronics through Arduino have little or no experience with analog circuitry. This is a nice gateway drug for the concepts.

The analog shield has a supply good for +/- 7.5 volts, 4-channel ADC, 4-channel DAC, and gets 100k samples at 16-bits. He showed us a spectrum analyzer using Fast Fourier Transform on the incoming signal from a microphone. He also built a function generator around the shield. And finally a synthesizer which plays MIDI files.

In the second half of the video we take a look at [Trey German's] work on a PCB-based quadcopter. His goal is to reduce the power consumption which will equate to longer flying times. To this end he chose the DRV8312 and a Piccolo to control each sensorless, brushless DC motor. The result should be 10% lower power consumption that his previous version.


Filed under: Arduino Hacks, drone hacks
Apr
11

Reach Out and Touch Your Next Project with Long Range RC Controller

arduino, arduino hacks, digi xtend 900Mhz, drone, drone hacks, high altitude balloon, RC Comments Off on Reach Out and Touch Your Next Project with Long Range RC Controller 

RC01

Long range wireless control of a project is always a challenge. [Mike] and his team were looking to extend the range of their current RC setup for a UAV project, and decided on a pair of Arduino mini’s and somewhat expensive Digi Xtend 900Mhz modems to do the trick. With a range of 40 miles, the 1 watt transceivers provide fantastic range. And paired with the all too familiar Arduino, you’ve got yourself an easy long range link.

[Mike] set the transmitter up so it can plug directly into any RC controller training port, decoding the incoming signal and converting it into a serial data package for transmitting. While they don’t provide the range of other RF transmitters we’ve seen, the 40 mile range of the modem’s are more than enough for most projects, including High Altitude Balloon missions.

The code for the Arduino transmitter and receiver sides is available at their github. Though there is no built-in error correction in the code, they have not had any issues.  Unfortunately, a schematic was not provided, but you should be able to get enough information from the images and datasheets to construct a working link.


Filed under: Arduino Hacks, drone hacks


  • Newsletter

    Sign up for the PlanetArduino Newsletter, which delivers the most popular articles via e-mail to your inbox every week. Just fill in the information below and submit.

  • Like Us on Facebook