Posts | Comments

Planet Arduino

Archive for the ‘David Cuartielles’ Category

History of the Arduino UNO

As familiar as we all are with the UNO, there’s probably a lot you don’t know about the iconic Arduino microcontroller board. Put on your rose-tinted spectacles, and let’s wax poetic about the origins of this beloved maker board.

Rise of the Techno-Hippies

By 2009, the team that would become Arduino was gathering steam. A team that Make: Magazine once referred to as “designers, teachers, artists, and techno-hippies.”

I don’t think anyone on that team would object to such a definition.

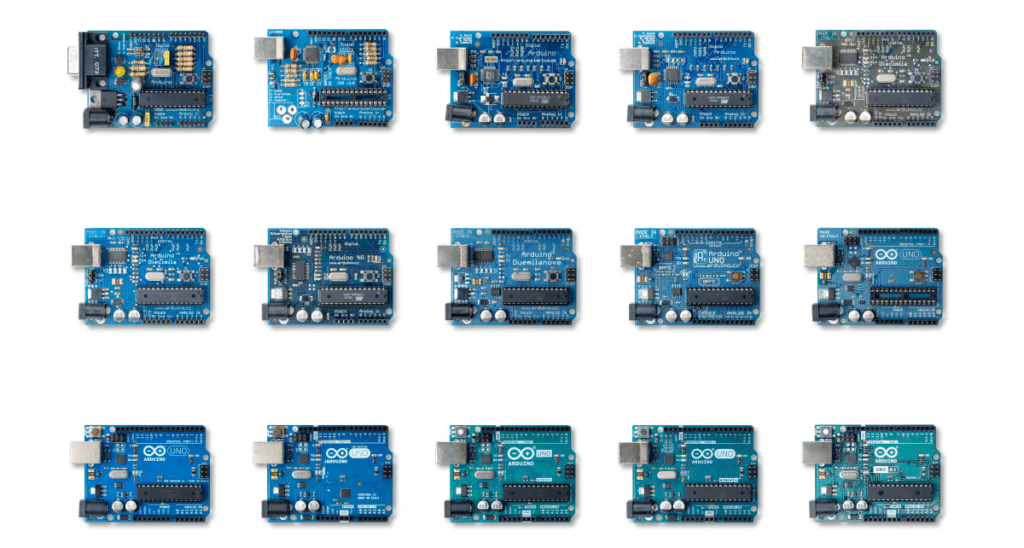
Forged in the crucible of a classroom, the idea of an accessible, affordable electronics development platform was under serious investigation. It would eventually give birth to the Arduino UNO, but despite its name meaning “one,” this is far from Arduino’s first board. Moreover, its name was chosen to mark a point in Arduino’s story where the business itself came out of beta and into version 1.0.

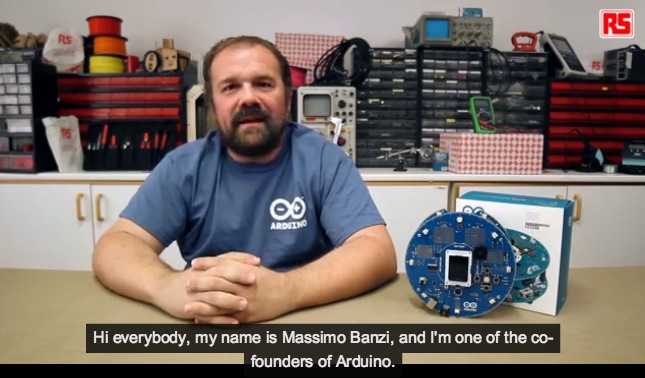
“The UNO is an arrival point of a large number of small experimentations and incremental improvements,” says co-founder Massimo Banzi.

These experiments weren’t just a learning experience for electronics design. They were useability tests, and even marketplace research. Each little quirk, unexpectedly popular feature and, of course, mistake helped to define what makers wanted and needed.

This was a time when the maker movement was still unrepresented by a defining brand or killer product. But not for long.

Massimo and David with Arduino CEO, Fabio Violante

Driving Towards the Future

The journey to the UNO wasn’t short, but it did have a distinct destination. The notion of an enhanced user experience was very prominent, although the people who would become the founders of Arduino hadn’t necessarily articulated it even to themselves. Looking back, it’s easy to see that this guiding principle was there from the beginning.

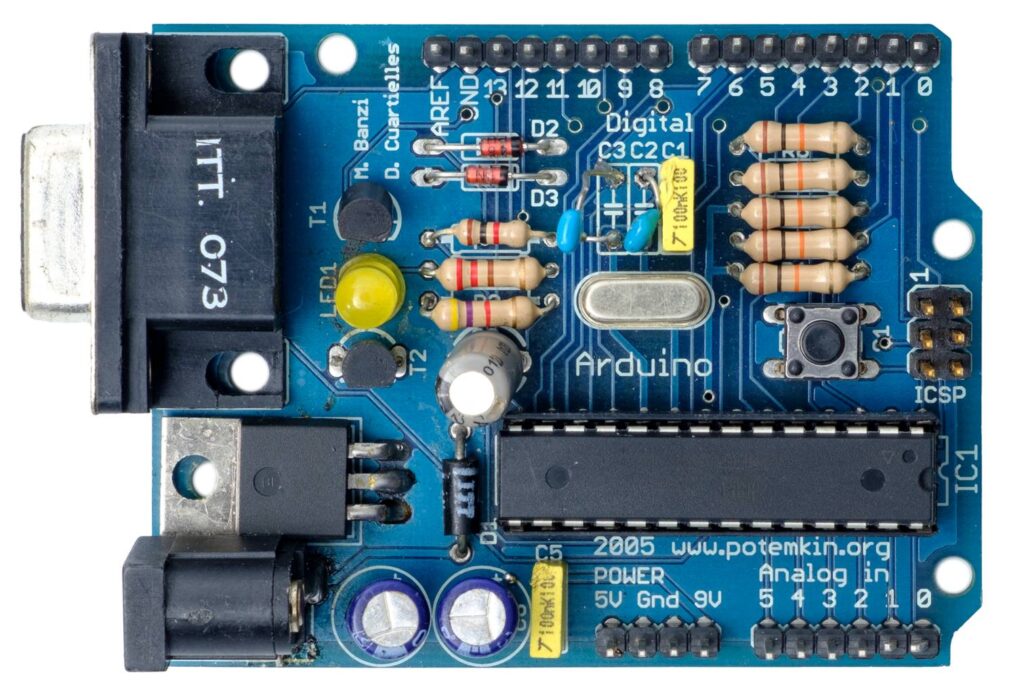
“On the original Arduino serial board, look at the components,” says co-founder David Cuartielles, talking about the earliest of Arduino’s self-assembly boards, which were used almost exclusively in the classroom. “They’re sorted by value. I made sure that components of a similar type and value were together, to minimize mistakes during assembly. For example, there were two diodes. In terms of operation, they’re working in opposite directions to each other. But to reduce errors when populating the board by hand, I set the diodes facing in the same direction, and the PCB’s tracks take care of orientation. So it’s optimized for education, not for electronic operation!”

“Back in the day we used to use FTDI chips,” Massimo recalls. “A Scottish company, now in Singapore. Great chips, but you had to install drivers to get your computer to recognize devices when you plugged them in.”

“Which is when we realized there was this thing called CDC (communications device class) protocol, which was embedded into operating systems. It’s the reason you don’t need a driver for a USB serial port. We found that you could develop a firmware for some simple Atmel processors that worked just the same as FTDI chips, but would liberate us from needing a driver.”

This opened the door to reprogramming the firmware and making the boards do other things. Some people created MIDI firmware to send notes to a computer. Others made HID firmware so they could emulate computer peripherals. It was the herald of dual processor experimentation, which piqued the interest of both Arduino users and its designers.

Press On with the UNO

These proto-UNOs also required you to press a reset button before uploading new code. It was a pretty standard requirement for any prototyping platform at the time. Most designers had simply never questioned this apparent necessity. But when the Arduino team found themselves placing more and more emphasis on user experience, this small requirement was identified as an obstacle to useability. 

It was at a workshop in Germany when Massimo figured out an alternative.

“It turned out that if you put a capacitor between the reset pin of the microcontroller and one of the serial port pins,” he explains, “it would reset the board automatically whenever you opened the port.” This small tweak became a vital and very popular aspect of the UNO’s useability.

But there were a lot of other factors that went into making the UNO so recognizable that it’s become indistinguishable from the overall Arduino brand.

The Power of One

Early Arduino boards required a more active participation when it came to powering them up.

They already offered flexibility in choosing your power source. But if you wanted to power the board from the USB or the external power jack, you had to move a jumper. Not a lot to ask, but as many of the design experiments proved, these seemingly insignificant requirements had a disproportionate effect on usability.

People would forget to set the jumper in the first place. Or have it in the wrong position when trying to power on, and frustrations ensued. So a small circuit was implemented that detected where the power was coming from, and switched to it automatically. Simple, but essential.

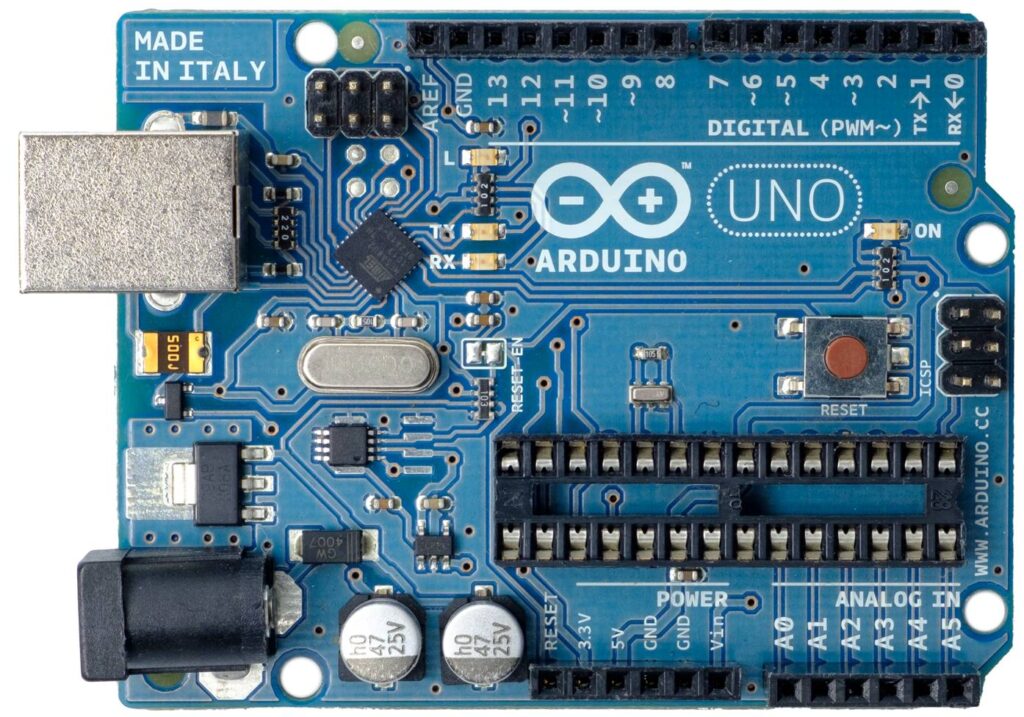
Tweaks to the power options didn’t stop there. On other boards there had been some experimentation with microUSB ports, not realizing how fragile they can be. So when it came to the UNO, the USB connector was carefully chosen for its reliability. “It’s like a Russian tank,” Massimo laughs. “It’s indestructible.”

Feeling Blue

“Going from the original design we had on a rectangular green board, to the shaped blue board that everyone recognizes now, took two days,” David recalls, musing on how Arduino could move so fast because of its focus on simplicity. “And in between we went to a party. Because the designs are very simple.”

 “The original board, before it became the Arduino UNO, was a typical green PCB,” Massimo explains, lavishing mediocrity on the state of pre-Arduino prototyping platforms. “Not so exciting. The PCB manufacturer we were talking to went on and on about how he was making blue PCBs because they were apparently easier on the eye for production line workers. We thought, ‘Hey! Blue is better, because everyone else is using green!’”

You can see a pattern in the way Arduino was beginning to question the norms of its industry. Those shades of blue and teal have become synonymous with Arduino devices, and that didn’t happen by accident. At the time, PCBs were green. Maybe beige, if they were still bare fibreglass. 

But no longer, once the UNO arrived.

Arduino didn’t just have its eye fixed on usability. It was also searching for an identity that makers would associate with enhanced experience and quality. It just so happened that the UNO was destined to become the vessel that gave that identity a tangible shape.

The beautiful blue board, with the first appearance of the brand new Arduino logo

Taking Shape

“I was teaching and I had to draw PCBs on a white board all the time,” recalls David. “And all boards were square or rectangular. So how do you tell people which is left and which is right? In order to avoid errors in plugging things in and building the boards, which originally were self-assembly, I thought it needed to be a non-symmetrical shape. Then the students could see that this is left and this is right. It wasn’t a creative decision, so much as a functional one for education purposes.”

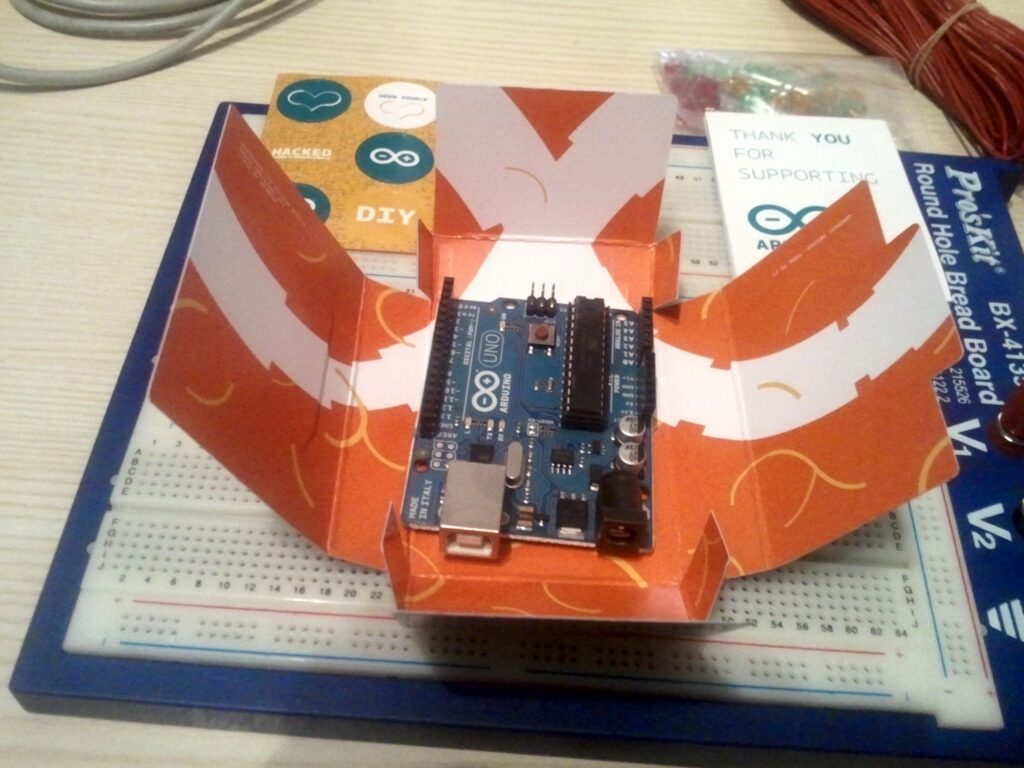
Around that same time, the school where he was teaching in Ivrea was issuing everyone with business cards. They arrived on Massimo’s desk in a small plastic box. “So that seemed like a good starting place for sizing,” Massimo remembers, “as it seemed like a great idea if we could fit the UNO in a plastic box like the one my business cards came in.”

It was taking shape as a very recognizable product. And you want to put your name on  products you’re proud of. Typically any branding on a PCB was added using the standard font that came with the Eagle PCB design software. Essentially vector lines, not graphics. This change was enacted by a former student of the Ivrea classroom, Giorgio Olivero. He was entrusted with the new Arduino identity.

“The strength of our current image depends entirely on the outstanding work Giorgio’s done,” David notes. “Giorgio understands not only graphic design, but the importance of designing the whole user experience. He understood interaction design really well. He understood the nature of the Arduino project intimately, and the needs of the end user.”

An UNO in its original packaging, designed by Giorgio Olivero. Photo courtesy of Francesco Balducci.

The UNO was the moment when quality came home in every respect. The boards were given an appealing new color, precision engineering, high quality manufacturing, and an emblem that made sure you knew you were holding an Arduino.

“The response was fantastic,” David continues, reflecting on the reception that the new Arduino and its flagship device received. “Nowadays it’s really common to do these kinds of things, but back then on the maker scene it was really unusual to put so much into making things look good, and putting a focus on the user experience.”

One Small Mistake

“When I was designing the board I made a mistake that we still have to live with,” admits Massimo. “I moved the connectors in the top right of the board half a step to the left, so the gap between the connectors is non-standard. It’s 1.27mm out. Which is fine on the connectors at the bottom, but that’s why you struggle to use a veroboard to develop shields, because the connectors aren’t quite aligned as they were meant to be.” 

It’s a mistake that had a silver lining, though. That slight misalignment also (inadvertently, perhaps) gave us a key for attaching shields the right way around. So, just between you and me, let’s pretend it was deliberate and say no more about it.

Even the first batch of UNOs that came off the production line weren’t quite where Arduino wanted them to be, quality wise. The process for milling the PCBs into the iconic UNO shape wasn’t as reliable as it is now.

A small number of the boards had rough edges where they were snapped out of the sheet after cutting. Nothing that affected the operation of the board, but not so good when your focus is on achieving a distinctive level of quality.

“A friend and I spent the weekend at the PCB manufacturers,” Massimo remembers, semi-fondly, “sandpapering the edges of the first batch of UNO boards. What else could we do?”

Ten Thousand and UNO

Makers responded very positively to the ethos behind the UNO. And that enthusiasm was directly reflected in the number of Arduino boards sold.

“I remember an article in a magazine celebrating that Arduino had sold 10,000 boards,” Massimo recalls. “Arduino was here to stay, they said, because back then if anyone sold 10,000 boards you were boss!” 

Arduino itself celebrated this milestone back in 2007, with a predecessor to the UNO called the Arduino Diecimila, meaning “ten thousand”. Interestingly enough, this was also the board that introduced automatic software resets when uploading a sketch, so you no longer had to press a reset button. Without the Diecimila, the UNO couldn’t have been born.

The Arduino Diecimila

Now Arduino’s selling in the region of 10,000 boards a week. As you can imagine, magazines and blogs have stopped writing about every maker device that hits the 10,000 milestone now. The UNO itself, in fact, has recently crossed the 10 million mark.

The Day of the UNO

It wasn’t just the Arduino UNO that was unveiled at the Maker Faire New York in 2010. It was the new Arduino. Colors, branding, logos and a refined focus on usability and recognizable quality across everything Arduino did, from the UNO to the website and the packaging. 

“I was the only one not present at that event in New York,” David laughs. “I was in a hotel in my home town of Malmö, because I had to launch the new website. At the time we were running the whole Arduino server in a $5-per-month VPS, because we had no money. Whenever we announced a new product, the website was going down. So to try and avoid this happening while Massimo was up on stage announcing the Arduino UNO, I was waiting to flip the website to Giorgio’s fantastic new design.”

The UNO’s launch signaled a transition from DIY success story to the primary platform for makers, engineers and creators around the world.

“We didn’t create a computer that allowed people to continue to do their job but at a cheaper price,” David continues. “We created a computer that empowered people who had no idea about electronics to start using technology, and this represented a huge life change for a lot of people. When I hear people say they started with an Arduino UNO, and now they’ve become the IT teacher at their school, it’s just amazing. And there are hundreds of stories like this.”

“There are some products in history that just work,” Massimo concludes. “That simply do what people need. So they endure. They last for a long time.”

He’s talking about the UNO. And its story hasn’t finished yet, as the iconic board was recently re-imagined as the stunningly beautiful UNO Mini Limited Edition.

The post One board to rule them all: History of the Arduino UNO appeared first on Arduino Blog.

Con el fin de apoyar a los nuevos participantes del Desafío STEM 2017, Arduino y Telefónica se han unido para crear una serie de tres podcast, abiertos al público en general, conducidos por David Cuartielles.

Desafío STEM es un concurso interescolar que fomenta el desarrollo de competencias tecnológicas, creado por Telefónica Educación Digital para impulsar la implantación de nuevas formas de aprender a través de dinámicas motivadoras y fomentar las vocaciones STEM.

Durante los podcast se abordarán los siguientes temas:

  • Primer podcast: 15 de Noviembre
    Cómo crear proyectos creativos usando tecnología digital.
  • Segundo podcast: 22 de Noviembre
    Identificación de problemas técnicos en la creación de proyectos.
  • Tercer podcast: 5 de Diciembre
    Nuevos usos de tecnología en el aula.

La duración de los podcast será de una hora comenzando a las 19: 00 GMT+1. Podrán seguir la transmisión del podcast en: http://verkstad.cc/urler/desafiostem

David responderá durante el podcast preguntas de la audiencia que se envíen antes de los podcast. Para enviar las preguntas, seguir el link que se presenta a continuación y llenar el formulario: http://verkstad.cc/urler/desafio-preguntas. También se podrá participar en twitter con el hashtag #desafiostempreguntas.


To support the new participants of Desafío STEM 2017, Arduino and Telefónica have come together to create a series of three open podcasts, conducted by David Cuartielles.

Desafío STEM is an interscholastic competition that promotes the development of technological competences, created by Telefónica Educación Digital to promote the implementation of new ways of learning to motivate and inspire students to pursue STEM vocations.

The following topics will be addressed:

  • First podcast: November 15
    How to build creative projects using digital technology.
  • Second podcast: November 22
    Identification and resolution of technical challenges in the creation of projects.
  • Third podcast: December 5th
    New uses of technology in the classroom.

The duration of each podcast will be one hour starting at 19:00 GMT + 1. To follow along, please click on the following link: http://verkstad.cc/urler/desafiostem

David will answer questions from the audience during the podcast, which need to be sent beforehand via this link: http://verkstad.cc/urler/desafio-preguntas. Twitter users can also participate using the hashtag #desafiostempreguntas.

**To the members of the Arduino community interested in social innovation and tech for the greater good, this is a call for your help.**

Almost a year ago I was awarded with an Ashoka Fellowship, which got me to join a group of people working with projects all over the world having to do with social change through entrepreneurship. Issues covered by the Ashoka fellows range from gender equality, passing by collaborative economy, democratic access to all sorts of material resources, and ending with education using technology.

I have always been engaged in different social initiatives in my life: helped creating two Scout groups, joined several student associations (became president of one), played in a band (sorry we’re not on Spotify), taught martial arts to kids with visual impairments… and helped create the largest community dedicated to open hardware in the history of technology (so far).

During the last 10+ years I have been focused in building the Arduino platform, but also in reaching out to other communities, including arts, design, and more recently, education. Therefore, the Ashoka Fellowship feels like the perfect fit to encourage me to continue to be engaged with the development of our platform by making it more accessible to others.

(For those interested, the Ashoka Fellowship got me and Arduino to collaborate with the PUIG Foundation in helping Spanish speaking teachers to realize some of their educational tools, but that is material for a different blog post.)

The role of the Arduino founders is, among other things, engaging with the community in trying to improve the platform, but also society in general. Not in vain, we work with open source, use open tools and create open content. In the past, thanks to the Arduino community, we have translated the Arduino IDE and the Arduino reference to multiple languages, added features to the software (also some bugs), or corrected errors on the website. With this post, I (we) want to invite the Arduino community to engage in a larger effort for the greater good. Something that can help shaping the future of how technology engages in making the world a better place.

This year (as a matter of fact, starting next week) Arduino will be working with UNLEASH in an effort to help them accomplish their goals through the innovative use of our platform. From August 13th to 21st, 2017, Denmark will host the first UNLEASH event, where 1,000 top talents from 129 countries are going to meet to create innovative solutions to challenges within the UN’s Sustainable Development Goals (SDGs). The talent pool draws from tech entrepreneurs, leading academics, and young development program officers. This year, talents will co-create solutions focusing on seven SDG-related themes: health, food, water, education & ICT, energy, urban sustainability, and sustainable consumption & production.

Over the nine days, the participants will work to create real, scalable solutions to the Sustainable Development Goals. The UNLEASH event has made a call for young talent and can only host 1,000 volunteers, but we want to augment their ability to share and collaborate online. Arduino has created a channel on the Arduino Forum named “UNLEASH 2017” where we invite all of you to participate in the online discussion to help those participating on site with possible technical challenges they may face. The channel will be open for as long as the collaborations go on. We expect some interesting projects to emerge, where some of the Arduino community members may even team up with those attending the event IRL.

Personally, I will be hosting an open seminar online (URL to be announced) on August 16th at 5pm CET to help the participants–but also anyone interested–in getting started with the use of Arduino tools. I will highlight examples of projects using Arduino, and there will be some time for questions via a chat. Later, I will follow the Arduino Forum and help with the moderation of the conversations happening there. I would love to see some of you there as well!

DSIWorkshop

Earlier today, Arduino co-founder David Cuartielles participated in DSI4EU’s policy workshop entitled “Shaping the Future of Digital Social Innovation in Europe,” which gathered digital social innovators and policy makers to inspire and connect with different networks. During the workshop, Cuartielles and other leaders demonstrated clear examples of digital social innovation throughout Europe, along with some best practices and hands-on tips.

D-cuartielles

How is Digital Social Innovation (DSI) connected with Maker Culture, you ask? DSI is a type of collaborative innovation in which users and communities collaborate with digital technologies to co-create knowledge and solutions for a wide range of social needs at a scale that was unimaginable before the rise of the Internet. The organizations and projects identified and mapped by DSI4EU can be grouped within six broad domains and projects like Arduino are empowering people to develop New Ways of Making thanks to open hardware and educational programs!

dsi-making

DSI4EU is a support action in the H2020 Collective Awareness Platforms program. The initiative will grow and scale the current Digital Social Innovation network of projects, organizations, and individuals bringing together social entrepreneurs, hackers, communities, and academics working on key DSI fields such as the Maker Movement, the collaborative economy, open democracy and digital rights. It’s fostering digital innovations for social good, helping communities share data, collaborate to solve societal problems, and scale their initiatives focusing on open and distributed technologies and new sustainable business models. Finally, it’s representing the building blocks for a new participatory innovation model for Europe, a more decentralised web and an inclusive and sustainable society, including a radical approach to scaling, extending and connecting the DSI network in Europe.

ArduinoD

Arduino Day’s events’ map is updating constantly with new events created by local communities worldwide. The participation is open to anyone who wants to celebrate Arduino, Genuino and all the amazing things that have been done (or can be done!) with them and the community of open source enthusiasts. The call for submission is now extended and open until March 15th! We’ve already received 280 submissions from more than 55 countries! Celebrate with us and add your local event  now on day.arduino.cc.

If you want to attend one of the events near your town,  check the map on the Arduino Day website and remember that this year we are also celebrating Genuino, Arduino’s sister brand for products sold outside of USA. US-based events will be called ’Arduino Day’, while events based outside the US will be called ’Genuino Day’.

GENUINODAY_banner_720x300

Some days ago Massimo Banzi and his team announced that the third edition of Arduino Day organized directly by the Arduino team will take place on Saturday April 2nd 2016 in Berkeley (CA) at Jacobs Institute for Design Innovation, University of California with Massimo Banzi, Tom Igoe and David Mellis.

“We’re really excited to express our love for open source – said Massimo Banzi, CEO at Arduino – in a day of celebration of our amazing community of makers, developers and partners. 6 million downloads of the Arduino Development Environment in the last year alone show the sheer size of our community.”

This is the draft agenda of the event (registration form coming soon):

– 11 am – 6 pm: exhibition of Arduino projects
– 12 pm – 4 pm : hands-on activities
– 3 pm -5.30 pm : Arduino co-founders  presentations

  • David Mellis  “Makers and machine learning: a system for analysis of real-time sensor data”
  • Tom Igoe “Talk Making amazing things talk”
  • Massimo Banzi “IoT and the connected objects”

“I’m also excited” – said David Mellis, Arduino co-founder – “to hold an Arduino Day at UC Berkeley’s Jacobs Institute because they both represent a playful and innovative approach to design and engineering. I’m looking forward to seeing all the amazing things that people here at Berkeley have been building with Arduino. I’m also hoping that Arduino Day will be a chance to connect makers on campus with those in the broader community.”

 David Cuartielles will be in Mexico City to take part to Genuino Day organized by Hacedores at Centro de Cultura Digital in Mexico City.

Share your pictures, comments and news on your social channels using Hashtag: #ArduinoD16

Jun
29

Arduino Yún controlling a 12 mentos-coke installation!

arduino, Arduino Yún, coke, David Cuartielles, Featured, installation, mentos, Yun Comments Off on Arduino Yún controlling a 12 mentos-coke installation! 

arduinoYunmentos
What happens in Zaragoza when you mix David Cuartielles, a group of teens, an Arduino Yún, 12 cokes and a bunch of mentos?

Here it is:

Feb
03

Circular Knitic and the power of doers in open source

3D printing, arduino, David Cuartielles, DUE, Featured, knitting machine Comments Off on Circular Knitic and the power of doers in open source 

circularknitic

Circular Knitic is an open hardware project created for DOERS, an exhibition curated by Arduino co-founder David Cuartielles, which takes place at Etopia Center for Art & Technology in Zaragoza, Spain.

It consists of an exhibition and a series of presentations, workshops and seminars focusing on the world of open creation, invention and personal fabrication. It aims to unveil a variety of extraordinary creations, ideas that are transforming the world, but mostly show visitors a group of people: “the DOERS, constantly looking for new projects that surprise us”.

During a period of eight months, 5 knitting machines will be knitting slowly and produce enough tubulars so that the ceiling of the art centre will be covered with knitted scarves.

Using digital fabrication and maker tools like 3D printing, laser cutting, makerbeam, and Arduino Uno— Knitic duo designed a replicable circular knitting machine. It’s not the first time they experiment on knitting techniques. A couple of years ago I interviewed them on this blog for their previous project focused on giving a new brain to old knitting machines using Arduino Due.

circularknitic2

Various designers are experimenting with 3D printing in fashion but this doesn’t mean  to 3d print garments directly. Knitic approach shows how digital fabrication could have greater impact on the way clothes are prototyped and produced, especially on producing new concepts of machines:

In maker culture, production of textiles is often overlooked. Circular Knitic demonstrates that beautiful textiles can be produced with digital fabrication tools.

Most of Circular Knitic parts are made with  RepRap 3D printers, some others are made of plexiglass that can be easily lasercut in a fablab. Instructions and all the stl files for the components are available for download on the project’s GitHub page.

The videos below shows the building of the machines and when they are in action.


Nov
21

Enjoy images and sound on your Arduino Robot – video tutorial

arduino, Arduino Robot, David Cuartielles, Robot, tutorial, video Comments Off on Enjoy images and sound on your Arduino Robot – video tutorial 

Arduino Robot

Some days ago RS Components published the 5th and last video in a series of 5 video tutorials about Arduino Robot. After learning how to get started, to remotely control the robot, avoid obstacles and follow lines, you can now learn how to use the TFT screen to deal with images and how to make music and listen to it with the Robot.

In the video below David  and Xun show examples and give your tips on how to navigate through these features:


Click and read more about Arduino Robot.

Oct
18

Logo and Remote control your Arduino Robot – Video tutorial

David Cuartielles, Massimo Banzi, Robot, RSComponents, tutorial, video, Workshops Comments Off on Logo and Remote control your Arduino Robot – Video tutorial 

Mbanzi_robot


RS Components released the second video focused on the first steps with the Arduino Robot with Massimo Banzi, David Cuartielles and Xun Yang:

In this video you will see where to find code examples on the IDE. The robot library comes with two folders named “learn” and “explore” with examples on how to use the software to program the top board – this is the board you will mainly interact with while the motor board runs its original firmware.

One of the first examples of coding on the Arduino Robot is called “LOGO” which is very similar to an early educational programming language that controlled a virtual turtle moving across the screen with simple instructions. This time however, instead of having a small virtual turtle running on a screen, we have a robot that can respond to commands demonstrating a basic example of movement.

“LOGO” invites users to interact with the robot using the keypad to tell the robot whether to move forwards/backwards or to turn left/right. The program can store a series of commands that will then be executed one at a time.

Xun and David show users where to find the LOGO example and how to upload it to the robot’s control board. You will notice that the robot’s motors are disengaged when the USB cable is connected. The Arduino Robot can be pretty powerful and this feature prevents it from running away with your laptop!

Since all motors are slightly different, users will have to configure the robot’s movement using a different example called “Calibration”. Using a screwdriver on the trimmer on the bottom board, it is possible to balance the strength applied by each one of the wheels so that the robot moves straight when asked to. The video closes with an example of how to use a simple IR-receiver connected to one of the sensor inputs on the robot to control it using a small universal TV-remote. This program is also part of the basic list of examples in the library.

Go and run with the first Arduino on wheels!


Debido a la presentación del Arduino GSM Shield, el cofundador y creador de Arduino David Cuartielles, ha llevado a cabo este gran videotutorial de como empezar a utilizar este gran shield. En el video podemos ver dos ejemplos muy útiles para poder empezar a trabajar con el GSM Shield. Sin más, os adjunto el video. […]


  • Newsletter

    Sign up for the PlanetArduino Newsletter, which delivers the most popular articles via e-mail to your inbox every week. Just fill in the information below and submit.

  • Like Us on Facebook