Posts | Comments

Planet Arduino

Archive for the ‘modular’ Category

LED and LCD displays are a technological marvel. They’ve brought the price of televisions and monitors down to unheard-of levels since the days of CRTs, but this upside arguably comes with an aesthetic cost. When everything is covered in bland computer screens, the world tends to look a lot more monotonous. Not so several decades ago when there were many sharply contrasting ways of displaying information. One example of this different time comes to us by way of this split-flap display that [Erich] has been recreating.

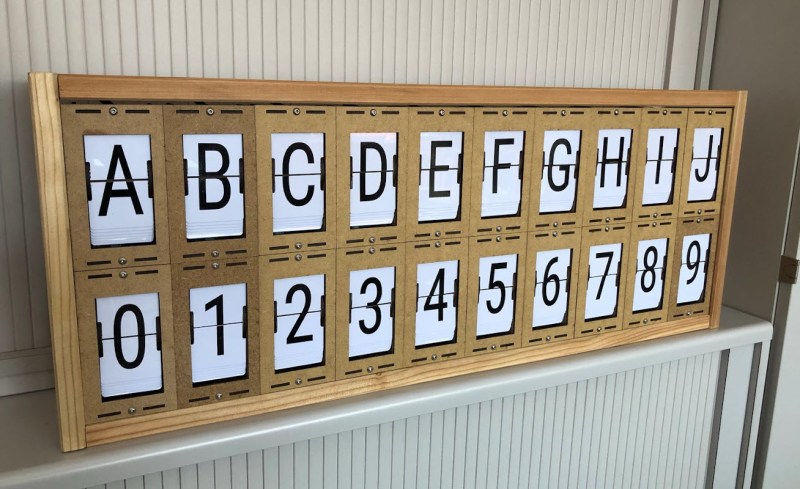
Split-flap displays work by printing letters or numbers on a series of flaps that are attached to a spindle with a stepper motor. Each step of the motor turns the display by one character. They can be noisy and do require a large amount of maintenance compared to modern displays, but have some advantages as well. [Erich]’s version is built out of new acrylic and MDF, and uses an Arduino as the control board. A 3D printer and CNC machine keep the tolerances tight enough for the display to work smoothly and also enable him to expand the display as needed since each character display is fairly modular.

Right now, [Erich]’s display has 20 characters on two different rows and definitely brings us back to the bygone era where displays of this style would have been prominent in airports and train stations. This display uses a lot of the basics from another split flap display that we featured a few years ago but has some improvements. And, if you’d prefer restorations of old displays rather than modern incarnations, we have you covered there as well.

Thanks to [Bob] for the tip!

Mar
21

CuteUino: Only use the parts of the Arduino that you need for each project

arduino hacks, ATmega328, AVR, cuteuino, modular, module Comments Off on CuteUino: Only use the parts of the Arduino that you need for each project 

CuteUino

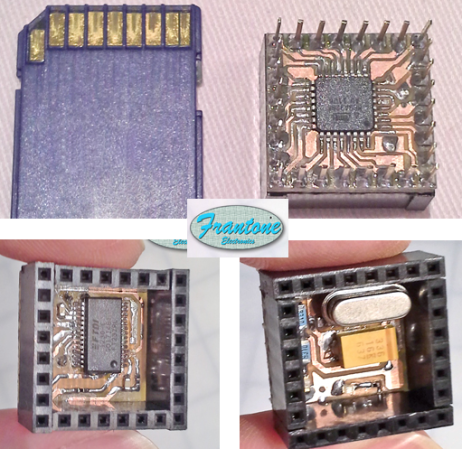
[Fran's] been working on her own version of the Arduino. She calls it CuteUino for obvious reasons. The size of the thing is pretty remarkable, fitting within the outline of an SD card. But that doesn’t mean you won’t get the power that you’re used to with the device. She’s broken it up into several modules so you can choose only the components that you need for the project.

The main board is shown on the right, both top and bottom. It sports the ATmega328p (it’s hard to believe we could make out the label on the chip package in the clip after the break) in a TQFP-32 package soldered to the underside of what she calls the Brain Module. You can also see the extra long pins which stick through from the female pin headers mounted on the top side of the board. Inside of these pin headers you’ll find the clock crystal, status LEDs, and a capacitor. The other module is an FTDI board used to connect the AVR chip to a USB port.

You’ll definitely want to check out her prototyping post for this project. She uses a very interesting technique of combining two single-sided boards to make a 3-layer PCB. The side that was not copper clad is fitted with copper foil by hand to act as a ground plane for the vias. Neat!

[Thanks Daniel]


Filed under: Arduino Hacks


  • Newsletter

    Sign up for the PlanetArduino Newsletter, which delivers the most popular articles via e-mail to your inbox every week. Just fill in the information below and submit.

  • Like Us on Facebook