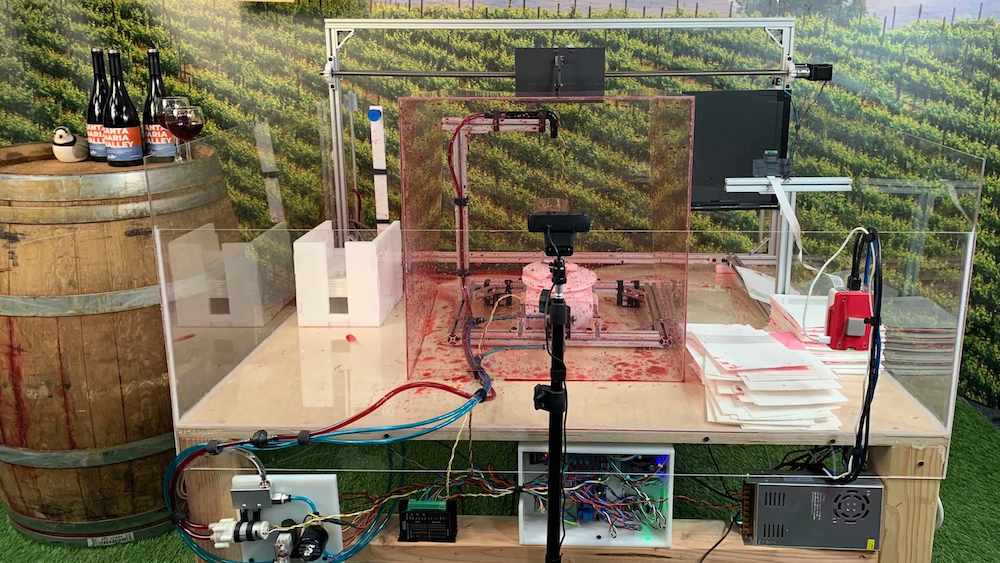
Spilled wine may be a hassle to clean up, but you might also observe that it makes interesting patterns. Marketing firm KPS3 had the same sort of thought process when they created “The Santa Maria Swirl Machine” to promote the Santa Maria Valley wine industry.
The machine takes the form of a tabletop display, where a vacuum gripper first picks up a piece of paper and transports it into a clear “swirl area.” A glass is then automatically filled with wine, spun up to speed, and flung at the paper in order to create art.
Visitors to the website can watch the current splash art being made, or register to join the queue to use the service—once their turn arrives, they are given a full-screen view and options to control their creation. Specialized watercolor paper is picked up by a servo equipped with a suction cup attached to a venturi (itself attached to an air compressor), which proceeds to hand off to a custom gripper to hold the paper in place for the wine to be spilled.
From there, the Arduino-controlled stepper motor turns the lead screw, moving the paper into the splash zone, and fills the glass to the user-selected level, and begins to swirl the glass at the user-selected speed. Once the proper speed is attained, an actuator tips the glass forward, spilling the wine onto the paper. All of this is streamed by two cameras, with the final result photographed by a third. This photo is then processed in Lambda to clean up the photograph, detecting corners, applying filters and branding for the Santa Maria Valley Chamber of Commerce.
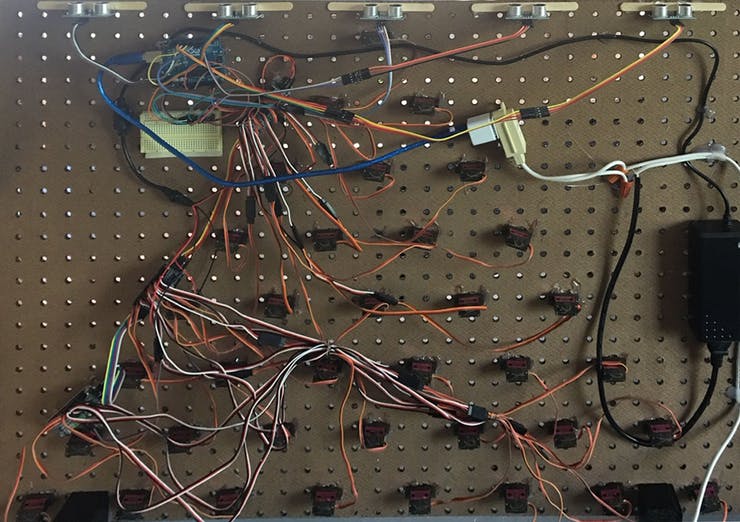
The device features 36 servo motors arranged on a pegboard to produce various patterns, and can even be used in an interactive mode where it follows a person’s hand around with the help of ultrasonic sensors.
Everything is driven by an Arduino Uno along with three 16-channel PWM control modules, and popsicle sticks show the servo movement to onlookers.
Details, including Arduino code, can be found in the Domke’s write-up. To really appreciate this project’s visuals, be sure to take in the coordinated movements in the video below!
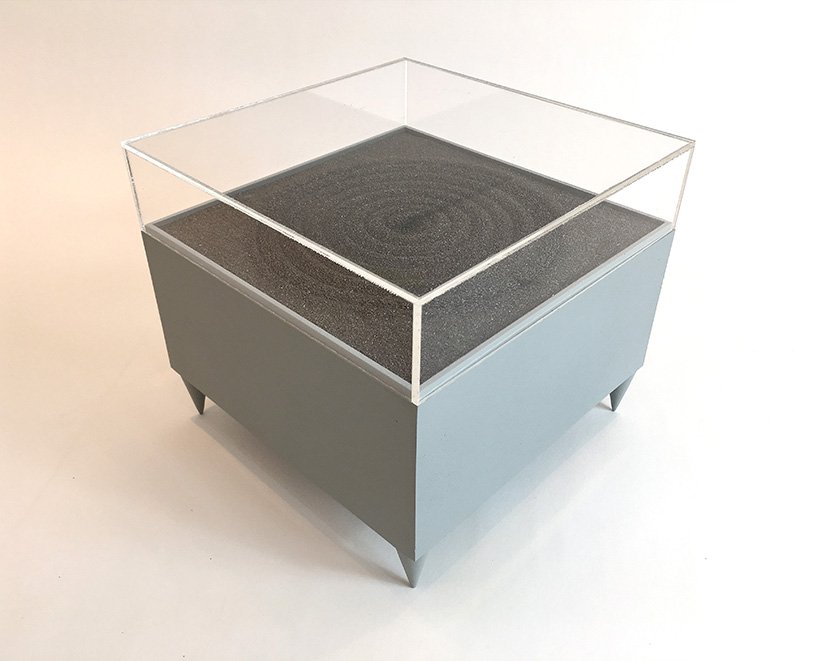
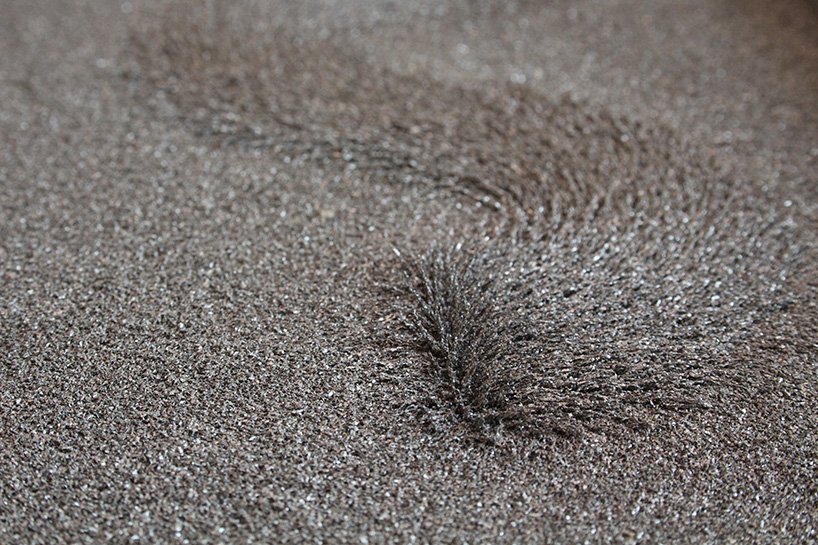
Artist Jo Fairfax has created automated drawing machines inspired by carefully manicured Japanese rock gardens, AKA zen gardens. The mesmerizing artwork uses magnets and motors that move underneath a bed of iron filings, generating soothing shapes as viewers come near via motion sensor.
An Arduino Uno is utilized for the device, or rather devices, and you can see a square “magnet garden” in the first video below, automatically producing a circular pattern. A (non-square) rectangular garden sketches a sort of snake/wave pattern in the second clip.
The build is reminiscent of sand drawing machines that rotate a metal marble through magnetic force, but does away with a visible source of movement as the filings react directly to the magnetic field as it’s applied.
An Arduino Uno is programmed to set off a mechanism with integrated magnets below the platform of iron filings. each time a viewer approaches the machine, it starts to ‘draw’ and agitate the black particles, moving them around the platforms. Slowly the drawings become three dimensional and the sense of the magnets’ tracing becomes visible.
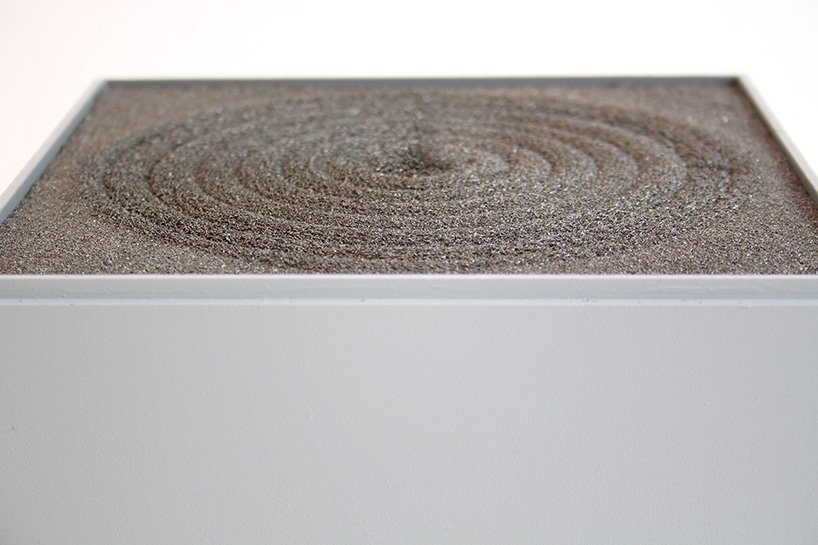
The charged iron filings create varying geometric clusters that shape the zen gardens. The drawing machines reveal the forces acting on them, imitating grass and sand that react to the natural force of the wind. the gesture of the viewer’s movement that activates the machine coupled with the magnetic power makes the artwork become a dialogue of forces… elegant and subtle, just like a zen garden.
Artist Jo Fairfax has created automated drawing machines inspired by carefully manicured Japanese rock gardens, AKA zen gardens. The mesmerizing artwork uses magnets and motors that move underneath a bed of iron filings, generating soothing shapes as viewers come near via motion sensor.
An Arduino Uno is utilized for the device, or rather devices, and you can see a square “magnet garden” in the first video below, automatically producing a circular pattern. A (non-square) rectangular garden sketches a sort of snake/wave pattern in the second clip.
The build is reminiscent of sand drawing machines that rotate a metal marble through magnetic force, but does away with a visible source of movement as the filings react directly to the magnetic field as it’s applied.
An Arduino Uno is programmed to set off a mechanism with integrated magnets below the platform of iron filings. each time a viewer approaches the machine, it starts to ‘draw’ and agitate the black particles, moving them around the platforms. Slowly the drawings become three dimensional and the sense of the magnets’ tracing becomes visible.
The charged iron filings create varying geometric clusters that shape the zen gardens. The drawing machines reveal the forces acting on them, imitating grass and sand that react to the natural force of the wind. the gesture of the viewer’s movement that activates the machine coupled with the magnetic power makes the artwork become a dialogue of forces… elegant and subtle, just like a zen garden.
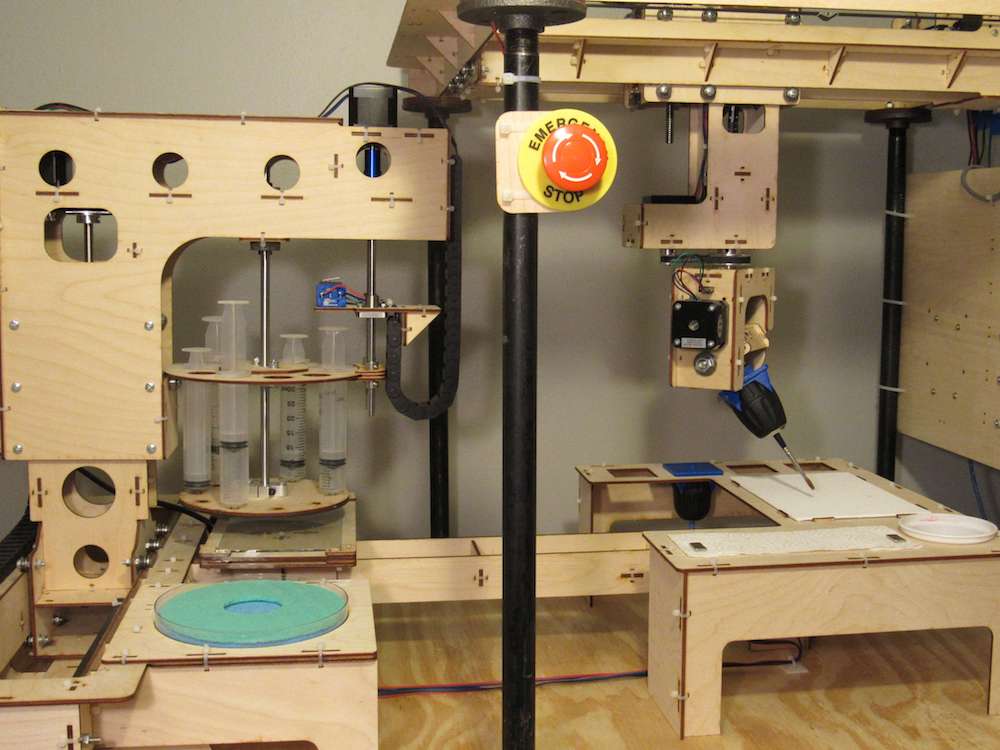
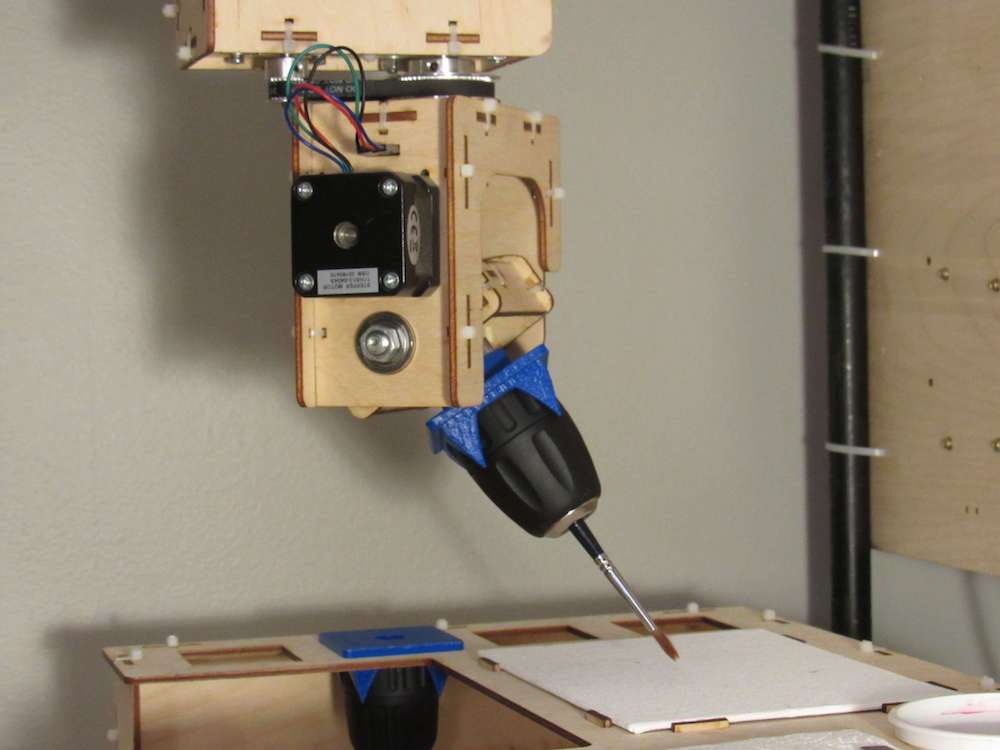
In order to produce the proper paint strokes, his device implements full six-axis brush control, moving not only in the X/Y/Z coordinate system, but rotating on three axes. Movement is handled by a modified version of Grbl running on an Arduino Mega.
If Then Paint also features the ability to change painting/art tools automatically, as well as a clever paint management system that turns a carousel of paint syringes.
More info on the build can be found here, and check out a few examples of how it works in the videos below.
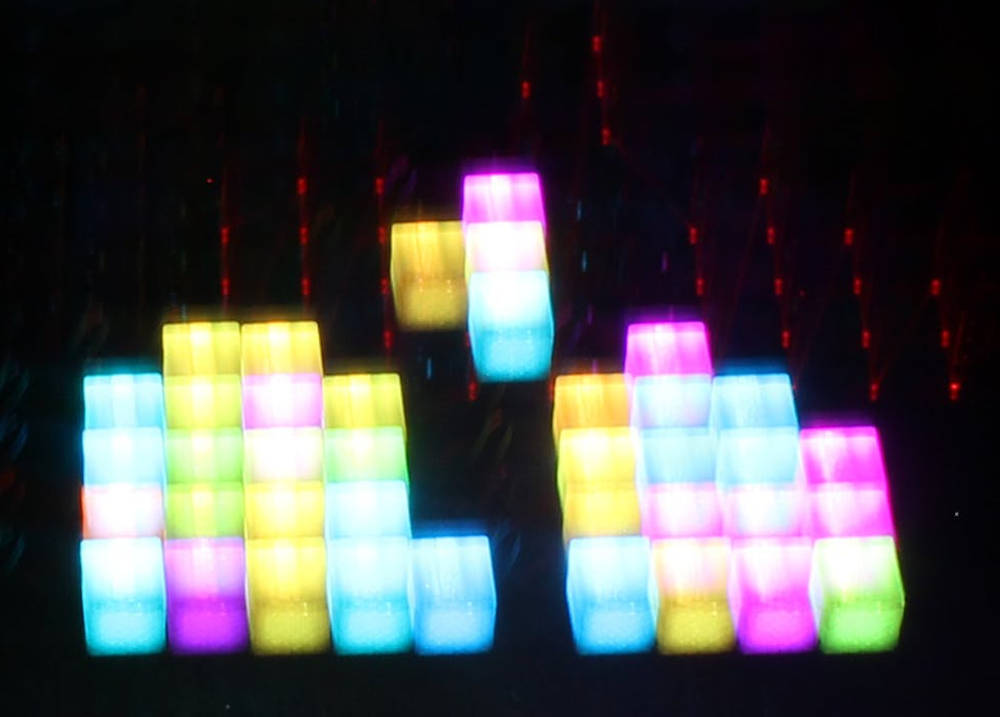
Maker Jeremy S. Cook has experimented with both CNC machinery and light painting in the past, and decided to combine these two skills into a new artistic device.
His setup uses a web app found here to program a CNC router as a sort of dot matrix printer. But instead of a pen, pencil, brush or other marking utensil, it uses a button as an input to the onboard Arduino Nano when pressed to the router’s surface.
From this input, the Arduino then commands a diffused RGB LED to “mark” the surface with light, painting an image on the camera’s exposed sensor.
Code and print files are are available on GitHub if you’d like to try your own light art experiments!
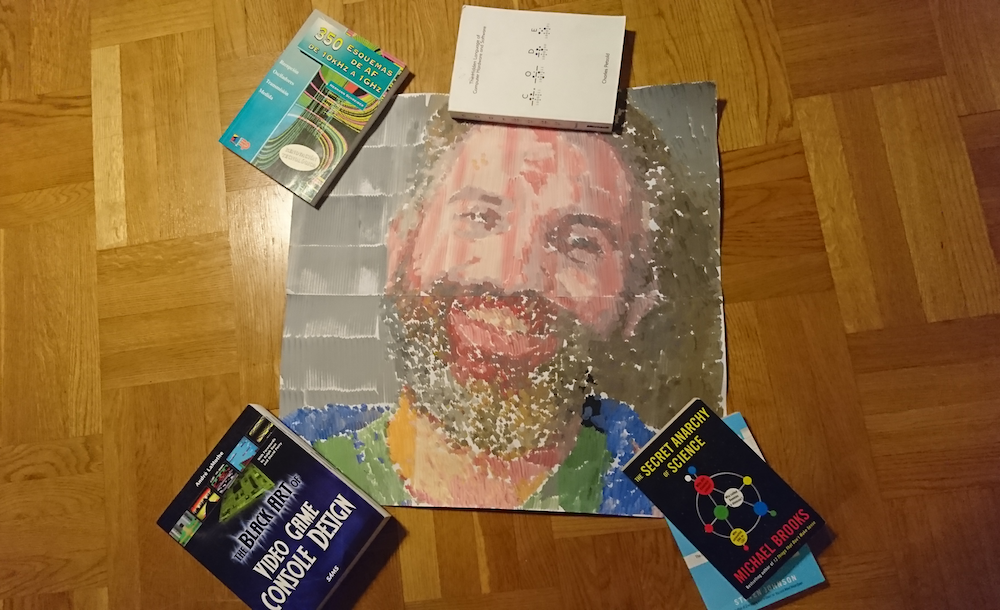
I participated in Maker Faire Rome back in December 2017. I came with the rest of the Arduino crew to spend two days talking to other makers in the show, check out the projects made in the field of education and to… get a portrait painted. Now seriously, I hadn’t planned to get a painting of my beard made at Maker Faire, it just happened. I was walking around together with Marcus, one of the guys running the Arduino Education web infrastructure, when I saw my own picture on a computer screen at a not-so-distant booth. We came closer just to satisfy my curiosity, and then the surprise… there was a robot making my portrait!
The process of making this portrait was not exactly short, the robot moves back and forth every couple of brush strokes to get some more paint. The colors are created by dipping into small containers. Imagine a CNC of sorts moving on the X-Y plane and making a small movement with the brush in order to make a mark on the canvas. My portrait is made of several A4 pages glued together, as you can see in the picture. In total it takes several hours to produce a portrait like this one.
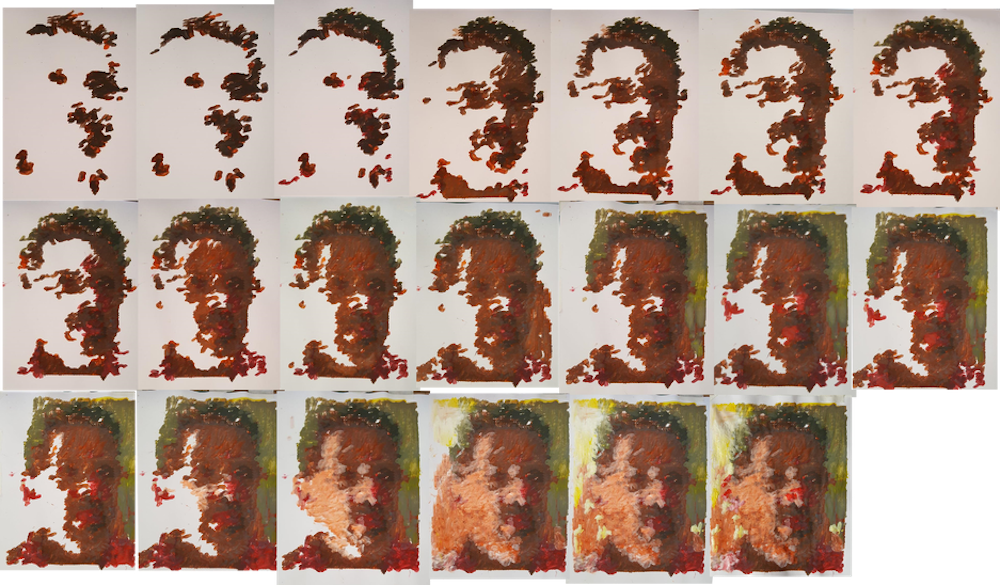
You can see the first traces made by the machine while painting my portrait in the following video.
The painting robot was built by Jose Salatino, a painter gone roboticist that used to go around making portraits to famous musicians and giving the paintings away to them. He told me that this is how he started in the art world. At some point he wanted to bring together his life passion with his hobby (electronics) and got interested into painting robots (seems like there is a whole niche there I haven’t explored yet) and realized that very few people were really using a painter’s technique to mix the colors. That triggered him into learning more about machines in general, and machines that could paint in particular.
[Jose’s self portrait process, image courtesy of Jose Salatino]
The machine itself
The painter robot, which I came to call Van Gogh because of its painting style, is a two-axis machine that can be programmed to move all over the canvas. The machine uses the technique of creating a color by mixing first basic pigments (blue, yellow, red) and then dipping the brush again into one of a series of containers grading from white to black. This is, Jose told me, how he would mix the paint: first dip into the different containers of basic color (e.g. to make a bright green, need to dip once in blue and maybe three times in yellow), second assign the luminosity by dipping into a certain gray color. When asked about whether the paint containers would not get dirty by doing so, Jose replied that so it goes when painting for him. The colors get dirty on the palette and you need to keep on adding new color. And this is when I realized that I was totally over engineering the project in my head when I tried to imagine how I would do it. Check the robot in action in the following video.
Note the sponge used to clean the brush before reloading it with paint, yet another master move, in my opinion. You can read more about the machine by visiting the project’s write-up here.
The contest Jose is participating in
Jose has entered a robotics painting contest with the works made by his robot. One of the proposed pieces is actually my portrait.
The 2018 “3rd Annual” International Robotic Art Competition’s goal is to challenge teams to produce something visually beautiful with robotics – that is, to have a robot use physical brushes and paint to create an artwork.
Jose’s robot is all about brushes, as I already told you. And he is all for the competition, for which he teamed up with his kids who learned everything that was needed to make the robot paint as it does. The idea is that, in case he won this contest, 90% off the $100.000 USD prize would be donated to an NGO in the US. Are you interested in art? More specifically, are you into robotic art? Then visit the contest’s site, register, and vote for your favorite pieces. If you voted for Jose’s work, you could also help him choose an NGO where to give the money away: Red Cross, Black Girls Code, Learn2Teach-Teach2Learn… as he lives in Barcelona, he doesn’t really know who he would give the price to in the US. Jose is open to suggestions, but remember he needs your vote first!
If you are interested in reading more about Jose’s project, his daughter, Flor, made a very nice interview and reflectionabout the role of the artist when there is a machine making the work. This is something I bet many readers were wondering by now: “if the machine paints it, who is the one to be credited, the machine or the person making the machine?” In my opinion, and since I am one of the models, I think we–the models giving away our image–should be also getting some credit, or? (Note: this last sentence was a joke!)
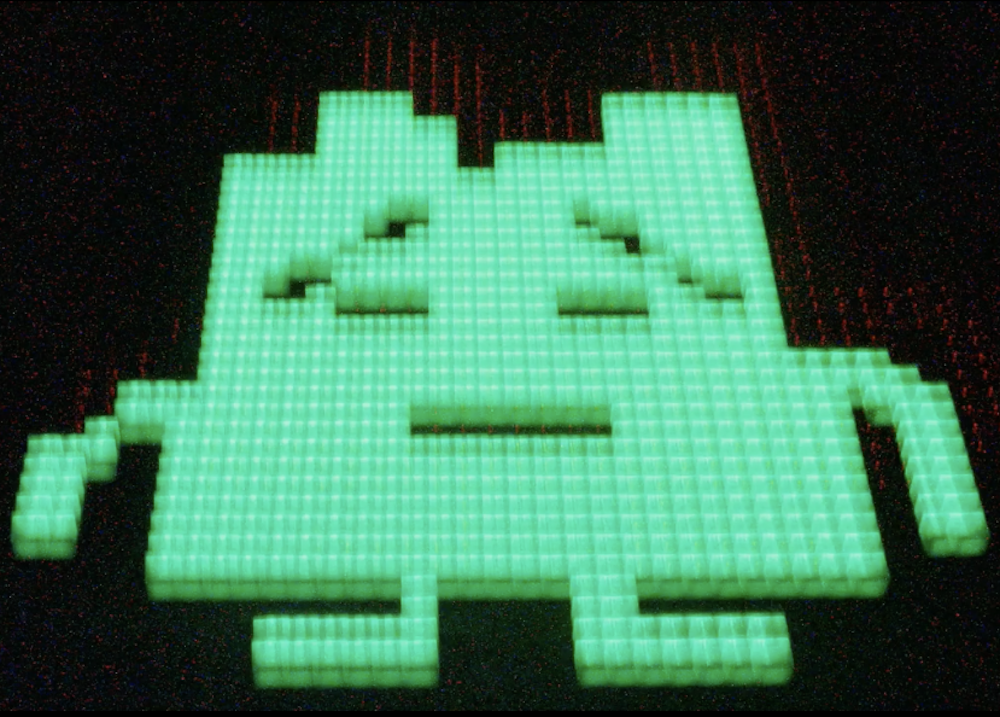
Have you ever wondered what television would look like if transposed onto string and wrapped around another object? If so, you’re not the only one, as shown in this teleknitting sculpture.
Although it’s hard to say where the idea for this piece came from, Moscow-based artist ::vtol::’s teleknitting installation resolves a TV signal down into one pixel by lowering its resolution in eight steps. This process is displayed as video on an Android tablet, and the results are transferred to thread via a unique dying mechanism involving “dye arms.”
This multi-colored string is then wrapped around an object (or objects) rotating on a pedestal, the height of the string being controlled by the TV signal’s volume.
As you can see below, the character Bender from Futurama along with an alligator bearing an accordion act as the items being wrapped in TV-string. You can find more details of this build on ::vtol::’s website, along with a number of his other Arduino-based interactive projects.
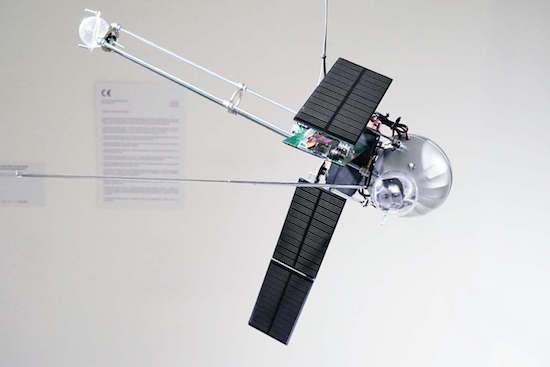
This model satellite is both strange and mesmerizing with folding solar panels and a FM transmitter.
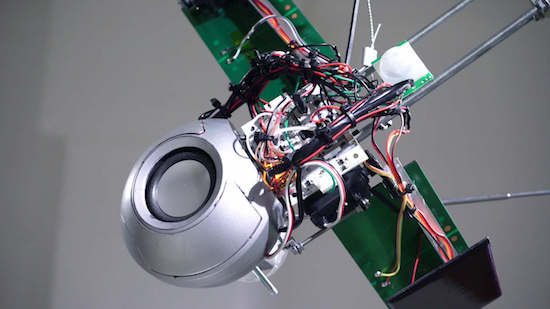
Media artist Dmitry Morozov, aka ::vtol::, is back with his latest kinetic sound object, this one resembling a satellite. The Orbitalochka hangs from the ceiling and broadcasts sound via an FM transmitter and a built-in speaker. These noises are based on the position of the satellite in space, and it can even transmit a pre-recorded lecture by Sergev Kasich, who appears to reside in the satellite’s clear bubble.
::vtol:: bases the sound signals on the generative sound processes created with Patchblocks, a modular mini-synth kit. The signals also react to a light intensity sensor, which responds to how the satellite’s position in space changes.
This happens due to mass redistribution as the solar cell changes location. The solar cells operate as sensors and produce CV (control voltage) to change sound program parameters.
Aside from its unusual sounds, what is really interesting about this synthesizer are the solar panels, which autonomously move around via four servo motors. The Orbitalochka is equipped with an Arduino Nano as well.
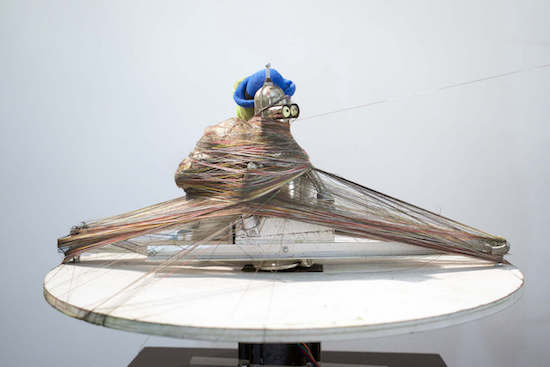
Moscow-based hacker artist ::vtol::, a.k.a. Dmitry Morozov, is back with another impressive project. His latest, called 2ch, is an interactive, pyramid-shaped instrument that enables two people to communicate via brain activity.
2ch consists of two NeuroSky EEG interfaces worn by both users, as well as two servo motors with a hall sensor and magnet, a two-channel sound system, a couple screens, and an Arduino. In terms of software, the instrument uses Pure Data and Max/MSP.
As Morozov explains:
The project is an instrument for communication between two people by means of visualising the electroencephalograms of two members, which are translated into sound, mechanical motion, and video images. Two participants should try to synchronize their minds, guided by the pitch of the tone, visualisation and movements of mechanical parts.
Planet Arduino is, or at the moment is wishing to become, an aggregation of public weblogs from around the world written by people who develop, play, think on Arduino platform and his son. The opinions expressed in those weblogs and hence this aggregation are those of the original authors. Entries on this page are owned by their authors. We do not edit, endorse or vouch for the contents of individual posts. For more information about Arduino please visit www.arduino.cc
You are currently browsing the archives for the Ar(t)duino category.