Posts | Comments

Planet Arduino

Archive for the ‘Programming’ Category

Lark Weather Station Arduino ESP32 Raspberry Pi

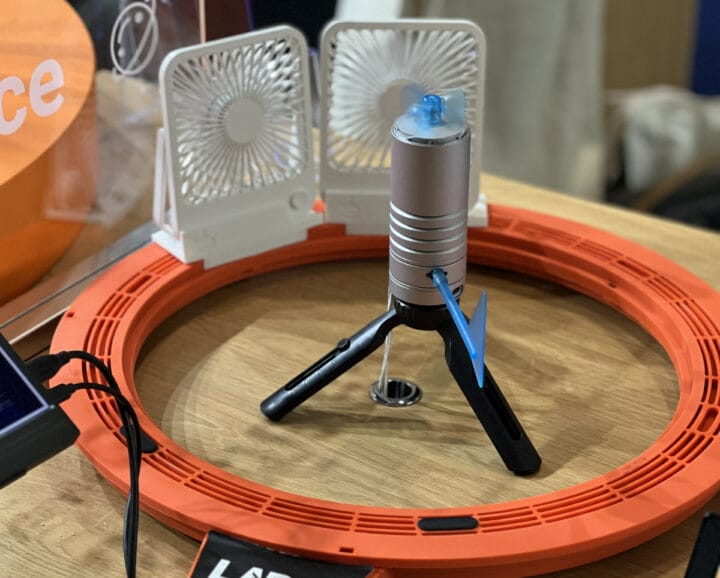
The Lark Weather Station measures wind speed, wind direction, temperature, humidity, and air pressure through a range of sensors and connects to popular development boards such as Arduino UNO, ESP32, BBC micro:bit, Raspberry Pi, or DFRobot Unihiker through I2C or UART. We’ve seen several projects for Internet-connection weather stations that retrieve weather data from the web and display the results locally, but the Lark Weather Station allows the users to get atmospheric data right in his/her current location thanks to its built-in anemometer, wind vane, and built-in sensors, as well as expansion interfaces for additional sensors. Lark Weather Station specifications: Storage – 16MB flash good to store about 160 days of data (when data is recorded once per minute) Sensors Compass Anemometer Wind Speed: 0.5~12m/s Cover to protect the anemometer during storage/transport Wind vane and wind direction shaft to report the wind direction (eight directions) Temperature Range –20~60℃ ±0.2℃ Humidity [...]

The post The Lark Weather Station works with Arduino, ESP32, micro:bit, Raspberry Pi, and other boards appeared first on CNX Software - Embedded Systems News.

Kevin from the Simple DIY Electronic Music Projects blog describes a PCB version of the Arduino EEPROM Reader/Writer as described here but with slight adjustments to support reading of 27Cxxx style ROMs often found in vintage equipment.

This is essentially the circuit from Ben Eater’s github repository, but there are a couple of configuration options for some of the connections to the (E)EPROM to support 27Cxxx, 28Cxxx (and probably 29Cxxx, which have the same pin-out as the 28Cxxx) style ROMs for reading.

See the project here.

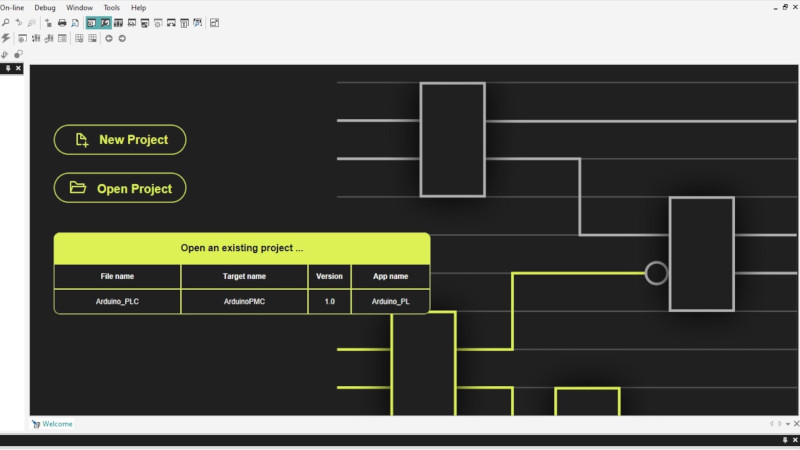
On the surface, a programmable logic controller (PLC) might seem like nothing more than a generic microcontroller, perhaps outfitted to operate in industrial settings with things like high temperatures or harsh vibrations. While this is true to some extent, PLCs also have an international standard for their architecture and programming languages. This standard is maintained by the International Electrotechnical Commission, making it so that any device built under these specifications will be recognizable to control engineers and maintenance personnel worldwide. And, if you use this standard when working with certain Arduinos, this common platform can become a standard-compliant PLC as well.

The IDE itself supports programming ladder diagrams, functional block diagrams, and other programming systems covered under the IEC 61131-3 standard. Not only that, it allows the combination of these types of PLC programming with Arduino sketches. The system offers many of the perks of PLC programming alongside the familiar Arduino platform, and supports a number of protocols as well including CANOpen, Modbus RTU, and Modbus TCP. It can also be used for monitoring a PLC system, essentially adding IoT capabilities to existing systems, enabling continuous monitoring, debugging, and program updates.

While not every Arduino is a great platform to build a PLC around, there are a few available for those looking for a system a little less proprietary and a little more user-friendly than typical PLC systems tend to be. There’s a reason that PLCs are built around an international standard and generally have certain hardware in mind to run it, though, and this comparison of a Raspberry Pi with an off-the-shelf PLC goes into detail about why certain components aren’t good choices for PLCs.

Programming an Arduino to do simple things like turn on an LED or read a sensor is easy enough via the official IDE. However, think back to your earliest experiences with this type of hardware. While rewarding, getting everything set up correctly was certainly more of a challenge, requiring research that you now likely take for granted.

To assist with these first steps of a beginner’s hardware journey, researchers at KAIST in South Korea have come up with HeyTeddy, a general-purpose prototyping tool based on dialogue.

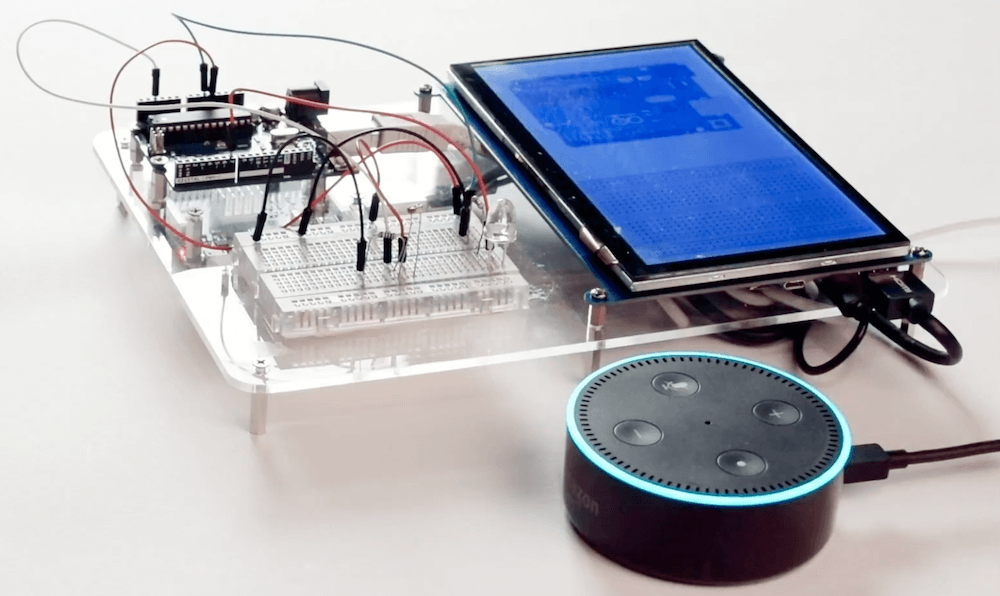
As seen in the video below, HeyTeddy’s voice input is handled by an Amazon Echo Dot, which passes these commands through the cloud to a Raspberry Pi. The system then interacts with the hardware on a breadboard using an Uno running Firmata, along with a 7” 1024 x 600 LCD touchscreen for the GUI.

Words spoken to HeyTeddy are parsed, interpreted, and executed in real-time, resulting in physical changes to the hardware without having to write any code. Once programmed, code can be exported and used on the board by itself.

Those wishing to learn more can check out the entire research paper here

Learning about how computers work and coding skills will be important for future generations, and if you’d like to get your kids started on this task—potentially before they can even read—the Ifs present an exciting new option. 

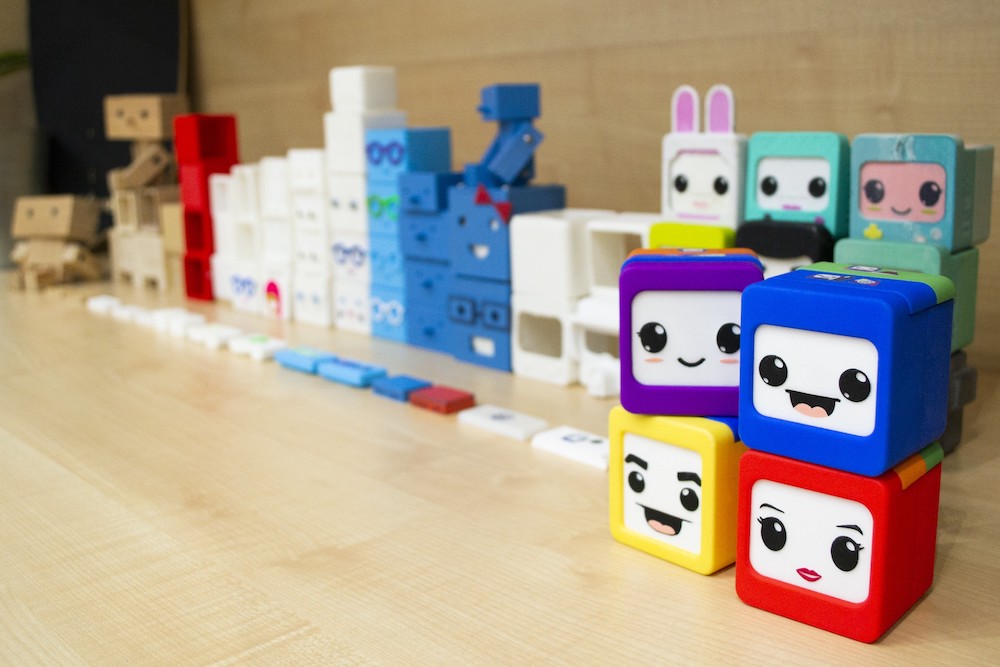
The Ifs are a series of four character blocks each with their own abilities, such as reproducing sound, movement, or sensitivity to light and darkness.

Children can program the blocks to accomplish tasks based on instructions that snap onto the top of each using magnets, and the whole “family” can communicate and work together to accomplish more advanced actions as a team. 

As outlined in more detail on this project page, the devices were developed using Arduino technology, and you can sign up here to be notified when they’re ready for crowdfunding.

The Ifs are full of sensors and actuators but they need some instructions in order to function. 

Programming is as simple as placing physical blocks in their heads with the help of magnets. No screens are involved. Each block has a different image serving as an intuitive symbol to represent an instruction. This makes the game suitable for children from the age of three, even before learning to read or write.

We only need different color pieces that are placed on their heads. The different color pieces are instructions that are combined as if it were a code, from being able to light them when it’s dark to making them communicate with each other. This allows kids to play with loops, statements, algorithms while also inventing their own stories. Their imagination is the only limit.

Embedded programming using the Arduino IDE has become an important part of STEM education, and while more accessible than ever before, getting started still requires some coding and basic electronics skills. To explore a different paradigm for starting out on this journey, researchers have developed Flowboard to facilitate visual flow-based programming.

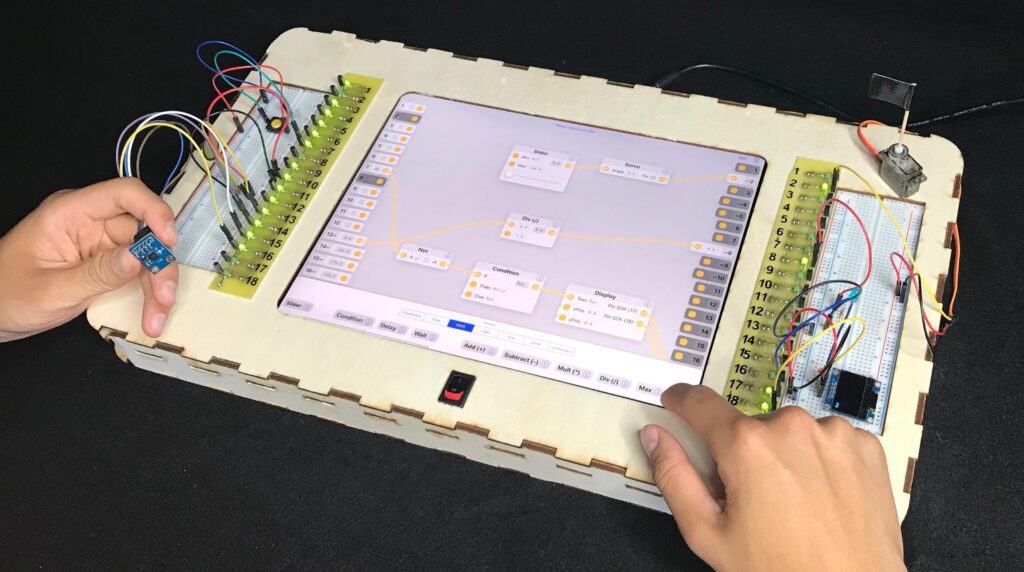
This device consists of an iPad Pro and a set of breadboards on either side. Users can arrange electrical components on these breadboards, changing the flow-based program on the screen as needed to perform the desired actions. Custom ‘switchboard’ hardware, along with an Arduino Uno running a modified version of Firmata, communicate with the iPad editor via Bluetooth.

With maker-friendly environments like the Arduino IDE, embedded programming has become an important part of STEM education. But learning embedded programming is still hard, requiring both coding and basic electronics skills. To understand if a different programming paradigm can help, we developed Flowboard, which uses Flow-Based Programming (FBP) rather than the usual imperative programming paradigm. Instead of command sequences, learners assemble processing nodes into a graph through which signals and data flow. Flowboard consists of a visual flow-based editor on an iPad, a hardware frame integrating the iPad, an Arduino board and two breadboards next to the iPad, letting learners connect their visual graphs seamlessly to the input and output electronics. Graph edits take effect immediately, making Flowboard a live coding environment.

Want to learn more? Check out the team’s research paper here

Machine learning is starting to come online in all kinds of arenas lately, and the trend is likely to continue for the forseeable future. What was once only available for operators of supercomputers has found use among anyone with a reasonably powerful desktop computer. The downsizing isn’t stopping there, though, as Microsoft is pushing development of machine learning for embedded systems now.

The Embedded Learning Library (ELL) is a set of tools for allowing Arduinos, Raspberry Pis, and the like to take advantage of machine learning algorithms despite their small size and reduced capability. Microsoft intended this library to be useful for anyone, and has examples available for things like computer vision, audio keyword recognition, and a small handful of other implementations. The library should be expandable to any application where machine learning would be beneficial for a small embedded system, though, so it’s not limited to these example applications.

There is one small speed bump to running a machine learning algorithm on your Raspberry Pi, though. The high processor load tends to cause small SoCs to overheat. But adding a heatsink and fan is something we’ve certainly seen before. Don’t let your lack of a supercomputer keep you from exploring machine learning if you see a benefit to it, and if you need more power than just one Raspberry Pi you can always build a cluster to get your task done just a little bit faster, too.

Thanks to [Baldpower] for the tip!

petduino1The Tamagotchi is a thing of the past. Bring your virtual pet into the 21st century with LEDs and an Arduino-compatible processor.

Read more on MAKE

The post Petduino Is the DIY Tamagotchi You Can Hack appeared first on Make: DIY Projects, How-Tos, Electronics, Crafts and Ideas for Makers.

Jul
15

Using A TeensyLC To Emulate The XBOX 360 Controller

32-bit, 360, arduino, arduino hacks, ARM, fight stick, Programming, Teensy, teensyduino, teensylc, USB, xbox Comments Off on Using A TeensyLC To Emulate The XBOX 360 Controller 

After the release of Mortal Kombat X, [Zachery’s] gaming group wanted to branch out into the fighter genre. They quickly learned that in order to maximize their experience, they would need a better controller than a standard gamepad. A keyboard wasn’t going to cut it either. They wanted a fight stick. These are large controllers that look very much like arcade fighting controls and include a joystick and large buttons. [Zachery’s] group decided to build their own fight stick for use with a PC.

[Zachery] based his build around the TeensyLC, which is a 32 bit development board with an ARM processor. It’s also compatible with Arduino. The original version of his project setup the controller as a HID, essentially emulating a keyboard. This worked for a while until they ran into compatibility issues with some games. [Zachery] learned that his controller was compatible with DirectInput, which has been deprecated. The new thing is Xinput, and it was going to require more work.

Using Xinput meant that [Zachery] could no longer use the generic Microsoft HID driver. Rather than write his own drivers, he decided to emulate the XBOX 360 controller. When the fight stick is plugged into the computer, it shows up as an XBOX 360 controller and Windows easily installs the pre-built driver. To perform the emulation, [Zachery] first had to set the VID and PID of the device to be identical to the XBOX controller. This is what allows the Microsoft driver to recognize the device.

Next, the device descriptor and configuration descriptor had to be added to the Teensy’s firmware. The device descriptor includes information such as USB version, device class, protocol, etc. The configuration descriptor includes additional information about the device configuration. [Zachery] used Microsoft Message Analyzer to pull the configuration descriptor from a real XBOX 360 controller, then used the same data in his own custom controller.

[Zachery] programmed the TeensyLC using the Arduino IDE. He ran into some trouble here because the IDE did not include the correct device type for an Xinput device. [Zachery] had to edit the boards.txt file and add three lines of code in order to add a new hardware device to the IDE’s menu. Several other files also had to be modified to make sure the compiler knew what an Xinput device type was.  With all of that out of the way, [Zachery] was finally able to write the code for his controller.


Filed under: Arduino Hacks, ARM
Jul
03

Arduinos (and other AVRs) Write To Own Flash

arduino, arduino hacks, AVR, bootloader, flash memory, optiboot, Programming Comments Off on Arduinos (and other AVRs) Write To Own Flash 

In this post on the Arduino.cc forums and this blog post, [Majek] announced that he had fooled the AVR microcontroller inside and Arduino into writing user data into its own flash memory during runtime. Wow!

[Majek] has pulled off a very neat hack here. Normally, an AVR microcontroller can’t write to its own flash memory except when it’s in bootloader mode, and you’re stuck using EEPROM when you want to save non-volatile data. But EEPROM is scarce, relative to flash.

Now, under normal circumstances, writing into the flash program memory can get you into trouble. Indeed, the AVR has protections to prevent code that’s not hosted in the bootloader memory block from writing to flash. But of course, the bootloader has to be able to program the chip, so there’s got to be a way in.

The trick is that [Majek] has carefully modified the Arduino’s Optiboot bootloader so that it exposes a flash-write (SPM) command at a known location, so that he can then use this function from outside the bootloader. The AVR doesn’t prevent the SPM from proceeding, because it’s being called from within the bootloader memory, and all is well.

The modified version of the Optiboot bootloader is available on [Majek]’s Github.  If you want to see how he did it, here are the diffs. A particularly nice touch is that this is all wrapped up in easy-to-write code with a working demo. So next time you’ve filled up the EEPROM, you can reach for this hack and log your data into flash program memory.

Thanks [Koepel] for the tip!


Filed under: Arduino Hacks


  • Newsletter

    Sign up for the PlanetArduino Newsletter, which delivers the most popular articles via e-mail to your inbox every week. Just fill in the information below and submit.

  • Like Us on Facebook