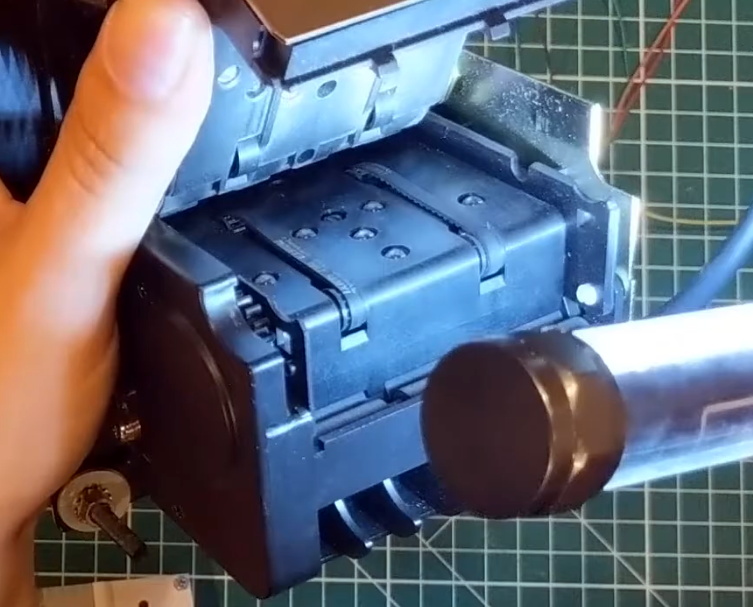
We’ve all seen, and occasionally wrestled with, bill acceptors like the one [Another Maker] recently liberated from an arcade machine. But have you ever had one apart to see how it works? If not, the video after the break is an interesting peak into how this ubiquitous piece of hardware tells the difference between a real bill and a piece of paper.
But [Another Maker] goes a bit farther than just showing the internals of the device. He also went through the trouble of figuring out how to talk to it with an Arduino, which makes all sorts of money-grabbing projects possible. Even if collecting paper money isn’t your kind of thing, it’s still interesting to see how this gadget works on a hardware and software level.
As explained in the video, a set of belts are used to pull the bill past an array of IR LEDs. The hardware uses these to scan the bill and perform some dark magic to determine if it’s a genuine piece of currency. [Another Maker] notes that these readers actually need to receive occasional firmware updates to take into account new bill designs. In fact, the particular unit he has is so out of date that it won’t accept modern $5 bills; which may explain how he got it for free in the first place.
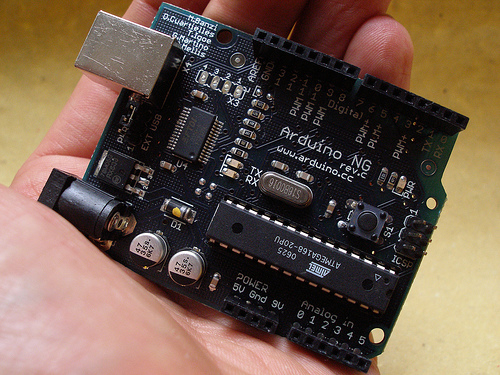
When we came up with Arduino, one of the things we decided very early on was that we wanted to release the hardware design files so that people could make their own versions or just make an exact copy if they couldn’t find boards where they lived.
I think we contributed to popularize the concept of open source hardware and we can see it from the huge amount of variations of Arduino-compatible devices being released every day.
After the platform started to become popular we had the issue of figuring out a business model to sustain our work and keep innovating the project. But we also realized we needed a way for people to be guaranteed that
they were buying a quality product that would replace any defective item, should problems arise
they were contributing to a community that would bring forward open-source values and knowledge sharing
A few years later the situation is clearly complex with so many companies identifying something as an Arduino even if the only thing they have in common with us is the board pinout. It’s time we clarify what in our mind is an Arduino, what are the different variations of Arduino around and how they relate to our project.
We classified them as Clones, Derivatives, Compatibles and Counterfeits. But let’s start with explaining what is an official board.
- Official Boards
An Arduino is a board which
it’s directly supported by the official Arduino IDE
it follows the Arduino layout we have standardised
it’s properly documented on our website
it’s properly licensed to bear the Arduino name and logo
it’s made by authorized manufacturers
The authorized manufacturers pay a small royalty to Arduino to keep the project going (pay for the servers, the people who develop the software, design the hardware, write documentation and provide support, etc.). We sign contracts with them and all the authorised distributors that make sure they will replace any defective board should the customer receive a product they feel is not working properly.
Although the percentage is incredibly small (less than 1%) it’s still important to know that somebody will take care of any issue. Through this system we have enabled people to have access to cheap hardware that is properly supported and the community can build upon. These are the only boards that can legitimately use the Arduino name.
Current official manufacturers are SmartProjects in Italy, Sparkfun in the USA and DogHunter in Taiwan/China. These are the only manufacturers that are allowed to use the Arduino logo on their boards.
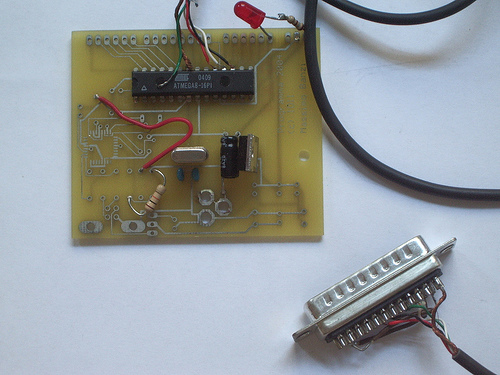
- Clones
A market developed for products we call Clones which are exact (or almost exact) replicas of Arduino boards with a different branding , i.e. they are usually named with some variation of Ardu-something or something-duino. These products are released according to trademark laws (unless they copy almost exactly our graphics which is not open-source) and have a place in the market.
Customers who want to support the Arduino project should be aware that these products do not give back anything financially and very rarely in term of help on software or documentation.
- Derivatives
A more interesting segment for us is what we call Derivatives. These are products that are derived from the Arduino hardware design but they innovate either by providing a different layout and features often to better serve a specific market. These are the products that have also helped Arduino become so ubiquitous.
There are many examples but I will mention only a couple:
Teensy by PJRC – Paul has contributed a lot of code, bug reports, pull requests and to the discourse in general.
Flora by Adafruit – Limor has contributed over 100 libraries and countless tutorials about Arduino becoming one of the most important members of the Arduino ecosystem.
- Arduino-compatibles
There is also a hazy cloud of products that call themselves “Arduino-compatible” but their actual compatibility is sometimes really marginal.
We go from products that have a semi-compatible port of the Arduino API but use very different processors, to boards that call themselves an “Arduino” just because they have a couple of connectors mechanically compatible with Arduino.
This, for example, is very common on Kickstarter where a number of projects try to get traction by using (sometimes obsessively) the Arduino keyword throughout the project description. Normally we’re pretty relaxed about these unless they are really shameless, then we email them and sometimes they realize they have gone too far.
- Counterfeits
Finally there is a category of products that are really detrimental to the whole open-source hardware movement, we call these “counterfeits”.
These are boards that clone the official board including the Arduino branding (logo and board graphics). Since the Arduino graphics is trademarked and we don’t release any of the files, whoever uses our graphics and logo makes a deliberate act of Trademark infringement. These products not only trick people into thinking they are buying an official Arduino (therefore supporting the Arduino project) but they also provide no support. We’ve had many reports of people buying these products and finding out they are damaged but unfortunately for them the manufacturer is nowhere to be found to provide a replacement.
The most common place where counterfeits can be found is usually on auction sites. Special mention is needed for Amazon.com because of the way the website works: they pool together all the suppliers of a certain product. When the customer buys an Arduino they might get a counterfeit depending from which stock they used. From our side it’s hard to stop them because if we report a counterfeit Arduino on their platform, they will “kick out” all the suppliers including the legitimate ones. We’re still trying to find ways to communicate with Amazon but it’s not easy.
- We love open-source
We believe firmly in open source hardware and we have always systematically released any hardware design and the software needed to reproduce our products. We think this advances the whole community and provides a platform for shared innovation where the advantages are more than the drawbacks, but we also think that Trademark violations are like identity theft: the same way each one of us wants to have the right to own their name we believe we have the right to decide whoever gets to be called Arduino, everything else is right there on Github for anybody to build upon.
If you’re experimenting with various Arduino or other projects and working with LED matrices or lots of LEDs – you may have come across the Maxim MAX7219 “Serially Interfaced, 8-Digit, LED Display Driver” IC. It’s a great part that can drive an 8 x 8 LED matrix or eight digits of seven-segment LED displays very easily. However over the last few years the price has shot up considerably. Supply and demand doing their thing – and for a while there was also the Austria Microsystems AS1107 drop-in replacement, which could be had for a few dollars less. But no more.
So where does the budget-minded person go from here? Charlieplexing? Lots of shift registers? Or dig a little deeper to find some cheaper units. With a MAX7219 heading north of US$10 in single units, they may turn to ebay or other grey-market suppliers in the Far East. Everyone likes to save money – and who can blame them? However with the proliferation of counterfeiting, “third shift” operations and other shifty practices – is buying those cheaper examples worth it?
A few people have been asking me of late, and there’s only one way to find out … so over the last month I ordered eight random “MAX7219s” from different suppliers on ebay and will compare them to the real thing using somewhat unscientific methods, then see how they work. The funny thing was that after five weeks only six of the eight arrived – so there’s risk number one: if it doesn’t come from a reputable supplier, it might not come at all. Funny stuff. Anyhow, let’s get started by looking at the differences between the real MAX7219 and the others.
Pricing differences
The easiest hint is the price. The non-originals are always cheaper. And if you wonder how much the real ones are in bulk, the quickest indicator is to check the Maxim website and that of a few larger distributors For example the Maxim “sticker price” for 1000 units is US$4.18 each:
How much at Digikey? Lots of 500 for US$4.67 each:
And you wouldn’t buy just one from element14 at this price:
However in fairness to element14 they will price match if you’re buying in volume. So if you can get a “MAX7219″ delivered for US$1.50 – there’s something wrong. Moving on, let’s examine some of those cheap ones in more detail.
Visual differences
If you’ve never seen a real MAX7219 – here it is, top and bottom:
And here’s our rogue’s gallery of test subjects:
In a few seconds the differences should be blindingly obvious – look at the positioning of the printed bar across the part, the printing of the logo, and the general quality and positioning of the printing. Next, those circles embedded in the top of the body at both ends of the part, and the semi-circle at the top end. And if you turn them over, there’s nothing on the bottom. Furthermore, there isn’t a divot indicating pin 1 on the fakes, as shown on the real part:
Oh – did you notice the legs on the real one? Look closely again at the image above, then consider the legs on the others below:
Finally, the non-originals are shorter. The Maxim width can fall between 28.96 and 32.13 mm – with our original test MAX7219 being 32 mm:
and all the test subjects are narrower, around 29.7 mm:
Fascinating. Finally, I found the quality of the metal used for the legs to be worse than the original, they were easier to bend and had trouble going into an IC socket. You can find all the physical dimensions and other notes in the data sheet available from the Maxim website. Finally, this packaging made me laugh – knock-offs in knock-off tubes? (Maxim purchased Dallas Semiconductor a while ago)
Weight difference
Considering that they’re shorter, they must weigh less. In the following video I put the original on the scales, tare it to zero then place each test subject – you can see the difference in weigh. The scales are out a bit however the differences are still obvious:
However over time the manufacturers may go to the effort of making copies that match the weight, size and printing – so future copies may be much better. However you can still fall back to the price to determine a copy.
Do they actually work?
After all that researching and measuring – did they work? One of the subjects came with a small LED matrix breakout board kit:
… so I used that with a simple Arduino sketch that turned on each matrix LED one at a time, then went through the PWM levels – then left them all on at maximum brightness.
void loop()
{
 single();
 for (int n=0; n<5; n++)
 {
 for (int z=0; z<16; z++)
 {
 lc.setIntensity(0,z);
 delay(100);
 }
 for (int z=15; z>-1; --z)
 {
 lc.setIntensity(0,z);
 delay(100);
 }
 }
 lc.setIntensity(0,15);
 do { }  while(1);
}
Here’s the real MAX7219 running through the test:
And test subjects one through to six running it as well:
And from a reader request, some current measurements. First the current used by the entire matrix module at full PWM brightness, then with LEDs off, then the MAX7219 in shutdown mode:
Well that was disheartening. I was hoping and preparing for some blue smoke, dodgy displays or other faults. However the little buggers all worked, didn’t overheat or play up at all.
Conclusion
Six random samples from ebay – and they all worked. However your experience may vary wildly. Does this tell us that copies are OK to use? From my own personal opinion – you do what you have to do with respect to your own work and that for others. In other words – if you’re making something for someone, whether it be a gift or a commercial product, or something you will rely on – use the real thing. You can’t risk a fault in those situations. If you’re just experimenting, not in a hurry, or just don’t have the money – try the cheap option. But be prepared for the worst – and know you’re supporting an industry that ethically shouldn’t exist. And at the end – to be sure you’re getting a real one – choose from a Maxim authorised source.
I’m sure everyone will have an opinion on this, so let us know about it in the moderated comments section below. And if you made it this far – check out my new book “Arduino Workshop” from No Starch Press.
In the meanwhile have fun and keep checking into tronixstuff.com. Why not follow things on twitter, Google+, subscribe for email updates or RSS using the links on the right-hand column? And join our friendly Google Group – dedicated to the projects and related items on this website. Sign up – it’s free, helpful to each other – and we can all learn something.
If you’re experimenting with various Arduino or other projects and working with LED matrices or lots of LEDs – you may have come across the Maxim MAX7219 “Serially Interfaced, 8-Digit, LED Display Driver” IC. It’s a great part that can drive an 8 x 8 LED matrix or eight digits of seven-segment LED displays very easily. However over the last few years the price has shot up considerably. Supply and demand doing their thing – and for a while there was also the Austria Microsystems AS1107 drop-in replacement, which could be had for a few dollars less. But no more.
So where does the budget-minded person go from here? Charlieplexing? Lots of shift registers? Or dig a little deeper to find some cheaper units. With a MAX7219 heading north of US$10 in single units, they may turn to ebay or other grey-market suppliers in the Far East. Everyone likes to save money – and who can blame them? However with the proliferation of counterfeiting, “third shift” operations and other shifty practices – is buying those cheaper examples worth it?
A few people have been asking me of late, and there’s only one way to find out … so over the last month I ordered eight random “MAX7219s” from different suppliers on ebay and will compare them to the real thing using somewhat unscientific methods, then see how they work. The funny thing was that after five weeks only six of the eight arrived – so there’s risk number one: if it doesn’t come from a reputable supplier, it might not come at all. Funny stuff. Anyhow, let’s get started by looking at the differences between the real MAX7219 and the others. (Or if you want to learn how to use the MAX7219 with Arduino – click here).
Pricing differences
The easiest hint is the price. The non-originals are always cheaper. And if you wonder how much the real ones are in bulk, the quickest indicator is to check the Maxim website and that of a few larger distributors For example the Maxim “sticker price” for 1000 units is US$4.18 each:
How much at Digikey? Lots of 500 for US$4.67 each:
And you wouldn’t buy just one from element14 at this price:
However in fairness to element14 they will price match if you’re buying in volume. So if you can get a “MAX7219″ delivered for US$1.50 – there’s something wrong. Moving on, let’s examine some of those cheap ones in more detail.
Visual differences
If you’ve never seen a real MAX7219 – here it is, top and bottom:
And here’s our rogue’s gallery of test subjects:
In a few seconds the differences should be blindingly obvious – look at the positioning of the printed bar across the part, the printing of the logo, and the general quality and positioning of the printing. Next, those circles embedded in the top of the body at both ends of the part, and the semi-circle at the top end. And if you turn them over, there’s nothing on the bottom. Furthermore, there isn’t a divot indicating pin 1 on the fakes, as shown on the real part:
Oh – did you notice the legs on the real one? Look closely again at the image above, then consider the legs on the others below:
Finally, the non-originals are shorter. The Maxim width can fall between 28.96 and 32.13 mm – with our original test MAX7219 being 32 mm:
and all the test subjects are narrower, around 29.7 mm:
Fascinating. Finally, I found the quality of the metal used for the legs to be worse than the original, they were easier to bend and had trouble going into an IC socket. You can find all the physical dimensions and other notes in the data sheet available from the Maxim website. Finally, this packaging made me laugh – knock-offs in knock-off tubes? (Maxim purchased Dallas Semiconductor a while ago)
Weight difference
Considering that they’re shorter, they must weigh less. In the following video I put the original on the scales, tare it to zero then place each test subject – you can see the difference in weigh. The scales are out a bit however the differences are still obvious:
However over time the manufacturers may go to the effort of making copies that match the weight, size and printing – so future copies may be much better. However you can still fall back to the price to determine a copy.
Do they actually work?
After all that researching and measuring – did they work? One of the subjects came with a small LED matrix breakout board kit:
… so I used that with a simple Arduino sketch that turned on each matrix LED one at a time, then went through the PWM levels – then left them all on at maximum brightness.
And test subjects one through to six running it as well:
And from a reader request, some current measurements. First the current used by the entire matrix module at full PWM brightness, then with LEDs off, then the MAX7219 in shutdown mode:
Well that was disheartening. I was hoping and preparing for some blue smoke, dodgy displays or other faults. However the little buggers all worked, didn’t overheat or play up at all.
Conclusion
Six random samples from ebay – and they all worked. However your experience may vary wildly. Does this tell us that copies are OK to use? From my own personal opinion – you do what you have to do with respect to your own work and that for others. In other words – if you’re making something for someone, whether it be a gift or a commercial product, or something you will rely on – use the real thing. You can’t risk a fault in those situations. If you’re just experimenting, not in a hurry, or just don’t have the money – try the cheap option. But be prepared for the worst – and know you’re supporting an industry that ethically shouldn’t exist. And at the end – to be sure you’re getting a real one – choose from a Maxim authorised source.
I’m sure everyone will have an opinion on this, so let us know about it in the moderated comments section below. And if you made it this far – check out my new book “Arduino Workshop” from No Starch Press.
In the meanwhile have fun and keep checking into tronixstuff.com. Why not follow things on twitter, Google+, subscribe for email updates or RSS using the links on the right-hand column? And join our friendly Google Group – dedicated to the projects and related items on this website. Sign up – it’s free, helpful to each other – and we can all learn something.
Planet Arduino is, or at the moment is wishing to become, an aggregation of public weblogs from around the world written by people who develop, play, think on Arduino platform and his son. The opinions expressed in those weblogs and hence this aggregation are those of the original authors. Entries on this page are owned by their authors. We do not edit, endorse or vouch for the contents of individual posts. For more information about Arduino please visit www.arduino.cc
You are currently browsing the archives for the counterfeit category.

 But [Another Maker] goes a bit farther than just showing the internals of the device. He also went through the trouble of figuring out how to talk to it with an Arduino, which makes all sorts of money-grabbing projects possible. Even if collecting paper money isn’t your kind of thing, it’s still interesting to see how this gadget works on a hardware and software level.