Posts | Comments

Planet Arduino

Archive for the ‘cloud’ Category

When we see RGB LEDs used in a project, they’re often used more for aesthetic purposes than as a practical source of light. It’s an easy way to throw some color around, but certainly not the sort of thing you’d try to light up anything larger than a desk with. Apparently nobody explained the rules to [Brian Harms] before he built Light[s]well.

Believe it or not, this supersized light installation doesn’t use any exotic hardware you aren’t already familiar with. Fundamentally, what we’re looking at is a WiFi enabled Arduino MKR1000 driving strips of NeoPixel LEDs. It’s just on a far larger scale than we’re used to, with a massive 4 x 8 aluminum extrusion frame suspended over the living room.
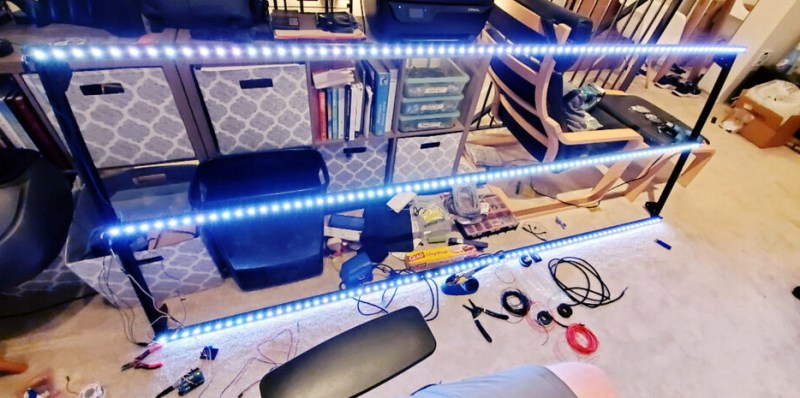
Onto that frame, [Brian] has mounted an undulating diffuser made of 74 pieces of laser-cut cardstock. Invoking ideas of waves or clouds, the light looks like its of natural or even biological origin while at the same time having a distinctively otherworldly quality to it.

The effect is even more pronounced when the RGB LEDs kick in, thanks to the smooth transitions between colors. In the video after the break, you can see Light[s]well work its way from bright white to an animated rainbow. As an added touch, he added Alexa voice control through Arduino’s IoT Cloud service.

While LED home lighting is increasingly becoming the norm, projects like Light[s]well remind us that we aren’t really embracing the possibilities offered by the technology. The industry has tried so hard to make LEDs fit into the traditional role of incandescent bulbs, but perhaps its time to rethink things.


In this short article we are going to have a look at a new exciting feature: theDynamic Dashboard of Arduino IoT Cloud.

Among other things with Arduino IoT Cloud you can create a dashboard to monitor data and interact with your project.

If you want to know more about properties and widgets you can go here

Now it’s possible to arrange the widgets as you like. You can also increase their size and move them around following your needs.

In order to resize them simply drag the small resize handle in the right bottom corner of each widget. This way they become dynamic and the widgets below will adjust and rearrange accordingly.

How to resize properties boxes

For now, Location and String are the only resizable widgets.

If you want to move the properties around just click and drag the title area.

How to move properties boxes

Below you can see the callbacks used in this easy example

void onLatitudeChange() {
  lat = Latitude;
  GPS = {lat, lon};
  Locations += "lat: " + String(lat) + "; " + "lon: " + String(lon) + "\n";
  Movements ++;
}


void onLongitudeChange() {
  lon = Longitude;
  GPS = {lat, lon};
  Locations += "lat: " + String(lat) + "; " + "lon: " + String(lon) + "\n";
  Movements ++;
}

If you want to further experiment on how multi-value properties work here’s an example

References

In this short article, we are going to provide an overview of all the new and exciting features the team has been working on.

Multi-Value Property Types: The first two types implemented are Location and Color. With Color, you can pick a color from the palette (clicking on it) or just show one in a small window. With Location, you can see a pin on a map and move it; furthermore, you can drag the box and make it bigger

The number of property types is huge, allowing you to pick the one that best suits your needs. All the possible values are taken from the SenML standard.

Shadow Thing: If a device happens to disconnect from the Cloud, as soon as it reconnects, the board will get back its previous property values. For example, if a property controls the status of a lamp, and the lamp property is set to on, the light will be kept on when the device comes back online.

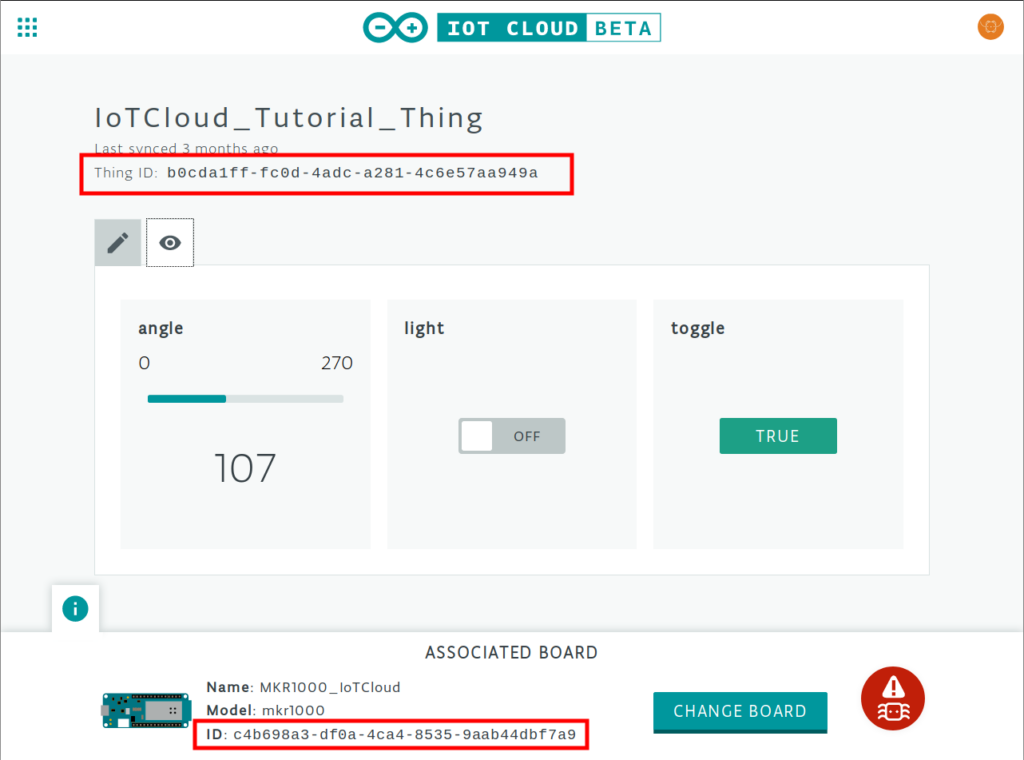
Simply Discover Your Thing ID and Device ID: The panel showing information about its associated board is opened by default, making it easier to read details about the board you are using.

Getting Started Procedure: The procedure is now faster and more reliable, thanks to bug-fixing and a new connection template used in the Cloud_blink sketch.

As previously announced, the Arduino IoT Cloud is an easy to use Internet of Things application platform that enables developers to go from unboxing their board to a working device in just minutes.

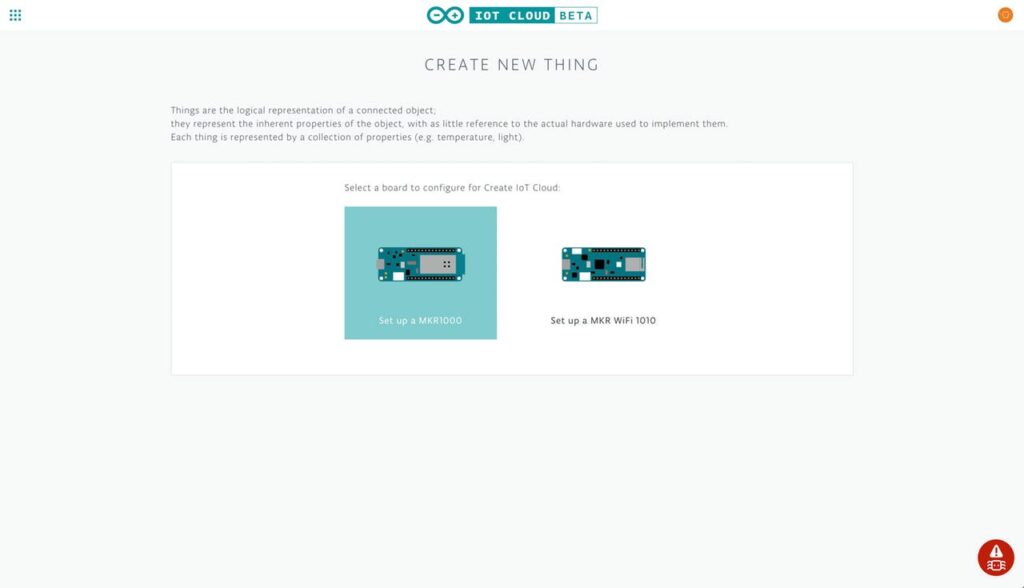
To help you get started, we’ve put together a quick project that’ll walk you through connecting a MKR1000 (or MKR WiFi 1010) to the Arduino IoT Cloud.

By the end of the tutorial, you’ll be able to control and monitor your board over the Internet using the Arduino IoT Cloud site.

First, we’ll add the board to the Arduino IoT Cloud as a Thing — a representation of the board in the cloud. We’ll then give the Thing a set of Properties which represent sensors, LEDs, motors, and many other components in the project that you’ll want to access from the cloud.

Want to see more? You can find the entire step-by-step guide here.

Love it or hate it, for many people embedded systems means Arduino. Now Arduino is leveraging its more powerful MKR boards and introducing a cloud service, the Arduino IoT Cloud. The goal is to make it simple for Arduino programs to record data and control actions from the cloud.

The program is in beta and features a variety of both human and machine interaction styles. At the simple end, you can assemble a dashboard of controls and have the IoT Cloud generate your code and download it to your Arduino itself with no user programming required. More advanced users can use HTTP REST, MQTT, Javascript, Websockets, or a suite of command line tools.

The system relies on “things” like temperature sensors, LEDs, and servos. With all the focus on security now, it isn’t surprising that the system supports X.509 authentication and TLS security for traffic in both directions.

Honestly, we tried it and the web-based IDE couldn’t find our MKR1000 board under Linux. That could be a misconfiguration on our part, but it is frustrating how little information you get from many web-based tools. It decided we had multiple Arduinos connected (we didn’t). Then removing a multiport serial adapter made it see no Arduinos even though there was an MKR1000 Vidor attached.

Naturally, there are plenty of options when it comes to putting devices on the cloud. However, if you are only using Arduino boards, this one is going to be pretty seamless — assuming it works for you.

Fidget spinners — so hot right now!

[Ben Parnas], and co-conspirator in engineering inanity [Greg Daneault], brought to the recent Boston Stupid Hackathon in Cambridge, MA, their IoT-enabled Fidget Spinner…. spinner. A Spidget Finner. Yep, that’s correct: spin the smartphone, and the spinner follows suit. Stupid? Maybe, but for good reason.

Part satire on cloud tech, part learning experience, a curt eight hours of tinkering brought this grotesque, ESP32-based device to life. The ESP can the Arduino boot-loader, but you’ll want to use the ESP-IDF sdk, enabling broader use of the chip.

Creating an app that pulls data from the phone’s gyroscope, the duo set up the spinner-bot to access the WiFi and request packets of rotational data from the smartphone via a cloud-based server — the ‘spincloud.’ Both devices were enabled as clients to circumvent existing IoT services.

[Parnas] stipulates that — theoretically — you could control as many spinners as you can imagine with this setup, but one is quite enough of a silly idea for us. Ridiculous or not — if you learn something, then it’s probably worthwhile! So keep hacking away at those ideas and you might be able to justify it to all the people with concerned stares.

To start, you can tell them you’re in  good company.


Filed under: Android Hacks, Arduino Hacks

If you were sad that Codebender had bit the dust, cheer up. A site called codeanywhere has acquired the online Arduino development environment and brought it back to life. In addition to the main Codebender site, the edu and blocks sites are also back on the air.

Not only is this great news, but it also makes sense. The codeanywhere site is a development IDE in the cloud for many different programming languages. The downside? Well, all the people who said they’d be glad to pay to keep Codebender alive will get a chance to put their money where their mouth is.

Here’s an excerpt from Codebender’s blog:

First of all, codebender will mostly remain the same. It will continue to operate as a standalone service, so you don’t have to change the way you are currently using codebender. However, it will transition to a monthly subscription service. This means that you will be able to use it for free for 1 month (as a trial, beginning on June 1st, or for the first month after registration), and it will then cost $10/month to keep using it. This is the price to pay for keeping codebender alive and sustainable, and it’s a small one, really.

Secondly, Codeanywhere intends to keep adding more and more features, the same way we have been adding features, libraries, and board support in the past few years. So you can expect codebender to keep improving with time, much as it did until now.

We have to wonder how many people will pay $120 / year to do something they can do for free. Mbed has support from ARM and offers a free IDE. Maybe a better deal with Codebender would have been with Atmel or Arduino. Not that we are opposed to charging for services, but we imagine a lot of people will just use free tools unless they have a strong use case for using a cloud-based service.

We covered Codebender’s short-lived demise back in October of last year.


Filed under: Arduino Hacks, news

What’s the best way to image a room? A picture? Hah — don’t be so old-fashioned! You want a LIDAR rig to scan the space and reconstruct it as a 3D point map in your computer.

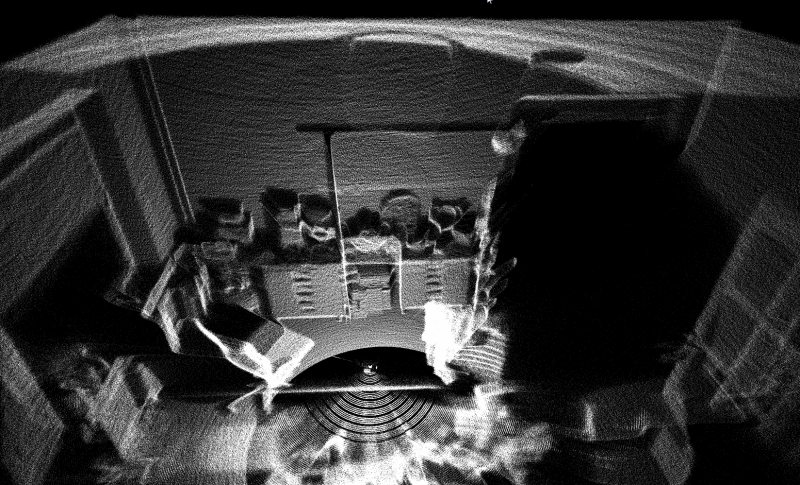
Hot on the heels of [Saulius Lukse]’s scanning thermometer, he’s replaced the thermal camera on their pan/tilt setup with a time-of-flight (TOF) camera — a Garmin LIDAR — capable of 500 samples per second and end up scanning their room in a mere fifteen minutes. Position data is combined with the ranging information to produce a point cloud using Python. Open that file in a 3D manipulation program and you’ll be treated to a sight like this:

That’s an image generated of a 4.7 million point cloud. It’s not perfect, but it’ll certainly do.

[Lukse] laments that the camera requires ideal lighting conditions that make it unsuitable to for a lot of outdoor imaging and is similarly limited to shorter ranges. It also necessitates hauling a laptop around so he’s considering making it an all-in-one package down the road.

Want to more about how LIDAR works? Check out this teardown video of a police speed enforcement LIDAR ‘gun.’ Or have a look at this (faster) completely DIY laser scanner.


Filed under: Arduino Hacks, laser hacks

Beehive connected to internet.Learn how to pull realtime sensor data from a beehive to monitor its weight, temperature, and humidity over the internet.

Read more on MAKE

The post The Internet of Bees: Adding Sensors to Monitor Hive Health appeared first on Make: DIY Projects, How-Tos, Electronics, Crafts and Ideas for Makers.


  • Newsletter

    Sign up for the PlanetArduino Newsletter, which delivers the most popular articles via e-mail to your inbox every week. Just fill in the information below and submit.

  • Like Us on Facebook