Posts | Comments

Planet Arduino

Archive for the ‘animation’ Category

Light painting: there’s something that never gets old about waving lights around in a long exposure photo. Whilst most light paintings are single shots, some artists painstakingly create frame-by-frame animations. This is pretty hard to do when moving a light around by hand: it’s mostly guesswork, as it’s difficult to see the results of your efforts until after the photo has been taken. But what if you could make the patterns really precise? What if you could model them in 3D?

[Josh Sheldon] has done just that, by creating a process which allows animations formed in Blender to be traced out in 3D as light paintings. An animation is created in Blender then each frame is automatically exported and traced out by an RGB LED on a 3D gantry. This project is the culmination of a lot of software, electronic and mechanical work, all coming together under tight tolerances, and [Josh]’s skill really shines.
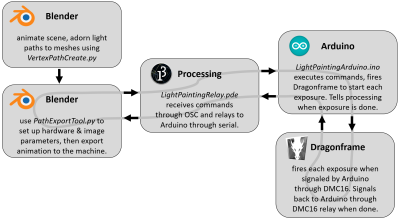
The first step was to export the animations out of Blender. Thanks to its open source nature, Python Blender add-ons were written to create light paths and convert them into an efficient sequence that could be executed by the hardware. To accommodate smooth sliding camera movements during the animation, a motion controller add-on was also written.

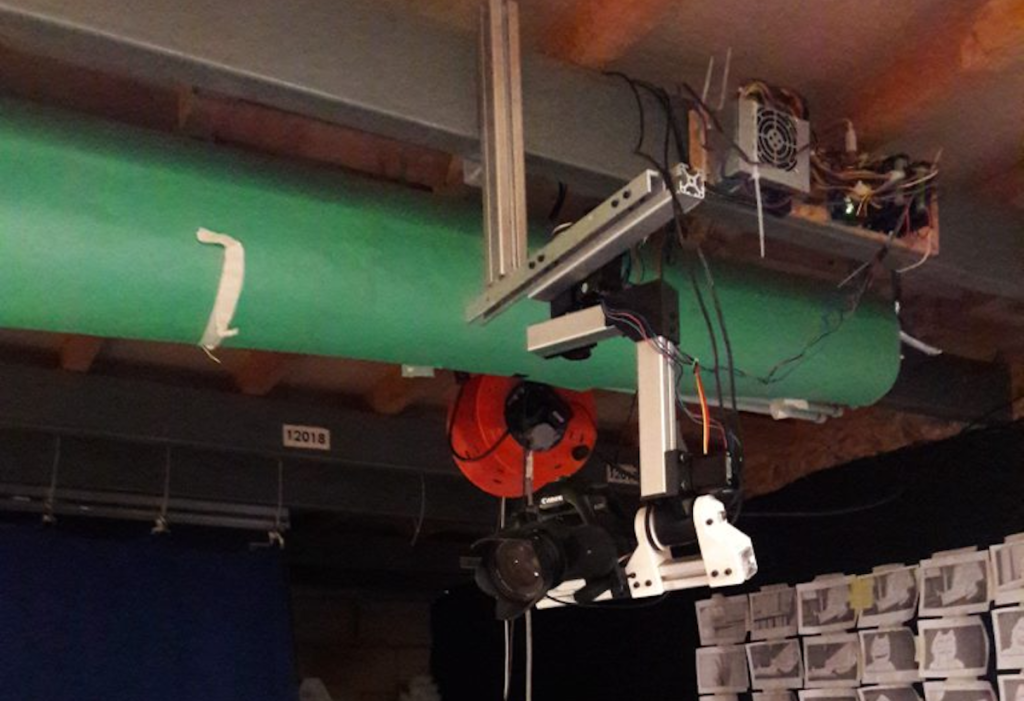
The gantry which carried the main LED was hand-made. We’d have been tempted to buy a 3D printer and hack it for this purpose, but [Josh] did a fantastic job on the mechanical build, gaining a solidly constructed gantry with a large range. The driver electronics were also slickly executed, with custom rack-mount units created to integrate with the DragonFrame controller used for the animation.

The video ends on a call to action: due to moving out, [Josh] was unable to continue the project but has done much of the necessary legwork. We’d love to see this project continued, and it has been documented for anyone who wishes to do so. If you want to check out more of [Josh]’s work, we’ve previously written about that time he made an automatic hole puncher for music box spools.

Thanks for the tip, [Nick].

One can imagine that making a stop motion animation film is a lot of work, but if you’ve ever wondered what one involves, James Wilkinson decided to document the process of making Billy Whiskers: The Mystery of the Misplaced Trowel. 

The main character of this film is a mystery-solving feline, who is animated with the help of five servos that control mouth movements under Arduino control.

In order to get shots that move properly, Wilkinson also came up with his own motion capture rig, moved by a number of stepper motors via an Arduino Mega. His documentation is certainly worth checking out if you’re interested in animatronics or advanced filming techniques, and you can see a trailer for the film below.

Lip syncing for computer animated characters has long been simplified. You draw a set of lip shapes for vowels and other sounds your character makes and let the computer interpolate how to go from one shape to the next. But with physical, real world puppets, all those movements have to be done manually, frame-by-frame. Or do they?

Billy Whiskers: animatronic puppet

Stop motion animator and maker/hacker [James Wilkinson] is working on a project involving a real-world furry cat character called Billy Whiskers and decided that Billy’s lips would be moved one frame at a time using servo motors under computer control while [James] moves the rest of the body manually.

He toyed around with a number of approaches for making the lip mechanism before coming up with one that worked the way he wanted. The lips are shaped using guitar wire soldered to other wires going to servos further back in the head. Altogether there are four servos for the lips and one more for the jaw. There isn’t much sideways movement but it does enough and lets the brain fill in the rest.

On the software side, he borrows heavily from the tools used for lip syncing computer-drawn characters. He created virtual versions of the five servo motors in Adobe Animate and manipulates them to define the different lip shapes. Animate then does the interpolation between the different shapes, producing the servo positions needed for each frame. He uses an AS3 script to send those positions off to an Arduino. An Arduino sketch then uses the Firmata library to receive the positions and move the servos. The result is entirely convincing as you can see in the trailer below. We’ve also included a video which summarizes the iterations he went through to get to the finished Billy Whiskers or just check out his detailed website.

[Jame’s] work shows that there many ways to do stop motion animation, perhaps a part of what makes it so much fun. One of those ways is to 3D print a separate object for each character shape. Another is to make paper cutouts and move them around, which is what [Terry Gilliam] did for the Monty Python movies. And then there’s what many of us did when we first got our hands on a camera, move random objects around on our parent’s kitchen table and shoot them one frame at a time.

petduino1The Tamagotchi is a thing of the past. Bring your virtual pet into the 21st century with LEDs and an Arduino-compatible processor.

Read more on MAKE

The post Petduino Is the DIY Tamagotchi You Can Hack appeared first on Make: DIY Projects, How-Tos, Electronics, Crafts and Ideas for Makers.

Aug
04
red-paper-heart-coin-slotYoutube may have started monetizing digital videos long ago, but now the folks at Red Paper Heart have come up with a new way to monetize the digital moving image with their prototype for a coin activated projection.

Read more on MAKE

Sep
03
Picture used with permission form @sbbrainI have to admit, I love LED, who doesn't. But when i came across this awesome Instructable from user Sbbrain I started to go nuts.

Read more on MAKE

May
28

Arduino particle light box generates animations from sound

8x8, animation, arduino hacks, led hacks, matrix, sound Comments Off on Arduino particle light box generates animations from sound 

arduino-particle-display

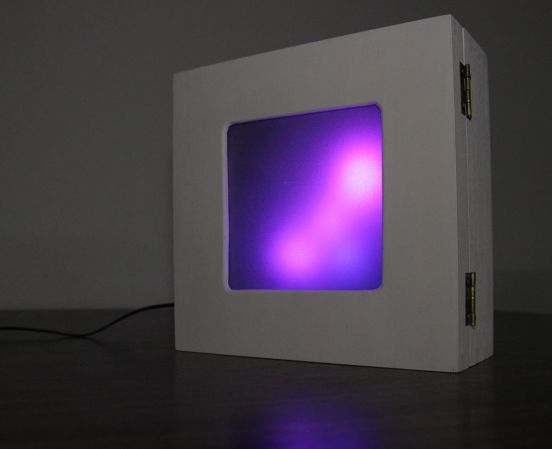
Simple tools used well can produce fantastic results. The hardware which [Gilad] uses in this project is the definition of common. We’d bet you have most if not all of them on hand right now. But the end product is a light box which seems to dance and twirl with every sound in the room. You should go watch the demo video before reading the bill of materials so that the simplicity doesn’t spoil it for you.

A wooden craft box serves as the enclosure. Inside you’ll find an Arduino board, microphone, and an 8×8 RGB module. The front cover of the project box diffuses the light using a sheet of tracing paper on a frame of foam board. It’s the code that brings everything together. He wrote his own particle system library to generate interesting animations.

If you don’t have a project box on hand this might work with an extra-deep picture frame.


Filed under: Arduino Hacks, led hacks


  • Newsletter

    Sign up for the PlanetArduino Newsletter, which delivers the most popular articles via e-mail to your inbox every week. Just fill in the information below and submit.

  • Like Us on Facebook