Posts | Comments

Planet Arduino

Archive for the ‘Yun’ Category

Since its launch in 2013, the Yùn–a small Linux machine and a microcontroller in a small Arduino form factor–found its way into hundreds of thousands of projects and professional applications. Last year, we decided that it was time for a refresh and began working hard to develop a true open-source design, with more compelling features and better overall software support.

The new board, which is expected to hit the market in the second half of April, will include enhanced functionality and compatibility with its predecessor.

Why a New Yùn

The Yùn enjoyed tremendous success; however, it ended up being affected by the internal issues we dealt with over the past couple of years and support has been quite intermittent.

For example, the board was never really an open-source product and the software had some challenges that we wanted to fix, especially from a security point of view.

What’s New in Rev.2

Hardware:  

  • Much better, more robust power supply
  • New Ethernet connector with a clever mounting solution that enables the use of all possible shields with no risk for accidental short circuits
  • Horizontal USB connector to save vertical space
  • Improved USB hub

Software: 

  • Software stack updated to OpenWRT latest version, including all patches
  • SSL support on the bridge Arduino / Linux bridge

Yùn Rev.2 is scheduled to begin shipping in April. Until then, you can stay up-to-date by clicking “NOTIFY ME” on our store

Hacker “wesgood,” apparently not satisfied with randomly checking the office coffee pot to see if a fresh brew was available, decided to make his own notification system.

His device uses a current sensor to monitor power usage of the coffee pot, and after some observation, he was able to pick out its brewing pattern—7A at 10 minutes, then quick cycling to keep the pot warm.

The system features an Arduino Yún for brew tracking and sends an alert via his office communication tool to let everyone know that a fresh pot is ready. As with many projects, the first iteration started life on a breadboard, but now exists on a manufactured PCB as a shield. It even has a second channel that is slated for use with the office kettle.

Once the Arduino side of the Yún detects the brew cycle is complete, it triggers a shell script under Linux that sends a notification to our office communication tool Hipchat. It also records the data about date and cycle stage so that Hipchat can query the database (on a webserver) and request things like what stage the brew cycle is on and when it brewed last.

You can find additional build details on Imgur.

With some projects, your goal is to get it working to prove out a concept for a larger project, or simply to satisfy your curiosity. On the other hand, sometimes you want your creation to look great. That was the case here, as this electromechanical clock integrates several different types of metal along with a chain drive into something that’s as much a work of art as it is a practical timekeeping tool.

Upon startup, the device is able to auto-calibrate using a clever sensor setup on the hour hand wheel to make sure it’s at 12:00 noon/midnight, then uses the Arduino Yún‘s built-in WiFi support to check the time off of the Internet and configure itself accordingly.

This clock was designed, machined and assembled, every piece from scratch (apart from a couple of the small chain sprockets and chains themselves). The timekeeping and motor/position control software was also developed and programmed 100% from scratch as well. All the parts are made out of a combination of copper, brass, steel, aluminum, and stainless, and the assembly is driven by an Arduino Yún running a NEMA style stepper motor, and Honeywell automation Hall effect sensors for the mechanical position readings.

You can find more details in the video seen below, and on its creator’s Reddit post.

“I’m a big fan of digital music, especially Spotify. The ability to dial-up a much loved song I’ve not heard for ages or discover new music are just some of the benefits I never tire of,” writes UK-based designer Brendan Dawes. “Yet the lack of physicality to this digital medium has always left me wanting. I still own vinyl and a turntable and I love the ritual of physically flicking through what to place on the platter and then wait for the needle to drop on the spinning vinyl.”

To bridge the gap between the digital and analog worlds, Dawes decided to create what he calls the “Plastic Player.” The playful interface features a Raspberry Pi running Pi MusicBox connected to his 50-year-old B&O stereo, and an Arduino Yún with an NFC shield.

The “albums” themselves are made from a box of slide mounts with tiny NFC stickers on the back. When Dawes drops one in place, the Arduino identifies the tag, matches it to a specific record, turns on a backlight, and then communicates via WiFi with the Pi MusicBox API to play the tunes.

Removing the cartridge from the device pauses the track. But that’s not all. There are also three buttons on top, which can be used to skip, go back, or stop a song.

It’s often easy to romanticise the past, convincing ourselves that things were better back then when really I think that’s just not the case. I’ve discovered way more music since moving to Spotify then I ever did in record shops. What I do like though is the physicality of choosing an album to play and this system is an attempt to blend the good parts of both worlds. The future will continue to be digitised and I embrace that, but I think there’s a space in between the digital and the analog to create interactions that are filled with the inconvenience of what it is to be human.

You can read more about the Plastic Player on Dawes’ website, and see it in action below!

(Photos: Brendan Dawes)

We’ve been waiting for this one. A worm was written for the Internet-connected Arduino Yun that gets in through a memory corruption exploit in the ATmega32u4 that’s used as the serial bridge. The paper (as PDF) is a bit technical, but if you’re interested, it’s a great read.

The crux of the hack is getting the AVR to run out of RAM, which more than a few of us have done accidentally from time to time. Here, the hackers write more and more data into memory until they end up writing into the heap, where data that’s used to control the program lives. Writing a worm for the AVR isn’t as easy as it was in the 1990’s on PCs, because a lot of the code that you’d like to run is in flash, and thus immutable. However, if you know where enough functions are located in flash, you can just use what’s there. These kind of return-oriented programming (ROP) tricks were enough for the researchers to write a worm.

In the end, the worm is persistent, can spread from Yun to Yun, and can do most everything that you’d love/hate a worm to do. In security, we all know that a chain is only as strong as its weakest link, and here the attack isn’t against the OpenWRT Linux system running on the big chip, but rather against the small AVR chip playing a support role. Because the AVR is completely trusted by the Linux system, once you’ve got that, you’ve won.

Will this amount to anything in practice? Probably not. There are tons of systems out there with much more easily accessed vulnerabilities: hard-coded passwords and poor encryption protocols. Attacking all the Yuns in the world wouldn’t be worth one’s time. It’s a very cool proof of concept, and in our opinion, that’s even better.

Thanks [Dave] for the great tip!


Filed under: Arduino Hacks, security hacks

Twitter is not only a convenient way to consume daily news and converse with friends online, it has become an excellent platform for gaining insight on what’s important at any particular moment in time. With this in mind, Maker Chadwick John Friedman has decided to harness the social network’s data into web-connected physical representations with the help of Arduino and Temboo.

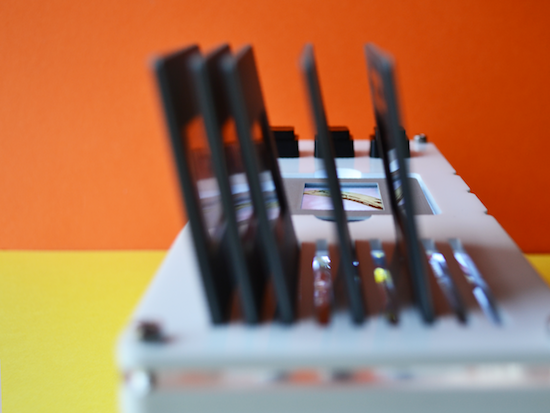
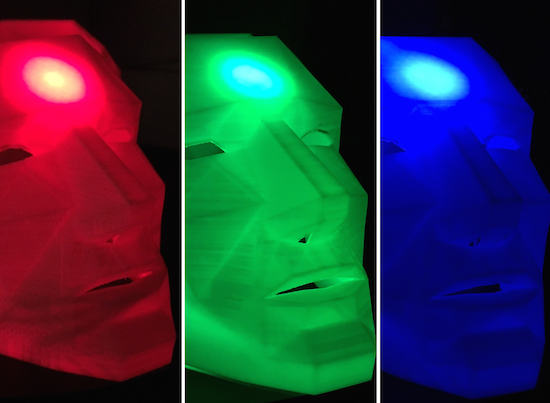
PrecogNation uses three 3D-printed geometric masks as real-time sci-fi future forecasters, which illuminate and change colors to reflect sustainability trends throughout the world.

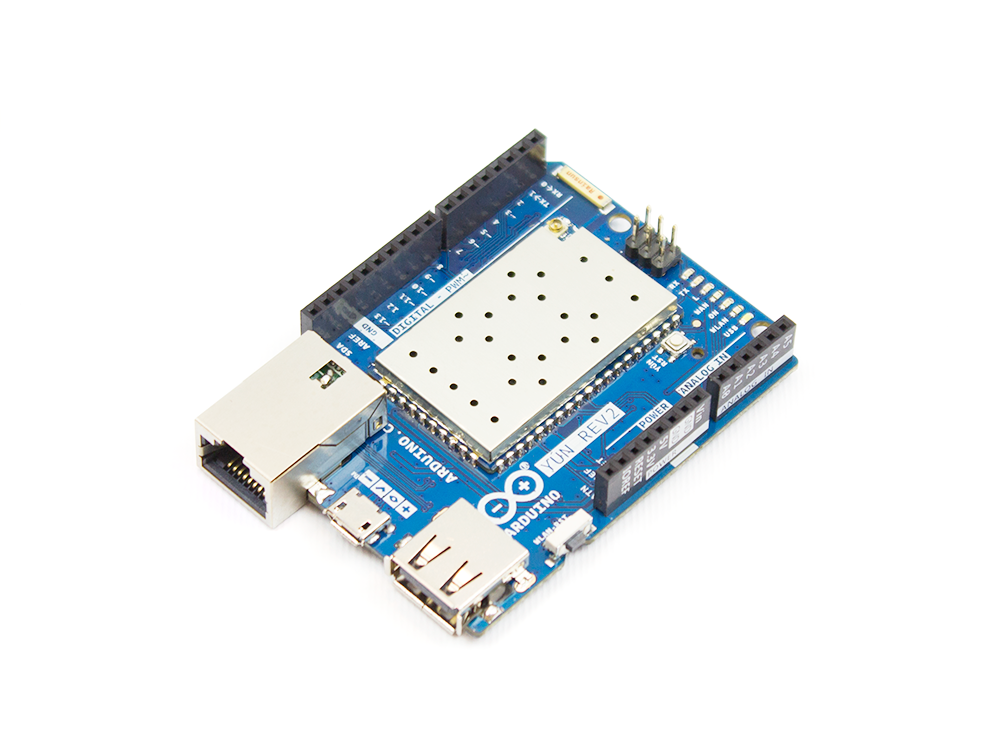
The three geometric 3D-printed masks are wirelessly connected to the Internet via an Arduino Yún. The masks were printed using a Zortrax 3D printer and white Z-ABS filament. The masks are a remixed version of Stephen Kongsle’s “Low Poly Mask.” Each mask took approximately 16 hours to print. The masks are constantly scraping data from Twitter in real-time via Temboo Choreos. Temboo assigns special API keys for Arduino devices that allow the user grab real-time data from Twitter that would otherwise be difficult to gather. That live data is then fed to the Arduino Yún, which illuminates a specific 10mm super bright LED, connected to the masks.

One of the largest challenges in representing this overload of data physically was finding the correct terms and/or keywords that activate a specific color/thought in the Precog’s faces. The three colors present in the faces are scraping the Twitterverse for terms relating to sustainability, environmental threats, and political involvement. PrecogNation has its very own Twitter account, which allows the masks to scan through data specifically submitted by sustainability related users, corporations, and initiatives.

As seen in the video below, progress in sustainable development (green) is represented by keywords such as renewable energy, clean coal, water treatment and wind turbines. Threats to sustainability (red) include deforestation, global warming, record heat, extinction, pollution, pandemics and so on. Meanwhile, blue denotes an overload of data and contradicting results.

The overload of data in the color blue works like this… say the word ‘polar’ is found, but then the words ‘melting-polar’ are found, followed by the words ‘polar bear.’ This is an unreadable thread of information – it’s not really giving us threats or progress related to sustainability so the face reflects the color blue to signify that confusion. Coming up with the correct terms to represent the overload of information was especially tricky, and writing the code to reflect that confusion was equally as challenging. I eventually found a series of keywords and demands that elicited the response I was hoping for in this category.

It is important to highlight the fact that although the colors red and blue may be perceived as negative (and usually appear more than the color green), they also mean that there are discussions about those negative sustainability issues happening every time those colors are activated. This is, in fact, a positive outcome, as one of the main goals of this project is to highlight the importance maintaining a dialogue – even if that dialogue surrounds daunting threats to sustainability. It is important that the masks provoke a highlighted continuation of focus surrounding social and political sustainability issues.

You can read all about the project on PrecogNation’s page.

IMG_2899-1024x768

What happens when a creative technologist wants his family to know he’s thinking about them? He creates a project with Arduino Yún! IMissYou is a simple project transforming a picture in a connected object thanks to a capacitive layer made with Bareconductive Paint and inserted behind the photo. The ‘touch’ is detected by the Arduino through the glass of the frame by a spike in the values (with a basic Capsense library), sent to the internet via wi-fi and delivered to a phone with Pushover.

IMG_0146-1024x768

Martin Hollywood, the Arduino user who made  the project, wrote us:

Looking at the photograph of my family that I have on my desk one day, I missed them and wanted to be home. I touched the photo and realised that somewhere between those was the germ of the idea…

I wanted my family to know I was thinking of them, but I didn’t want to create two products; think GoodNight Lamp – I do love that project. In any case, there was no guarantee they would even notice a ‘blinking’ photo frame responding to my signal. Making the Receive a PUSH notification seemed like a no brainer, but the last time I developed for mobile was iOS 1! There are a number of service apps out there: Pusher, Pushingbox but I decided on Pushover. It had a 7 day trial period and good API support (I’ve since bought a license).

Take a look at his blog for more details and if you want to give him some tips to make it a real product.

wetterhaus

The “Enchanted Cottage” is a project by Andy Clark with the aim of upgrading a traditional  german “wetter haus”  with a new mechanism and electronics running on Arduino Yún:

The mechanics were replaced with a servo and 3D printed parts designed to make the movement linear rather than arcing as in the traditional approach. The figures were fitted with magnets so that they could move without any obvious form of propulsion.
The electronics were based on an Arduino Yún, custom prototyping shield and an Infineon RGB LED driver shield. The whole thing is powered by a rechargable LiPo battery and a module from AdaFruit. Because the Arduino was deep in the middle of the house, I used fibre optics to bring the light to the top panel. A sensor was added into the roof so you could simply tap it to get it to update the forecast for you.

The project was build over a period of 16 weeks, the mechanical aspects were completed first and the 3D printing took several goes to get it right. The electronics build was fairly straightforward but fitting everything onto the proto shield was challenging and the high clearance for the Yún was also a challenge. The software was written as I went along with demo programs created to test each part. Getting the Yún to work on low power was fairly straightforward but getting a secure and validated HTTPS connection took a few attempts. tried to put as much of the processing into the Python script so that the C++ code was just handling the control. All in all a challenging project that pushed the Yún to it’s limits.

Learn more about the project on Andy’s blog.

Infomatic-1024x724

Aug
05

Build an IoT Gauge with Arduino Yún and IFTTT

arduino, Featured, Fritzing, gauge, IFTTT, iot, lasercut, tutorial, uno, Yun Comments Off on Build an IoT Gauge with Arduino Yún and IFTTT 

gauge

Tomas Amberg shared with us the link to an Instructable he published on how to build a Web-enabled, Arduino-based IoT Gauge with a REST API, and connect it to the IFTTT mash-up platform, via the Yaler.net relay service he founded.

The cool thing about this project is the connection with the Maker Channel  of IFTTT which supports custom Webhooks, to integrate DIY IoT projects: 

Inspired by WhereDial, a DIY Internet of Things classic, the IoT Gauge shows the current location of its owner. A bit like the Weasley Clock in Harry Potter. The design and code of the IoT Gauge is generic and could be used as well to display e.g. weather conditions. The logic resides in the Cloud, the gauge is just a servo with an API.

Check out the five-step tutorial and the ingredients you need at this link.

gauge-servo

Jul
23

Make Batman dance at the rythm of a gas sensor

arduino, Arduino Yún, Featured, tutorial, Yun Comments Off on Make Batman dance at the rythm of a gas sensor 

relayr-cloud

If you feel like experimenting with connected objects, a good idea could be to start from a funny project explained step-by-step in a tutorial. In the video below you can follow the instructions given by Dana, Documentation Hero at relayr, using an Arduino Yún, a gas sensor and relayr cloud to make a little Batman-shaped toy dance according to data:

I used a moisture sensor as an input and a servo motor as an output that I can control through a demo web application made using the browser-sdk.

The code in this repository will enable you to use your Arduino to build a prototype of a device and connect it to the relayr platform, much like the one created with the Particle.io Photon. It contains instructions and a demo app which will make your first few steps in the relayr-Arduino prototyping realm easy and fun!


  • Newsletter

    Sign up for the PlanetArduino Newsletter, which delivers the most popular articles via e-mail to your inbox every week. Just fill in the information below and submit.

  • Like Us on Facebook