
19
Kit review – Protostack ATmega32 Development Kit
ATmega, atmega32, atmega32a, atmel, AVR, board, competition, development, education, Electronics, kit, kit review, Microcontroller, microcontrollers, protostack, review, tronixstuff, usbasp Comments Off on Kit review – Protostack ATmega32 Development Kit
Introduction
For those of you prototyping with larger Atmel AVR microcontrollers such as the ATmega32, it can be inconvenient to continually assemble a circuit onto a solderless breadboard that includes power, programming header and a few basics – or you might want to create a one-off product without waiting for a PCB to be made. If these are issues for you, or you’re interested in working with AVRs then the subject of this review may be of interest – the ATmega32 Development Kit from Protostack. The kit is one of a range that spans from the ATmega8, and gives you almost everything needed to work with the microcontroller. We’ve assembled and experimented with the ATmega32 kit, so read on to find out more.
Assembly
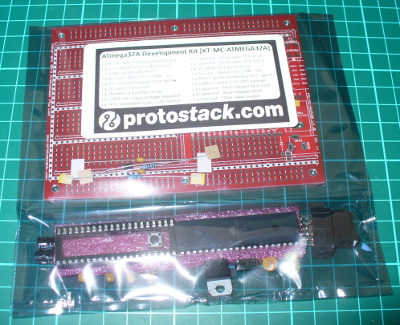
The kit arrives in a typical anti-static package with the contents and URL on the front:
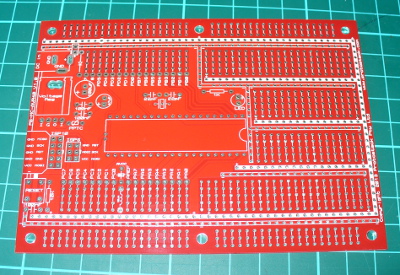
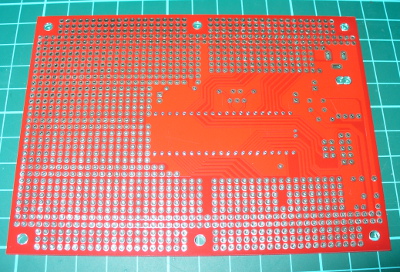
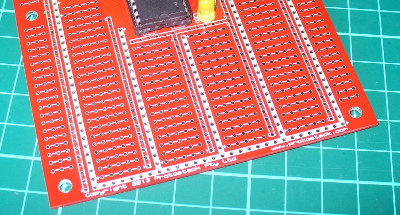
The PCB is large, measuring 127 x 94 mm, made from heavy 1.6 mm FR4 PCB and all the holes are through-plated. And as you can see from the images below, there’s plenty of prototyping space and power/GND rails:
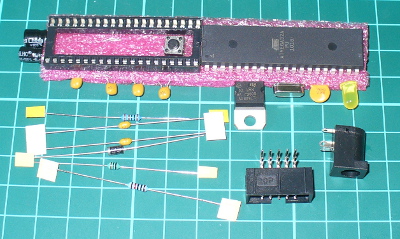
The included parts allow you to add a power supply, polyfuse, smoothing capacitors for the power, programmer socket, external 16 MHz crystal, a DC socket, IC socket, a lonely LED and of course the ATmega32A (which is a lower-power version of the ATmega32):
You can download the user guide from the product page, which details the board layout, schematic and so on. When soldering the parts in, just start with the smallest-profile parts first and work your way up. There’s a few clever design points, such as power regulator – there’s four holes so you can use both “in-GND-output” and “GND-output-input” types:

… and the layout of the prototyping areas resemble that of a solderless breadboard, and the power/GND rails snake all around – so transferring projects won’t be difficult at all:
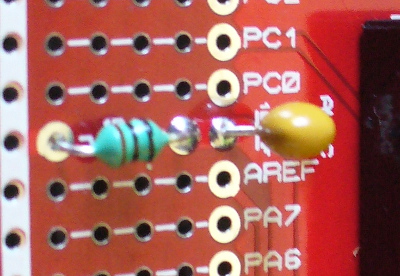
If you need to connect the AVcc to Vcc, the components and board space are included for a low-pass filter:
And if you get carried away and need to use two or more boards at once – they’re stackable:

Moving forward
After assembling the board and inserting the ATmega32, you can use an AVR programmer to check it’s all working (and of course program it). With a 10-pin interface USBASP inserted, I headed over to the AVRdude folder on my PC and entered:
avrdude -c usbasp -p m32
which (as all was well) resulted with:

Awesome – it’s nice to have something that just works. Let the experimenting begin!
Competition
Would you like the chance to win a kit? It’s easy. Clearly print your email address on a postcard, and mail it to:
Protostack Competition, PO Box 5435, Clayton 3168, Australia
Entries must be received by the 4th of August 2013. One postcard will then be drawn at random, and the winner will receive one ATmega32 kit delivered by Australia Post standard air mail. You can enter as many times as you like. We’re not responsible for customs or import duties, VAT, GST, postage delays, non-delivery or whatever walls your country puts up against receiving inbound mail.
Conclusion
It’s a solid kit, the PCB is solid as a rock, and it worked. However it could really have used some spacers or small rubber feet to keep the board off the bench. Otherwise the kit is excellent, and offers a great prototyping area to work with your projects. If you order some, Protostack have a maximum delivery charge of $9 so you won’t get burned on delivery to far-flung places. Larger photos available on flickr. And if you made it this far – check out my new book “Arduino Workshop” from No Starch Press.

Please note that the ATMEGA32A Development Kit in this review is a promotional consideration from Protostack.
In the meanwhile have fun and keep checking into tronixstuff.com. Why not follow things on twitter, Google+, subscribe for email updates or RSS using the links on the right-hand column? And join our friendly Google Group – dedicated to the projects and related items on this website. Sign up – it’s free, helpful to each other – and we can all learn something.


