Posts | Comments

Planet Arduino

Archive for the ‘Medical hacks’ Category

CPAP (Continuous Positive Airway Pressure) machines can be life-changing for people with sleep apnea. [Scott Clandinin] benefits from his CPAP machine and devised a way to improve his quality of life even further with a non-destructive modification to monitor his machine’s humidifier.

With a CPAP machine, all air the wearer breathes is air that has gone through the machine. [Scott]’s CPAP machine has a small water reservoir which is heated to humidify the air before it goes to the wearer. However, depending on conditions the water reservoir may run dry during use, leading to the user waking up dried out and uncomfortable.

To solve this in a non-invasive way that required no modifications to the machine itself, [Scott] created a two-part device. The first part is a platform upon which the CPAP machine rests. A load cell interfaced to an HX711 Load Cell Amplifier allows an Arduino Nano to measure the mass of the CPAP machine plus the integrated water reservoir. By taking regular measurements, the Arduino can detect when the reservoir is about to run dry and sound an alarm. Getting one’s sleep interrupted by an alarm isn’t a pleasant way to wake up, but it’s much more pleasant than waking up dried out and uncomfortable from breathing hot, dry air for a while.

The second part of the device is a simple button interfaced to a hanger for the mask itself. While the mask is hung up, the system is idle. When the mask is removed from the hook, the system takes measurements and goes to work. This makes activation hassle-free, not to mention also avoids spurious alarms while the user removes and fills the water reservoir.

Non-invasive modifications to medical or other health-related devices is common, and a perfect example of nondestructive interfacing is the Eyedriveomatic which won the 2015 Hackaday Prize. Also, the HX711 Load Cell Amplifier has an Arduino library that was used in this bathroom scale refurb project.


Filed under: Arduino Hacks, Medical hacks, The Hackaday Prize

These days we are a little spoiled. There are many sensors you can grab, hook up to your favorite microcontroller, load up some simple library code, and you are in business. When [Raivis] got a MAX30100 pulse oximeter breakout board, he thought it would go like that. It didn’t. He found it takes a lot of processing to get useful results out of the device. Lucky for us he wrote it all down with Arduino code to match.

A pulse oximeter measures both your pulse and the oxygen saturation in your blood. You’ve probably had one of these on your finger or earlobe at the doctor’s office or a hospital. Traditionally, they consist of a red LED and an IR LED. A detector measures how much of each light makes it through and the ratio of those two quantities relates to the amount of oxygen in your blood. We can’t imagine how [Karl Matthes] came up with using red and green light back in 1935, and how [Takuo Aoyagi] (who, along with [Michio Kishi]) figured out the IR and red light part.

The MAX30100 manages to alternate the two LEDs, regulate their brightness, filter line noise out of the readings, and some other tasks. It stores the data in a buffer. The trick is: how do you interpret that buffer?

[Raivis] shows the code to take the output from the buffer, remove the DC component, pass it through a couple of software filters, and detect the heart rate. To read the oxygen reading, you have even more work to do. You can find the code for the device on GitHub.

If you want to build your own without a dedicated IC, grab a clothespin. Or try this more polished build.


Filed under: Arduino Hacks, Medical hacks

[Diego Marino] and his colleagues at the Politecnico di Torino (Polytechnic University of Turin, Italy) designed a prototype that allows for patients with motor deficits, such as spinal cord injury (SCI), to do rehabilitation via Functional Electrical Stimulation. They devised a system that records and interprets muscle signals from the physiotherapist and then stimulates specific muscles, in the patient, via an electro-stimulator.

The acquisition system is based on a BITalino board that records the Surface Electromyography (sEMG) signal from the muscles of the physiotherapist, while they perform a specific exercise designed for the patient’s rehabilitation plan. The BITalino uses Bluetooth to send the data to a PC where the data is properly crunched in Matlab in order to recognize and to isolate the muscular activity patterns.

After that, the signals are ‘replayed’ on the patient using a relay-board connected to a Globus Genesy 600 electro-stimulator. This relay board hack is mostly because the Globus Genesy is not programmable so this was a fast way for them to implement the stimulator. In their video we can see the muscle activation being replayed immediately after the ‘physiotherapist’ performs the movement. It’s clearly a prototype but it does show promising results.

It reminds us of the Myoelectric Hand, with humans instead. We featured an EMG tutorial a while back for those curious about this topic. Without taking the merit out of excellent and needed medical research, we all wait for the day that all our bio-signals can be easy read and translated to, let’s say, a huge avatar robot like METHOD-2. Right? Right?…


Filed under: Arduino Hacks, Medical hacks

What with wearable tech, haptic feedback, implantable devices, and prosthetic limbs, the boundary between man and machine is getting harder and harder to discern. If you’re going to hack in this space, you’re going to need to know a little about electromyography, or the technique of sensing the electrical signals which make muscles fire. This handy tutorial on using an Arduino to capture EMG signals might be just the thing.

In an article written mainly as a tutorial to other physiatrists, [Dr. George Marzloff] covers some ground that will seem very basic to the seasoned hacker, but there are still valuable tidbits there. His tutorial build centers around a MyoWare Muscle Sensor and an Arduino Uno. The muscle sensor has snap connectors for three foam electrodes of the type used for electrocardiography, and outputs a rectified and integrated waveform that represents the envelope of the electrical signal traveling to a muscle. [Dr. Marzloff]’s simple sketch just reads the analog output of the sensor and lights an LED if it detects a muscle contraction, but the sky’s the limit once you have the basic EMG interface. Prosthetic limbs, wearable devices, diagnostic tools, virtual reality — the possibilities are endless.

We’ve seen a few EMG interfaces before, mainly of the homebrew type like this audio recorder recruited for EMG measurements. And be sure to check out [Bil Herd]’s in-depth discussion of digging EMG signals out of the noise.


Filed under: Arduino Hacks, Medical hacks

For most of us, our touch-screen smartphones have become an indispensable accessory. Without thinking we tap and swipe our way through our digital existence, the promise of ubiquitous truly portable computing has finally been delivered.

Smartphones present a problem though to some people with physical impairments. A touchscreen requires manual dexterity on a scale we able-bodied people take for granted, but remains a useless glass slab to someone unable to use their arms.

LipSync is a project that aims to address the problem of smartphone usage for one such group, quadriplegic people. It’s a mouth-operated joystick for the phone’s on-screen cursor, with sip-and-puff vacuum control for simulating actions such as screen taps and the back button.

To the smartphone itself, the device appears as a standard Bluetooth pointing device, while at its business end the joystick and pressure sensor both interface to a Bluetooth module through an Arduino Micro. The EAGLE board and schematic files are available on the project’s hackaday.io page linked above, and there is a GitHub repository for the code.

Technology is such a part of our lives these days, and it’s great to see projects like this bridge the usability gaps for everyone.  Needless to say, it’s a perfect candidate for the Assistive Technology round of the Hackaday Prize.


Filed under: Arduino Hacks, Medical hacks, The Hackaday Prize

Hard as it is to imagine, lie detectors have been sold as children’s toys for a number of years. A simple battery-operated device clipped to your fingers and would show the conductivity of your skin. The concept — which is probably not very reliable — observers that lying causes you to imperceptibly sweat which causes a sudden increase in your skin’s conductivity. These cheap toys would have a meter and you’d note the meter deflection to determine if the subject was lying.

You can debate the amusement value of interrogating your friends, perhaps, but they were pretty common and still exist (including some that shock you if they detect you are lying). Seventeen-year-old [BuildIt] has his own modern take on this classic device using — what else? — an Arduino. You can see a video of the device below.

fvb06bzirsuey29-largeOf interest is how he used the latest version of the Arduino IDE to visualize the data graphically (see right). This is easier than interpreting a bunch of numbers scrolling by on the serial terminal or having to import the data into a spreadsheet. You can find the graph under the Tools menu listed as Serial Plotter.

You don’t need a lot of external parts for this project, although the finger clips and the cardboard box will take a little mechanical skill to complete.

We’ve looked at galvanic skin response and other biosignal processing before. You can do a lot more if you build a little more hardware.


Filed under: Arduino Hacks, Medical hacks

Lots of us get to take home a little e-waste from work once in a while to feed our hacking habits. But some guys have all the luck and score the really good stuff, which is how these robotic surgical tools came to be gesture controlled.

The lucky and resourceful hacker in this case is one [Julien Schuermans], who managed to take home pieces of a multi-million dollar da Vinci Si surgical robot. Before anyone cries “larcency”, [Julien] appears to have come by the hardware legitimately – the wrist units of these robots are consumable parts costing about $2500 each, and are disposed of after 10 procedures. The video below makes it clear how they interface with the robot arm, and how [Julien] brought them to life in his shop. A quartet of Arduino-controlled servos engages drive pins on the wrist and rotates pulleys that move the cables that drive the instruments. A neat trick by itself, but when coupled with the Leap Motion controller, the instruments become gesture controlled. We’re very sure we’d prefer the surgeon’s hands on a physical controller, but the virtual control is surprisingly responsive and looks like a lot of fun.

When we talk about da Vinci around here, it’s usually in reference to 3D printers or a Renaissance-style cryptex build. Unsurprisingly, we haven’t featured many surgical robot hacks – maybe it’s time we started.

[via r/arduino]


Filed under: Arduino Hacks, Medical hacks

Chances are pretty good you’ve had a glowing probe clipped to your fingertip or earlobe in some clinic or doctor’s office. If you have, then you’re familiar with pulse oximetry, a cheap and non-invasive test that’s intended to measure how much oxygen your blood is carrying, with the bonus of an accurate count of your pulse rate. You can run down to the local drug store or big box and get a fingertip pulse oximeter for about $25USD, but if you want to learn more about photoplethysmography (PPG), [Rajendra Bhatt]’s open-source pulse oximeter might be a better choice.

PPG is based on the fact that oxygenated and deoxygenated hemoglobin have different optical characteristics. A simple probe with an LED floods your fingertip with IR light, and a photodiode reads the amount of light reflected by the hemoglobin. [Rajendra]’s Easy Pulse Plugin receives and amplifies the signal from the probe and sends it to a header, suitable for Arduino consumption. What you do with the signal from there is up to you – light an LED in time with your heartbeat, plot oxygen saturation as a function of time, or drive a display to show the current pulse and saturation.

We’ve seen some pretty slick DIY pulse oximeters before, and some with a decidedly home-brew feel, but this seems like a good balance between sophisticated design and open source hackability. And don’t forget that IR LEDs can be used for other non-invasive diagnostics too.

The 2015 Hackaday Prize is sponsored by:


Filed under: Arduino Hacks, Medical hacks, The Hackaday Prize

We’ve all likely watched an episode of “Star Trek” and admired the level of integration on the sick bay diagnostic bed. With its suite of wireless sensors and flat panel display, even the 1960s imagining of the future blows away the decidedly wired experience of a modern day ICU stay. But we may be getting closer to [Dr. McCoy]’s experience with this radar-based respiration detector.

[Øyvind]’s build, which takes the origin of the term “breadboard” to heart, is based on a not-inexpensive Xethru module, which appears to be purpose-built for detecting respiration. The extra-thick PC board seems to house the waveguides internally, which is a neat trick but might limit how the module can be deployed. The module requires both a USB interface and level shifter to interface the 2.8V levels of the module to the 5V Arduino Uno. In the video below, [Øyvind]’s prototype simply lights an RGB LED in response to the chest movement it detects, but there’s plenty of potential for development here. We’ve seen a laser-based baby breathing monitor before; perhaps this systems could be used to the same end without the risk of blinding your tyke. Or perhaps better diagnostics for sleep apnea patients than an intrusive night in a sleep study lab.

Clocking in at $750USD for the sensor board and USB interface, this build is not exactly for the faint of heart or the light of wallet. But as an off-the-shelf solution to a specific need that also has a fair bit of hacking potential, it may be just the thing for someone. Of course if radar is your thing, you might rather go big and build something that can see through walls.


Filed under: Arduino Hacks, Medical hacks
Feb
27

Taste-O-Vision Is Now A Thing

arduino hacks, Medical hacks, taste, taste-o-vision, tongue Comments Off on Taste-O-Vision Is Now A Thing 

taste

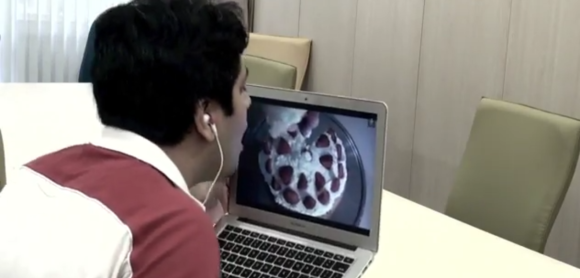
Not satisfied with late 1950s concepts of Smell-O-Vision [Nimesha]  has created something extraordinary: A digital taste sensor, capable of representing taste with a little bit of heat, electricity, and an Arduino

The device purportedly works by via thermal and electrical stimulation of the tongue using silver electrodes. According to this video, different tastes are created with different currents and temperatures. For example, a sour taste is produced on the electrodes by varying the current from 60uA to 180uA and increasing the temperature up to 30 degrees C. Mint is produced by simply decreasing the temperature from 22C to 19C.

The control electronics include an Arduino, a motor controller, and a heat sink attached to one of the silver electrodes. Communication is done through USB, and of course there’s a mobile app for it, more specifically a protocol called Taste Over IP. This allows anyone to send a taste to anyone with one of these devices.

Videos below, and before you laugh, we’d really like to try one of these out.

Thanks [Jess] for the tip.


Filed under: Arduino Hacks, Medical hacks


  • Newsletter

    Sign up for the PlanetArduino Newsletter, which delivers the most popular articles via e-mail to your inbox every week. Just fill in the information below and submit.

  • Like Us on Facebook