Posts | Comments

Planet Arduino

Archive for the ‘nes’ Category

Watching the advancement of technology is interesting enough by looking at improved specifications for various components as the years go by. But clock speeds, memory size, and power consumption are all fairly intangible compared to actual implementation of modern technology when compared to days of yore. For example, this $40 microcontroller can do what a video game console was able to do in the 80s for a tenth of the (inflation adjusted) price.

The NESDUE is an emulator for NES games which runs completely on an Arduino Due. The Arduino does have some limitations that have to be worked around to get the Nintendo to work, though. For one, it needs to be overclocked to be playable and it also needs a workaround to get past the memory limit of 96 kB of RAM. From there, a small screen is wired up along with a controller (from a Super Nintendo) and the gaming can begin.

This is an impressive feat for an Arduino platform to accomplish, especially with the amount of memory tweaking that has to happen. This might be the most advanced gaming system available that runs everything on an Arduino, right up there with the Arduinocade which can provide an arcade-like experience straight from the Arduino as well.

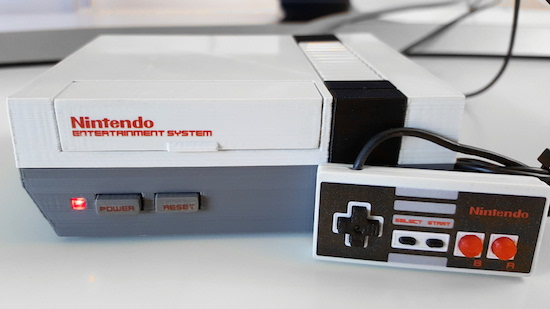
The NES was one of, if not, the first gaming consoles most of us ever experienced. That’s why we were all pretty excited to hear Nintendo’s recent plans of releasing the NES Classic Mini. As great as it sounds, though, turns out it won’t connect to the Internet and can’t play games beyond the 30 classics that come preloaded on the device. But leave it to a Maker to come up with a better solution! Enter DaftMike, who has built his own shrunken-down, 3D-printed version of the retro system complete with some of the features we all would’ve loved to see with Nintendo’s re-creation.

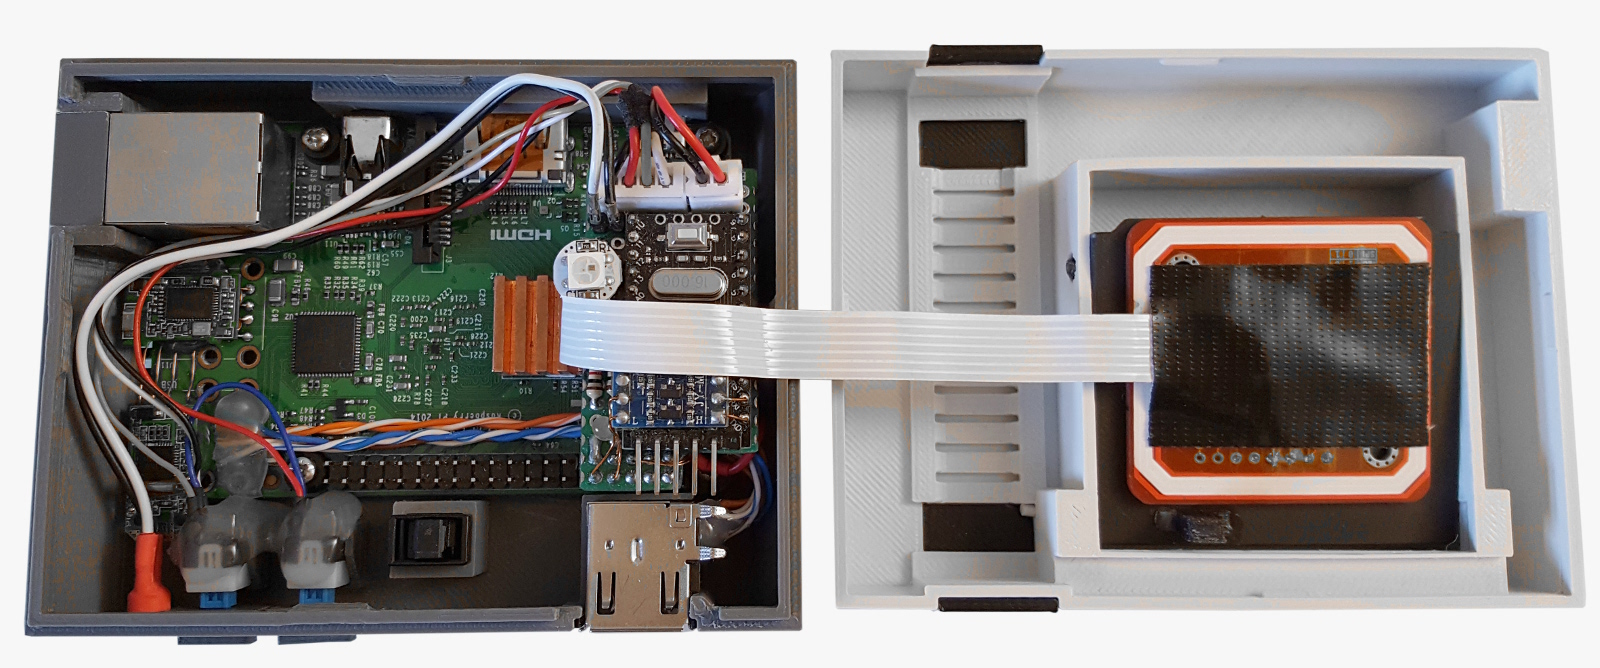
The DIY unit–which is 40% the size of the original–is powered by a Raspberry Pi and an Arduino. It runs on RetroPie emulation software and uses itsy-bitsy NFC tagged cartridges, ranging from Super Mario Bros. to Zelda. When a cartridge is inserted into the machine’s fully-functional slot, an NFC reader scans it, selects that specific game from the Pi’s internal memory, and boots it up onto the screen.

I designed the connections between the Arduino and Pi to use the top 10 GPIO pins so I could mount the Arduino directly to the Raspberry Pi using a 2×5 header. All the electronics would then sit in the case behind the USB ports.

The NFC reader mounts underneath the cartridge tray connected to the Arduino with a piece of flat cable. There’s enough length on it for the case halves to be splayed apart if I need to dismantle the unit and the Arduino ‘lump’ unplugs from the Pi so I can update the ‘firmware.’

DaftMike even rounded out his incredibly-realistic design with a mini, Arduino Pro Micro-based controller–although probably a bit too small for adult hands. (Cool nevertheless!)

In terms of software, an Arduino sketch is used to read the NFC tags and manage the power switching, while a Python script running on the Raspberry Pi is tasked with launching the games. The two communicate over serial.

Those wishing to spark some childhood gaming nostalgia should check out Daftmike’s entire blog post, which provides a full rundown of the build and its inner workings.


Jul
13

No nonsense guide for patching into a gaming controller

adaptive technology, arduino hacks, controller, nes, nintendo hacks Comments Off on No nonsense guide for patching into a gaming controller 

patching-into-a-gaming-controller

Here a straight-forward guide for tapping into the buttons on most gaming controllers. Why do something like this? Well there’s always the goal of conquering Mario through machine learning. But we hope this will further motivate hackers to donate their time and expertise developing specialized controllers for the disabled.

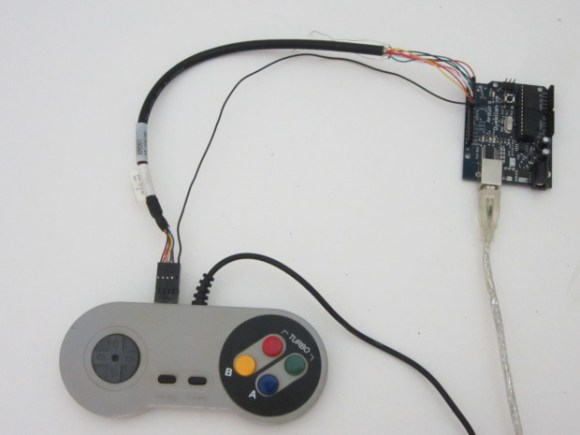
In this example a generic NES knock-off controller gets a breakout header for all of the controls. Upon close inspection of the PCB inside it’s clear that the buttons simply short out a trace to ground. By soldering a jumper between the active trace for each button and a female header the controller can still be used as normal, or can have button presses injected by a microcontroller.

The Arduino seen above simulates button presses by driving a pin low. From here you can develop larger buttons, foot pedals, or maybe even some software commands based on head movement or another adaptive technology.


Filed under: Arduino Hacks, nintendo hacks
Jul
03

The 14th game for the Nintendo Power Pad

arduino hacks, nes, nintendo, nintendo hacks, power pad, unity Comments Off on The 14th game for the Nintendo Power Pad 

Released 25 years ago, the Nintendo Power Pad, a plastic mat that plugged into an NES, saw very limited success despite its prevalence in basements and attics. In total, only six games for the Power Pad were released in North America, and only 13 worldwide. The guys over at cyborgDino thought they should celebrate the sliver anniversary of the Power Pad by creating its 14th game, using an Arduino and a bit of playing around in Unity 3D.

The first order of business was to read the button inputs on the Power Pad. Like all NES peripherals, the Power Pad stores the state of its buttons in a shift register that can be easily read out with an Arduino. With a bit of help from the UnoJoy library, it was a relatively simple matter to make the Power Pad work as intended.

The video game cyborgDino created is called Axis. It’s a bit like a cross between Pong and a tower defense game; plant your feet on the right buttons, and a shield pops up, protecting your square in the middle of the screen from bouncing balls. It’s the 14th game ever created for the Power Pad, so that’s got to count for something.

Video of the game below.


Filed under: Arduino Hacks, nintendo hacks


  • Newsletter

    Sign up for the PlanetArduino Newsletter, which delivers the most popular articles via e-mail to your inbox every week. Just fill in the information below and submit.

  • Like Us on Facebook