Posts | Comments

Planet Arduino

Archive for the ‘industrial machines’ Category

Wevolver’s previous article about the Arduino Pro ecosystem outlined how embedded sensors play a key role in transforming machines and automation devices to Cyber Physical Production Systems (CPPS). Using CPPS systems, manufacturers and automation solution providers capture data from the shop floor and use it for optimizations in areas like production schedules, process control, and quality management. These optimizations leverage advanced data Internet of Things (IoT) analytics over manufacturing datasets, which is the reason why data are the new oil.

Deployment Options for IoT Analytics: From Cloud Analytics to TinyML

IoT analytics entail statistical data processing and employ Machine Learning (ML) functions, including Deep Learning (DL) techniques i.e., ML based on deep neural networks. Many manufacturing enterprises deploy IoT analytics in the cloud. Cloud IoT analytics use the vast amounts of cloud data to train accurate DL models. Accuracy is important for many industrial use cases like Remaining Useful Life calculation in predictive maintenance. Nevertheless, it is also possible to execute analytics at the edge of the network. Edge analytics are deployed within embedded devices or edge computing clusters at the factory’s Local Area Network (LAN). They are appropriate for real-time use cases that demand low latency such as real-time detection of defects. Edge analytics are more power-efficient than cloud analytics. Moreover, they offer increased data protection as data stays within the LAN.

During the last couple of years, industrial organizations use TinyML to execute ML models within CPU and memory-constrained devices. TinyML is faster, real-time, more power-efficient, and more privacy-friendly than any other form of edge analytics. Therefore, it provides benefits for many Industry 4.0 use cases.

TinyML is the faster, real-time, most power-efficient, and most privacy friendly form of edge analytics. Image credit: Carbon Robotics.

Building TinyML Applications

The process of developing and deploying TinyML applications entails:

  1. Getting or Producing a Dataset, which is used for training the TinyML model. In this direction, data from sensors or production logs can be used.
  2. Train an ML or DL Model, using standard tools and libraries like Jupyter Notebooks and Python packages like TensorFlow and NumPy. The work entails Exploratory Data Analysis steps towards understanding the data, identifying proper ML models, and preparing the data for training them.
  3. Evaluate the Model’s Performance, using the trained model predictions and calculating various error metrics Depending on the achieved performance, the TinyML engineer may have to improve the model and avoid overfitting on the data. Different models must be tested to find the best one.
  4. Make the Model Appropriate to Run on an Embedded Device, using tools like TensorFlow Lite which provides a “converter” library that turns a model into a space-efficient format. TensorFlow Lite provides also an “interpreter” library that runs the converted model using the most efficient operations for a given device. In this step, a C/C++ sketch is produced to enable on device deployment.
  5. On-device Inference and Binary Development, which involves the C/C++ and embedded systems development part and produces a binary application for on-device inference.
  6. Deploying the Binary to a Microcontroller, which makes the microcontroller able to analyse data and derive real-time insights.
Building a Google Assistant using tinyML. Image credit: Arduino.

Leveraging AutoML for Faster Development with Arduino Pro

Nowadays, Automatic Machine Learning (AutoML) tools are used to develop TinyML on various boards, including Arduino boards. Emerging platforms such as Edge Impulse, Qeexo and SensiML, among others, provide AutoML tools and developers’ resources for embedded ML development. Arduino is collaborating with such platforms as part of their strategy to make complex technologies open and simple to use by anyone.

Within these platforms, users collect real-world sensor data, train ML models on the cloud, and ultimately deploy the model back to an Arduino device. It is also possible to integrate ML models with Arduino sketches based on simple function calls. AutoML pipelines ease the tasks of (re)developing and (re)deploying models to meet complex requirements.

The collaboration between Arduino and ML platforms enables thousands of developers to build applications that embed intelligence in smart devices such as applications that recognize spoken keywords, gestures, and animals. Implementing applications that control IoT devices via natural language or gestures is relatively straightforward for developers who are familiar with Arduino boards.

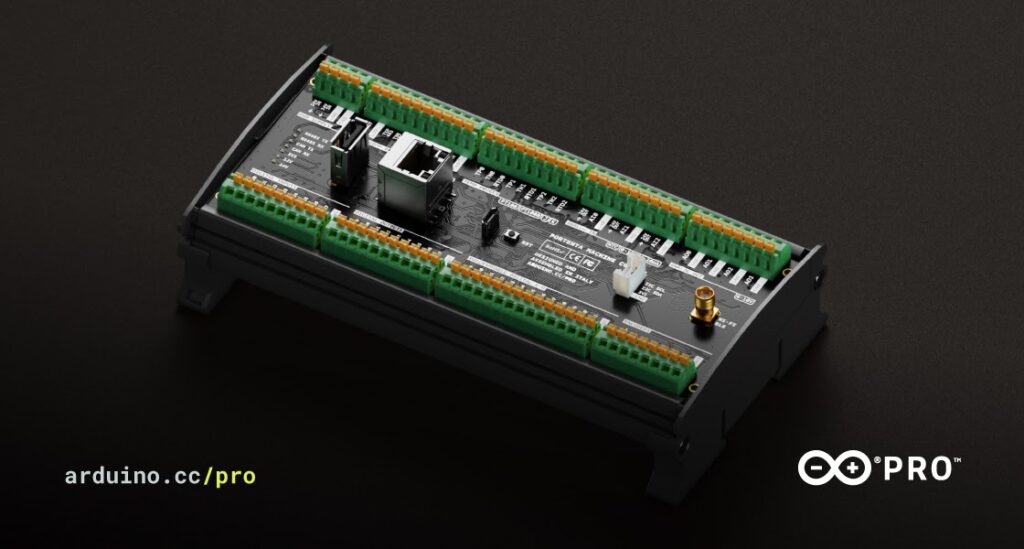
Arduino has recently introduced its new Arduino Pro ecosystem of industrial-grade products and services, which support the full development, production and operation lifecycle from Hardware and Firmware to Low Code, Clouds, and Mobile Apps. The Pro ecosystem empowers thousands of developers to jump into Industry 4.0 development and to employ advanced edge analytics.

Big opportunity at every scale

The Arduino ecosystem provides excellent support for TinyML, including boards that ease TinyML development, as well as relevant tools and documentation. For instance, the Arduino Nano 33 BLE Sense board is one of the most popular boards for TinyML. It comes with a well-known form factor and various embedded sensors. The latter include a 9-axis inertial sensor that makes the board ideal for wearable devices, as well as for humidity and temperature sensors. As another example, Arduino’s Portenta H7 board includes two asymmetric cores, which enables simultaneously runs of high level code such as protocol stacks, machine learning or even interpreted languages (e.g., MicroPython or JavaScript). Furthermore, the Arduino IDE (Integrated Development Environment) provides the means for customizing embedded ML pipelines and deploying them in Arduino boards.

In a Nutshell

ML and AI models need not always to run over powerful clouds and related High Performance Computing services. It is also possible to execute neural networks over tiny memory-limited devices like microcontrollers, which opens unprecedented opportunities for pervasive intelligence. The Arduino ecosystem offers developers the resources they need to ride the wave of Industry 4.0 and TinyML. Arduino boards and the IDE lower the barriers for thousands of developers to engage with IoT analytics for industrial intelligence.

Read the full article on Wevolver.

The post From Embedded Sensors to Advanced Intelligence: Driving Industry 4.0 Innovation with TinyML appeared first on Arduino Blog.

Arduino Pro is introducing a powerful new member of the Portenta product family, the Portenta Machine Control. It’s a fully-centralized, low-power, industrial control unit able to drive equipment and machinery. Plus, you can program it using the Arduino framework or other embedded development platforms.

Thanks to its computing power, the Portenta Machine Control enables a wide range of predictive maintenance and AI use cases. It enables the collection of real-time data from the factory floor, while supporting remote control of equipment, including from the cloud.

Key benefits include:

  • Shorter time-to-market
  • Enhance existing products
  • Add connectivity for monitoring, as well as control
  • Each I/O pin can be configured, so you can tailor it to your needs
  • Make equipment smarter, as well as AI-ready
  • Provide security and robustness from the ground up
  • Open new business model opportunities (such as servitization)
  • Interact with your equipment with advanced human-machine interfaces (HMI)
  • Modular design for adaptation, expansion and upgrades

Business as a Service

The Portenta Machine Control allows companies to enable new business-as-a-service models. You can monitor customer usage of equipment for predictive maintenance while gathering valuable production data.

The device enables industry standard soft-PLC control. Because of this, it’s able to connect to a range of external sensors and actuators. For example, the following options are all available.

  • Isolated digital I/O, 4-20mA compatible analog I/O
  • Three configurable temperature channels
  • Dedicated I2C connector. 

Multiple choices are available for network connectivity, including USB, Ethernet and WiFi and BLE. Furthermore, it offers impressive compatibility through industry specific protocols such as RS485. All I/O are protected by resettable fuses, but on-board power management ensures maximum reliability in harsh environments.

The Portenta Machine Control core runs an Arduino Portenta H7 microcontroller board. This is a highly reliable design operating at industrial temperature ranges (-40 °C to +85 °C). Firstly, it boasts a dual-core architecture that doesn’t require any external cooling. Secondly, thanks to this versatile processor, you can also connect external human-machine interfaces. These include displays, touch panels, keyboards, joysticks and mice to enable on-site configuration of state machines and direct manipulation of processes.

The Portenta Machine Control’s design addresses a large variety of use cases. It’s possible to configure a selection of the I/O pins in software. Because of this, it stands out as a powerful computer to unify and optimize production where one single type of hardware can serve all your needs. 

The Arduino Portenta Machine Control

Additional Portenta Machine Control Features

Furthermore, it offers these other outstanding features.

  • Industrial performance leveraging the power of Arduino Portenta boards
  • DIN rail compatible housing
  • Push-in terminals for fast connection
  • Compact size (170 x 90x 50 mm)
  • Reliable design, operating at industrial temperature rates (-40 °C to +85 °C) with a dual-core architecture and no external cooling
  • Embedded RTC (real time clock), for perfect synchronization of processes
  • Leverage embedded connectivity without any external equipment
  • CE, FCC and RoHS certified

The Portenta Machine Control can be used in multiple industries, across a wide range of machine types. For example, labelling machines, form and seal machines, cartoning machines, gluing machines, electric ovens, industrial washers and dryers, mixers and more.

As a result, adding the Portenta Machine Control to your existing processes mean you become the owner of your own solutions in the market of machines.

The Portenta Machine Control is now available for €279/$335.

Take a look here for more information and complete technical specs.

The post Portenta Machine Control: Add a powerful brain to your machines appeared first on Arduino Blog.

IMG_2044

Worse for Wear is a clothing company  for women who ride motorcycles. The fascinating clothing they produce is very fashionable, comfortable, and needs to protect riders from impact and abrasion if they have an accident. Jackets and trousers have knee and hip pads  included to protect the rider when sliding many meters across asphalt. That’s why the fabric must be strong and abrasion resistant because if the fabric wears away too quickly, the rider’s skin will be exposed and injured.

To choose the perfect fabric, Scott and Laura, co-founders of the company, created an Impact Abrasion Resistance Testing Machine running on Arduino Uno to perform tests on different materials like knit fabrics, woven fabrics, and leather, to see how long it takes before the material is sanded completely through. I interviewed them to learn more about it!

wear

- What is the impact abrasion resistance testing machine and how does it work?

When selecting fabric to use in our clothes, we have to make sure that it is strong and abrasion resistant. We use the impact abrasion resistance test machine to determine which fabrics will withstand abrasion (scraping and sliding) the best. It is important to us to test the fabrics ourselves and not rely solely on the claims of fabric manufacturers.

worseWear

The machine has a weighted arm, like a hammer, suspended above an abrasive belt sander. A sample of the fabric that we want to test is wrapped around the head of the hammer and then dropped onto the moving sanding belt. An Arduino Uno is used to record the amount of time it takes to sand through the fabric sample.

Check the video below to see how it works:

- Why did you decide to use Arduino?

We have used Lilypad Arduino and Arduino Uno before to prototype some e-textile projects, so it was easy for us to get started on this one with our previous experience. The large number of accessory boards available made it simple to add an informational display and user interface to the machine. In just a few hours, we were able to very quickly create a machine to compare the abrasion resistance of a variety of fabric samples. The simplicity of working with Arduino was a very good choice for us, because our real business is creating clothing, not building test machines!

- What does Arduino control in the machine? 

An Arduino Uno is used to record the amount of time it takes to sand through the fabric sample. The method we use is based on European Union standards for motorcycle safety gear testing. To measure the fabric’s abrasion time, we use two thin copper wires (magnet wire). One wire is placed inside and another outside of the fabric sample before everything is wrapped around the head of the hammer. Each wire is then connected to ground on one end and an to input pin on the Arduino on the other end. The pins are in INPUT_PULLUP mode so a current runs through them. The LCD display on the Arduino tells us when both wires are connected properly.

Then, we start the belt sander and drop the hammer onto the spinning sanding belt. The outer wire breaks very quickly, breaking the connection to that pin [ digitalRead(outerWireIn) == HIGH ]. At this point, the Arduino records the start time. When the fabric wears through – usually within a couple of seconds – the inner wire is exposed to the sanding belt and quickly breaks. That marks the end time, which the Arduino records and displays on the LCD shield. A single type of fabric must be tested at least five times in order to make sure our recorded times are accurate.

Explore the details and download the code on Worse for Wear blog.

Jul
19

Designing a replacement for an obsolete Electro Cam control system

arduino, industrial machines, prototyping, reverse engineering, Schematics, Teensy Comments Off on Designing a replacement for an obsolete Electro Cam control system 

etched prototype

Patrick Griffin is a  maintenance technician working in the plastics industry for the last 20+ years with primary focus being the repair, upkeep, & design of electrical, electronic, automation, and both relay & PLC control logic. He submitted his project to Arduino blog about using Teensy Arduino on a Maac vacuum former:

This story revolves around one of the workhorse machines in the company where I work: a Maac vacuum former. It is a solid, well-designed machine with a solid, well-designed control system that Maac contracted out to the Electro Cam systems group. As with any industrial equipment, as time goes by the OEM develops new products that replace their old stuff, technologies advance, and eventually they start the formal process of obsoleting their older inventory.
The situation started out years ago, long before I arrived on the scene, when the company I work for hired a contractor to add some automation to the Maac. When the automation was added almost all of the Electro Cam system was necessarily replaced with an Allen-Bradley SLC500 PLC to provide the changes in logic & the additional I/O points to do all of the new functions. The only Electro Cam components left in the Maac are the parts in the 84 zone oven controller.

We have been aware that more and more of it’s components, especially the Electro Cam controls, were being obsoleted. Recently we were put in the position to ask ourselves what our options are when one of these proprietary controls have a permanent catastrophic failure. What we learned was that we would be given few options through the official channels. We would have to leave the machine down and idle for an undetermined amount of time while the failed component was sent to Electro Cam for assessment and possible repair. This would certainly take longer than a week, but my gut says it would be closer to a month. There are also no guarantees that the part could be repaired at all. We were quoted a price for a replacement as starting at $4500, but with no promises.

Not having a replacement for a proprietary single-sourced part on the shelf is scary. Worse is when that single source says that they really can’t help you. This is one of several (maybe many) triggers for the maintenance department that I am a part of to fly wildly into a re-engineering frenzy.

Read the complete story and take a look at the schematics, on his website.

Prototype hooked to spare Electro Cam output boards

Jul
04

Using Arduino on industrial digital printing machines

arduino, industrial machines, open source Comments Off on Using Arduino on industrial digital printing machines 

Arduino goes industrial

Most of the projects we’ve been featuring on this blog are  happen to be focused on diy approaches around music, design, art. We are  noticing that more and more people are starting to realize the benefits of using Arduino also in  industrial settings.

Today I’m going to highlight a project posted by Paul M Furley on his blog and describing how back in 2009 he worked in a  family firm, producing the user operator software for their new digital printing machine and decided to use Arduino in high-tech manufacturing:

 I’d been hacking around with Arduino since my masters project and it came along at a perfect time for JF Machines. They had just developed their new ink circulation system: a serious affair with 5 separate ink bottles rising and falling to alter  pressure along with precise temperature control. They needed a way to drive the bottle lifting motors, read in alarm signals and switch inputs as well as output various flashing sequences for the benefit of the operator. Although a PLC would have been suitable, Arduino seemed like a great option.

Since then he realized why he made the right choice  and lists a number of the reasons useful to explore.

You can read the complete story on  his page, here’s just a couple of the most interesting benefits:

Supply security – even if Arduino stopped supplying boards tomorrow, other manufacturers are making clones, and the hardware design lives on. If Arduino changed their physical design, it wouldn’t be much trouble to make a converter to adapt the new and old sockets – in fact, someone would probably release it was an off-the-shelf project as soon as the announcement was made! In the worst case scenario, JF Machines could manufacture the whole Arduino board from the designs for as long as the a compatible microcontroller remained available.

Low cost – I often hear the opposite argument when discussing Arduino with the hobby and hacker scene. I agree that for integrating into a consumer product, the Arduino’s off-the-shelf price is fairly expensive (although good luck designing and making a small batch yourself for cheaper…). However when integrated in a five-figure industrial printing machine, the cost comes close to zero, especially when considering the PLC alternative and the support benefits. If JF Machines were ever to mass-produce their machines, reducing the price of the Arduino would be fairly low on the list of priorities!

picocolour

If you have a similar story and want to share it, we’d be happy to feature it on the blog,  just submit it on this page.


  • Newsletter

    Sign up for the PlanetArduino Newsletter, which delivers the most popular articles via e-mail to your inbox every week. Just fill in the information below and submit.

  • Like Us on Facebook