Posts | Comments

Planet Arduino

Archive for the ‘3D Printer’ Category

3D printers need to set their hot ends to a very specific temperatures suited to the filament material and keep them at those temperatures throughout the printing process. Most use PID (Proportional-Integral-Derivative) control for that purpose, which modulates power according to an algorithm that prioritizes stability and prevents feedback oscillations. But what if you want to control a hot end that isn’t connected to a 3D printer? In that case, Michael Klements has a guide on how to build a dedicated hot end controller.

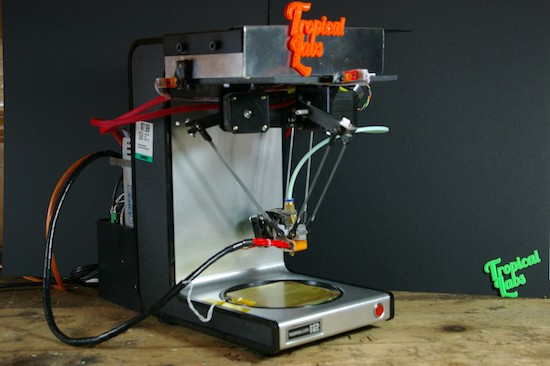
This dedicated hot end controller is useful if you’re building something like a filament extruder. Klements designed it for the PET Bottle Recycler, which turns garbage into useful filament. That machine needs to melt down the plastic and, naturally, it uses a hot end to do so. But because it isn’t connected to a 3D printer, Klements needed some way to control the temperature of the hot end. A full 3D printer controller board would have been overkill, so he created this dedicated controller for the job.

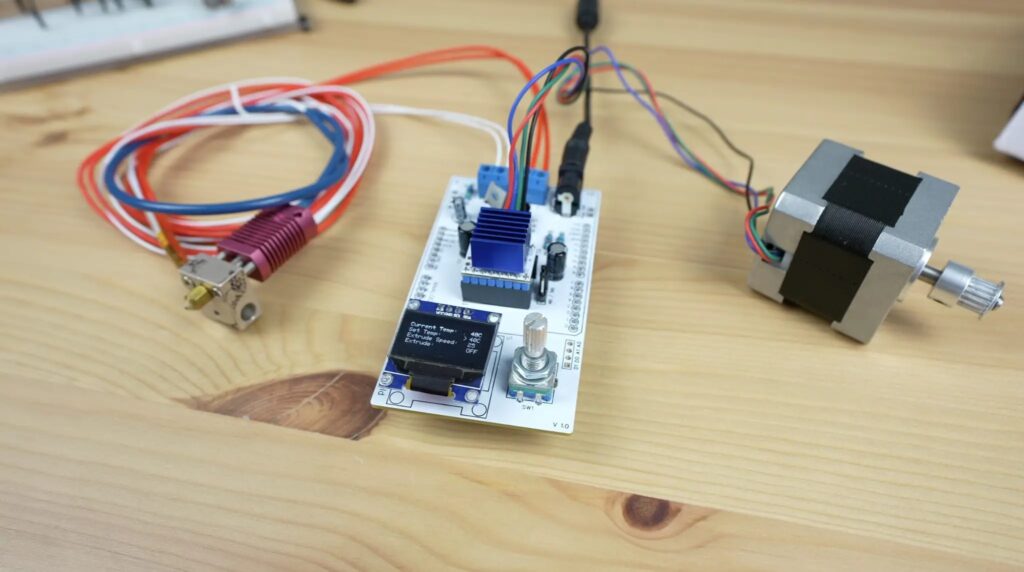
Because Klements designed this for the PET Bottle Recycler, it includes a stepper motor driver as well. It is meant for use with a Creality Ender 3 hot end, but should work with others that have standard thermistor feedback (which is crucial for PID control). The custom PCB hosts an Arduino UNO R4 WiFi, which is brand new and has a lot of great features like a built-in LED matrix. That PCB also contains a MOSFET to control power to the hot end, a small OLED screen, and a rotary push button for navigating the menu.

After assembling the PCB and flashing the provided sketch, you’ll be able to directly control a hot end or a complete filament extruder like the PET Bottle Recycler.

The post Building a dedicated 3D printer hot end controller with the Arduino UNO R4 WiFi appeared first on Arduino Blog.

For those unfamiliar with the details of the expansive work of fiction of Harry Potter, it did introduce a few ideas that have really stuck in the collective conscious. Besides containing one of the few instances of time travel done properly and introducing a fairly comprehensive magical physics system, the one thing specifically that seems to have had the most impact around here is the Weasley family clock, which shows the location of several of the characters. We’ve seen these built before in non-magical ways, but this latest build seeks to drop the price tag on one substantially.

To do this, the build relies on several low-cost cloud computing solutions and smartphone apps to solve the location-finding problem. The app is called OwnTracks and is an open-source location tracker which can report data to any of a number of services. [Simon] sends the MQTT data to a cloud-based solution called HiveMQCloud, but you could send it anywhere in principle. With the location tracking handled, he turns to some very low-cost Arduinos to control the stepper motors which point the clock hands to the correct locations on the face.

While the build does rely on a 3D printer for some of the internal workings of the clock, this does bring the cost down substantially when compared to other options. Especially when compared to this Weasley family clock which was built into a much larger piece of timekeeping equipment, having an option for a lower-cost location-tracking clock face like this one is certainly welcome.

LED and LCD displays are a technological marvel. They’ve brought the price of televisions and monitors down to unheard-of levels since the days of CRTs, but this upside arguably comes with an aesthetic cost. When everything is covered in bland computer screens, the world tends to look a lot more monotonous. Not so several decades ago when there were many sharply contrasting ways of displaying information. One example of this different time comes to us by way of this split-flap display that [Erich] has been recreating.

Split-flap displays work by printing letters or numbers on a series of flaps that are attached to a spindle with a stepper motor. Each step of the motor turns the display by one character. They can be noisy and do require a large amount of maintenance compared to modern displays, but have some advantages as well. [Erich]’s version is built out of new acrylic and MDF, and uses an Arduino as the control board. A 3D printer and CNC machine keep the tolerances tight enough for the display to work smoothly and also enable him to expand the display as needed since each character display is fairly modular.

Right now, [Erich]’s display has 20 characters on two different rows and definitely brings us back to the bygone era where displays of this style would have been prominent in airports and train stations. This display uses a lot of the basics from another split flap display that we featured a few years ago but has some improvements. And, if you’d prefer restorations of old displays rather than modern incarnations, we have you covered there as well.

Thanks to [Bob] for the tip!

Heavy duty coffee makers are good for, well, making coffee. On the other hand, if you were to look at the frame without the preconception of what it can do, you might notice that there is space on top where equipment could be attached, and space on the bottom with a built-in heating pad on which to place an object… in other words, a perfect 3D printer frame!

Tropical Labs realized this, and turned the ordinary household appliance into a delta printer with three steppers for motion and another to feed the printing media. An Arduino Mega serves as the brains of the operation along with a popular RAMPS 1.4 shield.

Frame aside, it’s a neat mechanism, and definitely worth checking out. You can see more about the project on Hackaday.io.

May
14

Vacuum Gauge Display; Arduino Replaces Industrial

3D Printer, arduino, arduino hacks, industrial, industry, rj45, vacuum Comments Off on Vacuum Gauge Display; Arduino Replaces Industrial 

Arduinos! They’re a great tool that make the world of microcontrollers pretty easy, and in [cptlolalot]’s case, they also give us an alternative to buying expensive, proprietary parts. [cptlolalot] needed a gauge for an expensive vacuum pump, and rather than buying an expensive part, built a circuit around an Arduino to monitor the vacuum.

pressure-gauge-thumb
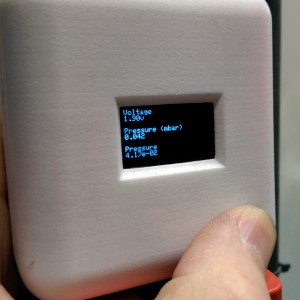
This project goes a little beyond simple Arduino programming though. A 12V to 5V power supply drives the device, which is laid out on a blank PCB. The display fits snugly over the circuit which reduces the footprint of the project, and the entire thing is housed in a custom-printed case with a custom-printed pushbutton. The device gets power and data over the RJ45 connection so no external power is needed. If you want to take a look at the code, it’s linked on [cptlolalot]’s reddit thread.

This project shows how much easier it can be to grab an Arduino off the shelf to solve a problem that would otherwise be very expensive. We’ve been seeing Arduinos in industrial applications at an increasing rate as well, which is promising not just because it’s cheap but because it’s a familiar platform that will make repairs and hacks in the future much easier for everyone.


Filed under: Arduino Hacks

[Helios Labs] recently published version two of their 3D printed fish feeder. The system is designed to feed their fish twice a day. The design consists of nine separate STL files and can be mounted to a planter hanging above a fish tank in an aquaponics system. It probably wouldn’t take much to modify the design to work with a regular fish tank, though.

The system is very simple. The unit is primarily a box, or hopper, that holds the fish food. Towards the bottom is a 3D printed auger. The auger is super glued to the gear of a servo. The 9g servo is small and comes with internal limiters that only allow it to rotate about 180 degrees. The servo must be opened up and the limiters must be removed in order to enable a full 360 degree rotation. The servo is controlled by an Arduino, which can be mounted directly to the 3D printed case. The auger is designed in such a way as to prevent the fish food from accidentally entering the electronics compartment.

You might think that this project would use a real-time clock chip, or possibly interface with a computer to keep the time. Instead, the code simply feeds the fish one time as soon as it’s plugged in. Then it uses the “delay” function in order to wait a set period of time before feeding the fish a second time. In the example code this is set to 28,800,000 milliseconds, or eight hours. After feeding the fish a second time, the delay function is called again in order to wait until the original starting time.


Filed under: 3d Printer hacks, Arduino Hacks

One of the bigger problems with any CNC machine or 3D printer is the issue of missed steps when moving the toolhead. If a stepper motor misses a step, the entire layer of the print – and every layer thereafter – will be off by just a tiny bit. Miss a few more steps, and that print will eventually make its way into the garbage. [Misan] has the solution to this: closed loop control of DC motors for a 3D printer.

Most printer firmwares use an open loop control system for moving their motors around. Step a few times in one direction, and you know where the nozzle of a 3D printer will be. Missed steps confound the problem, and there’s no way for the firmware to know if the nozzle is where it should be at any one time.

[Misan]’s solution to this was a DC motor coupled to an optical encoder. Both the motor and the encoder are connected to an Arduino Pro Mini which receives step and direction commands from the printer controller. The controller takes care of telling the motor where to go, the Arduino takes care of making sure it gets there.

The entire build is heavily derived from ServoStrap, but [Misan] has a very cool demo of his hardware: during a print, he can force the X and Y axes to either side, and the Arduino in each motor will move the print head back to where it needs to be. You can check that out below.


Filed under: 3d Printer hacks, Arduino Hacks
Materia-101_5We take an early look at the Materia 101, Arduino’s first foray into 3D printers

Read more on MAKE

Oct
16

Arduino Materia 101 is available for pre-order

3D Printer, 3D printing, 3DPrinting, arduino, arduino store, Featured, materia 101 Comments Off on Arduino Materia 101 is available for pre-order 

Arduinomateria101

During Maker Faire Rome we announced and gave a preview of our new project called Arduino Materia 101, the 3d printer developed in collaboration with Sharebot.

We are happy to announce that starting today the 3d printer is available for pre-order (30 days delivery time) from Arduino Store :

We can also share with you a list of documentation to learn all the details about it:

  • Product page with downloadable PDFs of
    • Use Manual in English and Italian
    • Assembly Manual (soon online in Italian and  in English)

In the next weeks we are going to post on the blog some cool hacks and user profiles to make it even easier to enjoy with the 3d printer.


Sep
29

Arduino Leaks a Peek of Their Upcoming 3D Printer

3d, 3D Printer, arduino Comments Off on Arduino Leaks a Peek of Their Upcoming 3D Printer 

sharebot_arduino_materia03

by Mike Senese @ makezine.com:

Arduino, known for creating an easy-to-use microcontroller revolution, is about to launch its own 3D printer.

The Arduino Materia 101 made its global debut earlier today on the official Arduino twitter account with a photo of a boxy white and teal FDM printer and a note that Arduino co-founder Massimo Banzi is showing the printer live on Italian TV. It also states that the printer will be presented next weekend at Maker Faire Rome.

In the image, the printer appears to have an LCD screen, a control knob, and a switch on the front plate. A filament spool holder with a matching color scheme sits attached to the right side. The mechanical bits are obscured, so details about its extruder or print bed size aren’t clear, but we’ll be looking forward to learning more shortly.

Arduino Leaks a Peek of Their Upcoming 3D Printer - [Link]


  • Newsletter

    Sign up for the PlanetArduino Newsletter, which delivers the most popular articles via e-mail to your inbox every week. Just fill in the information below and submit.

  • Like Us on Facebook