Posts | Comments

Planet Arduino

Archive for the ‘Medical’ Category

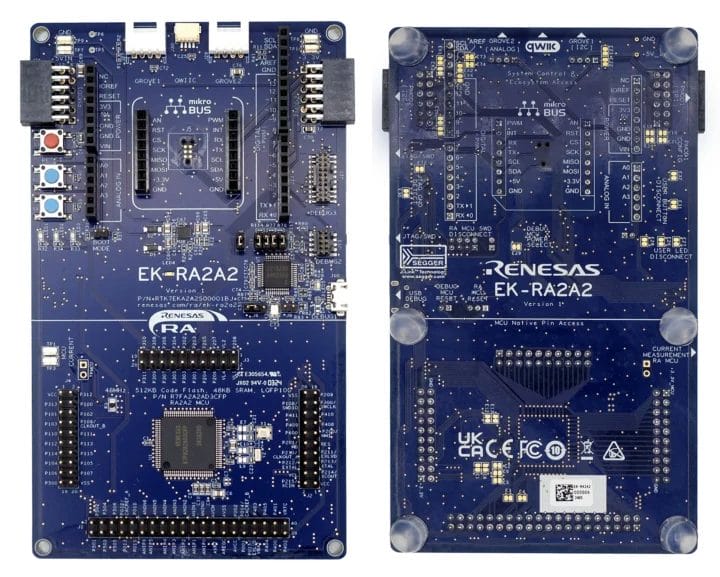
Renesas EK-RA2A2 evaluation board

Renesas Electronics RA2A2 Arm Cortex-M23 microcontroller (MCU) group offers a 7-channel high-resolution 24-bit Sigma-Delta ADC, as well as dual-bank flash and bank swap function for an easier implementation of firmware over-the-air (FOTA) updates. The 48MHz MCU also comes with 48KB SRAM, up to 512KB code flash, various interfaces, and safety and security features that make it suitable for smart energy management, building automation, medical devices, consumer electronics, and other IoT applications that can benefit from high-resolution analog inputs and firmware updates. Renesas RA2A2 specifications: MCU core – Arm Cortex-M23 Armv8-M core clocked at up to 48 MHz Arm Memory Protection Unit (Arm MPU) with 8 regions Memory 48 KB SRAM Memory Protection Units (MPU) Memory Mirror Function (MMF) Storage Up to 512 KB code flash memory in dual bank (256 KB × 2 banks); bank swap support 8 KB data flash memory (100,000 program/erase (P/E) cycles) Peripheral interfaces Segment LCD [...]

The post Renesas RA2A2 Arm Cortex-M23 microcontroller offers high-resolution 24-bit ADC, up to 512KB dual-bank flash appeared first on CNX Software - Embedded Systems News.

These days we are a little spoiled. There are many sensors you can grab, hook up to your favorite microcontroller, load up some simple library code, and you are in business. When [Raivis] got a MAX30100 pulse oximeter breakout board, he thought it would go like that. It didn’t. He found it takes a lot of processing to get useful results out of the device. Lucky for us he wrote it all down with Arduino code to match.

A pulse oximeter measures both your pulse and the oxygen saturation in your blood. You’ve probably had one of these on your finger or earlobe at the doctor’s office or a hospital. Traditionally, they consist of a red LED and an IR LED. A detector measures how much of each light makes it through and the ratio of those two quantities relates to the amount of oxygen in your blood. We can’t imagine how [Karl Matthes] came up with using red and green light back in 1935, and how [Takuo Aoyagi] (who, along with [Michio Kishi]) figured out the IR and red light part.

The MAX30100 manages to alternate the two LEDs, regulate their brightness, filter line noise out of the readings, and some other tasks. It stores the data in a buffer. The trick is: how do you interpret that buffer?

[Raivis] shows the code to take the output from the buffer, remove the DC component, pass it through a couple of software filters, and detect the heart rate. To read the oxygen reading, you have even more work to do. You can find the code for the device on GitHub.

If you want to build your own without a dedicated IC, grab a clothespin. Or try this more polished build.


Filed under: Arduino Hacks, Medical hacks

[Diego Marino] and his colleagues at the Politecnico di Torino (Polytechnic University of Turin, Italy) designed a prototype that allows for patients with motor deficits, such as spinal cord injury (SCI), to do rehabilitation via Functional Electrical Stimulation. They devised a system that records and interprets muscle signals from the physiotherapist and then stimulates specific muscles, in the patient, via an electro-stimulator.

The acquisition system is based on a BITalino board that records the Surface Electromyography (sEMG) signal from the muscles of the physiotherapist, while they perform a specific exercise designed for the patient’s rehabilitation plan. The BITalino uses Bluetooth to send the data to a PC where the data is properly crunched in Matlab in order to recognize and to isolate the muscular activity patterns.

After that, the signals are ‘replayed’ on the patient using a relay-board connected to a Globus Genesy 600 electro-stimulator. This relay board hack is mostly because the Globus Genesy is not programmable so this was a fast way for them to implement the stimulator. In their video we can see the muscle activation being replayed immediately after the ‘physiotherapist’ performs the movement. It’s clearly a prototype but it does show promising results.

It reminds us of the Myoelectric Hand, with humans instead. We featured an EMG tutorial a while back for those curious about this topic. Without taking the merit out of excellent and needed medical research, we all wait for the day that all our bio-signals can be easy read and translated to, let’s say, a huge avatar robot like METHOD-2. Right? Right?…


Filed under: Arduino Hacks, Medical hacks
Jan
11

There are many ways to detect a heartbeat electronically. One of the simpler ways is to take [Orlando’s] approach. He’s built a finger-mounted pulse detector using a few simple components and an Arduino.

This circuit uses a method known as photoplethysmography. As blood is pumped through your body, the volume of blood in your extremities increases and decreases with each heartbeat. This method uses a light source and a detector to determine changes in the amount of blood in your extremities. In this case, [Orlando] is using the finger.

[Orlando] built a finger cuff containing an infrared LED and a photodiode. These components reside on opposite sides of the finger. The IR LED shines light through the finger while the photodiode detects it on the other side. The photodiode detects changes in the amount of light as blood pumps in and out of the finger.

The sensor is hooked up to an op amp circuit in order to convert the varying current into a varying voltage. The signal is then filtered and amplified. An Arduino detects the voltage changes and transmits the information to a computer via serial. [Orlando] has written both a LabVIEW program as well as a Processing program to plot the data as a waveform. If you’d rather ditch the PC altogether, you might want to check out this standalone heartbeat sensor instead.


Filed under: Arduino Hacks
Dec
13

Hacking A Reader For Medical Test Strips

arduino hacks, Medical, Medical hacks, medicine, test strip Comments Off on Hacking A Reader For Medical Test Strips 

med

[Rahul] works at a startup that produces cutting edge diagnostic test cards. These simple cards can test for enzymes, antibodies, and diseases quickly and easily. For one test, this greatly speeds up the process of testing and diagnosis, but since these tests can now be administered en masse, health services the world over now have the problem of reading, categorizing, and logging thousands of these diagnostic test cards.

The normal solution to this problem is a dedicated card scanner, but these cost tens of thousands of dollars. At a 24-hour hackathon, [Rahul] decided to bring down the cost of the card scanners by whipping up his own, built from a CD drive and an Arduino.

The card [Rahul] used, an A1c card that tests for glucose bound to hemoglobin, has a few lines on the card that fluoresce with different intensify depending on the test results. This can be easily read with a photodiode connected to an Arduino. The mechanical part of the build consisted of an old CD drive with a 3D printed test strip adapter. Operation is very simple – just put the test strip in the test strip holder, press a button, and the results of the test are transmitted over Bluetooth.

Not only is [Rahul]‘s build extremely simple, it’s also extremely useful and was enough to net him the ‘Most Innovative Project’ prize at the hackathon in his native Singapore.


Filed under: Arduino Hacks, Medical hacks
Oct
10

A Baby Monitor goes open source: interview to the team

Africa, arduino, Biomedical, education, engineering, kenya, Medical, open source Comments Off on A Baby Monitor goes open source: interview to the team 

Open source Baby Monitor

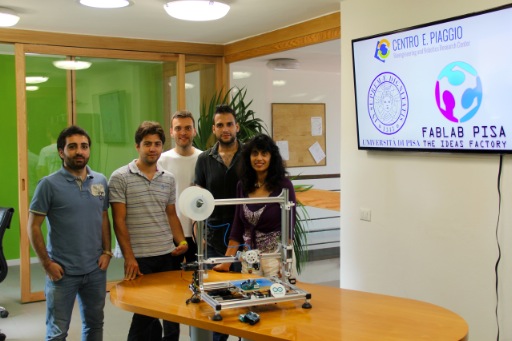
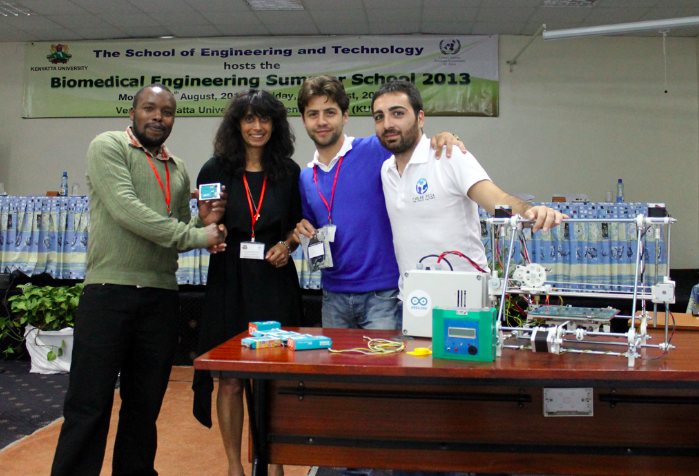
Last August, a team composed by researchers coming from  Research Center E. Piaggio of University of Pisa and FabLab Pisa, went to Nairobi to work at the Summer School developing an Open Source Baby Monitor for OS4BME (Open Source for Biomedical Engineering). Arduino supported the project with some hardware and following their adventure in Africa.

Arti Ahluwalia (Professor of Bioengineering), Daniele Mazzei and Carmelo De Maria (Biomedical Engineers, co-founders of FabLab Pisa and researchers at the Center) are now back in Italy and I interviewed them as this project raised interest from the open source community.
Open source Baby Monitor

Which tools did you use to prototype the baby monitor and why they were useful?

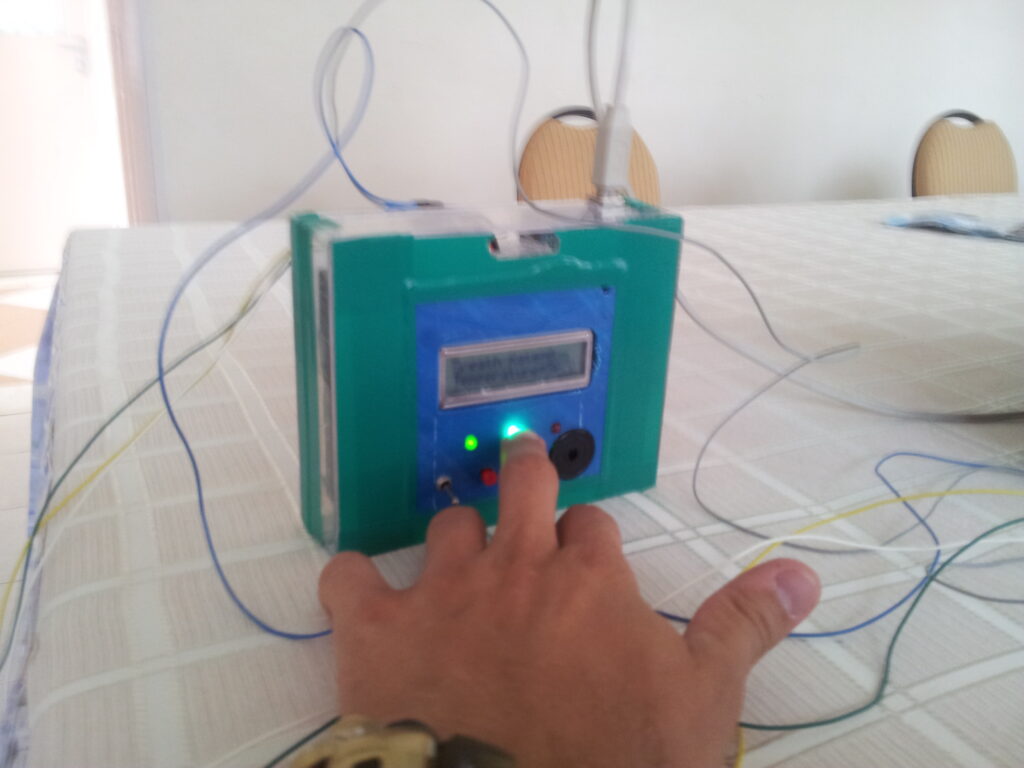
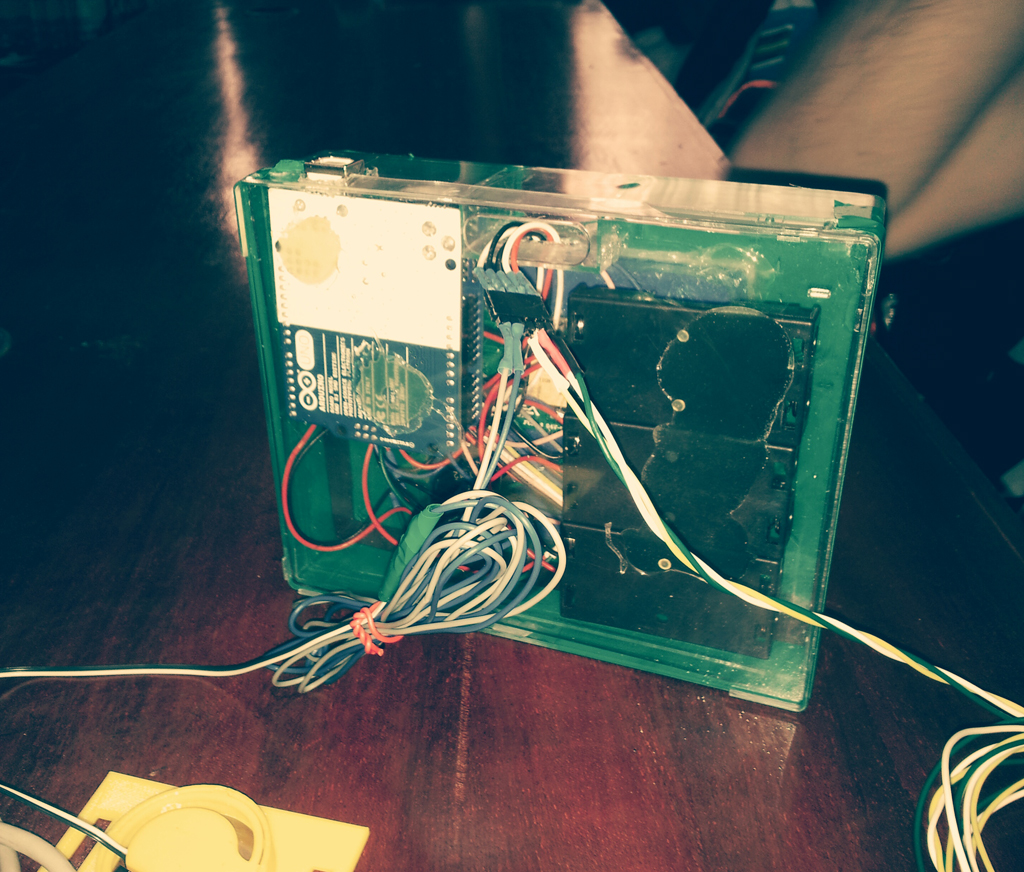
We decided to use open source tools to design and prototype the baby monitor because we believe economic barriers can’t stop the creative process. Our results will be the starting point for future projects, following the open source philosophy. A baby monitor is composed by a 3D-printed mechanical frame, an electronic board and a control software. Thus, in order, we used FreeCAD for mechanical design, MeshLab to analyze the quality of the mesh, Slic3r (http://slic3r.org/) to generate the machine code, Pronterface to send commands to a Prusa Mendel RepRap. The brain of the baby monitor, electronic and software, is based on Arduino.  MediaWiki helped us in documentation. As you can see the list is quite long, and the final result is a credit to all the components. This interview gives us the opportunity to say thank you to all the people who work in these projects.

Open source Baby Monitor

In which way the participants played an active role in the workshop?

From the first day, participants were divided into working groups in order to facilitate interaction. The groups were given specific tasks related to documentation and note taking, so as to collect all the notes for the final wiki document. On the third day the groups were split up into practical working groups according to the interests of individuals, whence they were given an aspect of the baby monitor to design, develop and realise.

What type of collaborative processes did you start and what are the next steps (documentation, sharing..etc)?

The processes involved a sort of twinning between Fablab Pisa and Fablab Nairobi. We delivered the Arduino donated kits to the Fab Lab Nairobi and Kenyatta University. FabLab Pisa introduced the FabLab Nairobi to the IOTPrise project of University of Pisa. Being part of the IOTPrise community FabLab Nairobi became beta tester of UDOO, an open hardware low-cost single-board Android/Linux ARM computer with Arduino-compatible integration.

As the importance of the action, particularly as regards the need to develop excellence and sustainability in Biomedical Engineering higher academic was noted by all. Thanks to our technical guidance and previous experience with human resource building in developing countries, all academic participating academic institutions have decided to pool their resources towards the creation of an African Biomedical Engineering consortium, dedicated to sharing curriculum development, staff and student training and teaching materials.

You started the this challenge with some expectations, what happened of unexpected?

We had expected the action to be an immediate success, and it was. Most students and staff were unaware of the existence of tools such as Arduino, FreeCad, Slicer, Media Wiki etc, let alone the power and implications of open source design and prototyping. The course was instrumental in bringing this knowledge to the participants, and their keen interest throughout the introductory part, particularly on 3D printing and rapid prototyping was apparent. We also expected immediate follow ups (requesting more information and documentation) from all participants. Actually this did not happen. We do need to be sensitive of cultural differences and of the fact that our priorities may not be the same as those of the participants.

Dealing with healthcare is not an easy task, how are you meeting with regulatory and performance standards?

As Biomedical Engineers, we were fully aware that biomedical devices must ensure patient safety and efficacy above all. Part of the course was purposely dedicated to biomedical device standards, regulation and performance, and this is what made the action unique with respect to others such as cooking hacks etc.

How can people collaborate now?

One of the goal of OS4BME  project was to create a common language, a shared way of thinking on which build future objectives. African engineers can use now our same instruments, and we know by first hand which are the real needs, desires and enthusiasm of African people: these facilitate an active collaboration. As aforementioned, FabLab Nairobi is involved together with FabLab Pisa in the IOTPrise project community.
In parallel, the University of Pisa is working with the ABEC and Boston University to raise funds for further courses and student and staff exchange. I have to stress that our (or at any rate my) objective is enable African countries to manage, develop and maintain their own medical equipment by transferring Biomedical expertise to African universities.
Baby Monitor Open Source

Learn more on their wiki

See more pictures on the Fablab Pisa website

Read the press release of the University of Pisa (in italian)
Jul
24

A Neonatal Baby Monitor goes open source and collaborative in Kenya

Africa, Announcements, arduino, device, Fablab, Medical, opensource Comments Off on A Neonatal Baby Monitor goes open source and collaborative in Kenya 

OpenBabyMonitorTeam

On the 11th of August a team composed by researchers from FabLab Pisa and University of Pisa’s Center for Bioengineering and Robotics “E.Piaggio” will start a great adventure with a Summer School on the project called OS4BME (Open Source for Biomedical Engineering).

The aim of the project is to bring the DIY&Makers approach in the developing of simple, low cost/high impact biomedical devices, precisely, in this particular case, a neonatal Baby Monitor.

The course will take place at Kenyatta University (Nairobi) and it will involve setting up a 3D printing system, developing a neonatal monitoring device, using open source, electronics based on the Arduino platform and powered by solar panels.

Participants will play an active role in the identification of components, design, assembling and testing of the device and in the discussion of regulatory issues in its development. Close attention will also be paid to safety, ergonomic aspects and regulatory  standards for biomedical devices.

The medical device industry in Africa is largely absent and there is an over reliance on foreign companies to repair and design biomedical instrumentation and resolve technical problems … More importantly, at present there are no specific engines or platforms focused on the sharing of biomedical instrumentation and devices. This is because, by their very nature, biomedical devices possess stringent performance requirements to comply with regulatory standards to ensure patient safety.

OS4BME is a project created by Prof. Arti Ahluwalia (Univ. Pisa), Daniele Mazzei and Carmelo De Maria (both from Fablab Pisa but also post-doc researchers at Centro E.Piaggio). The summer school is an initiative organized by a consortium of nine African universities with the objective of creating a sustainable health-care system, developing a network of academic excellence for Biomedical Engineering in Africa with the support of the ‘United Nations Economic Commission for Africa (UNECA).

 Arduino is supporting the project and  we sent to the team a bunch of Arduino UNO boards, Wi-Fi and GSM Shields to be used during the course and then will be donated to the Kenyatta University and Fablab Nairobi.

Arduino Package

In the next week  we’ll keep in touch with the team and receive updates directly from the summer school. Stay Tuned on this blog and on the work in progress of their WIKI!


  • Newsletter

    Sign up for the PlanetArduino Newsletter, which delivers the most popular articles via e-mail to your inbox every week. Just fill in the information below and submit.

  • Like Us on Facebook