Posts | Comments

Planet Arduino

Archive for the ‘bike’ Category

Cycling is a great way to spend time outdoors while simultaneously getting exercise and even as a mode of efficient transportation. And in the last few years due to the recent proliferation of e-bikes on the market and the pandemic, there has been an explosion in the number of people wanting to use bikes on a regular basis. A few people have gone a step further and have taken it upon themselves to create devices that make this experience safer, more convenient, or more fun. For this year’s World Bicycle Day, let’s celebrate these makers and how they were able to creatively embed Arduino products into their designs for a better cycling experience.

Automatic shifter

The purpose of a transmission is to convert the rotation of the motor into torque for the wheels, with more being needed at lower speeds for acceleration and less when cruising. Similarly, most bikes also have gearing wherein the rider can downshift to get up a hill or upshift to make larger strides on a straightaway. Jan Oelbrandt’s Shift4Me project eliminates the need to consciously think about this since it uses a magnetic cadence sensor attached to an Arduino Nano which allows it to automatically shift up or down depending on how quickly the pedals are moving. 

Bikelangelo water “graffiti” trailer

Similar to how a persistence of vision (POV) display moves rapidly changing pixels through the air to produce the illusion of a larger image, maker Sagarrabanana devised a towable bike trailer that sprays water on the ground using seven individual jets which take the place of the pixels in a POV display. Controlled by an Arduino Nano, the jets’ timing is determined by the bike’s speed in order to precisely deposit even lines of water in a dot-matrix pattern. Text from the user is inputted on a mobile phone and sent to the Nano via an HC-05 Bluetooth® module for printing. 

Biking position sensing

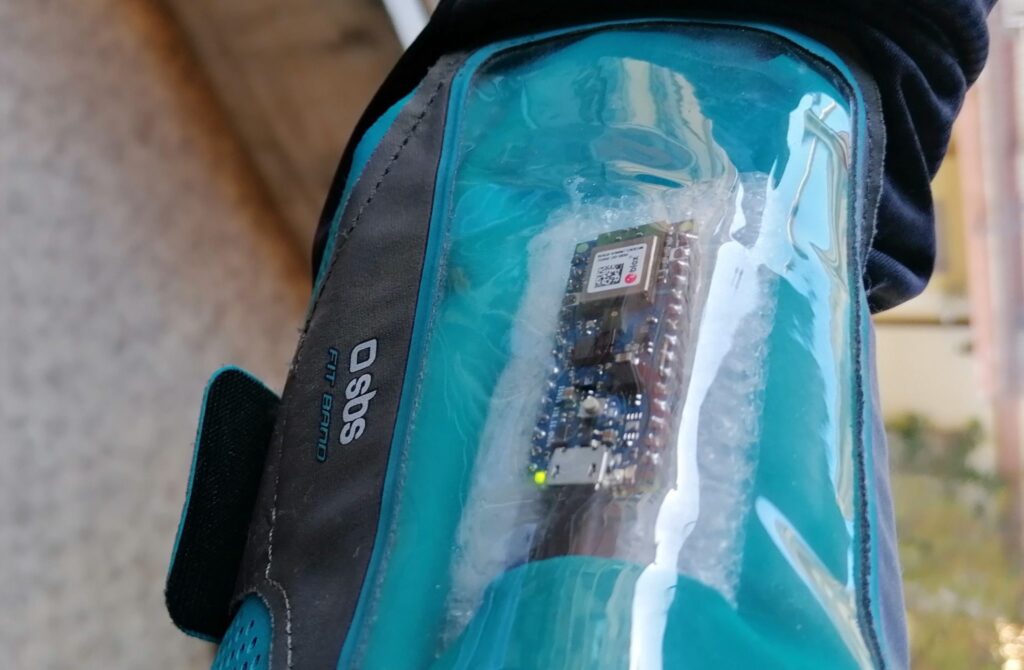
Bike computers are great for collecting detailed information on speed, cadence, power output, elevation, and more, but none can say whether the cyclist was sitting or standing for a period of time. This is why Fabio Antonini used an Arduino Nano 33 BLE Sense and Edge Impulse to develop such a device. He started by gathering 20 minutes of him sitting on a plane, sitting while going uphill, jumping on the pedals going uphill, and pushing on a flat sprint, then after training, deployed it to the Nano. In order to tell what is being detected, the built-in RGB LED changes color to notify the user. 

An unusual two-wheel steering system

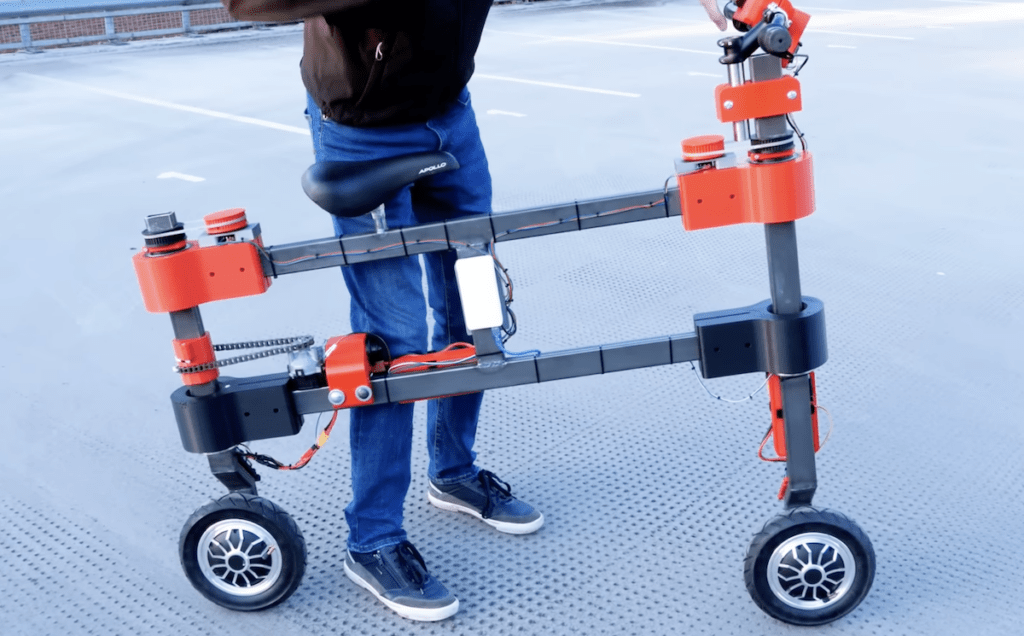
Prolific YouTuber and maker James Bruton is no stranger to unique robots and vehicles, and his take on the bicycle is no different. Unlike a traditional design that has a free front wheel and a locked rear wheel, this e-bike has a hub motor in both wheels that can turn independently thanks to an additional pair of motors. When the rider turns the front wheel, an Arduino Uno reads the encoder value and uses it to spin the rear wheel according to one of three modes: lock, mimic the front, and mirror the front. And although the resulting creating isn’t too practical, it’s a great way to see what’s possible when thinking out of the box. 

Intelligent lock

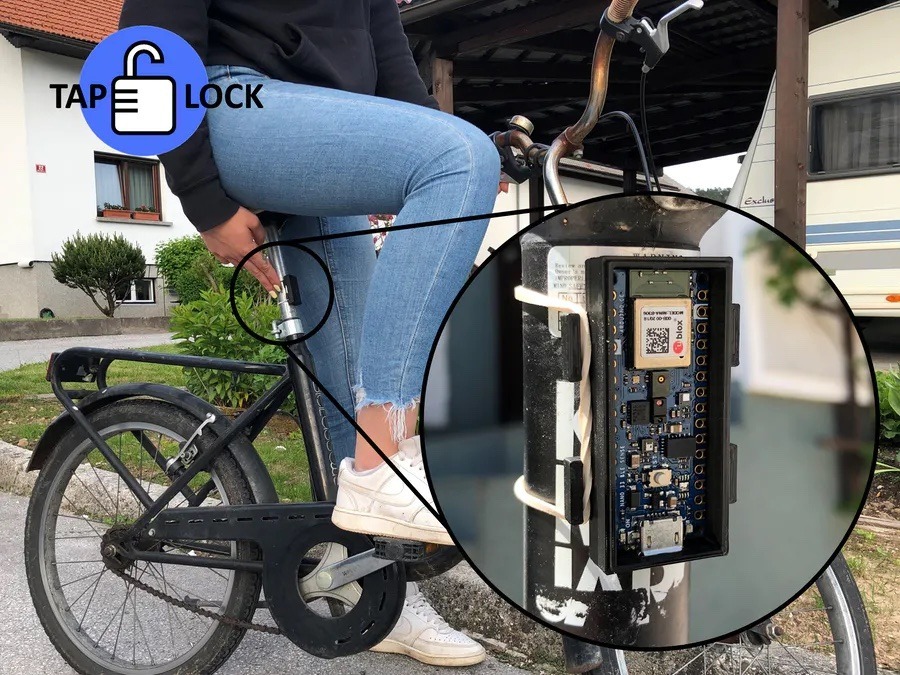
Nearly every bike lock in existence is operated by inserting a key into a cylinder and turning it to release the secured frame and/or wheel from a post. While this approach works, it also lacks several useful features such as keyless entry, mobile connectivity, and location tracking. The TapLock project reinvents the lock by relying on either a series of physical taps on the lock’s enclosure in a certain pattern or a paired phone to unlock. Beyond this, the TapLock’s Arduino Nano 33 BLE Sense communicates with the mobile app to store the current location on a map and even remotely lock the bike. 

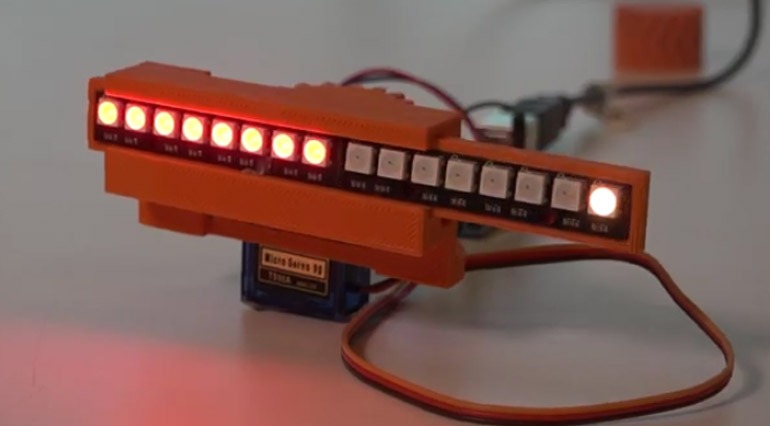
Compact turn signals

In a car, signaling is as easy as pushing a stock up or down to indicate your intention of changing lanes or turning, but for bikes, this role falls to the rider having to move their arm around. Tom Ouwerkerk’s solution was to buld a very compact signal by combing two eight-LED NeoPixel strips and an Arduino Uno to act as the signal. The strips sit on a gliding mechanism which moves either left or right thanks to a servo motor underneath, and it helps to clarify the intended direction of travel even further. 

ML-powered adjustable suspension

Higher-end, modern cars are beginning to add automatically adjustable suspension systems to their drivetrains which help to adapt the car to the current terrain, atmospheric conditions, and the driver’s comfort level. Jallson Suryo was able to create his own thanks to an Arduino Nano 33 BLE Sense and a servo motor that turns the bike’s front suspension fork to increase or decrease stiffness. Terrain recognition was accomplished by training an edge ML model on IMU readings and using them to distinguish between idle, smooth, medium, rough, and sprint conditions. 

Connecting a stationary bike to a simulator

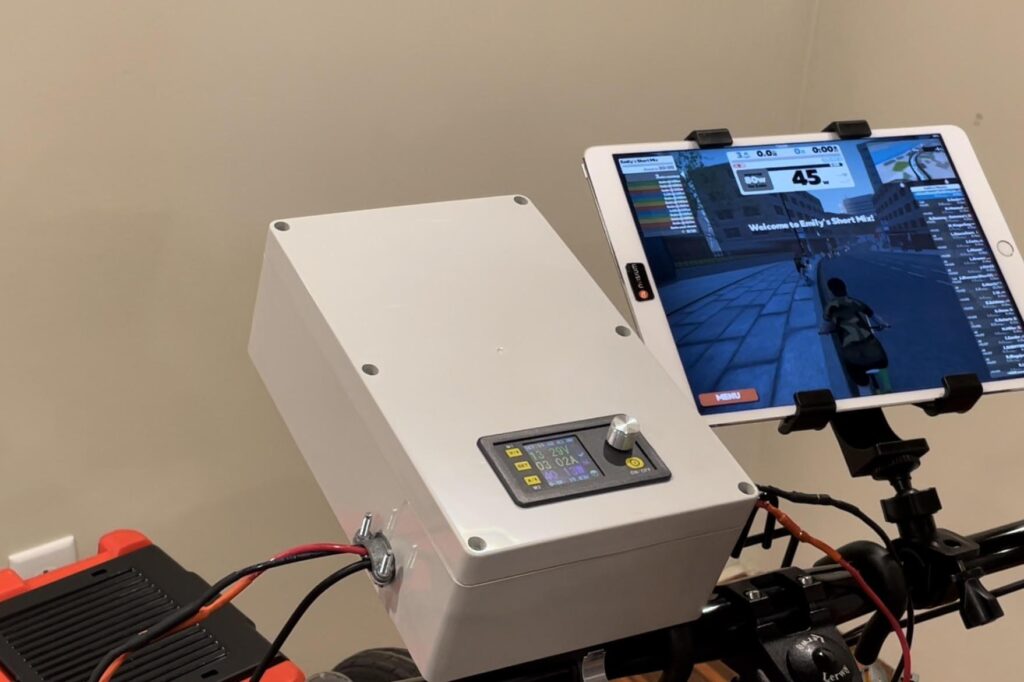
Bicycling simulators are a great way to experience races against others, explore trails, or simply enjoy a pleasant ride no matter what the weather outside is. Zwift is one such software, and two important features are that your actual pedaling speed is matched in-game and the game controls the pedaling difficulty. Gene’s Green Machine was able to integrate his bike with the system by connecting an Arduino Nano 33 IoT board to a DPS5020 charge controller for reading the current wattage and setting the target resistance. All of this information is sent and received by utilizing the Nano’s capabilities. 

A video game controller

Similar to the previous project, video game creator Jelle Vermandere wanted to ride his bike indoors along a virtual track. But this time, he took it a step further by not only integrating his bike using an Arduino Uno which determines the wheel speed via a magnetic reed switch, but building the game himself in Unity. He had to construct and animate models for himself, the bike, and the scenery. After adding an AI and ranking system to the game, he was able to successfully race within the virtual environment on a real bike. 

Responsive LED system

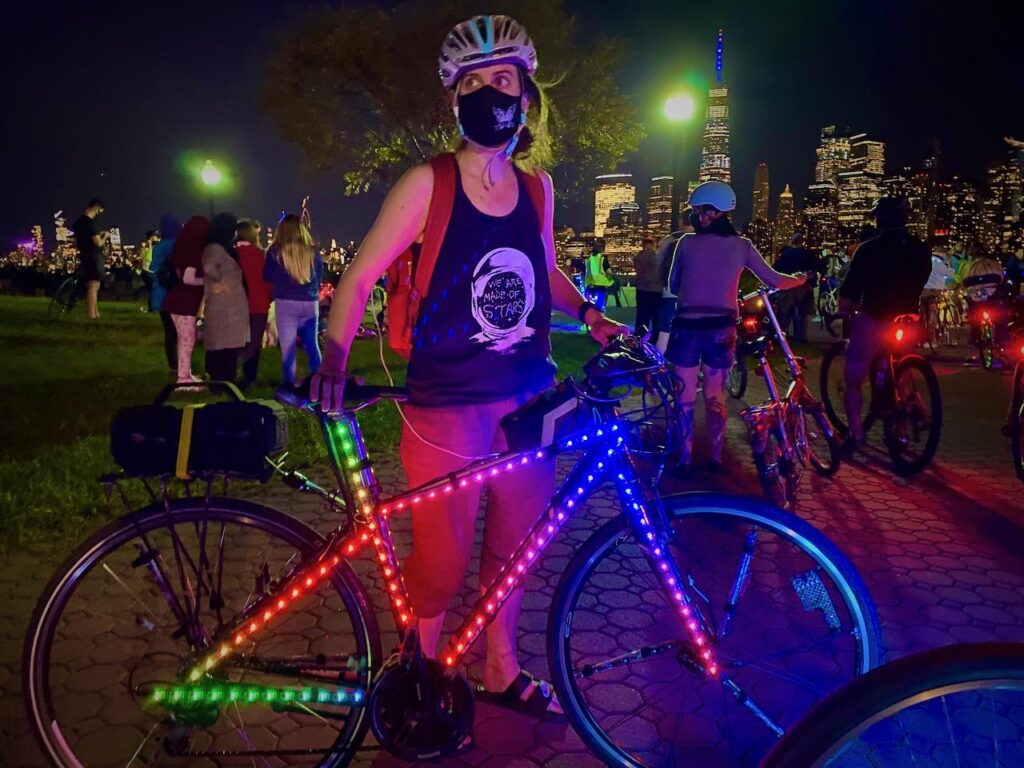
Motivated by the desire for a more advanced lighting system while on her nighttime bike rides, Natasha (TechnoChic) decided to affix strips of NeoPixel LEDs all over her bike that could react to music in real-time. The LEDs are controlled by an Arduino Nano 33 IoT that is, in turn, connected to her boombox via a 3.5mm audio jack for reading the audio signal. Two additional Nano 33 IoT boards were used for the wheels, along with more NeoPixels and batteries for each. 
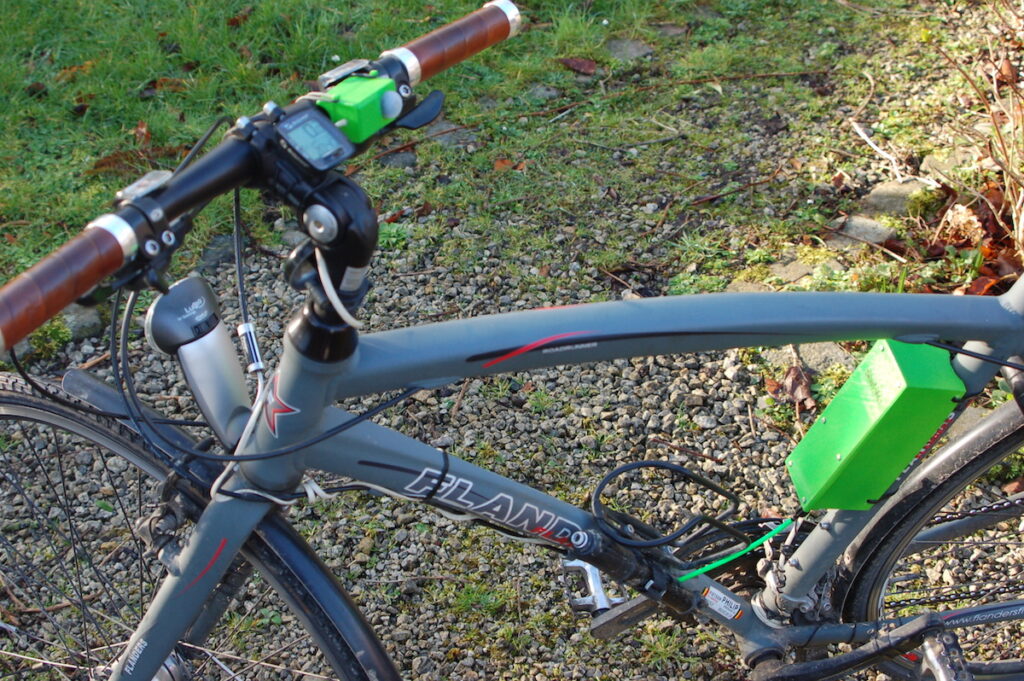
GPS tracker

Bicycle theft has been rapidly increasing over the last couple of years, which is why being able to recover a stolen bike has become vital. Johan’s bike tracker project contains an Arduino MKR GSM 1400 which reads motion data from an IMU and uses it to determine if the bike has moved when it is not supposed to. Once movement is detected, the board reads GPS data from a MKR GPS Shield and sends it over an LTE data connection in real-time so that the bike can be found. 

Integrated safety features

The majority of mountain bikes lack useful safety features such as integrated lights, turn signals, and speed tracking, which is why Collin Wentzien embarked on his “(not so) electric bike” project. He built a series of features, including automatic brake/turn lights, a headlight, and an electronic horn with the goal of improving safety. Furthermore, his bike also got a bike computer upgrade which contains an Arduino Mega, GPS module, and dual screens for displaying relevant telemetry data. 
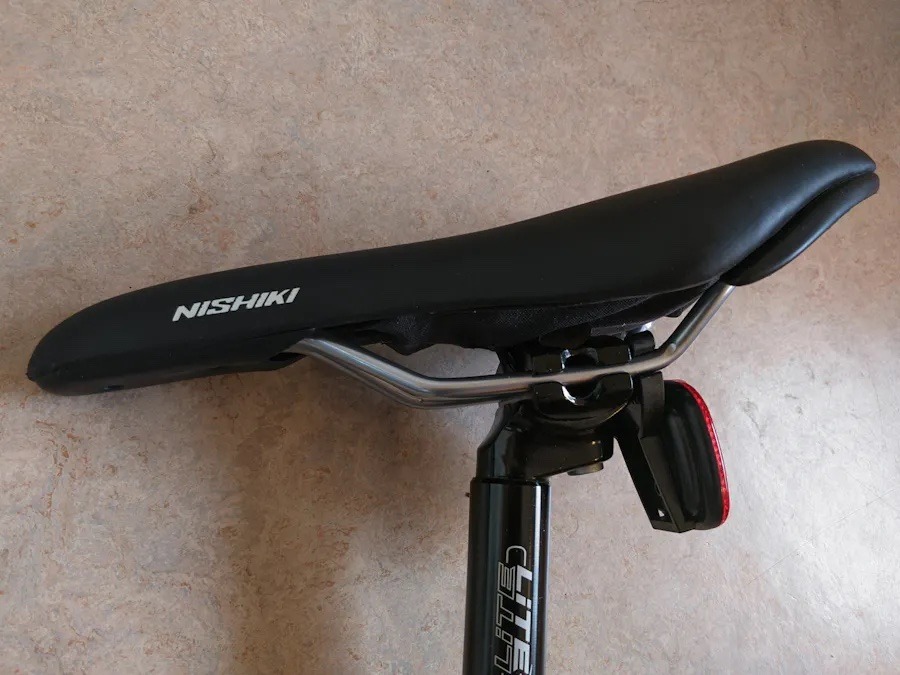
Speedometer display

After losing the display unit for her bike computer, Element14 Presents host Katie wanted to replace it with a DIY version that tracked the current speed via GPS instead of wheel rotations. An Arduino Nano 33 IoT board handled communication between the small 1.3” LCD screen and one of Quectel’s L80 small form-factor GPS modules. On each loop of the program, the time, speed, and distance are all shown on the screen thanks to the 4D Systems genieArduino display library. 

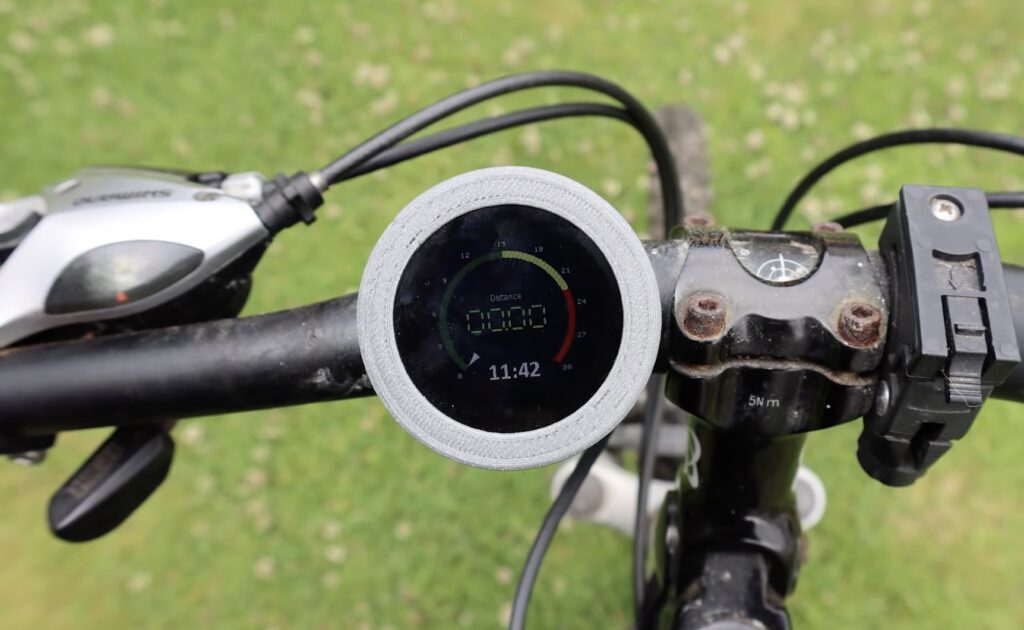
BLE-enabled cycling computer

This last DIY bicycle computer was made by YouTuber cubicpixelDE, and it integrates an Arduino Nano 33 BLE Sense along with a myriad of bicycle sensors and a heart rate sensor over BLE to display valuable data to the rider. The entire system combines a 1.8” color TFT screen and the Nano 33 BLE Sense into a single, compact unit which fits alongside the handlebar and reads out data to a mobile app wirelessly. 

The post Celebrate World Bicycle Day with these Arduino-powered bike projects appeared first on Arduino Blog.

cycling turn signals project

Turn signals are becoming more and more popular with cyclists. So it’s no surprise that we’re seeing more and more Arduino projects that give people the tools they need to ride safely on our busy roads.

Motorized Turn Signals

The first question you might ask about Tom Ouwerkerk’s latest Arduino project is why it’s motorized. His objective was to make a turn signal unit that’s as compact as possible. When you consider the amount of space you have on a bicycle frame, it makes a lot of sense.

His solution was to use two 8-LED Neopixel strips, side-by-side. The small housing they’re mounted in has a servo that’s driven by an Arduino Uno. The servo slides the LED strips side to side as Tom make a turn signal.

Motorized cycling turn signals project

The LEDs run in the turn direction to add a bit of movement to the signal as they slide to the side. It’s a great way to draw a bit of extra attention to the lights from the vehicles behind. This means the LED strips return to the center position to work as a break light when not turning. All of this in a 3D printed unit that’s no wider than the bicycle’s saddle. So you’re not going to kick (and break) as you get on and off.

3D Printing Practice

As much as a turn signal project, this was a 3D printing design project for Tom. He was experimenting with creating herringbone gears, which transfer power smoothly with excellent torque. But creating the chevron pattern is tricky, due to the precision required.

Clearly Tom nailed it, though. You can see from the video of his turn signal project that the servo is moving the LEDs easily and smoothly.

We’d be interested in seeing the controls Tom’s using, too. Presumably handlebar mounted switches or buttons for the turn signals and brakes. It’d also be interesting to know if it’s something that can run from batteries and a dynamo.

The post Super Compact Motorized Turn Signals for a Bike appeared first on Arduino Blog.

Recently [Imran Haque]’s family bought the quite popular Peloton bike. After his initial skepticism melted to a quiet enthusiasm, [Imran] felt his hacker curiosity begin to probe the head unit on the bike. Which despite being a lightly skinned android tablet, has a reputation for being rather locked down. The Peloton bike will happily collect data such as heart rate from other devices but is rather reticent to broadcast any data it generates such as cadence and power. [Imran] set out to decode and liberate the Peleton’s data by creating a device he has dubbed PeloMon. He credits the inspiration for his journey to another hacker who connected a Raspberry Pi to their bricked exercise bike.

As a first step, [Imran] step began with decoding the TRRS connector that connects the bike to the head unit. With the help of a multi-meter and a logic analyzer, two 19200bps 8N1 RS-323 channels (TX and RX) were identified. Once the basic transport layer was established, he next set to work decoding the packets. By plotting the bytes in the packets and applying deductive reasoning, a rough spec was defined. The head unit requested updates every 100ms and the bike responded with cadence, power, and resistance data depending on the request type (the head unit did a round-robin through the three data types).

Once the protocol was decoded, the next step for [Imran] was to code up an emulator. It seems a strange decision to write an emulator for a device with a simple protocol, but the reasoning is quite sound. It avoids a 20-minute bike ride every time a code change needs to be tested. [Imran] wrote both an event-driven and a timing-accurate emulator. The former runs on the same board as the PeloMon and the latter runs on a separate board (an Arduino).

The hardware chosen for the PeloMon was an Adafruit Feather 32u4 Bluefruit LE. It was chosen for supporting Bluetooth LE as well as having onboard EEPROM. A level shifter allows the microcontroller to talk directly to the RS-323 on the bike. After a few pull requests to the Adafruit Bluetooth libraries and a fair bit of head-banging, [Imran] has code that advertises two Bluetooth services, one for speed and another for power. A Bluetooth serial console is also included for debugging without having to pull the circuit out.

The code, schematics, emulators, and research notes are all available on GitHub.

It is pretty easy to go to a big box store and get a digital speedometer for your bike. Not only is that no fun, but the little digital display isn’t going to win you any hacker cred. [AlexGyver] has the answer. Using an Arduino and a servo he built a classic needle speedometer for his bike. It also has a digital display and uses a hall effect sensor to pick up the wheel speed. You can see a video of the project below.

[Alex] talks about the geometry involved, in case your high school math is well into your rear view mirror. The circumference of the wheel is the distance you’ll travel in one revolution. If you know the distance and you know the time, you know the speed and the rest is just conversions to get a numerical speed into an angle on the servo motor. The code is out on GitHub.

Granted, reading a magnet, keeping time, and driving a servo isn’t exactly cutting edge. On the other hand, it made us think about what other kinds of outputs you could drive. We haven’t seen a nixie tube speedometer (well, not on a bicycle, anyway), for example. Or maybe one built with mechanical flip numbers like an old clock.

We have seen some with Arduinos and lots of LEDs (although, again, not really for a bicycle). This speedometer might still be our favorite, though.


Filed under: Arduino Hacks, transportation hacks
Jun
03

Secure and Track Your Bike with this Arduino-Based GPS Lock

arduino, bicycle, bike, bike lock, lock, Security, Transportation Comments Off on Secure and Track Your Bike with this Arduino-Based GPS Lock 

Riding a bike can be fun, great exercise, and, if you live in a city conducive to it, a great mode of transportation. According to author Scott Bennett who lives in Vancouver BC, Canada, a city with a high bike theft rate, he “wanted to have some peace of mind […]

Read more on MAKE

The post Secure and Track Your Bike with this Arduino-Based GPS Lock appeared first on Make:.

Jul
09

DIY bike tachometer

arduino, bike, Tachometer Comments Off on DIY bike tachometer 

F9Z1SYQHX42QUO2.MEDIUM

Nikus @ instructables.com writes:

I will show you how to build a bike speedometer. It shows your speed, the average speed,the temperature, the trip time and the total distance. You can change it using the button. Additionally, the speed is shown on a tachometer. I built it because I like building new things, I have not found anything like this on the Internet so I want to show you how to build a good speedometer as the one on my bike is not as cool as I want :) . So let’s get started.

DIY bike tachometer - [Link]

Mar
06

Upcycling Umbrellas into a Blinky Bike Bag with Lilypad

Actuators, arduino, bag, bike, leds, Lilypad, tutorial, tutorials, Wearables Comments Off on Upcycling Umbrellas into a Blinky Bike Bag with Lilypad 

UmbrellaBag lilypad

Agy used for the first time Lilypad Arduino and LEDs on a textile project called Blinky Bike Bag, combining her expertise in fabric hacking with electronics:

The bike bag is made from umbrella material to make it waterproof, and I made it with safety features using the Lilypad light sensor and LEDs. My husband always forgets his reflectors but with the bikebag always being on the bike, he’ll have no excuse not to be a safe cyclist!

UmbrellaBag Lilypad

Follow the step-by-step tutorial on her website!

Aug
28

DIY Bicycle Computer with Arduino – auch auf Deutsch

arduino, bike, counter, german, tutorial, tutorials, video Comments Off on DIY Bicycle Computer with Arduino – auch auf Deutsch 

DIY bike computer videotutorial

This month we are going to work outdoor because Max is going to show us how  to make a DIY computer to customize our bicycle, collecting data of distances and speed. Watch the video tutorial in german language below and take a look at the schematics and the code.  Looking forward to your hacks!

——–

Diesen Monat geht es ab nach Draußen, denn Max zeigt uns wie man einen DIY Computer für ein Fahrrad bauen kann, welcher Daten über die Strecke und die Geschwindigkeit mit einem Arduino UNO ermittelt. Seht euch das deutschsprachige Video an und schaut euch den Schaltplan, die Komponenten und den Code an. Wir freuen uns auf eure Hacks!


  • Newsletter

    Sign up for the PlanetArduino Newsletter, which delivers the most popular articles via e-mail to your inbox every week. Just fill in the information below and submit.

  • Like Us on Facebook