Posts | Comments

Planet Arduino

Archive for the ‘digital cameras hacks’ Category

The next giant leap for mankind is to the stars. While we are mostly earthbound — for now — that shouldn’t stop us from gazing upwards to marvel at the night sky. In saying that, if you’re an amateur astrophotographer looking to take long-exposure photos of the Milky Way and other stellar scenes, [Anthony Urbano] has devised a portable tracking setup to keep your photos on point.

When taking pictures of the night sky, the earth’s rotation will cause light trails during long exposures. Designed for ultra-portability, [Urbano’s] rig uses an Arduino UNO controlled Sanryusha P43G geared stepper motor coupled to a camera mounting plate on a small tripod. The setup isn’t designed for anything larger than a DSLR, but is still capable of taking some stellar pictures.

55mm Exposure Comparison

A quartet of buttons and indicator LEDs allow [Urbano] to adjust the tracking speed and display the current speed; the key here is that it doesn’t require re-calibration for each use. The entire setup fits inside a standard camera bag, which makes for easier treks out into the wilds — away from light pollution — to truly capture the night sky.

[Urbano] has designed the project to be accessible to most amateur makers, but if you’re looking for a more involved setup, check out this star tracker — it uses 3D printed parts and has lasers!

[Thanks for sharing your project with us, Anthony Urbano!]


Filed under: Arduino Hacks, digital cameras hacks

It’s no secret that a lot of time, money, and effort goes into photographing and filming all that delicious food you see in advertisements. Mashed potatoes in place of ice cream, carefully arranged ingredients on subs, and perfectly golden french fries are all things you’ve seen so often that they’re taken for granted. But, those are static shots – the food is almost always just sitting on a plate. At most, you might see a chef turning a steak or searing a fillet in a commercial for a restaurant. What takes real skill – both artistic and technical – is assembling a hamburger in mid-air and getting it all in stunning 4k video.

That’s what [Steve Giralt] set out to do, and to accomplish it he had to get creative. Each component of the hamburger was suspended by rubber bands, and an Arduino timed and controlled servo system cut each rubber band just before that ingredient entered the frame. There’s even a 3D printed dual-catapult system to fling the condiments, causing them to collide in the perfect place to land in place on the burger.

In order to get this shot, [Steve] needed two things: precise timing and a robotic camera system to follow the burger down as it was assembled as it fell. The timing was taken care of with a control system he designed himself (which he’ll reuse for future projects). The robotic camera was a commercial unit capable of repeatedly following a preprogrammed path. You can see in the video below how it rotates around the hamburger to achieve a really cool 3D effect. Obviously a camera-wielding robot like the one [Steve] used is very expensive, but with a little ingenuity a DIY build is certainly possible.

[thanks to DMPalmer for the tip]


Filed under: Arduino Hacks, digital cameras hacks

Thermal imaging cameras are objects of desire for hackers and makers everywhere, but sadly for us they can be rather expensive. When your sensor costs more than a laptop it puts a brake on hacking.

Thankfully help is at hand, in the form of an affordable evaluation board for the Panasonic Grid-EYE thermal imaging camera sensor. This sensor has sparked the interest of the Hackaday community before, featuring in a project that made the 2014 Hackaday Prize semifinals, but has proved extremely difficult to obtain.

All that has now changed though with this board. It features the Grid-EYE sensor itself, an Atmel ATSAM-D21G18A microcontroller, and onboard Bluetooth, but has an interesting feature that, as well as being a standalone device, can be used as an Arduino shield. A full range of APIs are provided, and the code is BSD licensed.

This module is not the highest-spec thermal imaging camera on the market by any means, after all it has a resolution of only 64 pixels in an 8×8 grid. But its affordability and easy availability should trigger a fresh crop of thermal camera projects in our community, and we applaud that.

Thermal camera projects have featured quite a few times here on Hackaday. Some have been based on the FLIR Lepton module, like this one that combines its image with a 640×480 visible camera and another that claims to be one of the smallest thermal cameras, while others have harnessed raw ingenuity to create a thermal camera without a sensor array. This pan-and tilt design for example, or this ingenious use of light painting. Please, keep them coming!

[via oomlout]


Filed under: Arduino Hacks, digital cameras hacks
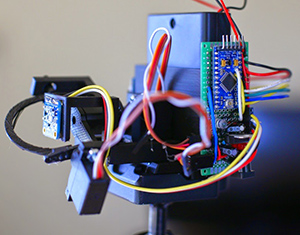
High speed photography is fun. Ultra high frame rate video, even more so. But since not many of us have access to $10,000 HFR cameras… we have to make do with long exposure shots a perfectly timed camera flash. You can design a system to trigger the flash at just the right millisecond — but they’re still pretty expensive typically.

[Electronupdate] has a 100W LED module and penchant for Arduino Nanos — so he wondered if he could make an affordable high speed camera rig — and he did.

It’s a pretty slick little setup. He has a limit switch mounted to a nail on a piece of wood — when the water balloon drops on it, it triggers the mechanical switch. The Arduino then triggers the LED flash, which is quite a large load and requires a High Side Switch to operate. A small LCD and series of buttons allow him to dial in the time offset just right in order to get some awesome photos of a water balloon exploding.

Alternatively, you can achieve the same effect with friggin’ lasers.


Filed under: Arduino Hacks, digital cameras hacks

The well-dressed hacker [Sean Hodgins] has put together a neat little project: a battery powered remote shutter. He built it for use with Beme, the latest Snapchat clone that all of the cool kids are now using.

This service is designed to get away from the selfie culture by starting to record when you hold your phone against your chest, so you are looking at the thing being recorded, not your phone. [Sean] wanted a bit more control than that, so he built a remote control that starts the recording by moving the servo arm over the proximity sensor.

He built this neat little device from an Arduino Pro Mini, a battery, a small servo, a couple of power control boards and a cheap RF link from SeedStudio, all glued onto an iPhone case. It’s a bit rough around the edges (the servo makes some noise that is picked up on the recording, for one thing), but it is a great example of how to lash together a quick prototype to test a project out.


Filed under: Arduino Hacks, digital cameras hacks
Mar
08

[kitesurfer1404] put together a nice looking vintage photobooth with WiFi capability. He’s using an arduino to monitor the state of the buttons, LED lighting control, seven segment display AND the DSLR camera. He then uses a Raspberry Pi to control imagine processing and to provide scaling and other effects, which can take up to 20 seconds per image. The Pi runs in WiFi Access Point mode, so anyone with a WiFi capable device can connect to the photo booth and view the images.

We’ve seen some interesting twists on photo booths before. But [kitesurfer1404’s] vintage style makes his stand out all on its own. He designed the graphics with Inkscape and printed them on thick paper. He then soaked the graphics in tea for several hours and dried then for several more days to get that nice rustic look.

Be sure to check out [kitesurfer1404’s] site for full details and an assortment of high resolution images of his project.


Filed under: Arduino Hacks, digital cameras hacks, Raspberry Pi

What’s cooler than learning about timers and interrupts on AVRs? Well, if you’re like [Matt], you can use that learning experience to build something useful – in this case, a timer for various camera flashes.

There are two ways to measure the speed of a flash. The first is the lag between when a button is pressed and when the flash goes off. As long as this is consistent, everything’s okay. The second type of speed is the pulse width. When looking at a xenon flash as time vs. brightness, they have a large spike at the beginning followed by a significant amount of decay. LED flashes are pretty much one cycle of a square wave.

To measure both types of flash speed, [Matt] used a $0.50 photodiode an a 3.5mm mack that ties into the flash remote. These bits are wired up to an Arduino, a little bit of fun work with timers and interrupts happens, and [Matt] learns how fast his flash is.


Filed under: Arduino Hacks, digital cameras hacks

pixel

[Ben] has written all sorts of code and algorithms to filter, sort, and convolute images, and also a few gadgets that were meant to be photographed. One project that hasn’t added a notch to his soldering iron was a camera. The easiest way to go about resolving this problem would be to find some cardboard and duct tape and built a pinhole camera. [Ben] wanted a digital camera. Not any digital camera, but a color digital camera, and didn’t want to deal with pixel arrays or lenses. Impossible, you say? Not when you have a bunch of integral transforms in your tool belt.

[Ben] is only using a single light sensor that outputs RGB values for his camera – no lenses are found anywhere. If, however, you scan a scene multiple times with this sensor, each time blocking a portion of the sensor’s field of view, you could reconstruct a rudimentary, low-resolution image from just a single light sensor. If you scan and rotate this ‘blocking arm’ across the sensor’s field of view, reconstructing the image is called a Radon transform, something [Ben] has used a few times in his studies.

camera [Ben]‘s camera consists of the Adafruit RGB light sensor, an Arduino, a microSD card, a few servos, and a bunch of printed parts. The servos are used to scan and rotate the ‘blocking arm’ across the sensor for each image. The output of the sensor is saved to the SD card and moved over to the computer for post-processing.

After getting all the pixel data to his laptop, [Ben] plotted the raw data. The first few pictures were of a point source of light – a lamp in his workspace. This resulted in exactly what he expected, a wave-like line on an otherwise blank field. The resulting transformation kinda looked like the reference picture, but for better results, [Ben] turned his camera to more natural scenes. Pointing his single pixel camera out the window resulted in an image that looked like it was taken underwater, through a piece of glass smeared with Vaseline. Still, it worked remarkably well for a single pixel camera. Taking his camera to the great outdoors provided an even better reconstructed scene, due in no small part to the great landscapes [Ben] has access to.


Filed under: Arduino Hacks, digital cameras hacks, Software Development

thermocam

[Max Ritter] is a 21 year old student of information technology at the University of Applied Science at Weingarten, Germany. Three years ago he brought us the DIY Cheap-Thermocam, a tool for thermal imaging that cost <$100. Since then he’s made a few upgrades.

The original Cheap-Thermocam made use of an Arduino, the sensor from a thermometer gun and a few XY servos. In about 2 minutes the XY servos can scan and measure 1344 points using the thermometer’s sensor, creating a heat-vision map of 42 x 32 pixels — not amazing, but it worked — and it was cheap!

The new version (V3) has its own ARM Cortex M3 processor, it measures 3072 points in 2 minutes from -70°C to 380°C with an accuracy of 0.5°C, and it exports its images at a resolution of 640 x 480 –close to commercial offerings! It’s not capable of real-time scanning, but for the majority of purposes you need one of these for — it’s really not that necessary.

Here’s a video from the first generation, which you can get the plans for free from his website.

It’s really cool seeing the development of something that we covered years ago come to market — we wish [Max] the best of luck continuing to advance the Cheap-Thermocam!


Filed under: Arduino Hacks, digital cameras hacks
Dec
17

Tricked-out Arduino-controlled Time-Lapse is More Than Just a Timer

arduino, arduino hacks, camera, digital cameras hacks, Infrared, photoresistor, remote control, servo Comments Off on Tricked-out Arduino-controlled Time-Lapse is More Than Just a Timer 

arduinoPhotoRig

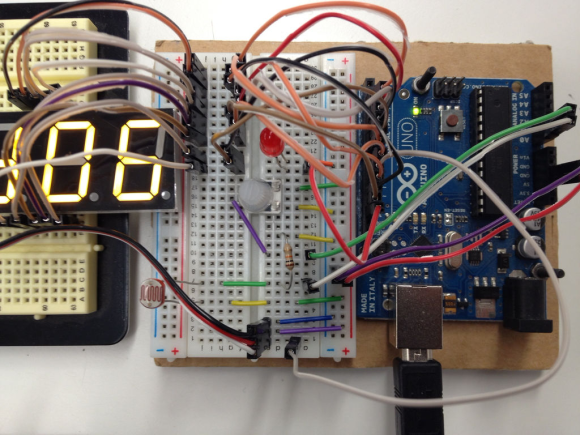
[Hlesliebole] wanted a finer degree of remote control over his time-lapse shots, so he decided to build an Arduino-driven infrared shutter. He ended up creating this killer Arduino-controlled photography rig that does a whole lot more.

This hack was built for [Hlesliebole]‘s Nikon D3100, but he says it should work with any DSLR and remote shutter. This initial build uses an LED as a stand-in for the remote shutter that he ordered.  He intends to update the post once it arrives and he integrates it.

[Hlesliebole] wired a 7-segment display to show the current time delay between photos. This can be set on the fly with a potentiometer, so there’s no need to stop and reprogram the Arduino. And while you’re grabbing a beer and watching the sun slowly sink, the rig can better capture that sunset because of a photoresistor. It detects the ambient light level and minimizes the number of throwaway dark shots.

If that weren’t enough, he’s built servo functionality into the code to support remote control over the camera’s physical position, allowing for panning or rotation over a scene. [Hlesliebole] doesn’t go into detail, but he assures us that there are many tutorials out there.  If you think you’re man enough, you could always work in this outstanding versatile motion dolly hack.


Filed under: Arduino Hacks, digital cameras hacks


  • Newsletter

    Sign up for the PlanetArduino Newsletter, which delivers the most popular articles via e-mail to your inbox every week. Just fill in the information below and submit.

  • Like Us on Facebook