Posts | Comments

Planet Arduino

Archive for the ‘magnet’ Category

We’ve seen countless different robot kits promoted for STEM education, every one of which can perform the robotic “Hello World” task of line following. Many were in attendance at Maker Faire Bay Area 2019 toiling in their endless loops. Walking past one such display by Microduino, Inc. our attention was caught by a demonstration of their mCookie modules in action: installing a peripheral module took less than a second with a “click” of magnets finding each other.
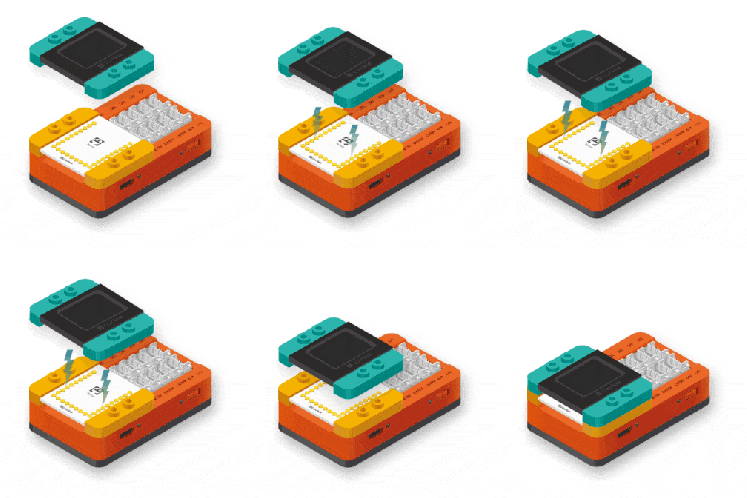
Many Arduino projects draw from an ecosystem of Arduino shields. Following that established path, Microduino had offered tiny Arduino-compatible boards and peripherals which connected with pins and headers just like their full-sized counterparts. Unfortunately their tiny size also meant their risk of pin misalignment and corresponding damage would be higher as well. mCookie addresses this challenge by using pogo pins for electrical contacts, and magnets to ensure proper alignment. Now even children with not-quite-there-yet dexterity can assemble these modules, opening up a market to a younger audience.

Spring loaded electric connections are a popular choice for programming jigs, and we’ve seen them combined with magnets for ideas like modular keyboards, and there are also LittleBits for building simple circuits. When packaged with bright colorful LEGO-compatible plastic mounts, we have the foundation of an interesting option for introductory electronics and programming. Microduino’s focus at Maker Faire was promoting their Itty Bitty Buggy, which at $60 USD is a significantly more affordable entry point to intelligent LEGO creations than LEGO’s own $300 USD Mindstorm EV3. It’ll be interesting to see if these nifty mCookie modules will help Microduino differentiate themselves from other LEGO compatible electronic kits following a similar playbook.

There are plenty of PC joysticks out there, but that didn’t stop [dizekat] from building his own. Most joysticks mechanically potentiometers or encoders to measure position. Only a few high-end models use Hall effect sensors. That’s the route [dizekat] took.

Hall effect sensors are non-contact devices which measure magnetic fields. They can be used to measure the position and orientation of a magnet. That’s exactly how [dizekat] is using a trio of sensors in his design. The core of the joystick is a universal joint from an old R/C car. The center section of the joint (called a spider) has two one millimeter thick disc magnets glued to it. The Hall sensors themselves are mounted in the universal itself. [Dizekat] used a small piece of a chopstick to hold the sensors in position while he found the zero point and glued them in. A third Hall effect sensor is used to measure a throttle stick positioned on the side of the box.

An Arduino micro reads the sensors and converts the analog signal to USB.  The Arduino Joystick Library by [Matthew Heironimus] formats the data into something a PC can understand.

While this is definitely a rough work in progress, we’re excited by how much [dizekat] has accomplished with simple hand tools and glue. You don’t need a 3D printer, laser cutter, and a CNC to pull off an awesome hack!

If you think Hall effect sensors are just for joysticks, you’d be wrong – they work as cameras for imaging magnetic fields too!

Desk toys are perfect for when you don’t want to work. There’s a particularly old desk toy called the Newton’s cradle. If you don’t know the name, you’d still recognize the toy. It is some ball bearings suspended in midair on strings. If you pull back, say, two balls and let them swing to impact the other balls, the same number of balls on the other side will fly out. When they return, the same number will move on the other side and this repeats until friction wears it all down.

We think [JimRD] might be carried away on procrastination. You see, he not only has a Newton’s cradle, he has automated it with an Arduino. According to [Jim], this is his third attempt at doing so. You can see the current incarnation in the video, below.

There are two servos. One pulls back the balls and releases them and the other stops the balls in anticipation of the next operation. The servo that pulls the balls back is clearly magnetic. At first, we thought it was an electromagnet and that deenergizing it released the balls. That’s not the case. Instead, the servo arm has a permanent magnet, but foam decouples it from the ball so that if the arm pulls far enough away, the ball can escape.

Because of the differences in magnets, ball bearings, and other factors, if you try to duplicate this, you’ll probably have to experiment a little with the angles and speeds in the code. The ball stop servo is probably unnecessary, as long as you don’t mind waiting for the thing to wind down on its own.

If you don’t have a cradle, you could always make one yourself. We’d probably avoid using light bulbs, though.


Filed under: Arduino Hacks

Stepper MotorLearn how one Maker created his own stepper motor using a 3D printer, an Arduino, and a few materials picked up from the hardware store.

Read more on MAKE

The post 3D Print Your Own Stepper Motor appeared first on Make: DIY Projects, How-Tos, Electronics, Crafts and Ideas for Makers.

Sep
24

Visualizing the process of human brain with magnets and liquids

arduino, arduino uno, eeg, Featured, magnet, Motors, visualisation Comments Off on Visualizing the process of human brain with magnets and liquids 

solaris

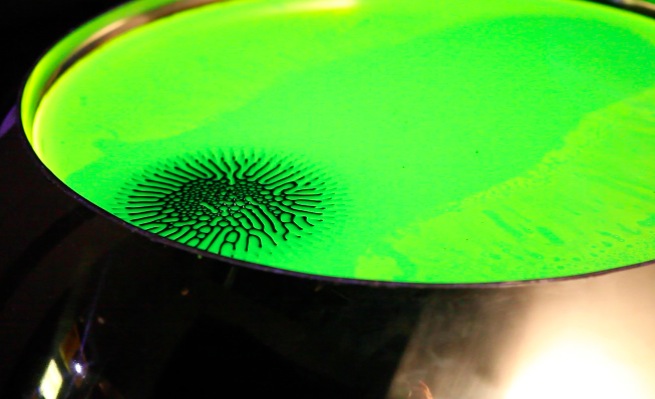
Solaris is an interactive installation created by Julia Borovaya (idea curation), Edward Rakhmanov (robotic system, chemistry), Vtol (programming, electronics) with the help of Alexander Kaplan, professor of neurophysiology:

it demonstrates the field influence of the permanent magnet on the magnetic and spirit (fluorescent) liquids. Two liquids constitute the diphasic system. Due to liquids movements and their surfaces’ modifications we visualize the unique processes of human brain. The spectator wears on neuro interface Emotive Epoc, the device computes a brain activity and sends information to the installation machinery.

To test the project people of different ages, social groups and professional areas were invited. Test results confirmed that brain activity and mood of the man reflect on the dynamic and character of liquids movements in the sphere. Object reacts on the changes of mind and emotion states. People who spent a plenty of time with the object managed to influence the dynamic and direction of the liquids on the unconsciousness level. We also reveal that the installation visualizes the temperament of the person. The object copies your mental organization and echoes it on the liquid’s surface. The object becomes a part of the participant.

It runs on Arduino Uno controlling dc motors, 2 actuators and a custom digital motor control system interface.

Sep
09

An etch-a-sketch on dope

arduino, inspiration, magnet, motor, shield Comments Off on An etch-a-sketch on dope 

Magnetography

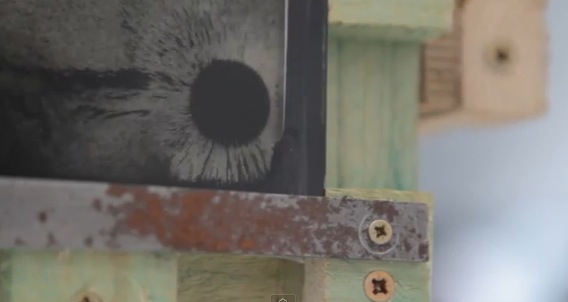
Arduino Facebook  page is a great source of inspiration  with plenty of people posting everyday about projects and experiments. Some days ago a user shared this interesting video about Magnetography, an alternative drawing toy using ferrofluid, a liquid which becomes strongly magnetized in the presence of a magnetic field.

Magnetography, by Christian Robach, is built out of old DC-Motors, a frame filled with water and ferrofluids.  The “pen” can be controlled by using the W-A-S-D letters on the keyboard allowing the users to play with the liquid metal without getting their hands dirty.
The commands are sent to the serial Port via Processing then Arduino UNO, with an Adafruit Motor Shield extension, reacts by powering the motors and moving the magnet according to the coordinates. Enjoy the video below:


  • Newsletter

    Sign up for the PlanetArduino Newsletter, which delivers the most popular articles via e-mail to your inbox every week. Just fill in the information below and submit.

  • Like Us on Facebook