Posts | Comments

Planet Arduino

Archive for the ‘Engine’ Category

If you live somewhere prone to power outages, you might have thought about buying a generator. The problem is that small generators are cheap but — well — small. Big generators are expensive. [Jake von Slatt] had an idea. He has a “yard car” which we thought might be a junk car but, instead, it is an old car he uses to drive around his yard doing tasks. It has a winch and a welder. Now it has a big generator, too. You can follow the project in the three videos found below.

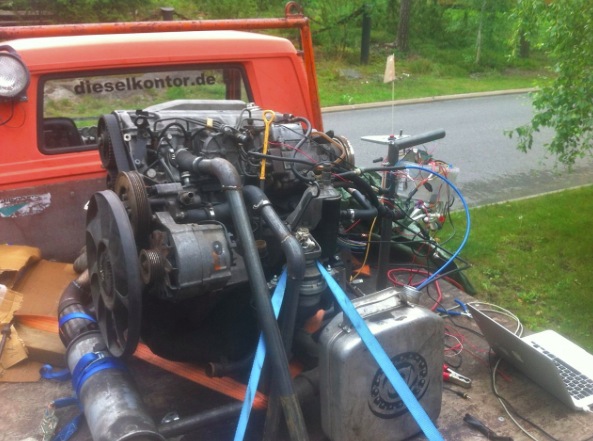
The project started with a scrap generator with a blown motor. Of course, the car has a motor so — in theory — pretty simple. Remove the generator from the motor and graft it to the car’s motor. But the details are what will kill you.

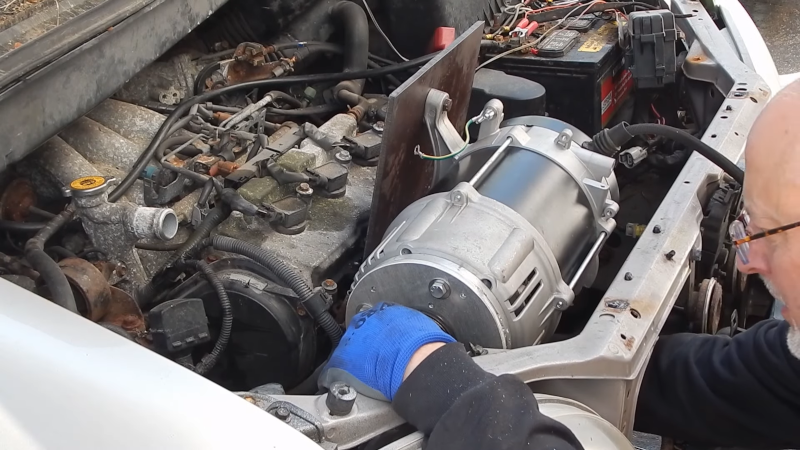
The first video shows the teardown of the generator unit and some planning. Some custom parts that were recovered from the scrap pile replaced some of the parts on the generator, including a custom casting leftover from another project that took a bit of machining to repurpose.

By the second video, he had a proof of concept working, but it had a small problem. He was controlling the speed of the motor with a stick on the accelerator linkage. So, he modified an idler from an AC compressor to limit the speed of the generator. The final video uses an Arduino to drive the cruise control to keep a steady RPM to the generator.

Overall, this is an interesting project both because it is unusual and useful, but also because of the wide range of skills [Jake] demonstrates — he knows his way around a machine shop, a car, and the Arduino. Pretty impressive!

We’d rather reuse a car engine than drive the generator ourselves. For some reason, that comes up repeatedly.

If you are working with OBD2 hardware or software, it’s easy enough to access test data, simply plug into a motor vehicle with an OBD2 socket. If, however, you wish to test OBD2 software under all possible fault conditions likely to be experienced by an engine, you are faced with a problem in that it becomes difficult to simulate all faults on a running engine without breaking it. This led [Fixkick] to create an OBD2 simulator using a secondhand Ford ECU supplied with fake sensor data from an Arduino to persuade it that a real engine was connected.

The write-up is quite a dense block of text to wade through, but if you are new to the world of ECU hacking it offers up some interesting nuggets of information. In it there is described how the crankshaft and camshaft sensors were simulated, as well as the mass airflow sensor, throttle position, and speedometer sensors. Some ECU inputs require a zero-crossing signal, something achieved with the use of small isolating transformers. The result is a boxed up unit containing ECU and Arduino, with potentiometers on its front panel to vary the respective sensor inputs.

We’ve brought you quite a few OBD2 projects over the years, for example, there was this LED tachometer, and a way into GM’s OnStar.

Thanks [darkspr1te] for the tip.


Filed under: Arduino Hacks, car hacks
Feb
25

An electronic diesel engine controlled with Arduino Mega

arduino, arduino mega, Cars, diesel, Engine, mega, reverse engineering Comments Off on An electronic diesel engine controlled with Arduino Mega 

Diesel_Engine

A few years ago Sven and Juho started working on the same type of project without knowing about each other and only by a coincidence their paths crossed. They wrote me about their cool story and the successful experiment of upgrading a diesel engine using Arduino Mega:

There’s a prettty large community out there in the car/motorsports hobbyist world that loves their vehicle but the engine is getting old, worn out and maybe even too bad to renovate. What people do is to take the engine from a newer car with a modern direct injected diesel engine, with all the cables, sensors and motor controller (the ECU) and adapt it to their beloved old car. This is exactly what is going on with the VW buses (called vanagons in the US) where the diesel engines from the beginning is a bit on the small side and 20 years later their performance is not much better than a garden tractor. A “new” electronically controlled engine is used to replace the old worn out engine, and with that follows better power, less pollution and way better fuel economy.

Schematic_diesel

BUT, this takes time and is a complex project. You have to adapt the cablage, install the ECU (the motor controller) and must be sure that all the peripheral sensors sitting all around the engine is brought over to the new car and is working. You might also have to adapt the instrument cluster behind the steering wheel to make all the warning lights and gauges to work again.

The idea with the Arduino controller is to take the ENGINE ONLY and then let the Arduino manage the engine with the sensors that is on the engine itself. By doing this, the motor swap is reduced to a weekend project and everything in the bus is working as it was before. No instruments modification, no need for external valves and sensors, no adapted cablage. Just the Arduino.

You can find the whole documentations and the details of the project on Juho’s website.

Sep
30

C++ 4 Stroke Engine Simulation MFC Visual Studio 2008

4 stroke, C, Engine, MFC, VS2008 Comments Off on C++ 4 Stroke Engine Simulation MFC Visual Studio 2008 


C++ 4 Stroke Engine Simulation MFC Visual Studio 2008

Wrote this back in 2005 when I was doing a boring managers job and didn't want all my skills to desert me. Function keys 2,3,4,5 and shift let you rotate the whole thing in X,Y,Z and zoom with the mouse.


Sep
30

C++ 4 Stroke Engine Simulation MFC Visual Studio 2008

4 stroke, C, Engine, MFC, VS2008 Comments Off on C++ 4 Stroke Engine Simulation MFC Visual Studio 2008 


C++ 4 Stroke Engine Simulation MFC Visual Studio 2008


Sep
27

Cool Lego Engines

cylinder, Engine, LEGO, pneumatic, Ross yoke Comments Off on Cool Lego Engines 


  • Newsletter

    Sign up for the PlanetArduino Newsletter, which delivers the most popular articles via e-mail to your inbox every week. Just fill in the information below and submit.

  • Like Us on Facebook