RC flying is one of those multi-disciplinary hobbies that really lets you expand your skill set. You don’t really need to know much to get started, but to get good you need to be part aeronautical engineer, part test pilot and part mechanic. But if you’re going to really go far you’ll also need to get good at electronics, which was part of the reason behind this Arduino servo tester.
[Peter Pokojny] decided to take the plunge into electronics to help him with the hobby, and he dove into the deep end. He built a servo tester and demonstrator based on an Arduino, and went the extra mile to give it a good UI and a bunch of functionality. The test program can cycle the servo under test through its full range of motion using any of a number of profiles — triangle, sine or square. The speed of the test cycle is selectable, and there’s even a mode to command the servo to a particular position manually. We’ll bet the build was quite a lesson for [Peter], and he ended up with a useful tool to boot.
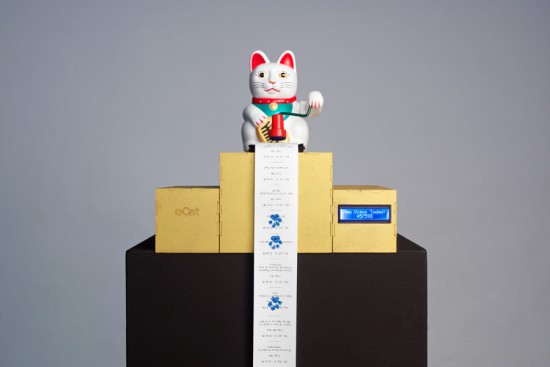
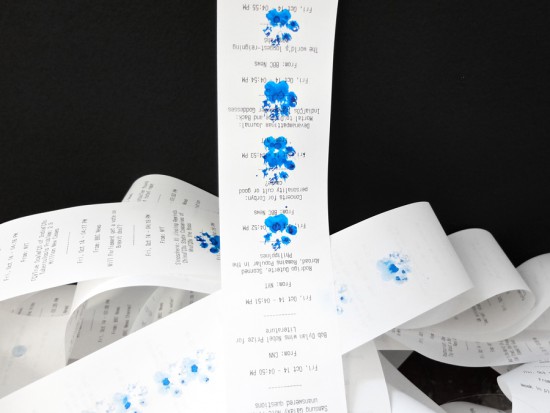
Over the last couple of years, cat videos have become the undisputed champions of the web. Whether it’s kittens playing with their shadows to failed jump attempts to giving each another massages, we’re all guilty of watching a few of these clips from time to time (yes, even at work). Built with this in mind, oCat is a real-time tracker for feline-related activity on the Internet.
oCat consists of two parts: the oCat News Distractor and the Kitty o’Cat Twitter bot. Using Google’s YouTube API, the system works by continuously monitoring for new uploads, the number of new views each day, or a specific video that has received a remarkable amount of attention. It then tweets these stats and prints them out on thermal paper, stamping a paw print on the timeline for every 1,000 views.
Created by Annika Engelhardt, a digital media design master’s student at the University of the Arts in Bremen, oCat uses an Arduino along with an ESP Wi-Fi module, a servo, and an LCD screen. The aim of the project is to increase and reveal the amount of hours people spend watching cat videos online.
The cat is an altered Maneki-neko, holding a stamp using welding wire and hot glue. Even though I filled the stamp with extra ink, it did not work properly and I had to cut out the paw-shape from a sponge and glue it onto the original stamp.
The thermal printer used in the device needs a USB connection, so I used a Raspberry Pi to control it. I wrote a Python script that checks four different RSS news feeds for new posts every 15 minutes and prints one headline with a timestamp every minute.
The Twitter bot was programmed using Python and a library called tweepy. Most of the script is reading JSON files, juggling and comparing data and text files and in the end mixing up parts of a sentence to form a tweet. The bot will be enhanced in the future
[Joekutz] wanted to re-build an audio-rate function generator project that he found over on Instructables. By itself, the project is very simple: it’s an 8-bit resistor-ladder DAC, a nice enclosure, and the rest is firmware.
[Joekutz] decided this wasn’t enough. He needed an LCD display, a speaker, and one-hertz precision. The LCD display alone is an insane hack. He reverse-engineers a calculator simply to use the display. But instead of mapping each key on the calculator and typing each number in directly, he only taps the four 1, +, =, and clear keys. He can then enter arbitrary numbers by typing in the right number of ones and adding them up. 345 = 111 + 111 + 111 + 11 + 1. In his video, embedded below, he describes this as a “rather stupid” idea. We think it’s hilarious.
The meat of the project is the Arduino-based waveform generator, though. In the second video below, [joekutz] walks through the firmware in detail. If you’d like a simple introduction to DDS, check it out (or read up our more in-depth version).
He also makes custom detents for his potentiometers so that he can enter precise numerical values. These consist of special knobs and spring-clips that work together to turn a normal pot into a rough 8-way (or whatever) switch. Very cool.
So even if you don’t need an R-2R DAC based waveform generator, go check this project out. There’s good ideas at every turn.
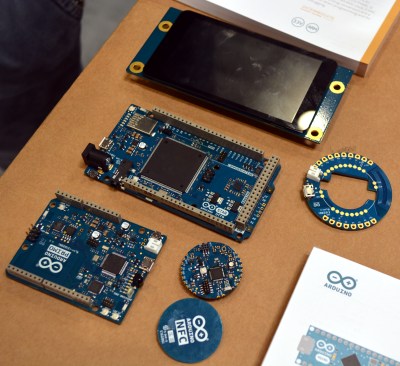
I caught up with Federico Musto, President and CEO of Arduino SRL, at the 2016 Bay Area Maker Faire. Their company is showing off several new boards being prepared for release as early as next month. In partnership with Nordic Semi and ST Microelectronics they have put together some very powerful offerings which we discuss in the video below.
The new boards are called Arduino Primo, Arduino Core, Arduino Alicepad, and Arduino Otto.
The first up is the Primo, a board built to adhere to the UNO form factor. This one is packing an interesting punch. The main micro is not an Atmel chip, but a Nordic nRF52832 ARM Cortex-M4F chip. Besides being a significantly fast CPU with floating-point support, the Nordic IC also has built-in Bluetooth LE and NFC capabilities, and the board has a PCB antenna built in.
On an UNO this is where the silicon would end. But on the Primo you get two more controllers: an ESP8266 and an STM32F103. The former is obvious, it brings WiFi to the party (including over-the-air programming). The STM32 chip is there to provide peripheral control and debugging. Debugging is an interesting development and is hard to come by in the Arduino-sphere. This will use the OpenOCD standard, with platformio.org as the recommended GUI.
The same nRF52 microcontroller is present on the Arduino Core and the Alicepad, which are targeted at wearable electronics. The circular form factor of the Alicepad mimics the familiar sewable form of the Lilypad.
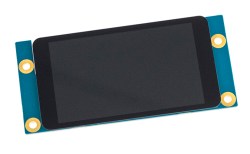
Arduino’s other offerings are where the horsepower really gets crazy. The Otto board boasts a gigantic STM32F469: a 169-pin ARM Cortex-M4F clocked at 180 MHz. The chip has a ridiculous assortment of built-in peripherals, and you’re not likely to run out of either pins or CPU cycles. It’s also got a hardware graphics accelerator, so it’s no surprise to find that the Otto has a DSI-IF connector on the back that is designed to plug into the LCD screen also being demonstrated at the event: a capacitive touch 480×800 display. The Otto also includes an ESP8266 to provide WiFi (why not, right?).
There are a few question marks in my mind on this one. First off, the Otto and the LCD have a product-family designator of “Star” which will be assigned to all the boards that feature the STM controllers. This seems a bit confusing (Star Otto, Star LCD, etc) but I guess they want to differentiate them from the “normal” Arduini. But are these devices becoming too complex to bear the Arduino name? Maybe, but the UNO is always going to be there for you and the new boards give you access to newer and more powerful features. Whether or not this complexity can be easily harnessed will depend on the software libraries and the IDE. After all, I think Donald Papp made a great point earlier in the week about the value of Arduino comfort in custom electronic work.
The Lawsuits
Finally, I asked Federico if there is any news about the Arduino versus Arduino trademark litigation. He spoke with us almost a year ago on the topic, but he had no new information for us at this point. (The US court case may be ruled on as early as July of this year, so there’s probably not much he could say, but I had to try.)
Federico spoke a little bit about the conflict between the two Arduinos, and said that it was brewing inside the company long before he got there. And it does appear that both companies calling themselves Arduino are trying to outdo each other with new boards and new initiatives, and going in different directions. If there is a bright side, it’s that this competition may end up building us better hardware than a single company would, because both are making bets on what will put them out ahead of the game.
There are cheap LCDs available from China, and when plugged into an Arduino, these displays serve as useful interfaces or even shinier baubles for your latest project. [Michael] picked up a few of these displays in the hope of putting a few animated .GIFs on them. This is an impossible task with an ATMega microcontroller – the Arduino does not have the RAM or the processing power to play full-screen animations. It is possible to display 3D vector graphics, with an updated graphics library [Michael] wrote.
The display in question uses the ILI9341 LCD driver, found in the Adafruit library, and an optimized 3D graphics driver. Both of these drivers have noticeable flicker when the animation updates, caused by the delay between erasing a previous frame and when a new frame is drawn.
With 16-bit color and a resolution of 320×240 pixels, there simply isn’t enough memory or the processing power on an ATMega microcontroller to render anything in the time it takes to display a single frame. There isn’t enough memory to render off-screen, either. To solve this problem, [Michael] built his render library to only render pixels that are different from the previous frame.
Rendering in 3D presents its own problems, with convex surfaces that can overlap themselves. To fix this, [Michael]’s library renders objects from front to back – if the pixel doesn’t change, it doesn’t need to be rendered. This automatically handles occlusions.
In a demo application, [Michael]’s LCD and Arduino can display the Stanford bunny, a low-poly 3D face, and geometric object. It’s not a video game yet, but [Michael] thinks he can port the classic game Spectre to this platform and have it run at a decent frame rate.
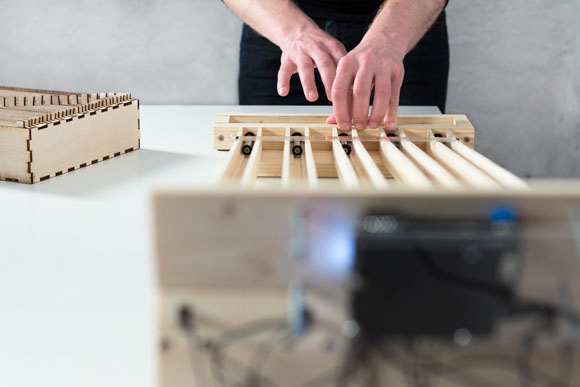
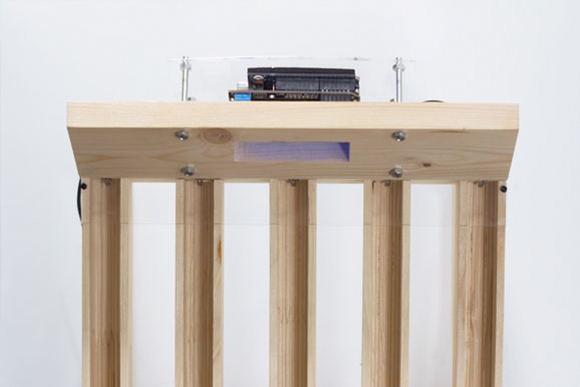
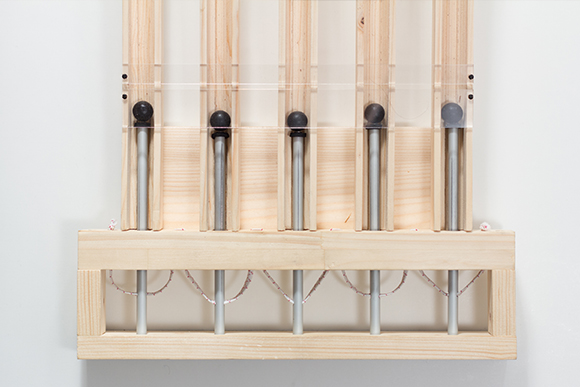
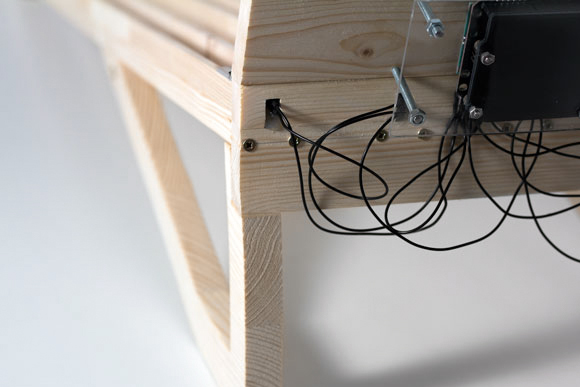
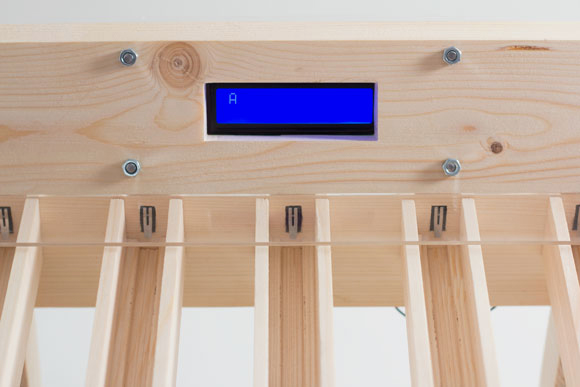
Julian Hespenheide is an interaction designer based in Germany who submitted to Arduino blogpost a writing machine called émile. It’s an interactive installation created in collaboration with Irena Kukric, David Beermann, Jasna Dimitrovskais and using Baudot code - a binary 5-bit code, predecessor of ASCII and EBCDID – intended for telecommunication and electronic devices, representing the entire alphabet.
It runs on Arduino Uno and translates the bauds (/?b??d/, unit symbol Bd) into moving objects that are being sent over physical tracks in order to illustrate a simple computational process of 5-bit binary information transmission:
The machine was built in six days with four people. In our group we came to the conclusion, that not every process in a computer is really transparent and it already starts when you type a simple letter on a keyboard. To unwrap this “black box” of data transmission, we set our goal to build a small writing machine where you can literally see bits rolling around. After some research we got back to the beginnings of Telefax machines and data transmission using Baudot-code. We then quickly designed punchcards and mapped them to a slightly altered baudot code table and cut them with a laser cutter from 5mm plywood.
Whenever a marble hits a switch, a short timer goes off and waits for input on the other switches. If no other marbles are hitting those switches, we finally translate the switches that have been hit into the corresponding letter.
arduino, HD44780, LCDComments Off on How to use an LCD displays – Arduino Tutorial
by codebender_cc @ instructables.com:
The LiquidCrystal library allows you to control LCD displays that are compatible with the Hitachi HD44780 driver. There are many of them out there, and you can usually find them by the 16-pin interface.
In this tutorial you will learn how to use LCD 16×2 display (and 20×4) with Arduino uno.
You will also learn how to use lcd.begin(), lcd.print() and lcd.setCursor() functions
How to use an LCD displays – Arduino Tutorial – [Link]
arduino, distance, LCD, ultrasonicComments Off on Arduino LCD Project for Measuring Distance with Ultrasonic Sensor
by toptechboy.com:
In LESSON 18 you learned how to use an ultrasonic sensor to measure distance, and in LESSON 19 you learned how to connect an LCD to the arduino. In this lesson we will combine what you have learned to create a circuit for measuring distance, and displaying results on an LCD display.
You can use the schematic below to connect the circuit. If you did LESSON 19, you should already have the LCD hooked up. For more info on connecting to the LCD, and how it works, review LESSON 19. This schematic is for the LCD in the Sparkfun Inventor Kit, or similar LCD. If you have a different LCD, you will have to determine the proper connections. There are some helps in LESSON 19. If you need the ultrasonic sensor, you can pick one up HERE.
Arduino LCD Project for Measuring Distance with Ultrasonic Sensor – [Link]
A while ago, [Paul Stoffregen], the creator of the Teensy family of microcontrollers dug into the most popular Arduino library for driving TFT LCDs. The Teensy isn’t an Arduino – it’s much faster – but [Paul]’s library does everything more efficiently.
Even when using a standard Arduino, there are still speed and efficiency gains to be made when driving a TFT. [Xark] recently released his re-mix of the Adafruit GFX library and LCD drivers. It’s several times faster than the Adafruit library, so just in case you haven’t moved on the Teensy platform yet, this is the way to use one of these repurposed cell phone displays.
After reading about [Paul]’s experience with improving the TFT library for the Teensy, [Xark] grabbed an Arduino, an LCD, and an Open Workbench Logic Sniffer to see where the inefficiencies in the Adafruit library were. These displays are driven via SPI, where the clock signal goes low for every byte shifted out over the data line. With the Adafruit library, there was a lot of wasted time in between each clock signal, and with the right code the performance could be improved dramatically.
The writeup on how [Xark] improved the code for these displays is fantastic, and the results are impressive; he can fill a screen with pixels at about 13FPS, making games that don’t redraw too much of the screen at any one time a real possibility.
A pretty color LCD screen, an Arduino, a buzzer and a joystick is all you need for a minimalist gaming console for under $20. At least, that’s all [João Vilaça] needed to get this sweet version of Tetris up and running. (He’s working on Breakout right now.)
It’s a testament to the current state of the hardware hacking scene that [João] could put this device together in an afternoon for so cheap, presumably after waiting a while for shipments from China. The 320×240 SPI color TFT LCD screen used to cost twice as much as this whole project did. And wiring it up is a simple matter of connecting this pin to that pin. Almost child’s play.
Equally impressive is the state of open source software. A TFT library from Seeed Studios makes the screen interface a piece of cake. [João] wrote his own sound and joystick code, and of course the Tetris gameplay itself, but it’d be much more than a few weeks’ work without standing on the shoulders of giants. Check out [João]’s Github for the project code and stick with us after the break for a demo video and some of our other favorite Arduino gaming hacks.
Now, we’ve seen a whole lot of Arduino-based gaming platforms around here before, and they range from the simplistic black-and-white to the bells-and-whistles of the Gameduino which tacks an FPGA onto your Arduino to enable sprites, awesome sound, and VGA output. But we’ve also got a place in our hearts for simplicity and comprehensibility, and [João]’s device and code has got those in spades.
If you’re ready to push your Arduino skills beyond blinking LEDs, [João]’s game project should be on your reading / building list. We can’t wait to see Breakout.
Planet Arduino is, or at the moment is wishing to become, an aggregation of public weblogs from around the world written by people who develop, play, think on Arduino platform and his son. The opinions expressed in those weblogs and hence this aggregation are those of the original authors. Entries on this page are owned by their authors. We do not edit, endorse or vouch for the contents of individual posts. For more information about Arduino please visit www.arduino.cc
You are currently browsing the archives for the LCD category.


 The new boards are called Arduino Primo, Arduino Core, Arduino Alicepad, and Arduino Otto.