Posts | Comments

Planet Arduino

Archive for the ‘3d printed’ Category

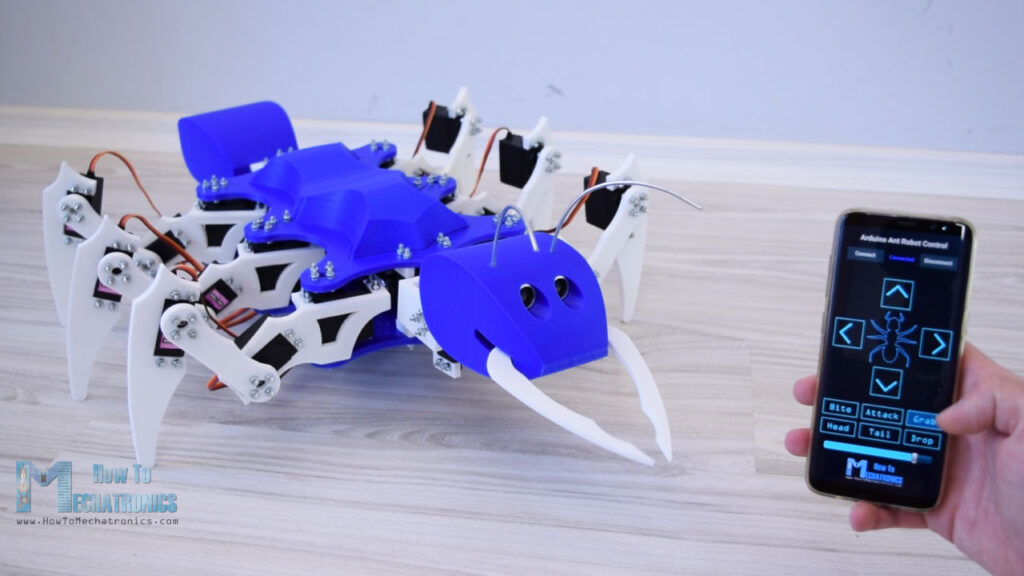
Six-legged robots are nothing new, but if you’d like inspiration for your own, it would be hard to beat this 22 servo-driven, 3D-printed hexapod from Dejan at How To Mechatronics. 

The ant-inspired device features three metal geared servos per leg, as well as a pair to move the heat, another for the tail, and a micro servo to activate the mandibles.
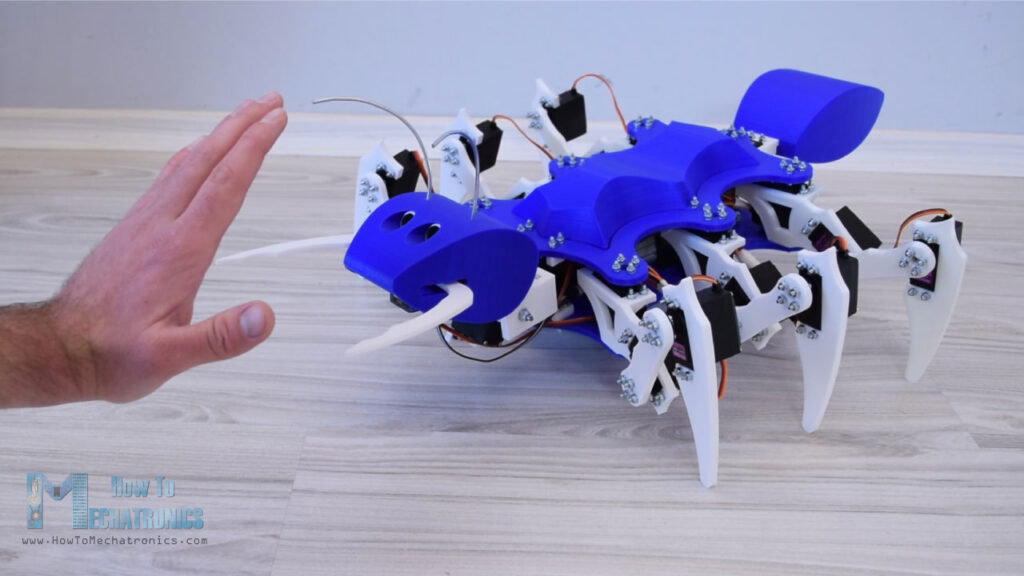
To control this large number of servos, Dejan turned to the Arduino Mega, along with a custom Android app and Bluetooth link for the user interface. While most movements are activated by the user, it does have a single ultrasonic sensor buried in its head as “eyes.” This allows it to lean backwards when approached by an unknown object or hand, then strike with its mandibles if the aggressor continues its advance. 

As the name suggests, the hexapod has six legs but in addition to that, it also has a tail or abdomen, a head, antennas, mandibles and even functional eyes. All of this, makes the hexapod look like an ant, so therefore we can also call it an Arduino Ant Robot.

For controlling the robot I made a custom-built Android application. The app has four buttons through which we can command the robot to move forward or backwards, as well as turn left or right. Along with these main functions, the robot can also move its head and tail, as well as it can bite, grab and drop things and even attack.

You can see it in action and being assembled in the video below, and build files are available here.

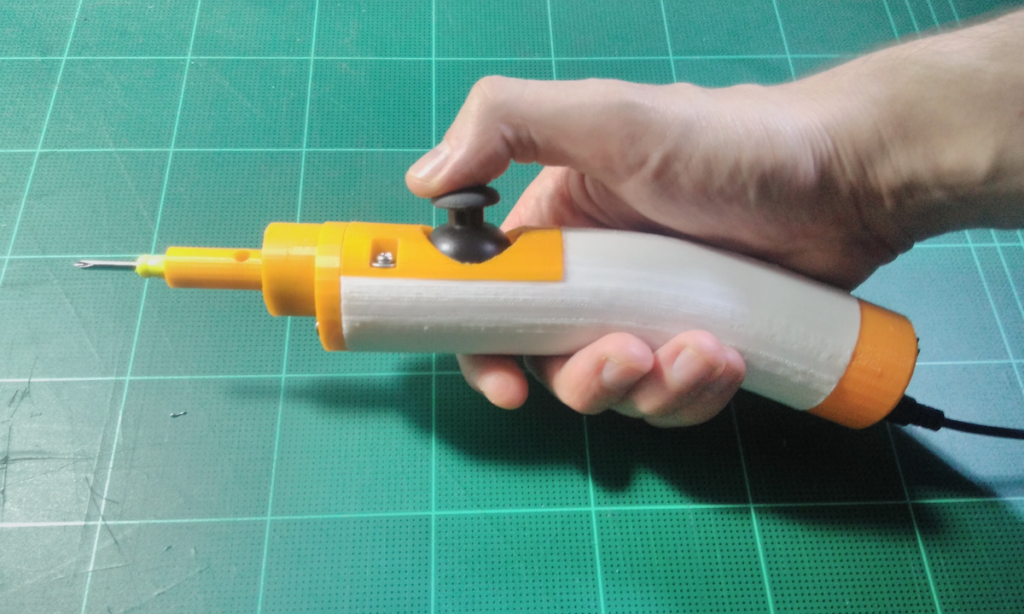
What do you do when you need to attach 400-500 screws for an upcoming project? If you’re “Progress Thailand” you simply create one yourself using a 9g micro servo modded for continuous rotation, an Arduino Nano, and some 3D printing!

The build uses a small thumb joystick for proportional control, and can accommodate a small hand driver in addition to a bit by itself. Impressively, a functional prototype of the tool was produced in a single day, with the final(?) version appearing a couple of days later. 

Hand and power tools are cheap, reliable, and easily accessible. But their production is still done in large centralized factories. 3D printing technology and cheap, open source electronics continue to improve bringing the decentralization of manufacturing one step closer.

We are experimenting with different designs to see how close current 3D printing technology can bring us to production-quality tools you can buy in the store. We’re also experimenting to see what modifications we can make to store-bought tools to enhance and customize their use.

While they note that the project isn’t meant to replace commercial screwdrivers at this point, it looks like a fun project with all the needed files available here to modify and improve things to your specifications!

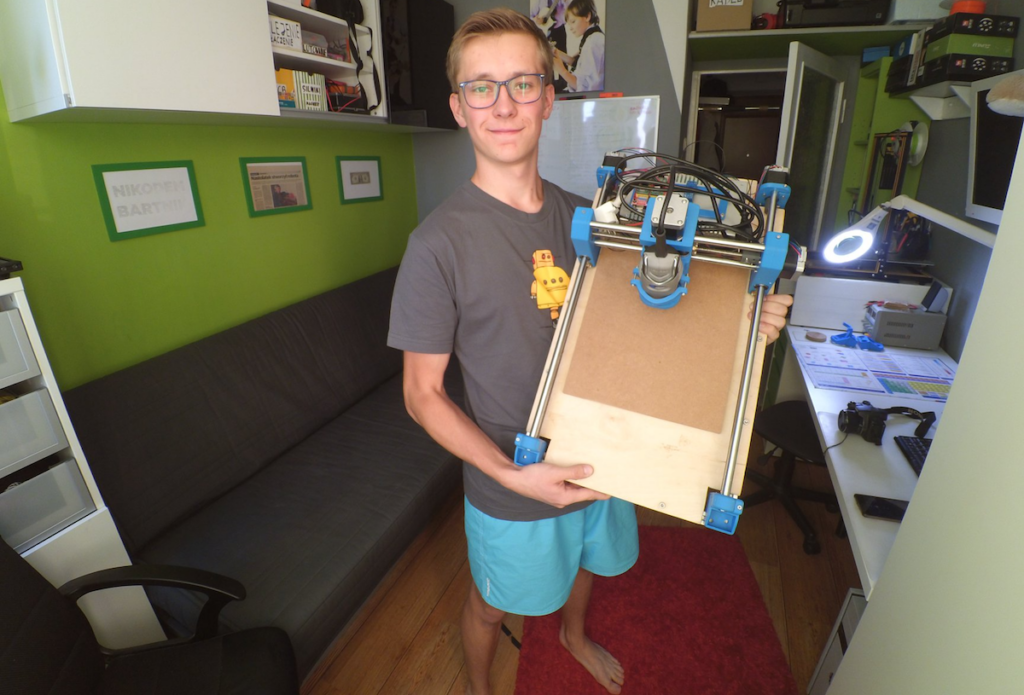
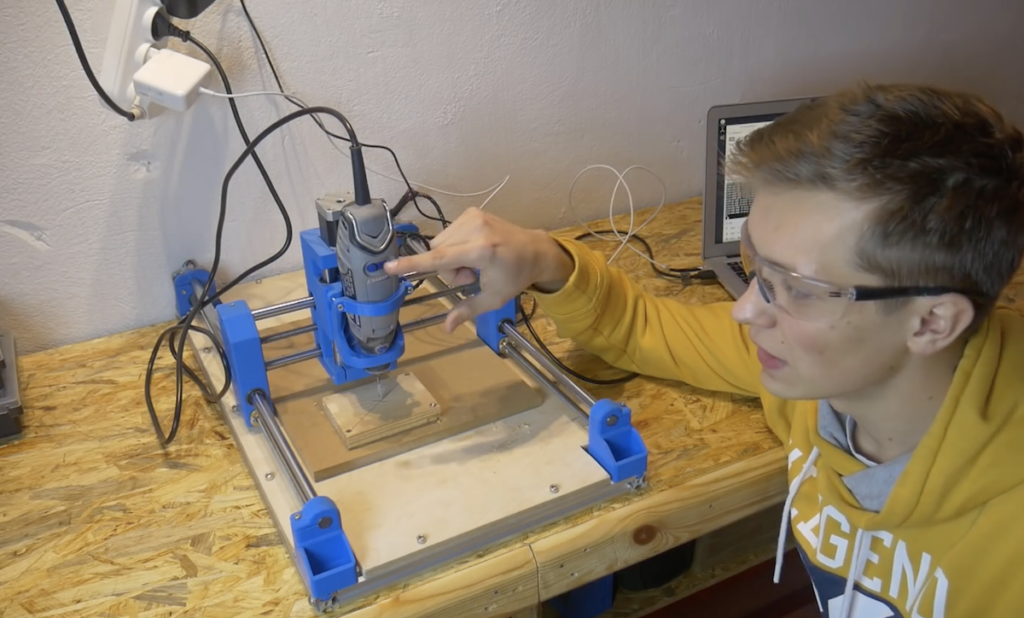
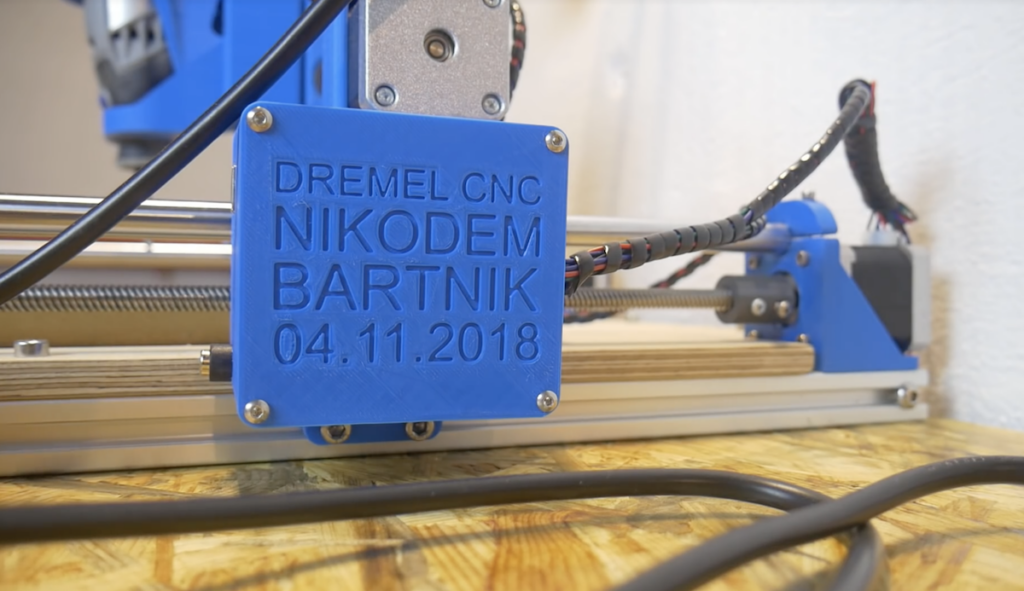
3D printers get most of the attention in maker-fabrication news, but other computerized tools, like laser cutters and CNC routers, can also be extremely useful. In fact, Nikodem Bartnik decided to create his own Dremel-based machine constructed out of 3D-printed parts and aluminum profiles. 

Electronics include an Arduino Uno and CNC stepper shield running GRBL for control, along with some NEMA 17 steppers and motor drivers, a relay for the Dremel, and a 12V / 30A power supply.

As with many other projects, his build went through several iterations, but the final results—seen in the video below—are quite good. The machine, which only cost him around $300, is able to mill MDF and acrylic.

If you’d like to make your own, Bartnik outlines his design in the first video below, then shows how to use it in the second. 

It isn’t a unique idea, but we liked [Eric Wiemers’s] take on the classic animated skull for Halloween. In addition to showing you the code and the wiring, the video spends some time discussing what the audio looks like and what has to happen to get it into a format suitable for the Arduino. You can see the spooky video, below.

Of course, this is also a 3D printing project, although the skull is off-the-shelf. We wondered if he felt like a brain surgeon taking the Dremel to the poor skull. To fix the two parts of the device, he used brass threaded inserts that are heat set, something we’ve seen before, but are always surprised we don’t see more often.

Of course, the project uses a servo. We may have missed it but other than freezing the video, we didn’t see the Arduino source code online. It isn’t much code, though, so typing it from the video is an option. The schematic is a little easier to read when you realize the top part is the schematic and the bottom part is the “as built” layout.

We are glad this skull doesn’t taunt us with our time remaining like some we’ve seen. We’ve seen this done with fewer parts, by the way, and you can compare the videos to see how different the circuits respond.

The first thing to notice about [Bijuo]’s cat-sized quadruped robot designs (link is in Korean, Google translation here) is how slim and sleek the legs are. That’s because unlike most legged robots, the limbs themselves don’t contain any motors. Instead, the motors are in the main body, with one driving a half-circle pulley while another moves the limb as a whole. Power is transferred by a cable acting as a tendon and is offset by spring tension in the joints. The result is light, slim legs that lift and move in a remarkable gait.

[Bijuo] credits the Cheetah_Cub project as their original inspiration, and names their own variation Mini Serval, on account of the ears and in keeping with the feline nomenclature. Embedded below are two videos, the first showing leg and gait detail, and the second demonstrating the robot in motion.

There’s more than one way to make a robot cat, of course, and here’s another design that doesn’t completely evict motors from the limbs, but still manages to keep them looking sleek and nimble.

[via Let’s Make Robots]

One of the biggest advantages of e-readers such as the Kindle is the fact that it doesn’t weigh as much as a traditional hardcover book, much less the thousands of books it can hold in digital form. Which is especially nice if you drop the thing on your face while reading in bed. But as light and easy to use as the Kindle is, you still need to hold it in your hands and interact with it like some kind of a baby’s toy.

Looking for a way to operate the Kindle without having to go through the exhaustive effort of raising their hand, [abm513] designed and built a clip-on device that makes using Amazon’s e-reader even easier. At the press of a button, the device knocks on the edge of the screen which advances the book to the next page. Going back a page will still require you to extend your meaty digit, but that’s your own fault for standing in the way of progress.

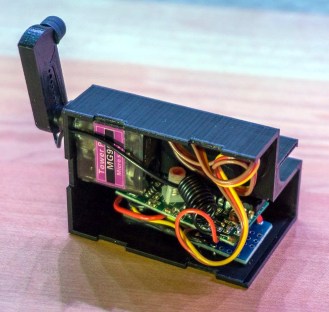
The 3D printed case holds an Arduino and RF receiver, as well as a small servo to power the karate-chop action. There’s no battery inside, meaning the device needs to stay plugged in via a micro USB connection on the back of the case. But let’s be honest: if you’re the kind of person who has a remote-controlled Kindle, you probably aren’t leaving the house anytime soon.

To fool the Kindle into thinking a human finger is tapping the screen, the page turner’s arm has a stylus tip on the end. A channel is designed into the 3D printed arm for a wire to run from the tip to the Arduino’s ground, which triggers the capacitive screen to register a touch.

All joking aside, the idea holds promise as an assistive technology for individuals who are unable to lift an e-reader or operate its touch screen controls. With the Kindle held up in a mount, and this device clipped onto the side, anyone who can push a button (or trigger the device in whatever method they are physically capable) can read a book on their own. A simple pleasure that can come as a huge comfort to a person who may usually be dependent on others.

In the past we’ve seen physical buttons printed for touch screens, and an Arduino used to control a touch screen device. But this particular combination of physical and electrical interaction is certainly a unique way to tackle the problem without modifying the target device.

As if we didn’t have enough to worry about in regards to the coming robot uprising, [Ali Aslam] of Potent Printables has recently wrapped up work on a 3D printed robot that can flatten itself down to the point it can fit under doors and other tight spaces. Based on research done at UC Berkeley, this robot is built entirely from printed parts and off the shelf hardware, so anyone can have their own little slice of Skynet.

On display at East Coast RepRap Festival

The key to the design are the folding “wings” which allow the robot to raise and lower itself on command. This not only helps it navigate tight spaces, but also gives it considerable all-terrain capability when it’s riding high. Rather than wheels or tracks, the design uses six rotors which look more like propellers than something you’d expect to find on a ground vehicle. These rotors work at the extreme angles necessary when the robot has lowered itself, and allow it to “step” over obstructions when they’re vertical.

For the electronics, things are about what you’d expect. An Arduino Pro Mini combined with tiny Pololu motor controllers is enough to get the bot rolling, and a Flysky FS-X6B receiver is onboard so the whole thing can be operated with a standard RC transmitter. The design could easily be adapted for WiFi or Bluetooth control if you’d rather not use RC gear for whatever reason.

Want to build your own? All of the STL files, as well as a complete Bill of Materials, are available on the Thingiverse page. [Ali] even has a series of videos on YouTube videos walking through the design and construction of the bot to help you along. Outside of the electronics, you’ll need a handful of screws and rods to complement the 50+ printed parts. Better start warming up the printer now.

As an interesting aside, we got a chance to see this little critter first hand at the recent East Coast RepRap Festival in Maryland, along with a number of other engineering marvels.

Tank projects are great because while every tank design is the same in a fundamental way, there’s nevertheless endless variety in the execution and results. [Hoo Jian Li]’s 3D Printed Tank is smartly laid out and has an unusual tank tread that shows off some slick curves.

The tank itself is remotely controlled over Bluetooth with a custom controller that uses the common HC-05 Bluetooth radio units. The treads are driven by four hobby gearmotors with custom designed wheels, and run over an idler wheel in the center of the body. There isn’t any method of taking up slack in the track and a ripple in the top surface of the track is visible as it drives, but the tank is small enough that it doesn’t seem to mind much. STL files and source code is available on GitHub; unfortunately the repository lacks a wiring diagram but between the low component count, photos, and source code that’s not a show-stopper.

Tank treads see a lot of variation, from 3D printed designs for tracks that use a piece of filament as hinges to an attempt to use a conveyor belt as a tank tread for a go-kart. Some tank projects even eschew treads altogether and go for a screw drive.

Taking a vintage radio and cramming it full of modern, Internet-connected, guts has long been a staple of the hacking and making scene. While some might see it as a crime to take what’s arguably a legitimate piece of history and turn it into nothing more than a slipshod case for the Raspberry Pi, we have to admit there’s a certain appeal to the idea. Taking the beauty of classic design and pairing it with more modern capabilities is getting the best of both worlds.

But this project by [Nick Koumaris] is a somewhat unique take on the concept. Rather than sacrificing a real vintage piece of hardware to house the electronics, he’s designed a 3D printable case that looks like a classic 1936 AWA Radiolette. But what’s really interesting to us is that he then puts a basic FM radio inside of it.

That’s right, no Internet radio streaming or smartphone Bluetooth compatibility here. It’s just a regular FM radio, not entirely unlike the kind of hardware you’d expect to be inside of a classic radio. Of course, it’s much more modern, and [Nick] actually built it himself from a TEA5767 FM radio module and an Arduino Pro Mini.

While functionally it might not be terribly exciting, we do appreciate that he went through the trouble to make a vintage-looking user interface for the radio. While physical buttons would arguably have been more appropriate given the era, the art deco inspired font and graphics that show on the device’s Nokia 5110 LCD do look really slick.

Purists will surely be happy to see another project where a piece of vintage piece of audio equipment wasn’t sacrificed at the Altar of Hack, but we’ve also played host to many projects which weren’t nearly as concerned with historical preservation.


  • Newsletter

    Sign up for the PlanetArduino Newsletter, which delivers the most popular articles via e-mail to your inbox every week. Just fill in the information below and submit.

  • Like Us on Facebook