Posts | Comments

Planet Arduino

Archive for the ‘IMU’ Category

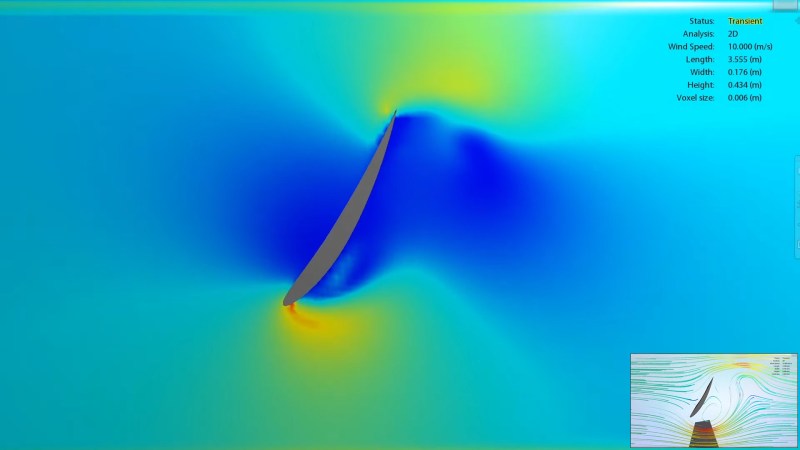
Sometimes a great hack is great for no other reason than that it’s fun, and [Michael Rechtin]’s DIY Active Aero Spoiler and Air Brake certainly qualifies as a fun hack. This is a mod designed to live in a world where looks are everything, stickers add horsepower, and a good sound system is more important than good wheel alignment. Why is that? Because like the switch that exists only to activate the mechanism that turns it off, the DIY Active Aero Spoiler and Air Brake seen below is almost completely useless. So to understand its allure, we must understand its inspiration.

For a few decades now, luxury sports car manufacturers have been adding active aerodynamic components to their vehicles. For example, several Porsche models feature adaptive spoilers that adjust to driving conditions. Super cars such as the Bugatti Veyron have spoilers that flip up at high angles during braking to increase drag and reduce braking distance. All of these features are sadly missing from the average two or four door family-car-turned-wannabe-track-fiend. Until now!

[Michael] has created a new active spoiler for every mall-bound muffler-challenged hand me down. The build starts with a CNC cut foam wing which is covered with fiberglass, Bondo (an automotive necessity) and some faux carbon fiber for that go-fast feel. An Arduino, IMU, two servos, and a battery pack detect deceleration and automatically increase the spoiler angle just like the big boys, but without needing any integration into the vehicles systems. Or bolts, for that matter.

It’s unlikely that the braking force is enough to slow down the vehicle though, given that it’s not enough to pop the suction cups holding it to the trunk lid. But does it have the “wow” factor that it was designed to induce? Spoiler Alert: It does!

As it turns out, this isn’t the first adjustable spoiler featured here at Hackaday, and this adjustable spoiler on a car that’s made for actual racing is quite interesting.

Thanks to [Zane] for the tip on this project!

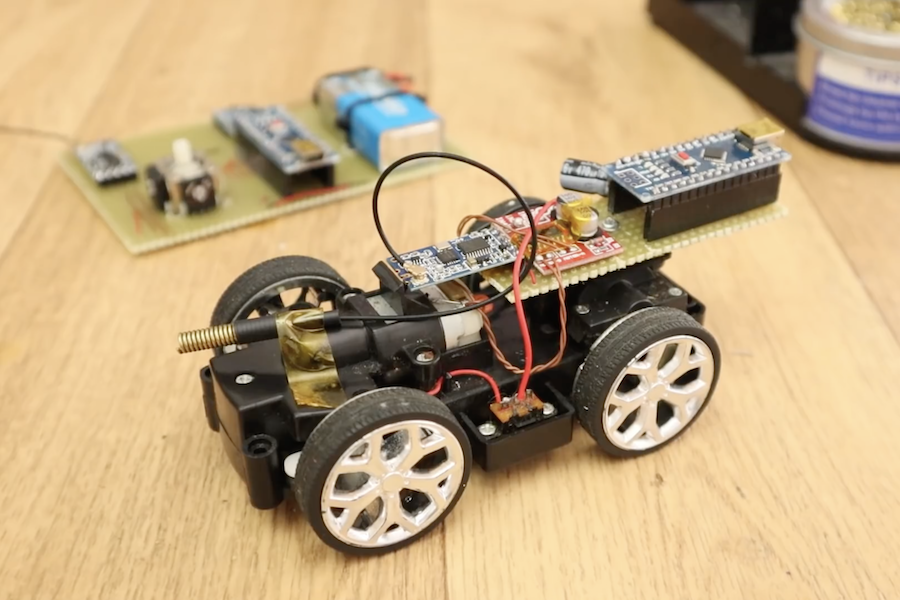
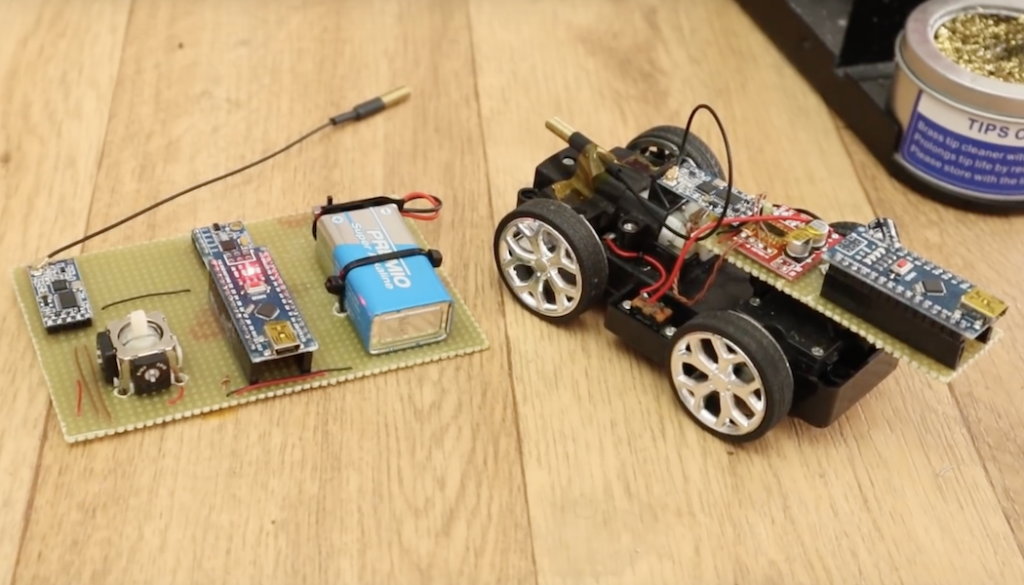
When piloting a vehicle remotely, it’s only natural to tilt your controller one way or the other to “help” guide it in the right direction. While usually this has no effect whatsoever, YouTuber Electronoobs decided to take this concept and run with it, creating a remote control transmitter that responds to an onboard MPU-6050 inertial measurement unit.

The transmitter’s Arduino Nano takes movement data, and sends the corresponding signals to a custom receiver board on the RC car via a pair of HC-12 wireless modules. A second Arduino mounted in the car then commands the vehicle’s DC motors with the help of an H-bridge. 

This is a radio controller that has 2 analog channels and the data is out from a MPU-6050 gyro module. So, we could control a toy car for example just by rotating the controller. I usually use the nRF24 module, but in this project I also want to show you how to use the HC-12 module. You will learn how to get the IMU data, how to use the HC-12 radio connection and how to control 2 DC motors using PWM signals and an H-bridge.

It’s quite a versatile build, and it can even be set up to output PWM signals if you need to interface with more advanced electronics.

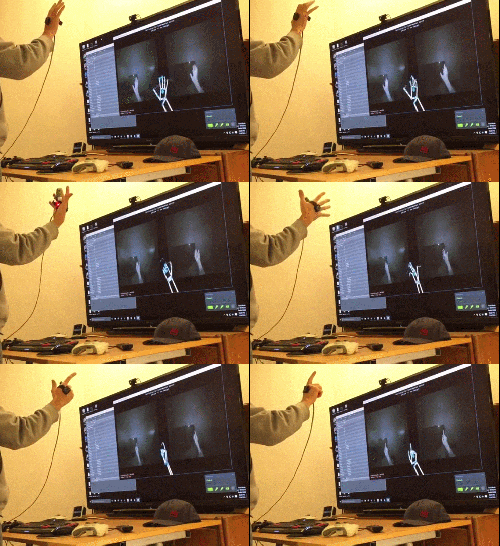
[Florian] has been putting a lot of work into VR controllers that can be used without interfering with a regular mouse + keyboard combination, and his most recent work has opened the door to successfully emulating a Vive VR controller in Steam VR. He uses Arduino-based custom hardware on the hand, a Leap Motion controller, and fuses the data in software.

We’ve seen [Florian]’s work before in successfully combining a Leap Motion with additional hardware sensors. The idea is to compensate for the fact that the Leap Motion sensor is not very good at detecting some types of movement, such as tilting a fist towards or away from yourself — a movement similar to aiming a gun up or down. At the same time, an important goal is for any added hardware to leave fingers and hands free.

emulation-demo-optimized[Florian]’s DIY VR hand controls emulate the HTC Vive controllers in Valve’s Steam VR Tracking with a software chain that works with his custom hardware. His DIY controller doesn’t need to be actively held because by design it grips the hand, leaving fingers free to do other tasks like typing or gesturing.

Last time we saw [Florian]’s work, development was still heavy and there wasn’t any source code shared, but there’s now a git repository for the project with everything you’d need to join the fun. He adds that “I see a lot of people with Wii nunchucks looking to do this. With a few edits to my FreePIE script, they should be easily be able to enable whatever buttons/orientation data they want.”

We have DIY hardware emulating Vive controllers in software, and we’ve seen interfacing to the Vive’s Lighthouse hardware with DIY electronics. There’s a lot of hacking around going on in this area, and it’s exciting to see what comes next.


Filed under: Arduino Hacks, Virtual Reality

Gyroscopes and accelerometers are the primary sensors at the heart of an IMU, also known as an internal measurement unit — an electronic sensor device that measures the orientation, gravitational forces and velocity of a multicopter, and help you keep it in the air using Arduino.

Two videos made by Joop Brokking, a Maker with passion for RC model ‘copters, clearly explain how to program your own IMU so that it can be used for self-balancing your drone without Kalman filters,  libraries, or complex calculations.

Auto leveling a multicopter is pretty challenging. It means that when you release the pitch and roll controls on your transmitter the multicopter levels itself. To get this to work the flight controller of the multicopter needs to know exactly which way is down. Like a spirit level that is on top of the multicopter for the pitch and roll axis.

Very often people ask me how to make an auto level feature for their multicopter. The answer to a question like this is pretty involved and cannot be explained in one email. And that is why I made this video series.

You can find the bill of materials and code here.

Jan
09

Self-Balancing Robots Wobble, But They Don’t Fall Down

arduino hacks, arduino nano, IMU, Robot, robots hacks, Self Balancing Robot Comments Off on Self-Balancing Robots Wobble, But They Don’t Fall Down 

[Trandi] can check ‘build a self-balancing robot’ off of his to-do list. Over a couple of weekends, he built said robot, and, in his own words, managed not to over-design it. It even kept the attention of his 2-year-old son for several minutes, and that’s always a plus.

He was originally going to re-purpose one of his son’s RC cars, but didn’t want to risk breaking it. Instead, he designed a triangular 3-D printed chassis to hold a motor and some cogs to fit both the motor shaft and some re-used Meccano wheels. [Trandi]‘s design employs an MPU 6050 6-DOF IMU for the balancing act and is built on an Arduino Nano clone.

[Trandi] is controlling the motor with an L293D, which has built-in flyback diodes to minimize spikes. He found that the Nano clone was not powerful enough to handle everything, so he added an L7805CV voltage regulator. After the break, watch [Trandi]‘s cute bot tool around on various types of terrain, with and without a payload.

Don’t have an IMU lying around? You don’t really need one to build a self-balancing bot, as this IR-based lilliputian bot will demonstrate.

[via Dangerous Prototypes]


Filed under: Arduino Hacks, robots hacks
Nov
22

Building a self balancing bot

Accelerometer, arduino, ATmega, ATmega328, Bajduino, IMU, motor, MPU6050 Comments Off on Building a self balancing bot 

self-balancing-bot-1-600x400

Bajdi documented his Arduino self balancing bot build:

For the electronics I used one of my own PCB creations, a Bajduino of course It’s just a small (50x50mm) break out board for an ATmega328. I’m running the ATmega @ 16MHz and 3.3V. It’s out of spec according to the datasheet but it works… I also needed an IMU of course. I found a MP6050 sensor in my parts box. The MPU6050 combines a 3 DOF gyro and 3 DOF accelerometer in a small package, ideal for a self balancing bot.

[via]

Building a self balancing bot - [Link]


  • Newsletter

    Sign up for the PlanetArduino Newsletter, which delivers the most popular articles via e-mail to your inbox every week. Just fill in the information below and submit.

  • Like Us on Facebook