Posts | Comments

Planet Arduino

Archive for the ‘reverse engineer’ Category

Ott
01

Strobe Remote

If you want to take a photograph with a professional look, proper lighting is going to be critical. [Richard] has been using a commercial lighting solution in his studio. His Lencarta UltraPro 300 studio strobes provide adequate lighting and also have the ability to have various settings adjusted remotely. A single remote can control different lights setting each to its own parameters. [Richard] likes to automate as much as possible in his studio, so he thought that maybe he would be able to reverse engineer the remote control so he can more easily control his lighting.

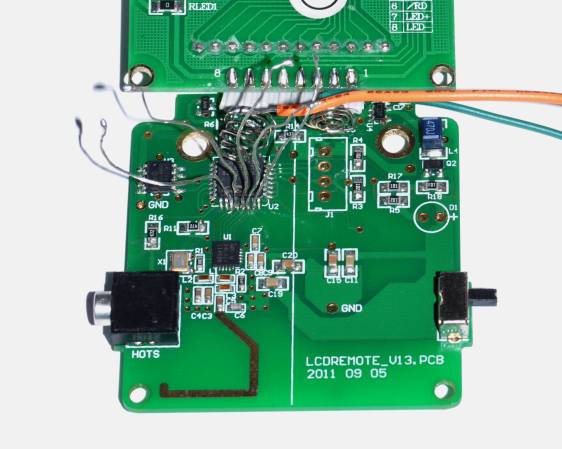
[Richard] started by opening up the remote and taking a look at the radio circuitry. He discovered the circuit uses a nRF24L01+ chip. He had previously picked up a couple of these on eBay, so his first thought was to just promiscuously snoop on the communications over the air. Unfortunately the chips can only listen in on up to six addresses at a time, and with a 40-bit address, this approach may have taken a while.

Not one to give up easily, [Richard] chose a new method of attack. First, he knew that the radio chip communicates to a master microcontroller via SPI. Second, he knew that the radio chip had no built-in memory. Therefore, the microcontroller must save the address in its own memory and then send it to the radio chip via the SPI bus. [Richard] figured if he could snoop on the SPI bus, he could find the address of the remote. With that information, he would be able to build another radio circuit to listen in over the air.

Using an Open Logic Sniffer, [Richard] was able to capture some of the SPI communications. Then, using the datasheet as a reference, he was able to isolate the communications that stored information int the radio chip’s address register. This same technique was used to decipher the radio channel. There was a bit more trial and error involved, as [Richard] later discovered that there were a few other important registers. He also discovered that the remote changed the address when actually transmitting data, so he had to update his receiver code to reflect this.

The receiver was built using another nRF24L01+ chip and an Arduino. Once the address and other registers were configured properly, [Richard's] custom radio was able to pick up the radio commands being sent from the lighting remote. All [Richard] had to do at this point was press each button and record the communications data which resulted. The Arduino code for the receiver is available on the project page.

[Richard] took it an extra step and wrote his own library to talk to the flashes. He has made his library available on github for anyone who is interested.


Filed under: Arduino Hacks, radio hacks
ardAndRFoutlets

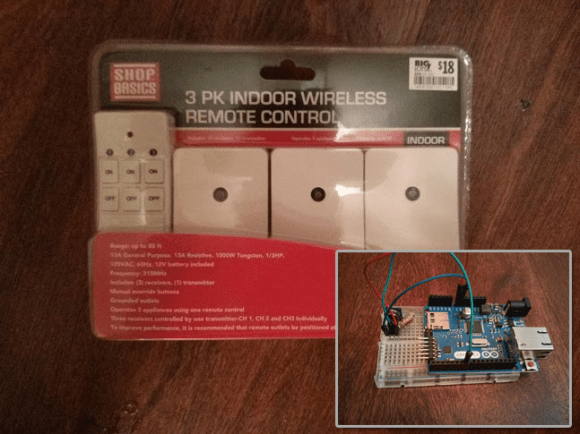
Cyber Monday may be behind us, but there are always some hackable, inexpensive electronics to be had. [Stephen's] wireless Android/Arduino outlet hack may be the perfect holiday project on the cheap, especially considering you can once again snag the right remote controlled outlets from Home Depot. This project is similar to other remote control outlet builds we’ve seen here, but for around $6 per outlet: a tough price to beat.

[Stephen] Frankenstein’d an inexpensive RF device from Amazon into his build, hooking the Arduino up to the 4 pins on the transmitter. The first step was to reverse engineer the communication for the outlet, which was accomplished through some down and dirty Arduino logic analyzing. The final circuit included a standard Arduino Ethernet shield, which [Stephen] hooked up to his router and configured to run as a web server. Most of the code was borrowed from the RC-Switch outlet project, but the protocols from that build are based on US standards and did not quite fit [Stephen's] needs, so he turned to a similar Instructables project to work out the finer details.

Stick around after the break for a quick video demonstration, then check out another wireless outlet hack for inspiration.

[Via Reddit]


Filed under: Android Hacks, Arduino Hacks, home hacks


  • Newsletter

    Sign up for the PlanetArduino Newsletter, which delivers the most popular articles via e-mail to your inbox every week. Just fill in the information below and submit.

  • Like Us on Facebook