Posts | Comments

Planet Arduino

Archive for the ‘misc hacks’ Category

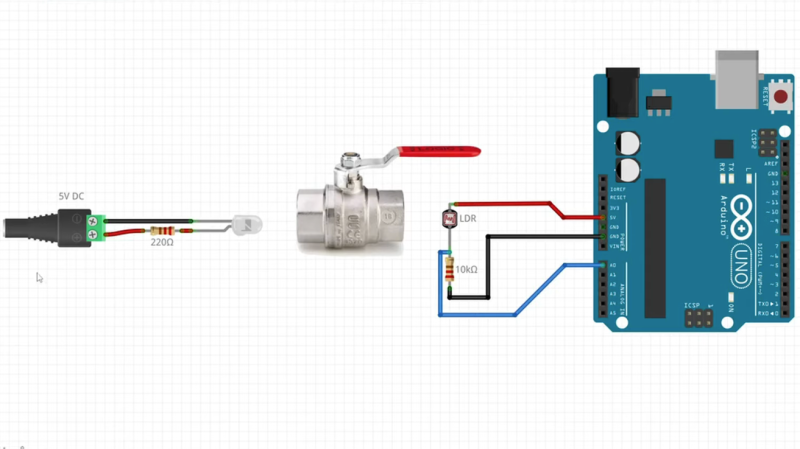
A diagram showing an LED on the left, a lever-style plumbing valve in the center, and an Arduino Uno on the right.

Input devices that can handle rough and tumble environments aren’t nearly as varied as their more fragile siblings. [Alastair Aitchison] has devised a brilliant way of detecting inputs from plumbing valves that opens up another option. (YouTube) [via Arduino Blog]

While [Aitchison] could’ve run the plumbing valves with water inside and detected flow, he decided the more elegant solution would be to use photosensors and an LED to simplify the system. This avoids the added cost of a pump and flow sensors as well as the questionable proposition of mixing electronics and water. By analyzing the change in light intensity as the valve closes or opens, you can take input for a range of values or set a threshold for an on/off condition.

[Aitchison] designed these for an escape room, but we can see them being great for museums, amusement parks, or even for (train) simulators. He says one of the main reasons he picked plumbing valves was for their aesthetics. Industrial switches and arcade buttons have their place, but certainly aren’t the best fit in some situations, especially if you’re going for a period feel. Plus, since the sensor itself doesn’t have any moving parts, these analog inputs will be easy to repair should anything happen to the valve itself.

If you’re looking for more unusual inputs, check out the winners of our Odd Inputs and Peculiar Peripherals contest or this typewriter that runs Linux.

If you don’t own a cat, hearing the sound of one meowing from somewhere in the house probably comes as quite a shock. The Cat Prank box built by [Reuben] promises to deliver such hilarity with aplomb. 

The idea is simple: hide the Cat Prank box in a cupboard or other space in a friend’s house, and it will meow from its secret location. When found, either the light sensor or motion sensor will trigger the yowling of an angry feline, with hopefully startling effects.

An Arduino Mini is the brains of the operation, paired with an XY-V17B sound module which plays the required animal wailings. There’s also a 433 MHz radio module that lets the prankster trigger meowing via remote control.

Code is available for those wishing to build their own. We’d love to see a mod with a time delay built in, so the device could be hidden and left to start meowing at some later date when the prankster is far away.

Similar work has graced these pages before, like the devilishly fiendish OpenKobold design. Just make sure your friends are receptive to such jokes before you go ahead and invest time and hardware in the prank!

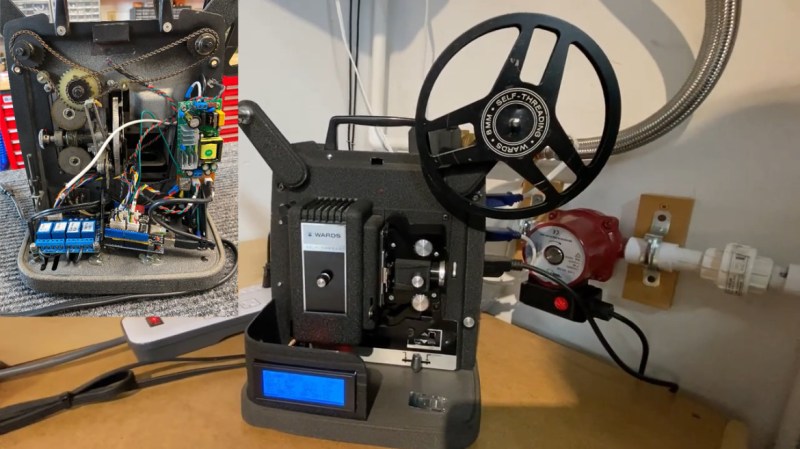
This film projecter is hiding an Arduino Uno that controls a water-based cooling system.

Having any kind of shop is pretty great, no matter how large it may be or where it’s located. If the shop is in an outbuilding, you get to make more noise. On the other hand, it will probably get pretty darn hot in the summer without some kind of cooling system, especially if you don’t have a window for a breeze (or a window A/C unit).

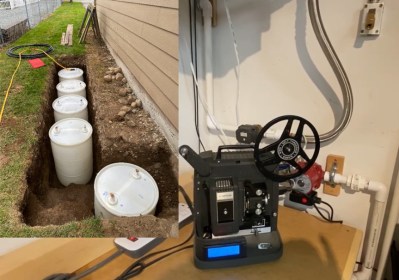
Five 55-gallon tanks of tap water are buried just outside the shop.[Curtis in Seattle] built an awesome thermal battery-based cooling system for his shop. The battery part consists of five 55-gallon drums full of tap water that are connected in series and buried a foot underground, about two feet out from the wall. There are two radiators filled with water and strapped to 20″ box fans  — one inside the shop, which sends heat from the shop into the water, and another outside that transfers heat out of the water and into the cool night air. Most summer days, the 800-square-foot shop stays at a cool 71°F (21.7°C).

We love that the controls are housed in an old film projector. Inside there’s an Arduino Uno running the show and taking input from four DS18B20 one-wire temperature sensors for measuring indoor, outdoor, battery, and ground temperatures. There are four modes accessible through the LCD menu — idle, cool the shop, recharge mode, and a freeze mode in case the outside temperature plummets. Why didn’t [Curtis in Seattle] use anti-freeze? It’s too expensive, plus it doesn’t usually get that cold. (Although we hear that Seattle got several inches of snow for Christmas.) Check it out after the break.

If you can’t just go burying a bunch of 55-gallon drums in the ground where you live, consider building a swamp cooler out of LEGO.

Thanks for the tip, [Zane Atkins]!

What’s this? Another fabulous creation from [Niklas Roy] and [Kati Hyyppä] that combines art and electronics with our zeitgeist and a lot of recycled bits and bobs? You got it. Their workshop in eastern Berlin used to be a retail shop and has a large display window as a result. This seems perfect for a pair of artists in a pandemic, because they can communicate with the community through the things they display in the window. Most recently, it was this interactive cyborg baby we are choosing to call Cybaby.

You might recognize Cybaby as one of the very hackable Robosapien robots, but with a baby doll head. (It also has a single red eye that really pulls its look together.) In the window, Cybaby comes alive and toddles around against a backdrop that grew and evolved over several weeks this spring and summer. Passersby were able to join the network and control Cybaby from outside with their smartphone to make it walk around, press various buttons that change its environment, and trigger a few sensors here and there. Robosapien has been around for about 20 years, so there is already Arduino code out there that essentially simulates its R/C signals. [Niklas] and [Kati] used a NodeMCU (ESP12-E) to send pulses to the IR input of the robot.

Back on the zany zeitgeist front, there’s a hair salon, a convenience store, and a nightclub for dancing that requires a successful trip through the testing center first (naturally). Oh, and there’s a lab next door to the nightclub that can’t be accessed by Cybaby no matter what it tries or how it cries. Check it out after the break.

There’s a dearth of Robosapien posts for some reason, so here’s what [Niklas] and [Kati] had in their window before the World of Cybaby — a really cool pen plotter that prints out messages sent by people walking by.

It’s 2021. Everyone and their mother is filming themselves doing stuff, and a lot of it is super cool content. But since most of us have to also work the video capture devices ourselves, it can be difficult to make compelling footage with a single, stationary overhead view, especially when there are a lot of steps involved. A slider rig is a good start, but the ability to move the camera in three dimensions programmatically is really where it’s at.

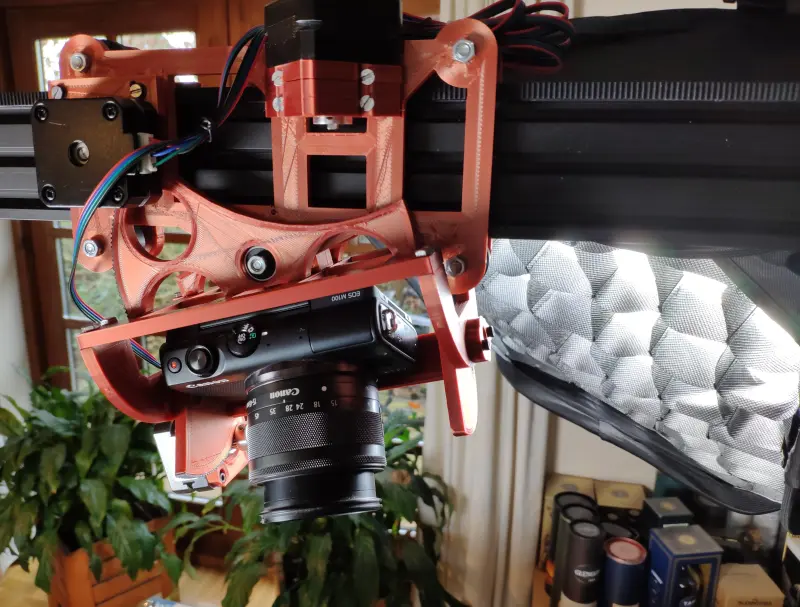
[KronBjorn]’s excellent automated overhead camera assistant runs on an Arduino Mega and is operated by typing commands in the serial monitor. It can pan ±20° from straight down and moves in three axes on NEMA-17 stepper motors. It moves really smoothly, which you can see in the videos after the break. The plastic-minimal design is interesting and reminds us a bit of an ophthalmoscope — that’s that main rig at the eye doctor. There’s only one thing that would make this better, and that’s a dedicated macro pad.

If you want to build your own, you’re in luck — there’s quite a lot of detail to this project, including a complete BOM, all the STLs, code, and even assembly videos of the 3D-printed parts and the electronics. Slide past the break to check out a couple of brief demo videos.

Not enough room for a setup like this one? Try the pantograph version.

Once you’ve ground the beans and tamped the grounds just so, pulling the perfect shot of espresso comes down to timing. Ideally, the extraction should last 20-30 seconds, from the first dark drips to the tan and tiger-striped crema on top that gives the espresso a full aftertaste.

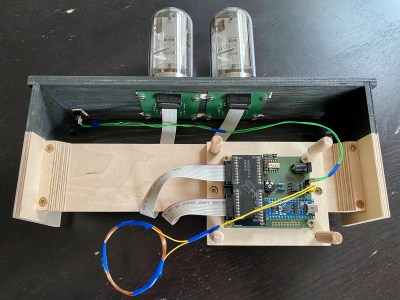
[Marco] has a beautiful espresso machine that was only missing one thing: an equally beautiful shot timer with a Nixie tube display. Instead of messing with the wiring, [Marco] took the non-invasive approach and is using a DIY coil to detect the magnetic field of the espresso machine’s pump and start a shot timer.

An LM358-based op-amp magnifies the current induced by the machine and feeds it to an Arduino Nano, which does FFT calculations. [Marco] found a high-voltage interface driver to switch 170 V to the Nixies instead of using two handfuls of transistors. Grab yourself a flat white and check it out after the break.

The last Nixies may have been mass-produced in the 1980s, but never fear — Dalibor Farny is out there keeping the dream alive and making new Nixies.

Okay, so this doesn’t really use a taser — that’s just click bait and we apologize. An actual taser would be a terrible way to train yourself to be a better typist, because depending on where you choose to deliver the shock, you could damage your typing nerves pretty quickly with a few milliamps at 50,000 volts.

Instead of a taser, [nobody6502] got a pack of prank gum off of Amazon that delivers a much more doable shock that is painful enough to get the user to type more carefully. [nobody6502] set up a simple no-pain, no-train website that presents random English words one at a time and checks for typos against an open-source list of nearly half a million entries. Misspell a word, and a get a relay-driven shock from the gum circuit.

The main brain of this pain trainer is a Particle Argon board which has I/O pins that can be controlled from the web. When the website detects a typo, it sends a signal to the Argon, which turns on a relay that activates the shock mechanism. What’s most impressive is that [nobody6502] doesn’t have a full-blown computer and programmed everything on an iPad. Check out the build video after the break.

Are you a hunt and peck typist? There’s a negative reinforcement keyboard for that.

Thanks to [Heladera Dragon] and [Alvarito050506] for tipping us off.

Keyboard shortcuts are great. Even so, a person can only be expected to remember so many shortcuts and hit them accurately while giving a presentation over Zoom. [Sebastian] needed a good set of of shortcuts for OBS and decided to make a macro keyboard to help out. By the time he was finished, [Sebastian] had macro’d all the things and built a beautiful and smart peripheral that anyone with a pulse would likely love to have gracing their desk.

The design started with OBS, but this slick little keyboard turned into a system-wide assistant. It assigns the eight keys dynamically based on the program that has focus, and even updates the icon to show changes like the microphone status.

This is done with a Python script on the PC that monitors the running programs and updates the macro keeb accordingly using a serial protocol that [Sebastian] wrote. Thanks to the flexibility of this design, [Sebastian] can even use it to control the office light over MQTT and make the CO2 monitor send a color-coded warning to the jog wheel when there’s trouble in the air.

This project is wide open with fabulous documentation, and [Sebastian] is eager to see what improvements and alternative enclosure materials people come up with. Be sure to check out the walk-through/build video after the break.

Inspired to make your own, but want to start smaller? There are plenty to admire around here.

Hackers and makers can sometimes feel like they’re getting the short end of the stick when it comes to gift giving. You’re out there making thoughtful, intricate circuit sculptures, helpful software, or face masks for people, and what do you get in return? Okay, yes, usually gift cards or tools or other things that feed your creativity in the first place. But darn it, it would be nice to receive a handmade gift once in a while, right?

So here’s what you do: make friends with enough other makers that you find your birthday twin, or close enough that you both feel the warmth of the personal holiday you share. Then you get them to agree to trade handmade birthday presents with you. That’s more or less what happened between [Becky Stern] and [Estefannie], who seem to have found each other through the magic of sharing projects on YouTube.

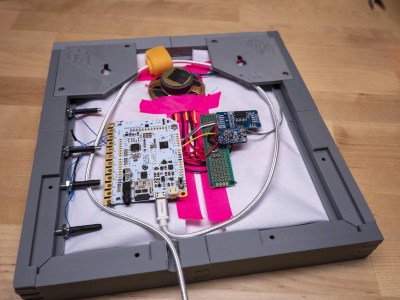
[Becky]’s gift to [Estefannie] is a busy intersection of maker elements including graphic design, embroidery, electronics, and 3D printing. [Becky] started with the embroidery, which was made possible thanks to a new open-source library for Processing called PEmbroider. Once that was done, she 3D printed the frame and added the electronics — candle flicker LEDs for the birthday cake, and a handful of songs that are accessible via touch contacts screwed into the side of the frame. [Becky] added a real-time clock module so it plays a few extra songs on [Estefannie]’s actual birthday.

The most thoughtful element here is personalization, and it’s amazing what can happen when you put 100% of yourself into something that is 100% about someone else. Every bit of the art is personal to [Estefannie], and every atom of the build is pure [Becky]. Check out the demo and build video and see what [Estefannie] made for [Becky] after the break.

[Becky]’s varied creativity has graced these pages many times before. See how she bid adieu to 2020, built a daily affirmation mirror, and gave a mask-making masterclass in the early stages of the pandemic.

One of the worst things about sewing is finding out that your bobbin — that’s the smaller spool that works together with the needle and the larger spool to make a complete stitch — ran out of thread several stitches ago. If you’re lucky, the machine has a viewing window on the bobbin so you can easily tell when it’s getting dangerously close to running out, but many machines (ours included) must be taken halfway apart and the bobbin removed before it can be checked.

Having spare bobbins ready to go is definitely the answer. We would venture to guess that most (if not all) machines have a built-in bobbin winder, but using them involves de-threading the machine and setting it up to wind bobbins instead of sew. If you have a whole lot of sewing to do and can afford it, an automatic bobbin winder is a godsend. If you’re [Mr. Innovative], you build one yourself out of acrylic, aluminium, and Arduinos.

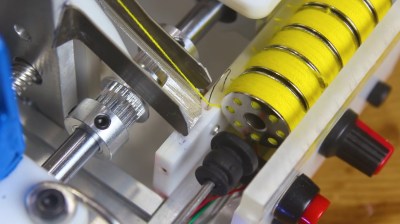
Here’s how it works: load up the clever little acrylic slide with up to twelve empty bobbins, then dial in the speed percentage and press the start button. The bobbins load one at a time onto a drill chuck that’s on the output shaft of a beefy 775 DC motor. The motor spins ridiculously fast, loading up the bobbin in a few seconds. Then the bobbin falls down a ramp and into a rack, and the thread is severed by a piece of nichrome wire.

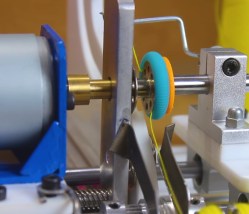
An important part of winding bobbins is making sure the thread stays in place at the start of the wind. We love the way [Mr. Innovative] handled this part of the problem — a little foam doughnut around a bearing holds the thread in place just long enough to get the winding started. The schematic, BOM, and CAD files are available if you’d like to make one of these amazing machines for yourself. In the meantime, check out the demo/build video after the break.

Still not convinced that sewing is cool enough to learn? Our own [Jenny List] may be able to convert you. If that doesn’t get you, you might like to know that some sewing machines are hackable — this old girl has a second life as a computerized embroidery machine. If those don’t do it, consider that sewing machines can give you a second life, too.

Thanks for the tip, [Baldpower]!


  • Newsletter

    Sign up for the PlanetArduino Newsletter, which delivers the most popular articles via e-mail to your inbox every week. Just fill in the information below and submit.

  • Like Us on Facebook