Posts | Comments

Planet Arduino

Archive for the ‘LCD shield’ Category

Hello readers

In this article you can follow the process of making another LCD shield for the Arduino Duemilanove or compatible boards. In the past (which explains the word another in this title) I made a 16 x 2 character LCD shield, however it was not backlit, nor large enough. Recently I acquired a 20 x 4 character backlit LCD for use in my Arduino tutorials, therein making this project necessary. To refresh your memories, here is the original shield:

However this time, I cannot mount the display on the shield, it is just too large. Furthermore, it is preferable to be able to stack other shields on top of the new LCD shield. Therefore the display will be external and connected with lengths of wire. So time to get cracking. The first step was to assemble all the parts together. The new LCD has a standard 16-pin  HD44780 interface, and is very easy to connect:

What we have: one 20×4 character backlit LCD, a Freetronics basic protoshield, some stacking pin headers, a button, 10k ohm trimpot for contrast adjustment, and some spacers and matching screws to give the LCD some legs. Afterwards I got some 0.1uF ceramic capacitors as well, to smooth supply current on the 5V rail of the shield. Here is the data sheet for the LCD: 2004 LCD.pdf.

As usual the first thing to do was to make a plan. The LCD interface is easy enough, but I still like to have something on paper to refer to:

The next step is to breadboard it – to make sure it works. However I did solder in the wires to the LCD at this stage:

And after assembling the circuit, a brief test:

Success. The demonstration sketch is the example provided with the Arduino IDE, modified for a 20×04 LCD – 2004LCDdemo.pdf. During the test above, I used an external 5V power supply for the breadboard. Remember to connect the ground line from the Arduino to the ground line of your breadboard, otherwise it will not work. At this point I was wondering how much current the LCD used by itself. The data sheet claimed it was five milliamps… I think not. Mr Multimeter had a different opinion:

Now it was time to finish the soldering work. Instead of trying to jam all the wires together along the digital pins, I used some wire jumpers to spread out the landing points for the wires from the LCD.

Furthermore, I decided to install a power LED and 560 ohm resistor – you can never have too many LEDs. :) The rear of the protoshield was also quite neat, dollops of solder easily bridged pads when required. Then after a visual inspection it was time to solder in the header pins. The easiest way to do this is to use an existing shield:

After soldering in the pins, the first attempt of using the display was unsuccessful. I had confused a couple of wires, but some reprogramming of the sketch fixed that. (It was Saturday night and my eyes were tired). But once the error had been fixed – success!

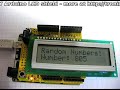
If this shield/display needed a name, I would call it the Dog’s breakfast. Now, hardware is only half of the solution – there are one or two things to take into account when writing your sketch. If you do not have the latest version of the Arduino IDE (v18), upgrade so you will have the new LiquidCrystal library. Also, when using .setCursor(x,y); to position the cursor, the top left position on the LCD is 0,0; and the bottom right is 19,3. For example, the image below was created by:

lcd.setCursor(0, 0);
lcd.print("A");
lcd.setCursor(1,1);
lcd.print("B");
lcd.setCursor(2,2);
lcd.print("C");
lcd.setCursor(3,3);
lcd.print("D");

Now to make something slightly more useful to take advantage of the screen area – another clock! (I like clocks) using my DS1307 real time clock shield. Here is the sketch: worldclock.pdf, (doesn’t allow for DST) and an action shot:

Question – from which organisation did my LCD module come from? :)

So there you have it. Another way to use an LCD with an Arduino, and show how you can do things yourself.

If you have any questions at all please leave a comment (below). We also have a Google Group dedicated to the projects and related items on the website – please sign up, it’s free and we can all learn something. High resolution photos are available from flickr. This article is a guide – always check your own work before committing to construction.

Otherwise, have fun, stay safe, be good to each other – and make something! :)


May
20

Hello fellow Arduidans

Today we are going to make an Arduino shield with an LCD module. More often than not I have needed to use an LCD shield in one of my projects, or with the Arduino tutorials. Sometimes I would use the Electronic Brick parts, which in themselves are a great product, but the chassis blocks some of the pins that we need to use. So instead of complaining, we’re doing something about it.

Before we start, let me say this: “to fail to plan is to plan to fail”.  That saying is very appropriate when it comes to making your own shields.

The first step is to gather all of the parts you will need. In this case:

  • an LCD module (backlit if possible, but I’m being cheap and using a non-backlit module)
  • a 10k linear trimpot, used to adjust the LCD contrast
  • a blank protoshield that matches your Arduino board (Duemilanove or Mega)
  • various header pins required to solder into the shield (they should be included with your protoshield)
  • plenty of paper to draw on

For example:

Next, test your parts to ensure everything works. So, draw a schematic so you have something to follow:

And then build the circuit on a solderless breadboard, so you can iron out all the hardware bugs before permanently soldering into the shield. If you have a backlit LCD, pins 15 and 15 are also used, 15 for backlight supply voltage (check your data sheet!) and 16 for backlight ground:

In this example, I wrote a simple sketch to send some random numbers to the LCD. (Very similar to tutorial example 2.2) Excellent, everything is working as it should.

Now to make the transition from temporary to permanent. Place your components onto the protoshield, and get a feel for how they can sit together. Whilst doing this, take into account that you will have to solder some jumper wires between the various pads and the digital pin contacts and the 5V strip at the top row, as well as the GND strip on the bottom row. You may find that you have to solder jumper wires on the bottom of the shield – that’s fine, but you need to ensure that they won’t interfere with the surface of your Arduino board as well.

Furthermore, some protoshields have extra functions already added to the board. For example, the shield I am using has two LEDs and a switch, so I will need to consider wiring them up as well – if something is there, you shouldn’t waste the opportunity to not use them.

If your shield has a solder mask on the rear, a great way to plan your wiring is to just draw them out with a whiteboard marker:


Remember to solder these wires in *before* the LCD … otherwise you will be in a whole world of pain. The LCD should be soldered in second-last, as it is the most difficult thing to desolder if you have made any mistakes. The last items to solder will be the header pins. So let’s get soldering…

After every solder joint, I pushed in the LCD module – in order to check my placement. You can never check too many times, even doing so I made a small mistake. Having a magnifying glass handy is also a great idea:

Now just to soldier on, soldering one pad at a time, then checking the joint and its relationship with where it should be on the board. Be very careful when applying solder to the pads, they can act as a “drain” and let lots of solder flow into the other side. If this happens you will spend some time trying to remove that excess solder – a solder sucker and some solder wick is useful for this.

Finally all the wires and pads were connected, and I checked the map once more. Soldering in the LCD was  the easiest part – but it is always the most difficult to remove – so triple check your work before installing the display. Now it was time to sit in the header sockets, and test fit the shield into my arduino board. This is done to make sure there is sufficient space between the wires on the bottom of our shield and the top of the arduino:

Even though you wouldn’t normally put a shield on top of this shield, I used the header sockets to allow access to all of the arduino pins just in case. Soldering the sockets was easy, I used blu-tack to hold them into place. Crude but effective.

And we’re finished. Soldering is not the best of my skills, so I checked continuity between the pins on the LCD and where they were supposed to go, and also electrically checked for bridges between all the soldered pins to check for shorts. A multimeter with a continuity buzzer makes this easy. Naturally I had a short between LCD pin 14 and 13, but some solder wick helped me fix that.

So electrically it was correct… time to see if it actually worked! At this point it is a good idea to clear up the workspace, switch off the soldering iron, put it somewhere safe to cool down, then wash your hands thoroughly.

Here are some photos of the finished product on my arduino board:

The only thing to do was alter the demonstration sketch to take account for the pin placements, and insert some code to blink the LEDs. For example: LCDshielddemo.pdf. I never need an excuse to make a video clip, so here is the result:

So there you have it. With a little planning and care, you too can make your own Arduino shield. An LCD shield would be useful for everyone, as they are great for displaying data and requesting input, yet quite fiddly to use with a solderless breadboard. High resolution photos are available on flickr.

If you have any questions or comments, please leave them below, or consider joining our Google Group!

As always, thank you for reading and I look forward to your comments and so on. Please subscribe using one of the methods at the top-right of this web page to receive updates on new posts!


  • Newsletter

    Sign up for the PlanetArduino Newsletter, which delivers the most popular articles via e-mail to your inbox every week. Just fill in the information below and submit.

  • Like Us on Facebook