Posts | Comments

Planet Arduino

Archive for the ‘pressure sensor’ Category

While humans have done a pretty good job of figuring out how to fly with various mechanical contrivances, the fact remains that our natural senses aren’t really well suited to being off the ground. For example, unless you have a visual reference point, determining which way is up is quite a bit harder than you might think. Which is why pilots rely on instruments such as the variometer, that determines the current rate of climb and descent, to guide them when their eyes can’t be trusted.

It’s also a very handy thing to have when paragliding, which is why [mircemk] decided to build a hand-held version using the Arduino Nano and a BMP180 pressure sensor. Since you don’t want to be staring at a little screen in mid-air, the device conveys changes in altitude with audio tones. A rising tone means you’re moving upwards, while a lower tone indicates downward travel. In the video below, you can see that it only takes a meter or two of vertical movement before the device picks up on the change.

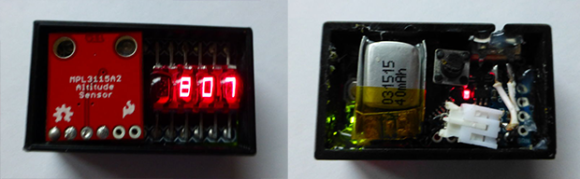
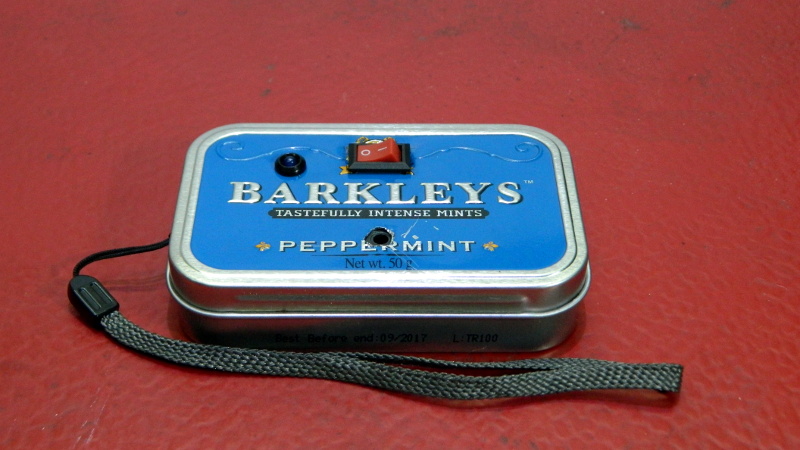
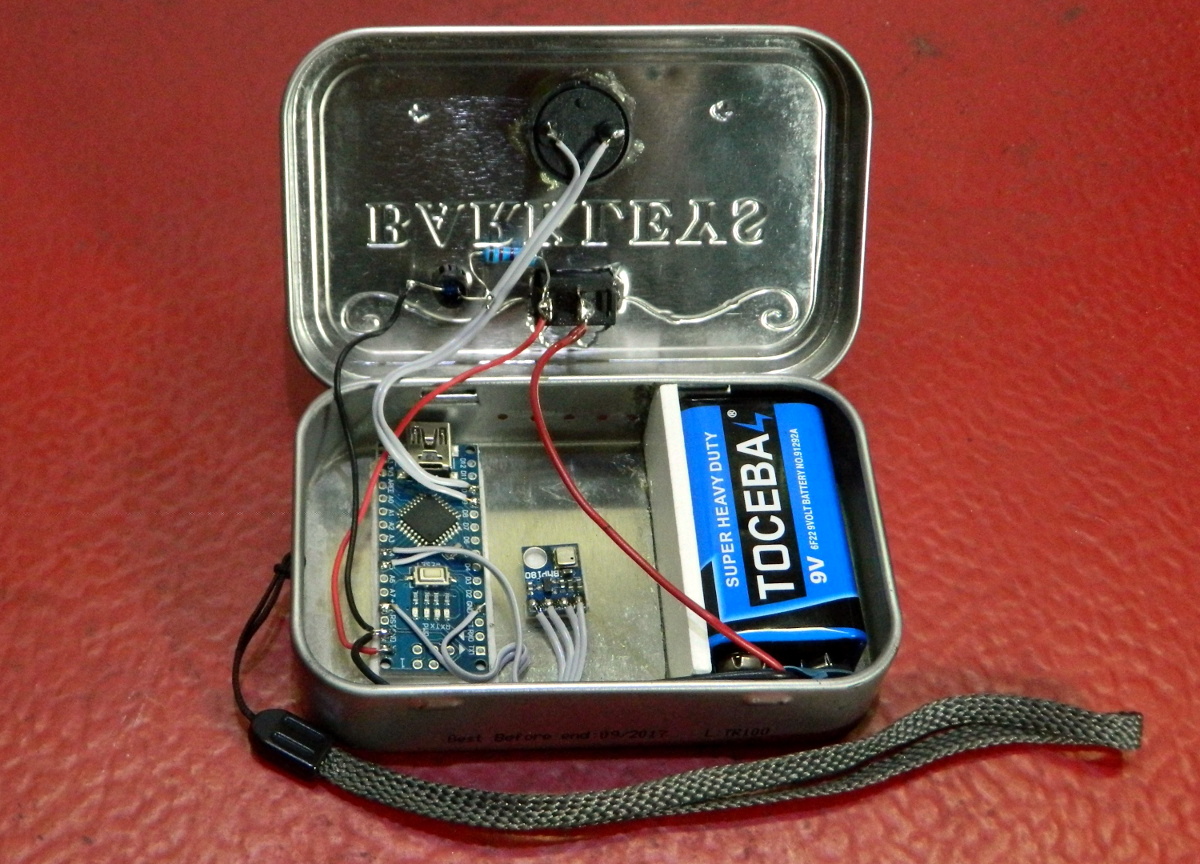
Looking for a simple yet rugged enclosure for the device, [mircemk] found a metal mint tin that would hold the microcontroller, sensor, buzzer, and the 9 V battery that powers it all. We know what you’re thinking, but don’t worry; holes have been popped in the sides to make sure there’s no pressure difference inside the tin. There’s plenty of room to replace the alkaline battery with a rechargeable pack and associated charge controller, but we imagine there’s a certain security in tossing in a fresh new primary cell before slipping the surly bonds of Earth.

If you’re in interested DIY instrumentation for a glider or other aircraft that actually has a proper cockpit, this sunlight readable flight computer made from a Kobo e-reader would be a great start.

How do you know if your 3D printer bed is levelled? Oh, don’t worry – you’ll know. Without a level bed, filament won’t stick properly to the build surface and you’ll run into all sorts of other problems. Knowing how tricky it can be to get the bed just right, [Antzy] built a tool to help.

The device, which he calls the FS-Touch, is based around an Arduino Pro Micro fitted with a force sensitive resistor. This allows the distance between the bed and nozzle to be measured based on the force read by the resistor when placed in between the two.

Using the tool is simple. First, the bed is brought roughly into alignment using the typical paper method. Then, a reading is taken from one corner of the bed, and the measurement saved for reference. The other corners can then be set to the same level, with the aid of LEDs to guide the user in which direction to turn the adjustment knobs.

Measuring force in this way has the potential of being more repeatable than the somewhat difficult paper method. It promises to ease the task for users that may be struggling to get their bed in proper shape. Of course, automated bed levelling makes things even easier again. Video after the break.

Puff and Suck (or Sip and Puff) systems allow people with little to no arm mobility to more easily interact with computers by using a straw-like unit as an input device. [Ana] tells us that the usual way these devices are used to input text involves a screen-based keyboard; a cursor is moved to a letter using some method (joystick, mouse emulator, buttons, or eye tracking) and that letter is selected with a sip or puff into a tube.

[Ana] saw such systems as effective and intuitive to use, but also limited in speed because there’s only so fast that one can select letters one at a time. That led to trying a new method; one that requires a bit more work on the user’s part, but the reward is faster text entry. The Puff-Suck Interface for Fast Text Input turns a hollow plastic disk and a rubber diaphragm into bipolar pressure switch, able to detect three states: suck, puff, and idle. The unit works by having an IR emitter and receiver pair on each side of a diaphragm (one half of which is shown in the image above). When air is blown into or sucked out of the unit, the diaphragm moves and physically blocks one or the other emitter-receiver pair. The resulting signals are interpreted by an attached Arduino.

How does this enable faster text input? By throwing out the usual “screen keyboard” interface and using Morse code, with puffs as dots and sucks as dashes. The project then acts as a kind of Morse code keyboard. It does require skill on the user’s part, but the reward is much faster text entry. The idea got selected as a finalist in the Human-Computer Interface Challenge portion of the 2018 Hackaday Prize!

Morse code may seem like a strange throwback to some, but not only does the bipolar nature of [Ana]’s puff-suck switch closely resemble that of Morse code input paddles, it’s also easy to learn. Morse code is far from dead; we have pages of projects and news showing its involvement in everything from whimsical projects to solving serious communication needs.

[Amitabh] was frustrated by the lack of options for controlling air pressure in soft robotics. The most promising initiative, Pneuduino, seemed to be this close to a Shenzhen production run, but the creators have gone radio silent. Faced with only expensive alternatives, he decided to take one for Team Hacker and created Programmable Air, a modular system for inflatable and vacuum-based robotics.

The idea is to build the cheapest, most hacker-friendly system he can by evaluating and experimenting with all sorts of off-the-shelf pumps, sensors, and valves. From the looks of it, he’s pretty much got it dialed in. Programmable Air is based around $9 medical-grade booster pumps that are as good at making vacuums as they are at providing pressurization. The main board has two pumps, and it looks like one is set to vacuum and the other to spew air. There’s an Arduino Nano to drive them, and a momentary to control the air flow.

Programmable Air can support up to 12 valves through daughter boards that connect via right-angle header. In the future, [Amitabh] may swap these out for magnetic connections or something else that can withstand repeated use.

Blow past the break to watch Programmable Air do pick and place, control a soft gripper, and inflate a balloon. The balloon’s pressurization behavior has made [Amitabh] reconsider adding a flow meter, but so far he hasn’t found a reasonable cost per unit. Can you recommend a small flow meter that won’t break the bank? Let us know in the comments.

Apr
02

During a recent trip to Bhutan, [electronut] wished for a device that would show the temperature and altitude at the various places he visited in the Kingdom. Back home after his trip, he built this simple Temperature, Altitude and Pressure Display Device using a few off the shelf parts.

Following a brief search, he zeroed in on the BMP 180 sensor which can measure temperature and pressure, and which is available in a break-out board format from many sources. He calculates altitude based on pressure. The main parts are an Arduino Pro Mini clone, a BMP180 sensor and a Nokia 5110 LCD module. A standard 9V battery supplies juice to the device. A push button interface allows him to read the current parameters when pressed, thus conserving battery life.

Standard libraries allow him to interface the LCD and sensor easily to the Arduino. He wrapped it all up by enclosing the hardware in a custom laser cut acrylic box. The result is bigger than he would like it to be, so maybe the next iteration would use a custom PCB and a LiPo battery to shrink it in size. While at it, we think it would be nice to add a RTC and some sort of logging capability to the device so it can store data for future analysis. The schematic, code and enclosure drawing are available via his Github repository.


Filed under: Arduino Hacks
Nov
04

E-traces creates visual sensations from ballerinas

Accelerometer, arduino, dance, inspiration, Lilypad, pressure sensor Comments Off on E-traces creates visual sensations from ballerinas 

etrace

Electronic Traces is an interactive project designed to allow ballet dancers to recreate their movements in  digital pictures using a customizable mobile application. It was prototyped by product-designer Lesia Trubat mixing technological, artisanal skills and using Arduino Lilypad, force sensitive resistors and accelerometer:

The concept of Electronic Traces is based on capturing dance movements and transforming them into visual sensations through the use of new technologies. To do this we focused on the ballet shoes themselves, which through the contact with the ground, and thanks to Lilypad Arduino technology, record the pressure and movement of the dancer’s feet and send a signal to an electronic device. A special application will then allow us to show this data graphically and even customize it to suit each user, through the different functions of this app.

The user can then view all the moves made in video format, extract images and even print them. Dancers can interpret their own movements and correct them or compare them with the movements of other dancers, as graphs created with motion may be the same or different depending on the type of movements execute.

e-traces-lesia-trubat-08_800


Jun
20

altimeter

While traditionally a project geared more toward the model rocket crowd, a lot of people are flying quadcopters these days, and knowing the altitude your RC aircraft reached is a nice thing to know. [Will] came up with a very nice, very small, and very lightweight altimeter that’s perfect for strapping to microquads, their bigger brothers, and of course model rockets. As a nice bonus, it also looks really cool with an exceedingly retro HP bubble display.

The components used in this tiny altimeter include a MEMS altitude and pressure sensor, HP bubble display featuring four seven-segment LEDs, an Arduino Pro Mini, and a tiny 40 mAh LiPo capable of powering the whole contraption for hours.

In the video below, [Will] shows off the functions of his altimeter, sending it aloft on a quadcopter to about 100 ft. There are settings for displaying the minimum, maximum, and delta altitudes, all accessed with a single button.

While it’s not the most feature packed altimeter out there, it’s still much better than commercial offerings available for the model rocket crowd.


Filed under: Arduino Hacks
Feb
24

Prototyping a pressure sensor with Arduino Micro #ArduinoMicroMonday

arduino, Arduino micro, micro, pressure sensor, Wearables Comments Off on Prototyping a pressure sensor with Arduino Micro #ArduinoMicroMonday 

Pressure sensor Arduino Micro

  managed to build a pressure sensor to behave like a switch, when it’s in an idle state the LED is off, if you apply some pressure,  light goes on:

The pressure pad doesn’t just work straight out the box – it requires a little bit of craft. What I’ve done is sandwich a pressure sensitive conductive sheet – known as Velostat – between two pieces of felt. I then stitched some conductive thread through each piece of felt – this applies a current to the pad and when the sandwich is put together, the circuit is complete. The Velostat acts like a resistor – the value changes when pressure is applied. It’s then just a case of writing out code that tells the LED to come on when the pressure reading goes over a certain threshold.


Take a look at the first and  second part of the experiment on his blog.


  • Newsletter

    Sign up for the PlanetArduino Newsletter, which delivers the most popular articles via e-mail to your inbox every week. Just fill in the information below and submit.

  • Like Us on Facebook