Posts | Comments

Planet Arduino

Archive for the ‘ecu’ Category

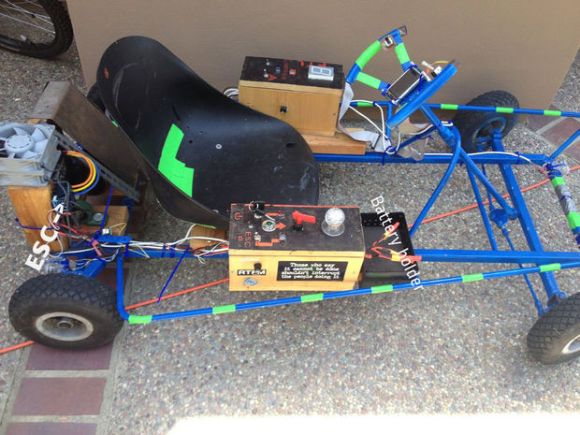
When [Robot Cantina] isn’t busy tweaking the 420cc Big Block engine in their Honda Insight, they’re probably working on some other completely far out automotive atrocity. In the video below the break, you’ll see them take the concept of a ‘lean burn’ system from the Insight and graft hack it into their 1997 Saturn coupe.

What’s a lean burn system? Simply put, it tricks the car into burning less fuel when it’s cruising under a light load to improve the vehicle’s average mileage. The Saturn’s electronics aren’t sophisticated enough to implement a lean burn system simply, and so [Robot Cantina] did what any of us might have done: hacked it in with an Arduino.

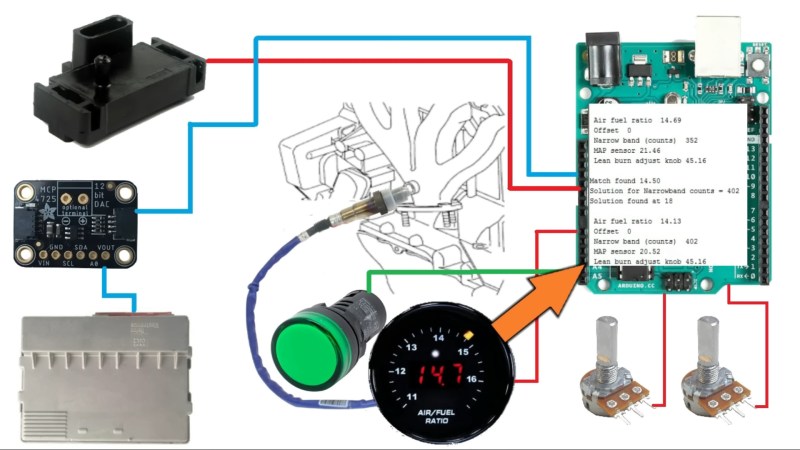
The video does a wonderful job going into the details, but essentially by using an oxygen sensor with finer resolution (wide-band) and then outputting the appropriate narrow band signal to the ECU, [Robot Cantina] can fine tune the air/fuel ratio with nothing more than a potentiometer, and the car’s ECU is none the wiser. What were the results? Well… they weren’t as expected, which means more experimentation, more parts, and hopefully, more videos. We love seeing the scientific method put to fun use!

People are ever in the quest to try interesting new (and sometimes old) ideas, such as this hot rod hacked to run with a lawnmower carburetor.

If you are working with OBD2 hardware or software, it’s easy enough to access test data, simply plug into a motor vehicle with an OBD2 socket. If, however, you wish to test OBD2 software under all possible fault conditions likely to be experienced by an engine, you are faced with a problem in that it becomes difficult to simulate all faults on a running engine without breaking it. This led [Fixkick] to create an OBD2 simulator using a secondhand Ford ECU supplied with fake sensor data from an Arduino to persuade it that a real engine was connected.

The write-up is quite a dense block of text to wade through, but if you are new to the world of ECU hacking it offers up some interesting nuggets of information. In it there is described how the crankshaft and camshaft sensors were simulated, as well as the mass airflow sensor, throttle position, and speedometer sensors. Some ECU inputs require a zero-crossing signal, something achieved with the use of small isolating transformers. The result is a boxed up unit containing ECU and Arduino, with potentiometers on its front panel to vary the respective sensor inputs.

We’ve brought you quite a few OBD2 projects over the years, for example, there was this LED tachometer, and a way into GM’s OnStar.

Thanks [darkspr1te] for the tip.


Filed under: Arduino Hacks, car hacks
Jul
27

Electric Go-Cart Has Arduino Brains

arduino, arduino hacks, ecu, go-kart, gokart, transportation hacks Comments Off on Electric Go-Cart Has Arduino Brains 

arduino powered go cart

Oh how times have changed. Back in the 30’s the VW Beetle was designed to be cheap, simple and easy for the typical owner to maintain themselves. Nowadays, every aspect of modern cars are controlled by some sort of computer. At least our go-carts are spared from this non-tinkerable electronic nightmare…. well, that’s not completely true anymore. History is repeating itself as [InverseCube] has built an electronic go-cart fully controlled by an Arduino. Did I forget to mention that [InverseCube] is only 15 years old?

The project starts of with an old gas-powered go-cart frame. Once the gas engine was removed and the frame cleaned up and painted, a Hobbywing Xerun 150A brushless electronic speed controller (ESC) and a Savox BSM5065 450Kv motor were mounted in the frame which are responsible for moving the ‘cart down the road. A quantity of three 5-cell lithium polymer batteries wired in parallel provide about 20 volts to the motor which results in a top speed around 30mph. Zipping around at a moderate 15mph will yield about 30 minutes of driving before needing to be recharged. There is a potentiometer mounted to the steering wheel for controlling the go-cart’s speed. The value of the potentiometer is read by an Arduino which in turn sends the appropriate PWM signal to the ESC.

In addition to the throttle control, the Arduino is also responsible for other operational aspects of the vehicle. There are a bunch of LED lights that serve as headlights, tail lights, turn signals, brake lights and even one for a backup light. You may be wondering why an Arduino should be used to control something as simple as brake or headlights. [InverseCube] has programmed in some logic in the code that keeps the break lights on if the ESC brake function is enabled, if the throttle is below neutral or if the ESC enable switch is off. The headlights have 3 brightnesses, all controlled via PWM signal provided by the microcontroller.

There is also an LCD display mounted to the center of the steering wheel. This too is controlled by the Arduino and displays the throttle value, status of the lights and the voltage of the battery.


via reddit


Filed under: Arduino Hacks, transportation hacks
Mar
19

GEVCU – an Open Generalized Electric Vehicle Control Unit

arduino due, arduino hacks, ARM, CAN BUS, ecu, Hardware Comments Off on GEVCU – an Open Generalized Electric Vehicle Control Unit 

At Hackaday we’re very happy to see the increasing number of open hardware devices that appear everyday on the internet, and we’re also quite thrilled about open-source electric cars. Pictured above is the GEVCU, an open source electric vehicle control unit (or ECU). It is in charge of processing different inputs (throttle position, brake pressure, vehicle sensors) then send the appropriate control commands to electric motor controllers (aka inverters) via CAN bus messages or digital / PWM signals.

The project started back in December 2012 and was originally based on an Arduino Due. Since then, the GEVCU went through several revisions and ultimately a complete custom board was produced, while still keeping the Cortex M3 ATSAM3X8E from the Due. As you may have guessed, the board also includes a Wifi transceiver so users may adjust the ECU parameters via a web based platform. All resources may be downloaded from the official GitHub.


Filed under: Arduino Hacks, ARM, hardware


  • Newsletter

    Sign up for the PlanetArduino Newsletter, which delivers the most popular articles via e-mail to your inbox every week. Just fill in the information below and submit.

  • Like Us on Facebook