Posts | Comments

Planet Arduino

Archive for the ‘serial monitor’ Category

Every new generation of computers repeats the techniques used by the earlier generations. [Kim Salmi] created an ASCII-based quadcopter simulation game using an Arduino that displays on the Arduino serial monitor. The modern twist is the controller: an accelerometer supplements the joystick for immersive play. And of course there are flashing LEDs.

An Arduino Uno provides the processing power and drives the serial monitor. A joystick and a Hitachi H48C accelerometer are mounted on a breadboard and wired to the Uno. The tilting of the accelerometer controls the height and left-right motion of the quadcopter on the screen. The joystick sets the the ‘copter in hover mode and lowers a ‘rescue’ line. Another LED warns when the maximum height, the vertical limit of the screen, is reached. The joystick also selects one of the three quadcopters, which have different performance characteristics.

There’s a video after the break. [Kim] provides the source code so  you use it as a reference for handling the joystick and accelerometer inputs.

More proof that what is old is new. 


Filed under: Arduino Hacks

serial01

A serial monitor is an easy way to debug your projects. As we step through code, it’s nice to see a “Hey! I’m working, moving to next thing!” across the monitor, and not so nice to see nothing – the result of a bug that needs debugging. This has always meant needing a PC loaded with your favorite serial terminal program close at hand.

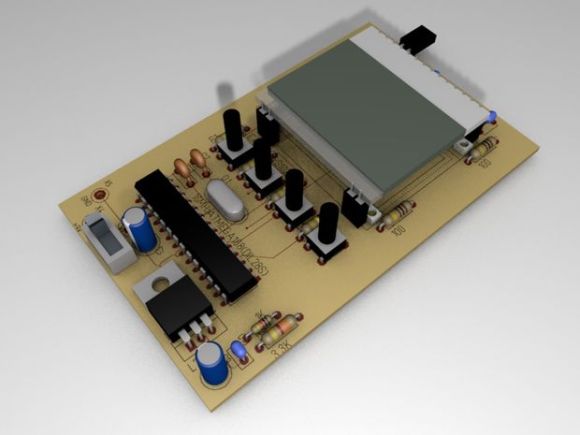
Most of the time this is not an issue, because the PC is used to compile the code and program the project at hand. But what if you’re in the field, with a mission of fixing a headless system, and in need a serial monitor? Why lug around your PC when you can make your own External Serial Monitor!

[ARPix] built this fully functional serial monitor based on an Atmega328 and a 102 x 64 LCD display. While it doesn’t have a keyboard port like this microcontroller based serial terminal, tact switches allow access to the user interface to start and stop the reading and set the baud rate. The Atmega328 has 2K of SRAM, which is needed for the project. Apparently, 1K was not enough to handle all the data. All code, schematics and a very well done parts layout are available, making this sure to be your next weekend project!


Filed under: Arduino Hacks, Microcontrollers


  • Newsletter

    Sign up for the PlanetArduino Newsletter, which delivers the most popular articles via e-mail to your inbox every week. Just fill in the information below and submit.

  • Like Us on Facebook