Posts | Comments

Planet Arduino

Archive for the ‘speaker’ Category

A macro keypad making music.

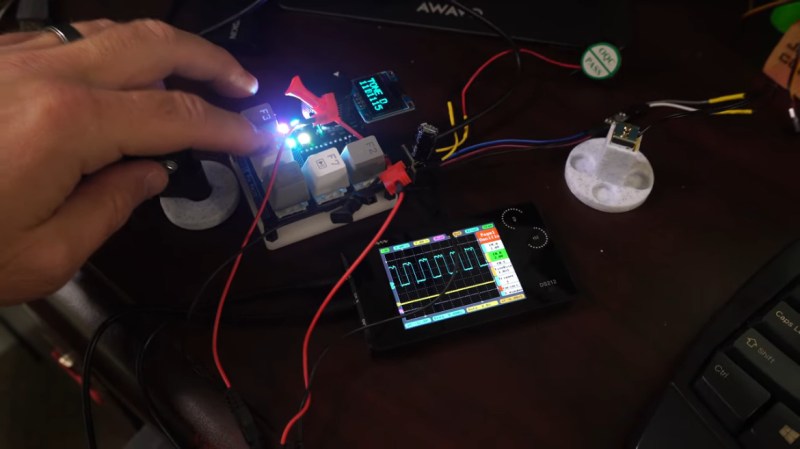
Do you kind of want a macropad, but aren’t sure that you would use it? Hackaday alum [Jeremy Cook] is now making and selling the JC Pro Macro on Tindie, which is exactly what it sounds like — a Pro Micro-based macro keypad with an OLED screen and a rotary encoder. In the video below, [Jeremy] shows how he made it into a music maker by adding a speaker and a small solenoid that does percussion, all while retaining the original macro pad functionality.

[Jeremy]’s original idea for a drum was to have a servo seesawing a chopstick back and forth on the table as one might nervously twiddle a pencil. That didn’t work out so well, so he switched to the solenoid and printed a thing to hold it upright, and we absolutely love it. The drum is controlled with the rotary encoder: push to turn the beat on or off and crank it to change the BPM.

To make it easier to connect up the solenoid and speaker, [Jeremy] had a little I²C helper board fabricated. There’s one SVG connection and another with power and ground swapped in the event it is needed. If you’re interested in the JC Pro Macro, you can pick it up in various forms over on Tindie. Of course, you might want to wait for version 2, which is coming to Kickstarter in October.

There are many ways to make a macro keyboard. Here’s one that also takes gesture input.

[Mike Clifford] of [Modustrial Maker] had not one, not two, but five friends call him to announce that their first children were on the way, and he was inspired to build them a Bluetooth speaker with a unique LED matrix display as a fitting gift. Meant to not only entertain guests, but to audio-visually stimulate each of their children to promote neurological development.

Picking up and planing down rough maple planks, [Clifford] built a mitered box to house the components before applying wood finish. The brain inside the box is an Arduino Mega — or a suitable clone — controlling a Dayton Bluetooth audio and 2x15W amp board. In addition to the 19.7V power supply, there’s a step down converter for the Mega, and a mic to make the LED matrix sound-reactive. The LED matrix is on a moveable baffle to adjust the distance between it and a semi-transparent acrylic light diffuser. This shifts the light between sharp points or a softer, blended look — perfect for the scrolling Matrix text and fireplace effects! Check it out!

[Clifford]’s Arduino code is up on GitHub for anyone else out there with friends who are expecting. You never know when your own childhood Fisher-Price cassette players from back in the day might come in handy.


Filed under: Arduino Hacks, Musical Hacks

When [::vtol::] wants to generate random numbers he doesn’t simply type rand() into his Arduino IDE, no, he builds a piece of art. It all starts with a knob, presumably connected to a potentiometer, which sets a frequency. An Arduino UNO takes the reading and generates a tone for an upward-facing speaker. A tiny ball bounces on that speaker where it occasionally collides with a piezoelectric element. The intervals between collisions become our sufficiently random number.

The generated number travels up the Rube Goldberg-esque machine to an LCD mounted at the top where a word, corresponding to our generated number, is displayed. As long as the button is held, a tone will continue to sound and words will be generated so poetry pours forth.

If this take on beat poetry doesn’t suit you, the construction of the Ball-O-Bol has an aesthetic quality that’s eye-catching, whereas projects like his Tape-Head Robot That Listens to the Floor and 8-Bit Digital Photo Gun showed the electronic guts front and center with their own appeal.


Filed under: Arduino Hacks

[IanMeyer123] should be working on his senior design project. Instead, he’s created a sound-reactive Bluetooth speaker that may not earn him an A grade but will at least keep the team entertained.

[Ian] started with the amp and power. The amp is a 15 watt, 12 volt model based on the popular TDA7297 chip. Power comes from a portable laptop battery rated at 185 Wh. [Ian] himself said that is absolute overkill for this project. While [Ian] hasn’t run any longevity tests on his setup, we’re guesstimating it would be rated in days.

Every Bluetooth speaker needs a sweet light show, right? [Ian] wrapped his 2″ full range speakers in Neopixel rings from Adafriut. The WS2812’s are driven by an Arduino. When music is playing, MSGEQ7 allows the Arduino to play a light show in time to the beat. When the stereo is off, a DS3231 real-time clock module allows the Arduino to display the time on the two rings. If you’re curious about the code for this project, [Ian] posted it on his Reddit thread. Reddit isn’t exactly a great code repository, so please, [Ian] setup a GitHub account, and/or drop your project on Hackaday.io!

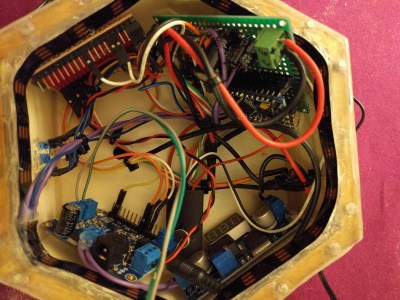
[Ian] didn’t realize how many wires would be flying around inside the speaker. That may be why the wiring looks a bit scary. All the chaos is hidden away, underneath a well-built wooden case.

If you want to see another take on a Bluetooth speaker with a Neopixel display, check [Peter’s] project here. Interested in more portable power units? This one’s for you!


Filed under: Arduino Hacks, musical hacks

Finding a product that is everything you want isn’t always possible. Making your own that checks off all those boxes can be. [Peter Clough] took the latter route and built a small Bluetooth speaker with an LED visualization display that he calls Magic Box.

A beefy 20W, 4Ohm speaker was screwed to the lid of a wooden box converted to the purpose. [Clough] cut a clear plastic sheet to the dimensions of the box, notching it 2cm from the edge to glue what would become the sound reactive neopixel strip into place — made possible by an electret microphone amplifier. There ended up being plenty of room inside the speaker box to cram an Arduino Pro Mini 3.3V, the RN-52 Bluetooth receiver, and the rest of the components, with an aux cable running out the base of the speaker. As a neat touch, neodymium magnets hold the lid closed.

Magic Box Bluetooth Speaker ComponentsWe gotta say, a custom speaker with LED visualization makes for a tidy little package — aside from the satisfaction that comes from building it yourself.

Depending on your particular situation, you may even opt to design a speaker that attaches to a magnet implanted in your head.

[via /r/DIY]


Filed under: Arduino Hacks, hardware, led hacks, musical hacks
Mag
18

Manipulate your voice with Mimic Monster and Intel Edison

arduino, ArduinoCertified, edison, Featured, Intel Edison, microphone, speaker, tutorial, USB sound card, video, voice Commenti disabilitati su Manipulate your voice with Mimic Monster and Intel Edison 

Monster_post2

It’s time to introduce you to another great tutorial made for  Intel Edison.  Mimic Monster is a project allowing you to record soundbites and playing them back manipulated.
In this step-by-step project, everyone who is interested in audio features and mods , can find useful information on how to manipulate audio files and create amazing effects from your voice.

Grawr! It’s a mimic monster! What did you say? Grawr! It’s the mimic monster!

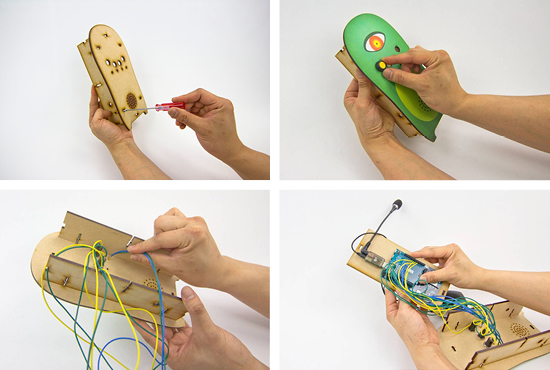
Having landed on Earth, this little alien needs you to teach it how to speak. Speak into its audio antenna and it will repeat your words back. Press a button and change its pitch. In this tutorial, you will learn in more detail, how to work with a USB sound card, a microphone, and a speaker.


Before you begin, make sure you’ve followed through Intel® Edison Getting Started guide, and our previous tutorial, the Intel® Edison mini-breakout Getting Started Guide.

Monster_post1

 Check the other tutorials of the series.

Feb
10

Converting Morse Code to Text with Arduino

Amateur Radio, arduino, arduino hacks, ham, microphone, morse, Morse Code, radio, speaker, translate Commenti disabilitati su Converting Morse Code to Text with Arduino 

Morse code used to be widely used around the globe. Before voice transmissions were possible over radio, Morse code was all the rage. Nowadays, it’s been replaced with more sophisticated technologies that allow us to transmit voice, or data much faster and more efficiently. You don’t even need to know Morse code to get an amateur radio license any more. That doesn’t mean that Morse code is dead, though. There are still plenty of hobbyists out there practicing for the fun of it.

[Dan] decided to take a shortcut and use some modern technology to make it easier to translate Morse code back into readable text. His project log is a good example of the natural progression we all make when we are learning something new. He started out with an Arduino and a simple microphone. He wrote a basic sketch to read the input from the microphone and output the perceived volume over a Serial monitor as a series of asterisks. The more asterisks, the louder the signal. He calibrated the system so that a quiet room would read zero.

He found that while this worked, the Arduino was so fast that it detected very short pulses that the human ear could not detect. This would throw off his readings and needed to be smoothed out. If you are familiar with button debouncing then you get the idea. He ended up just averaging a few samples at a time, which worked out nicely.

The next iteration of the software added the ability to detect each legitimate beep from the Morse code signal. He cleared away anything too short. The result was a series of long and short chains of asterisks, representing long or short beeps. The third iteration translated these chains into dots and dashes. This version could also detect longer pauses between words to make things more readable.

Finally, [Dan] added a sort of lookup table to translate the dots and dashes back into ASCII characters. Now he can rest easy while the Arduino does all of the hard work. If you’re wondering why anyone would want to learn Morse code these days, it’s still a very simple way for humans to communicate long distances without the aid of a computer.


Filed under: Arduino Hacks
Apr
15

The most advanced Lamp/Speaker is open source and also Arduino at heart

arduino, ArduinoAtHeart, crowdfunding, lamp, Open source hardware, speaker Commenti disabilitati su The most advanced Lamp/Speaker is open source and also Arduino at heart 

cromatica digital habits

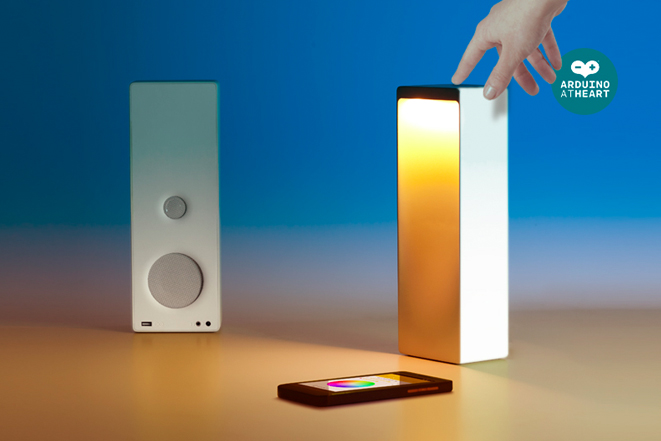
Interacting with objects in a new way has always been the main focus of Digital Habits, a design studio based in Milan.  Today we are proud to announce they’ve become a partner  of the Arduino At Heart program with their new project called Cromatica (it was exhibited at the coveted Fuorisalone Milan Design Week in the Superstudio Temporary Museum for New Design and started the crowdfunding campaign just some days ago!).

Cromatica is half speaker and half desk lamp: it can be controlled through a natural gestural interface, touch sensors or remotely via the Cromatica Android and iOS app. Designed to deliver both light and sound functions, Cromatica features wireless 4.0 Bluetooth connection for streaming music and a RGB lamp for multiple ambient effects.

Cromatica is embedded with an Arduino allowing for a highly digital, multi-sensory music and desktop working experience.  It blends  light and sound functionalities in unexpected ways, taking IoT products to a new level of quality.  For example you can download the app for natural awakening: light will rise and music streaming will start allowing you to wake up to your favourite playlist, perfect for early mornings.

Take a look at the video for the Natural Interaction:

In the video below you can see how you can create your favorite ambient  to match with your mood:

Innocenzo Rifino, Director of Digital Habits, told us:

“The Cromatica is a multi-purpose light-speaker but it is also our vision of the evolution of electronics, a vision that is moving in a more human and open direction. Crowdrooster have helped tremendously by opening our product up to a wider community whilst giving us the chance to generate enough funding to share our concepts more widely.”

The Cromatica is also true to its maker roots being Open Source and hackable, opening the doors for endless innovation from the maker community as it can be adapted to integrate with other tech and the Internet of Things. To enable this there will be a special ‘Maker Edition’ campaign reward complete with digital file to 3D print the shell.

Take a look at their campaign Crowdrooster and make your pledge!
Crowdrooster, the new ‘all tech’ crowdfunding site, introduced Cromatica as the first maker project available for funding on the site.


  • Newsletter

    Sign up for the PlanetArduino Newsletter, which delivers the most popular articles via e-mail to your inbox every week. Just fill in the information below and submit.

  • Like Us on Facebook