Posts | Comments

Planet Arduino

Archive for the ‘lock’ Category

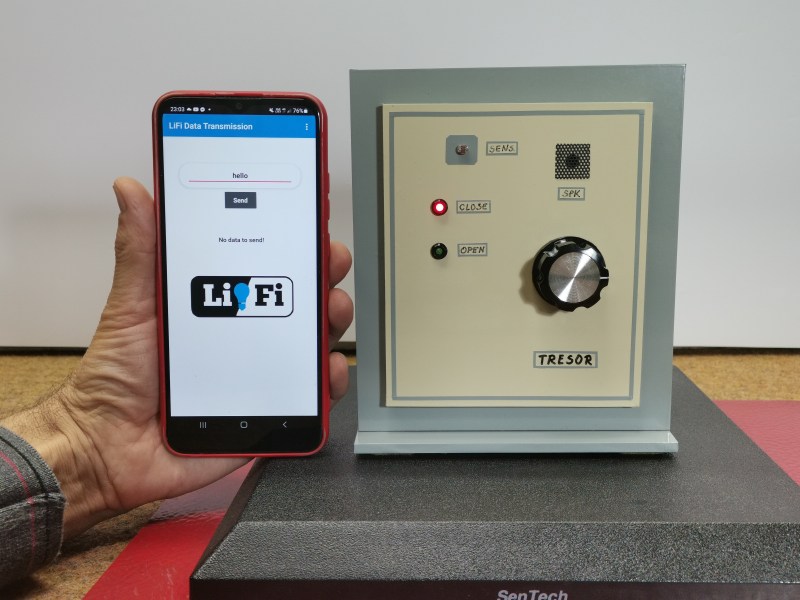
There are many ways to lock a door. You could use a keypad, an RFID card, a fingerprint or retina scan, Wi-Fi, Bluetooth, the list goes on. You could even use a regular old metal key. But none of these may be as secure as [mircemk]’s Arduino-based door lock that employs a smartphone’s flashlight as a pass code.

At first blush, this seems horribly insecure. Use a plain old flashlight to open a door? Come on. But the key is in the software. In fact, between the typed-in pass code and the flash of light it generates, this lock kind of has two layers of security.

Here’s what’s going on: inside the accompanying smart phone application, there’s a list of passwords. Each of these passwords corresponds to a flash of light in milliseconds. Enter the correct password to satisfy the Arduino, and the phone’s flashlight is activated for the appropriate number of milliseconds to unlock the door.

As you’ll see in the video below, simply flashing the light manually doesn’t unlock the door, and neither does entering one of the other, bogus passwords. Although it does activate the flashlight each time, they don’t have the appropriate light-time length defined.

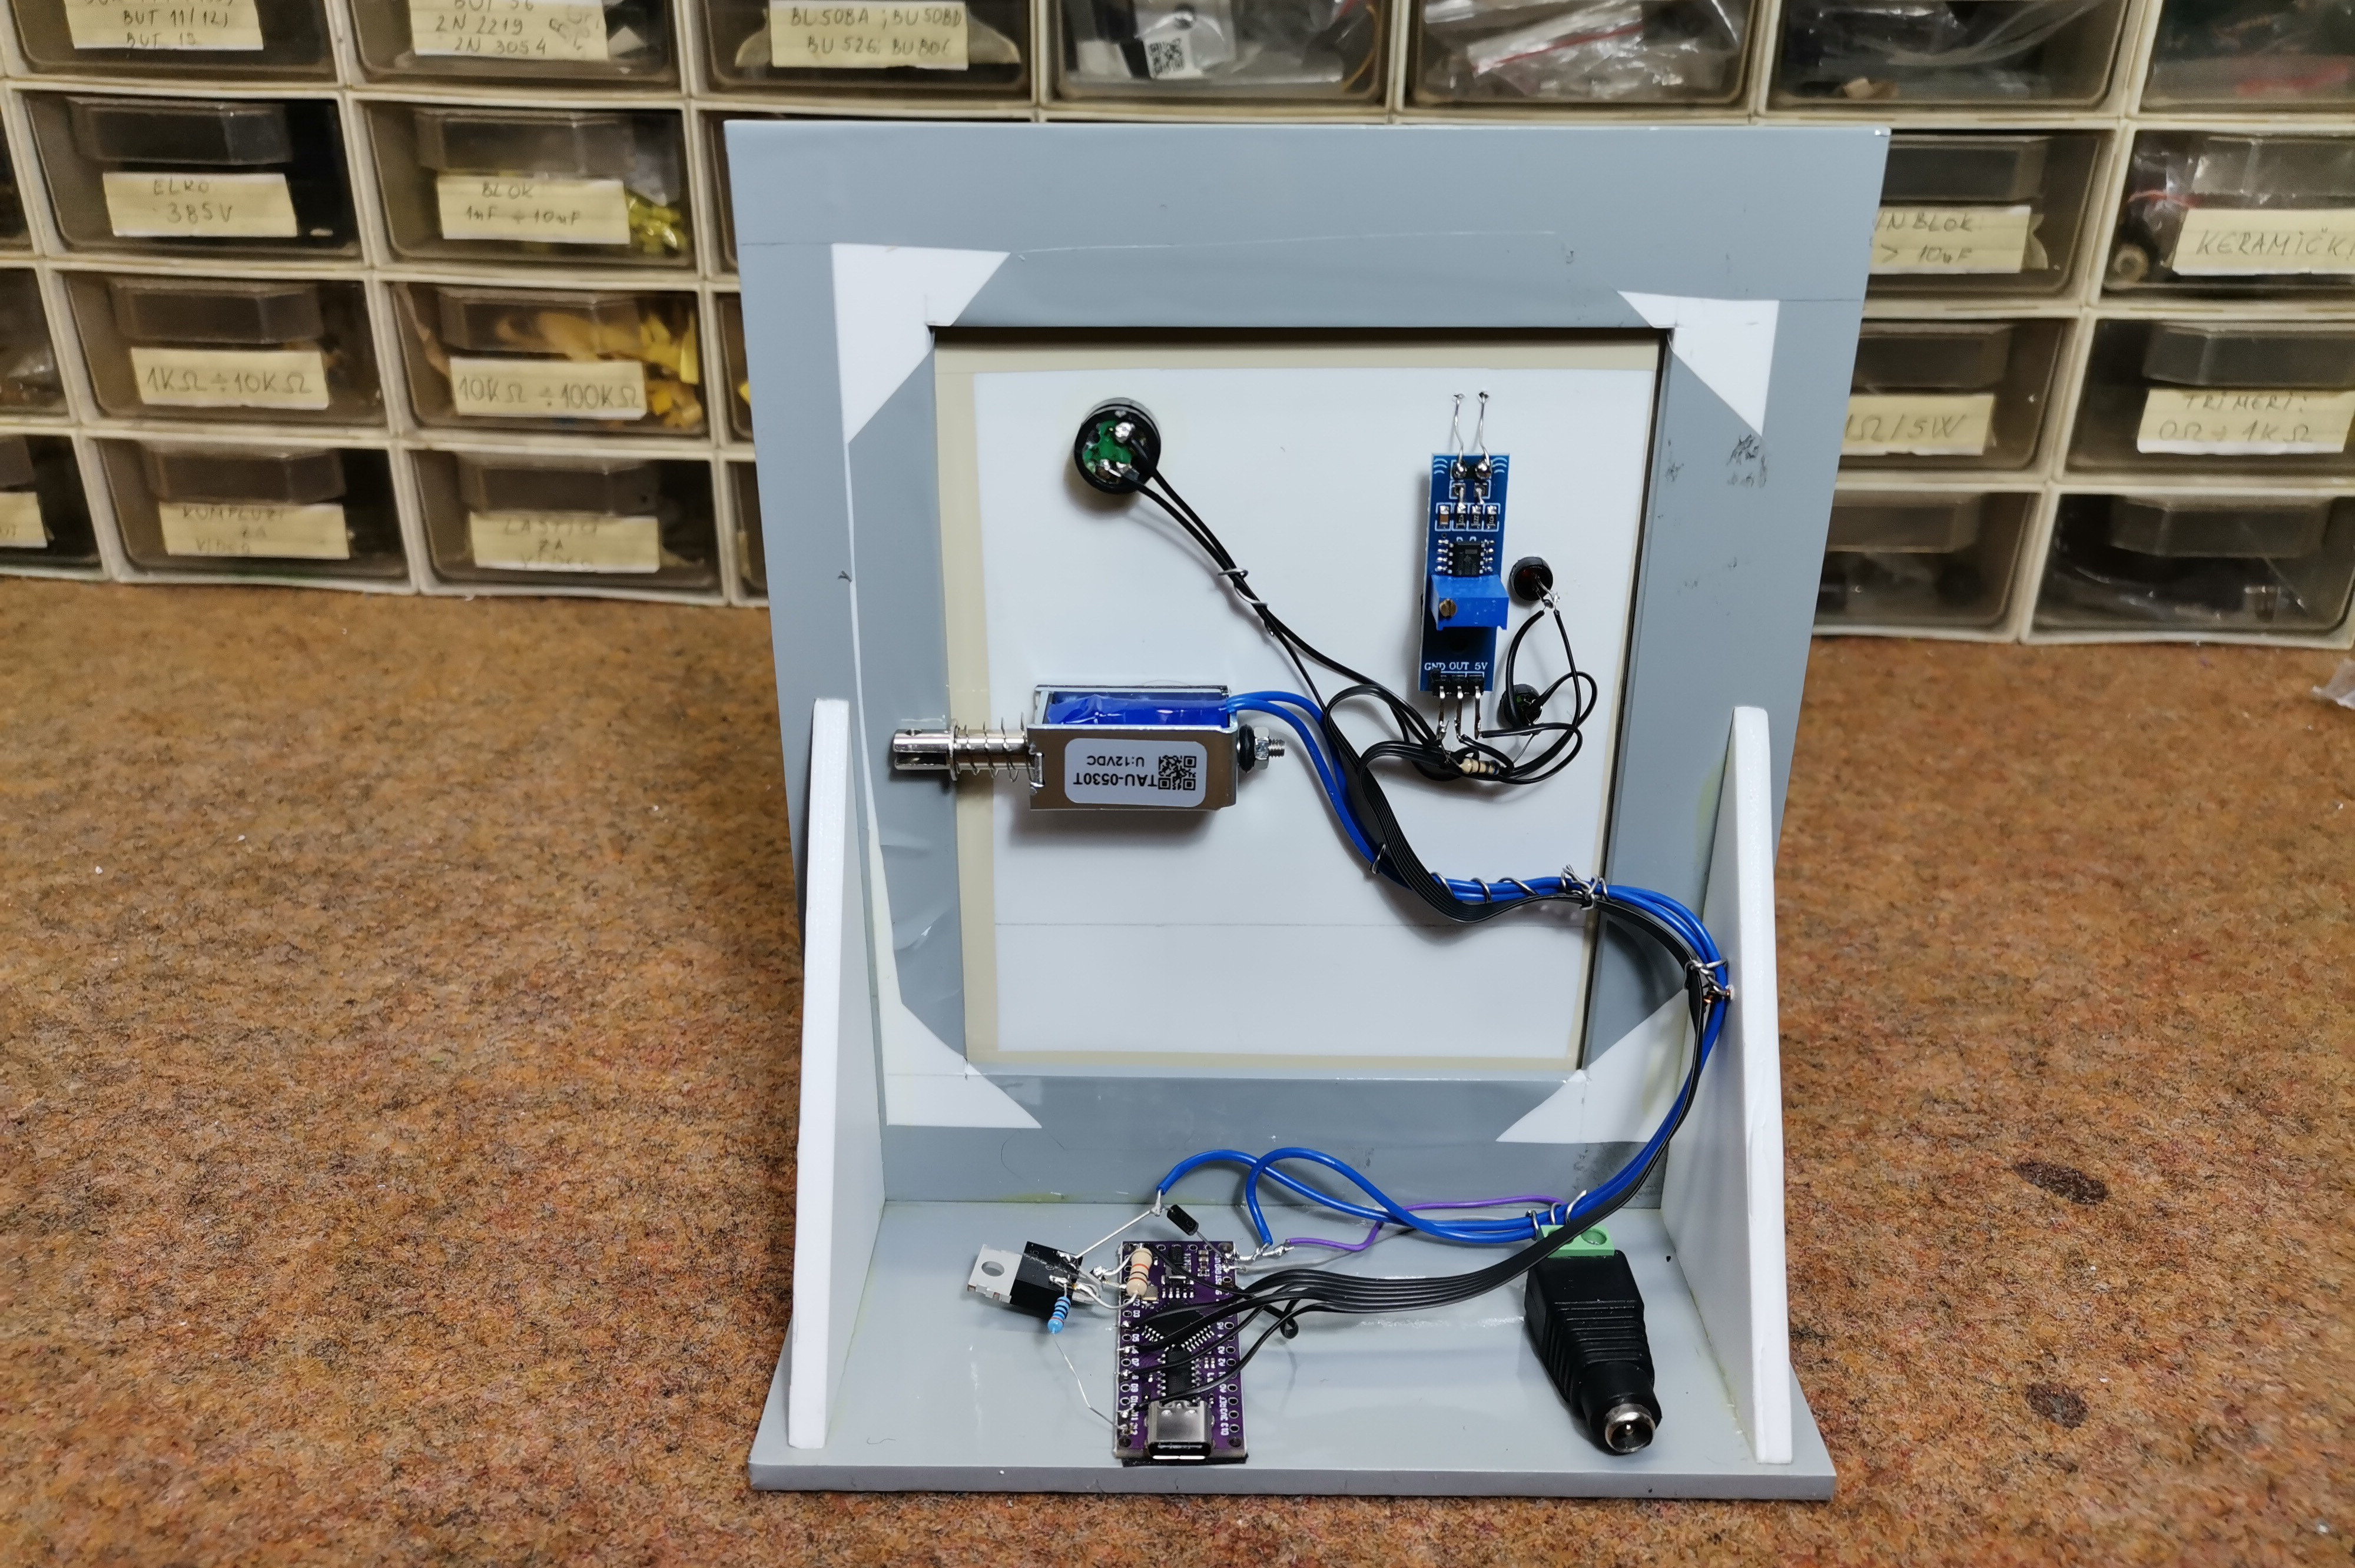
Hardware-wise, there is an Arduino Nano Every in charge of the LDR module that reads the flashlight input and the 12 V relay that unlocks the door. Be sure to check it out it the video after the break.

If you want to keep your critters from bringing wild critters back inside, check out this Wi-Fi cat door that lets you have a look at what might be dangling from their jaws before unlocking the door.

Watch any movie about the years of prohibition, and you’ll probably see character gain admittance to a speakeasy by using a secret knock on the door. In the old movies, a little sliding door would open so the doorman could check you out and let you in. With [‘s] electronic lock, the secret knock automatically unlocks the door. You can see a video of how it works, below.

The device uses a piezoelectric speaker to detect the knocking. A speaker is a transducer and like many transducers, it will work — to some extent — in either direction. A servo motor manages the deadbolt. An Arduino runs the whole thing.

The code is relatively simple. It holds an array of projected delays between knocks and compares what it hears to those delays. If you complete the sequence, the door unlocks. We probably would add some extra security if we were locking up the country’s gold supply, but for a light-duty lock, it should be fine.

The circuit is simple, too. There is an analog input tied to a resistor and the sensor. The Arduino is perfectly capable of driving a small servo directly. Add a battery and it is done.

It’s been a while since we’ve seen knock-operated locks around here, but they used to be all the rage. Here is a nice simple one, one that uses logic chips, and of course one built from 555s. If knocking isn’t your style, try replacing the piezo with a button or even a capacitive sensor. You can’t knock it!

[Adnan.R.Khan] had a sliding door latch plus an Arduino, and hacked together this cool but simple app controlled door lock.

Mechanically the lock consists of a Solarbotics GM3 motor, some Meccano, and a servo arm. A string is tied between two pulleys and looped around the slide of a barrel latch. When the motor moves back and forth it’s enough to slide the lock in and out. Electronically an Arduino and a Bluetooth module provide the electronics. The system runs from a 9V battery, and we’re interested to know whether there were any tricks pulled to make the battery last.

The system’s software is a simple program built in MIT App Inventor. Still, it’s pretty cool that you can get functionally close to a production product with parts that are very much lying around. It also makes us think of maybe keeping our childhood Meccano sets a little closer to the bench!

Who doesn’t like the user interface in the movie Minority Report where [Tom Cruise] manipulates a giant computer screen by just waving his hands in front of it? [AdhamN] wanted to unlock his door with hand gestures. While it isn’t as seamless as [Tom’s] Hollywood interface, it manages to do the job. You just have to hold on to your smartphone while you gesture.

The project uses an Arduino and a servo motor to move a bolt back and forth. The gesture part requires a 1sheeld board. This is a board that interfaces to a phone and allows you to use its capabilities (in this case, the accelerometer) from your Arduino program.

The rest should be obvious. The 1sheeld reads the accelerometer data and when it sees the right gesture, it operates the servo. It would be interesting to do this with a smart watch, which would perhaps look a little less obvious.

We covered the 1sheeld board awhile back. Of course, you could also use NFC or some other sensor technology to trigger the mechanism. You can find a video that describes the 1sheeld below.


Filed under: Arduino Hacks

Smart phones are great. So great that you may find yourself distracted from working, eating, conversing with other human beings in person, or even sleeping. [Digitaljunky] has this problem (not surprising, really, considering his name) so he built an anti-procrastination box. The box is big enough to hold a smart phone and has an Arduino-based time lock.

The real trick is making the box so that the Arduino can lock and unlock it with a solenoid. [Digitaljunky] doesn’t have a 3D printer, so he used Fimo clay to mold a custom latch piece. A digital display, a FET to drive the solenoid, and a handful of common components round out the design.

The software uses C++ classes to keep everything organized. You can download the code on Github. Usage is simple (see the video below). Lock your phone away and get some work done while you wait for the Arduino to unlock the box.

We thought the use of clay instead of the customary 3D printed part makes it easier to duplicate the project. Of course, you could 3D print a piece, and if you really want to blend both worlds, you can always 3D print in clay. Of course, if you wanted a simpler solution, you could just write locking software for the phone. The box, on the other hand, could lock up anything tempting, not just a phone.


Filed under: Arduino Hacks
Jun
03

Secure and Track Your Bike with this Arduino-Based GPS Lock

arduino, bicycle, bike, bike lock, lock, Security, Transportation Comments Off on Secure and Track Your Bike with this Arduino-Based GPS Lock 

Riding a bike can be fun, great exercise, and, if you live in a city conducive to it, a great mode of transportation. According to author Scott Bennett who lives in Vancouver BC, Canada, a city with a high bike theft rate, he “wanted to have some peace of mind […]

Read more on MAKE

The post Secure and Track Your Bike with this Arduino-Based GPS Lock appeared first on Make:.

Dec
11

Digital Code Lock using Arduino with LCD Display

arduino, code lock, display, LCD, lock Comments Off on Digital Code Lock using Arduino with LCD Display 

code-lock-using-arduino

by praveen @ circuitstoday.com:

We have published a digital code lock using arduino some weeks before. This one is a little different. The earlier version was based on a defined password, where the user can not change it. Moreover there was no LCD display interfaced with the project to output lock status. This project is a much improved version of the same digital code lock which comes with a user defined password and LCD display. The user will be prompted to set a password at installation. This password inputted at installation will continue to serve the lock until it is changed. The user can change the current password with a single key press. The program will check for current password and allows the user to change password only if the the current password is input correctly.

Digital Code Lock using Arduino with LCD Display - [Link]

Img_9095bHow to make an basic electronic color sensor and how to use it to make a color activated lock box

Read more on MAKE

Jul
15

Door Lock Provides Peace of Mind With Real-Time Security

arduino hacks, arduino mega, door lock, EEPROM, HD44780, lock Comments Off on Door Lock Provides Peace of Mind With Real-Time Security 

arduino door lock

[HSP] got tired of locking his door with a key, so he decided to upgrade to a keypad system which he’s designed himself.

It uses an Arduino Mega with the standard 44780 display, a standard keypad, and the “key override” (shown above) for fun. The locking mechanism is a standard 12V actuator based lock which was modified to run off of only 7.5V, by softening up the spring inside and running it upside down (as to let gravity help do the work). The whole system draws less than half a watt on standby, and engaging the lock peaks at only 4-7W.

What’s really clever about this design is how he locks it from inside the room. He’s programmed the Arduino to write 1 to address 128 of the EEPROM — at power on it will increment this by 1, and after 5 seconds, it will reset to 1. This means it can detect a quick power cycle, so you can lock the door by turning it off, turning it on for a few seconds, and turning it off and on again — he did this so he didn’t have to make a button or console, or any kind of wireless control on the inside.

Now we know that kind of adds a huge flaw to the overall security of the system… but [HSP] learned his lesson last time he built something “too” secure.

The relay board is inside the box on the wall on the outside, and the lock is only locked with power. This is insecurity by design. This is to keep the casual people out. The door itself is thin wood with cardboard in between. I previously had a lock which was locked on power failure, and the machine (Windows) running it, crashed. I got to climb through the roof window, 7 meters up to get inside without trashing the door, so now I have a little respect for the possibility of failure, and design my systems for the expected threat-level.


Filed under: Arduino Hacks


  • Newsletter

    Sign up for the PlanetArduino Newsletter, which delivers the most popular articles via e-mail to your inbox every week. Just fill in the information below and submit.

  • Like Us on Facebook