Posts | Comments

Planet Arduino

Archive for the ‘tutorial’ Category

MKRRobotTutorial

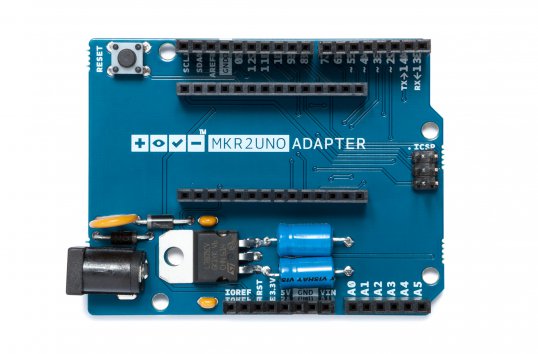
A few days ago, we launched the MKR2UNO Adapter, which enables you to easily turn an Arduino Uno form factor project into a MKR1000-based one. Simply mount your IoT board to the adapter, plug in any Uno shield and have a wireless device in no time.

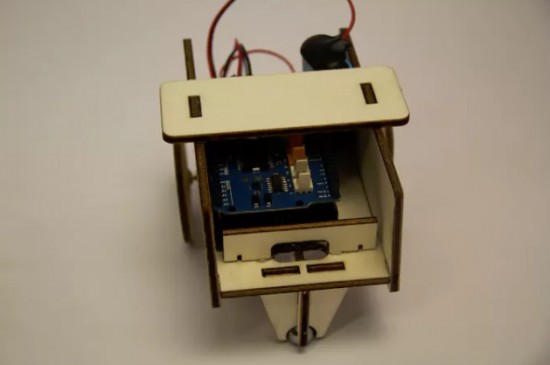
Our newly-published tutorial provides a step-by-step overview of how to build a WiFi-controllable robot using the MKR2UNO Adapter with a MKR1000 and an Arduino Motor Shield.

MKR2Uno

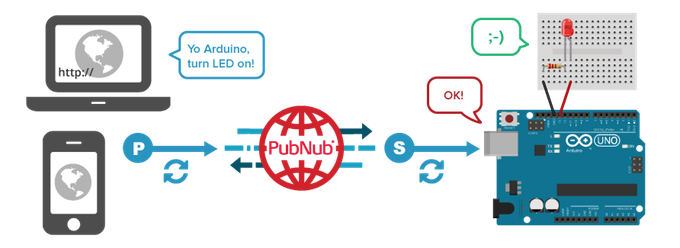
This project combines the Arduino MKR1000’s web server and Arduino Motor Shield’s capabilities to drive a pair of different DC motors. A basic interface is hosted and hard-coded in the MKR1000, allowing the user to maneuver the robot up, down, left or right.

Check out all of the schematics and code here!

Oscillo-02

Starting a new project is always a fun yet effective way to hone your skills while exploring circuitry and programming. To help improve his engineering chops, Joop Brokking recently bought an inexpensive oscilloscope (a device for visualizing voltage over time in an x-y graph) and connected it to an Arduino Uno. He then shared his findings in a detailed tutorial on YouTube.

In the video below, Brokking is using a Hantek 6022BE 20MHz dual-channel oscilloscope and provides three examples to better understand what can go wrong when building a simple Arduino setup.

IMAGE11

Last year, we announced on the blog how Windows became the first Arduino certified OS and introduced Windows Virtual Shields for Arduino and Windows Remote Arduino. Now, engineers at Windows have published a blog post showing how you can use Windows 10 IoT Core to create or port Arduino Wiring sketches that will run on supported IoT Core devices.

The setup and installation steps vary based on what hardware you have, but the resources below can assist with creating/porting Arduino Wiring apps running on Windows 10 IoT Core:

Want to learn more? Read all about it on the Windows blog!

plant-data

Increasing accuracy in the collection of data coming from sensors is a need that, sooner or later, Makers need to face. Paul Martinsen from MegunoLink created a tutorial to eliminate noise from sensor readings on Arduino with three simple filtering techniques.

The Averaging and Running Average techniques are easy to implement as they work by adding a number of measurements together, then dividing the total by the number of measurements. In both cases, the downside is that it can use a lot of memory.

The Exponential filter is a better solution for several reasons: it doesn’t require much memory, you can control how much filtering is applied with a single parameter, and it saves battery power because you don’t need to make many measurements at once. For this solution, they developed an Arduino filter library so you don’t need to go mad with math!

Filtering

Interested? You can find the tutorial and explore the code on MegunoLing’s blog post here.

If you’ve been looking for a simple audio Arduino project, you may want to check out this VU meter from YouTuber RZtronix. The Maker built the device using an Uno along with some LEDs, a couple wires, a breadboard, a sound sensor, and a 5V power supply.

In this video, our friends at PubNub are going to create a smart home network that builds upon their previous Johnny Five tutorial. They again hack an Arduino Uno using JavaScript, but this time to create the simplest smart bulb. Because by “smart bulb,” we really just mean an LED.

The tutorial was developed by Tomomi Imura from PubNub and also uses Johnny-Five. No, not the robot from the movie Short Circuit. It is an open-source JavaScript robotics framework that lets you program an Arduino with Node.js. The bulb itself is remotely controlled via a web portal.

To establish the realtime communication between the Arduino and a web browser, the PubNub Data Stream Network (DSN) is used. PubNub provides global infrastructure and allows you to build and scale real-time apps and IoT devices quite easily.

The remote controller (web app) is written in JavaScript. This is a simple user interface that includes only one button. While a completed code sample is available on CodePen, this tutorial employs a simplified version so that it’s easier to follow along.


Interested in the world of hardware hacking, but feeling left out because you just don’t have the time to learn another language? Or maybe you aren’t comfortable using Sketch to program? Have no fear, you can easily use JavaScript to program boards like Arduino and Genuino. Yes, just JavaScript!

In this series of video, PubNub’s Tomomi Imura shows you how to start hacking an Arduino with Node.js using Johnny-Five, a JavaScript Robotics Framework.

Part one of this tutorial covers:

  1. Setting up a board.
  2. Building the Hello World of hardware, a LED blink.
  3. Writing your Johnny-Five code to make it blink programmatically.

Enjoy the tutorial!


FAUKXSLIOVP4W18.LARGE

Project-based lessons are a great way to introduce students to the world of electronics. Clearly Jenna Debois agrees, as she has built a DIY classroom clock based on an Arduino Nano. What’s even cooler is that it’s optimized for teachers! 

The device is made using laser-cut wood pieces, NeoPixels, a real-time clock module, and packs plenty of customizable features like:

  • An additional digit that keeps track of the block or period- an especially useful feature for rotating block schedules
  • The ability to program holidays into the code to prevent the block from advancing on days when school is not in session
  • LED digits that fade from green to red as the end of the period or block approaches so that a single glance can convey the remaining class time
  • A countdown timer triggered 6 minutes before the period ends that flashes between the time and the remaining time- a useful feature for signaling cleanup time
  • Other light effects that can be triggered during lunch, free periods, after school, or other special occasions

Debois not only created a step-by-step guide, but also shared all the documentation on GitHub and a detailed video of the build process.

Gyroscopes and accelerometers are the primary sensors at the heart of an IMU, also known as an internal measurement unit — an electronic sensor device that measures the orientation, gravitational forces and velocity of a multicopter, and help you keep it in the air using Arduino.

Two videos made by Joop Brokking, a Maker with passion for RC model ‘copters, clearly explain how to program your own IMU so that it can be used for self-balancing your drone without Kalman filters,  libraries, or complex calculations.

Auto leveling a multicopter is pretty challenging. It means that when you release the pitch and roll controls on your transmitter the multicopter levels itself. To get this to work the flight controller of the multicopter needs to know exactly which way is down. Like a spirit level that is on top of the multicopter for the pitch and roll axis.

Very often people ask me how to make an auto level feature for their multicopter. The answer to a question like this is pretty involved and cannot be explained in one email. And that is why I made this video series.

You can find the bill of materials and code here.


  • Newsletter

    Sign up for the PlanetArduino Newsletter, which delivers the most popular articles via e-mail to your inbox every week. Just fill in the information below and submit.

  • Like Us on Facebook