Posts | Comments

Planet Arduino

Archive for the ‘app’ Category

In the latest Arduino Education update, we’ve made the Arduino Create app free for Chrome. From today, as many educators, students, and parents around the world as possible can now access the Arduino Create Agent.

Arduino Chrome app is now free

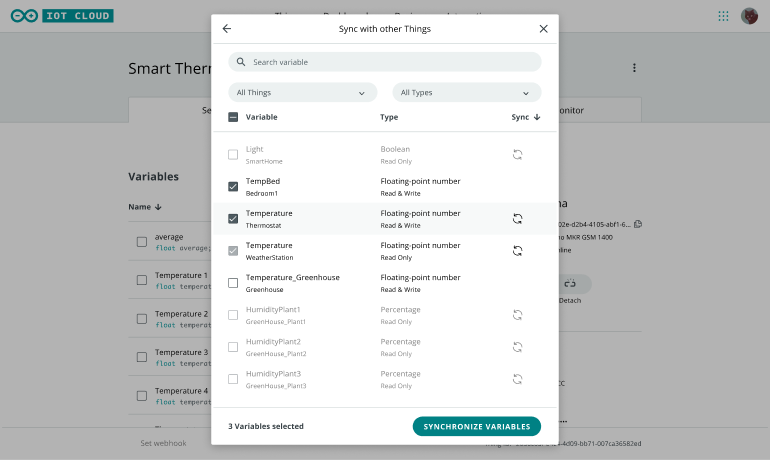
What is Arduino Create (soon to become Arduino Cloud)?

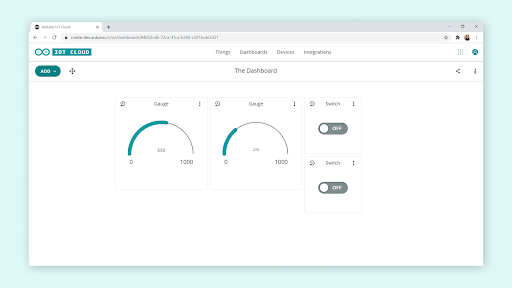
Arduino Create is an online platform that lets students write code, access tutorials, configure boards, and share projects. 

Designed to provide users with a continuous workflow, Arduino Create connects the dots from inspiration to creation. This means students can manage every aspect of their projects right from a single dashboard.

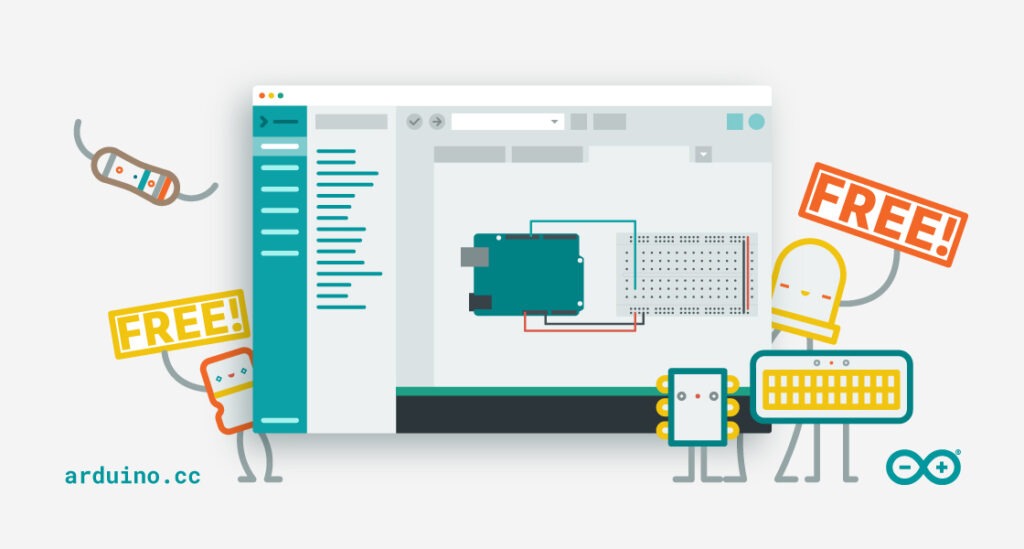
Get the app for Chrome and Chromebooks

The app lets you use the Arduino Create on Chromebooks. You can then code online and save your sketches in the Cloud. Then you can upload them to any Arduino board connected to your computer, and do it all without having to install anything locally.

Developed with the classroom in mind, the Arduino Create app runs on Chrome OS. It enables you to teach and play with Arduino electronics and programming in a shared environment. Because it’s a Cloud-based environment, you can also be sure it’s always up-to-date. All the contributed libraries are automatically included, and any new Arduino boards are supported out-of-the-box.

Arduino’s CEO, Fabio Violante, says, “The aim of Arduino Education is to put technology into the hands of every student around the world. Making Arduino Create free, and therefore more accessible, is a step towards doing this. We’re proud to provide open-source software, and want to inspire students and educators in STEAM learning.”

Download the Arduino Create app here, and join us on the forums to tell us about your experiences.

The post Now free! Get the Arduino Create app for Chrome classrooms appeared first on Arduino Blog.

There’s a brand new device-to-device communication feature available now in the Arduino IoT Cloud. It’s something we’ve been working on for a long time. So we’re excited to see how it’ll add a whole new connected dimension to your Arduino projects.

Arduino IoT Cloud thing to thing communication

What is “Device-to-Device”? Communication?

Internally we’ve been looking at this feature as “device-to-device” communication. It will allow your Arduino devices to send wireless messages to each other, without writing a single line of code or spending time with radio modules and network protocols.

Using this feature you can link variables of the same data type between two or more cloud-enabled devices. For example, one button could set three smart bulbs to the same color. Or you could turn on a heater when temperature sensors in your room or outside in your weather station drop below a certain level. Being able to sync variables gives you an intelligent way to control multiple devices very easily.

Whether you use an Oplà IoT Kit, a MKR WiFi 1010, a Nano 33 IoT or an (upcoming!) Nano RP2040 Connect, you can configure everything from the web interface. After configuration, any changes you make to variables on one device will be reflected promptly on the other(s). This creates a seamless, powerful and secure two-way communication with almost no effort on your part, and no code required. The Arduino IoT Cloud handles authentication, security, network disruptions and any other tricky parts. 

What Does This Mean For Your Projects and Devices?

It means there are lots of options with thing-to-thing communication (also known as variable synchronization):

  • Collect sensor readings from remote devices.
  • Actuate devices remotely. For instance, pressing a button on one Arduino turns on an LED or motor on another.
  • Create a distributed algorithm where multiple devices collaborate with each other.

Are you thinking about home automation? Interactive installations? Monitoring and controlling machines from a wireless panel? This powerful new feature makes all those things easy to achieve for makers of all abilities.

Arduino Cloud thing to thing dashboard.

Combined with IoT Cloud’s dashboards this delivers a powerful new way to build incredible automations with minimal (if any) changes. Furthermore, it gives you smartphone control of your connected boards via the existing Arduino IoT Remote iOS and Android apps.

If you want to be one of the first to try it out, grab an Arduino IoT Cloud subscription. After that, just make sure you’re signed up to the Arduino newsletter to hear about other new features.

The post It’s easier than ever to add two-way communication to Arduino devices appeared first on Arduino Blog.

The perfect companion to the Arduino IoT Cloud! Develop your IoT solution online via a desktop, then monitor and control your dashboards on your mobile with the new Arduino IoT Cloud Remote app.

Initially available for free for iPhone on the App Store (Android to follow in the next few weeks), the Arduino IoT Cloud Remote app gives you with the ability to access, monitor or control your IoT projects regardless of the time or place:

  • In the field: you can read the data from your soil sensors or start your irrigation system directly from anywhere. 
  • In the factory: constant visibility of the state of your manufacturing process status, with the ability to control your automation remotely. 
  • In the home: monitor your home automation systems, check your previous or actual energy consumption from the convenience of your sofa.

The latest dashboard for the Arduino IoT Cloud comes with a host of enhanced features. Creating your dashboard via a desktop or tablet is quick and easy. The tool automatically configures your devices (including the secure crypto element) and automatically generates the main code for your project, making setup as straightforward as possible. A broad set of simple widgets to connect to the properties provides maximum versatility and enables you to set up a new dashboard in minutes.

Your dashboards, how you like them — all dashboards are fully customizable, it’s possible to group devices and organize them in any sequence — just drag and drop to arrange the layout, and select from multiple options including graphs to visualize the data. You can gather and display data from multiple IoT devices in one dashboard, and control those devices as required through your dashboard to fully integrate your solution. 

The addition of the Arduino IoT Cloud Remote app to access, monitor, and control dashboards on the go via your phone is the final piece of the jigsaw. 

iOS version is now available for free from the App Store.

[Sergey Mironov] sent in his SelfieBot project. His company, Endurance Robots, sells a commercial version of the bot, which leads us to believe that in a strange and maybe brilliant move he decided to just sell the prototype stage of the product development as a kit. Since he also gave away the firmware, STLs, BOM, and made a guide so anyone can build it, we’re not complaining.

The bot is simple enough. Nicely housed hobby servos in a 3D printed case take care of the pan and tilt of the camera. The base of the bot encloses the electronics, which are an Arduino nano, a Bluetooth module, and the support electronics for power and motor driving.

To perform the face tracking, the build assumes you have a second phone. This is silly, but isn’t so unreasonable. Most people who’ve had a smart phone for a few years have a spare one living in a drawer as back-up. One phone runs the face tracking software and points the bot, via Bluetooth, towards the user. The other phone records the video.

The bot is pretty jumpy in the example video, but this can be taken care of with better motors. For a proof-of-concept, it works. A video of it in action after the break.

The HackadayPrize2016 is Sponsored by:

Filed under: Arduino Hacks, Cellphone Hacks, robots hacks, The Hackaday Prize

With three kids, including himself, [Dave] faced the very real likelihood of someone absent-mindedly leaving the garage door open and being robbed blind. Rather than installing some plebeian solution, he compiled a feature list. And what a feature list it is!

The garage door needed to notify him of its status with strategically placed LEDs around the house, and give him full control on his devices. He wanted to open and close it using his existing key-code entry system. Lastly, it would be extra-cool if he could add some biometrics to it; in this case, a fingerprint sensor.

The core hardware is the staple Arduino augmented with a fingerprint module, a touch screen, some vitamins, and a WiFi break-out. He also worked up some casings in tinkercad: one for the indoor hardware, another with a flip cover for the outdoor fingerprint scanner.

We think [Dave] has accomplished what he set out to. We can just picture the would-be-thief staring at the finger print scanner and moving their operation one house over where the world is simpler. Video after the break.


Filed under: Arduino Hacks, home hacks

App development is not fun for everyone, and sometimes you just want to control a device from your phone with minimal work. Blynk appears to be a fairly put-together library for not only hooking up any Arduino or esp8266 to a phone through WiFi, but also through the net if desired.

Install the app onto your iPhone or Android device. Install the libraries on your computer. Next, modify your Arduino source to either pass direct control of a pin to Blynk, or connect Blynk to a virtual pin inside your code for more advanced control. If you want to go the easy route, create an account, log into the app, and drag and drop the interface you’d like. If the idea of letting some corporation host your Arduino project sends shivers down your spine, there is also an option to host your own server. (Editorial snark: Yes, it requires a server. That’s the cost of “simplicity”.)

There have been a few times where we’ve wished we could add app control to our projects, but installing all the libraries and learning a new language just to see a button on a screen didn’t seem worth it. This is a great solution. Have any of you had experience using it?


Filed under: Arduino Hacks, Cellphone Hacks

PETT Plant DeluxeEver wish you could synchronize your brainwaves with an otherworldly luminescent plant from the comfort of your own room?

Read more on MAKE

The post This Trippy Arduino-Powered “Plant” Trains Your Brain appeared first on Make: DIY Projects, How-Tos, Electronics, Crafts and Ideas for Makers.

The world’s first Android autonomous vehicleLearn how a team of students created the first Google Android-based autonomous R/C car, able to detect lanes, avoid obstacles, self-park, and more.

Read more on MAKE

The post Build Your Own Android-Powered Self Driving R/C Car appeared first on Make: DIY Projects, How-Tos, Electronics, Crafts and Ideas for Makers.

Skateboards are fun, but you have to do all that pesky kicking in order to get anywhere. That’s why [Nick] decided to build his own electric skateboard. Not only is the skateboard powered with an electric motor, but the whole thing can be controlled from a smart phone.

[Nick] started out with a long board deck that he had made years ago. After cleaning it up and re-finishing it, the board was ready for some wheels. [Nick] used a kit he found online that came with the trucks, wheels, and a belt. The trucks have a motor mount welded in place already. [Nick] used a Turnigy SK3 192KV electric motor to drive the wheels. He also used a Turnigy electronic speed controller to make sure he could vary the speed of the board while riding.

Next [Nick] needed some interface between a smart phone and the motor controller. He chose to use an Arduino Nano hooked up to a Bluetooth module. The Nano was able to directly drive the motor controller, and the Bluetooth module made it easy to sync up to a mobile phone. The Android app was written using MIT’s App Inventor software. It allows for basic control over the motor speed so you can cruise in style. Check out the video below for a slide show and some demonstration clips.

It’s a popular project, and eerily similar to the one we saw a couple months back.


Filed under: Arduino Hacks
Dec
28

Coffee Payment System Doesn’t Void Your Warranty

Android, app, arduino, arduino hacks, bluetooth, coffee, maker, payment, rfid, smart phone, uno Comments Off on Coffee Payment System Doesn’t Void Your Warranty 

[Oliver] is back with an update to his recent coffee maker hacks. His latest hack allowed him to add a coffee payment system to an off-the-shelf coffee maker without modifying the coffee maker itself. This project is an update to his previous adventures in coffee maker hacking which logged who was using up all of the coffee.

The payment system begins with an Arduino Uno clone inside of a small project enclosure. The Arduino communicates with the coffee maker via serial using the coffee maker’s service port. This port is easily available from outside the machine, so you won’t have to crack open the case and risk voiding your warranty.

The system also includes an RFID reader and a Bluetooth module. The RFID reader allows each user to have their own identification card. The user can swipe their card over the reader and the system knows how many credits are left in their account. If they have enough credit, the machine will pour a delicious cup of coffee.

The Arduino communicates to an Android phone using the Bluetooth module. [Oliver’s] Android app was built using MIT’s app inventor. It keeps track of the account credits and allows the user to add more. The system can currently keep track of up to forty accounts. [Oliver] also mentions that you can use any Bluetooth terminal program to control the system instead of a smart phone app.


Filed under: Arduino Hacks


  • Newsletter

    Sign up for the PlanetArduino Newsletter, which delivers the most popular articles via e-mail to your inbox every week. Just fill in the information below and submit.

  • Like Us on Facebook