Posts | Comments

Planet Arduino

Archive for the ‘328p Atmega’ Category

A Raspberry Pi Zero (W) and Arduino are very different animals, the prior has processing power and connectivity while the latter has some analog to digital converters (ADCs) and nearly real-time reactions. You can connect them to one another with a USB cable and for many projects that will happily wed the two. Beyond that, we can interface this odd couple entirely through serial, SPI, I2C, and logic-level signaling. How? Through a device by [cburgess] that is being called an Arduino shield that supports a Pi0 (W). Maybe it is a cape which interfaces with Arduino. The distinction may be moot since each board has a familiar footprint and both of them are found here.

Depending on how they are set up and programmed, one can take control over the other, or they could happily do their own thing and just exchange a little information. This board is like a marriage counselor between a Raspberry Pi and an Arduino. It provides the level-shifting so they don’t blow each other up and libraries so they can speak nicely to one another. If you want to dig a bit deeper into this one, design files and code examples are on available.

Perhaps we’ll report on this board at the heart of a pinball machine retrofit, a vintage vending machine restoration, or maybe a working prop replica from the retro bar in Back to the Future II.
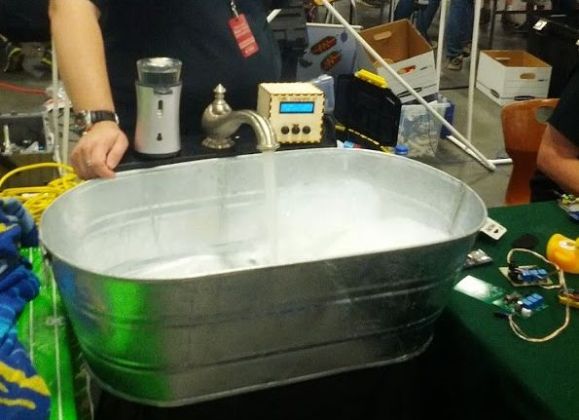

Automated Bathtub Controlled by Arduino

We live in the future don’t we? Is there a reason why only rich people have touchscreen controlled showers and temperature regulated bathtubs? [Raptor_Demon] shows us how to make our very own automated bathtub for cheap, using our favorite microprocessor — the Arduino.

The system controls the filling of the tub, monitors the temperature based on a user profile — and it even adds bubbles. Why do you need this? You probably don’t — but why not, wouldn’t it be nice to press a button and have a bath drawn for you? It uses an Arduino compatible board that controls 3 relays for the water system, a DS18b20 temperature sensor on the inlet and a second wireless (434mhz) Arduino compatible board for monitoring the tub temperature and adding bubble bath using a hacked automated soap dispenser.

[Raptor_Demon] showcased his prototype at the Maker Faire NC 2013 and 2014 where it was a huge hit. He even had a full size tub going, in which he would sit in during his explanation — check it out!

[Thanks Hardik!]


Filed under: Arduino Hacks


  • Newsletter

    Sign up for the PlanetArduino Newsletter, which delivers the most popular articles via e-mail to your inbox every week. Just fill in the information below and submit.

  • Like Us on Facebook