Posts | Comments

Planet Arduino

Archive for the ‘chess’ Category

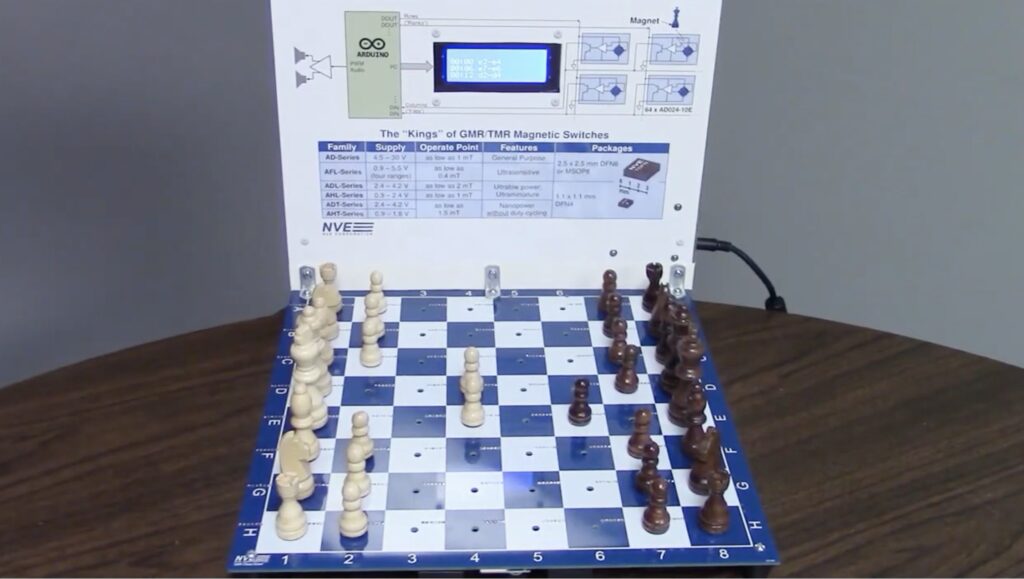
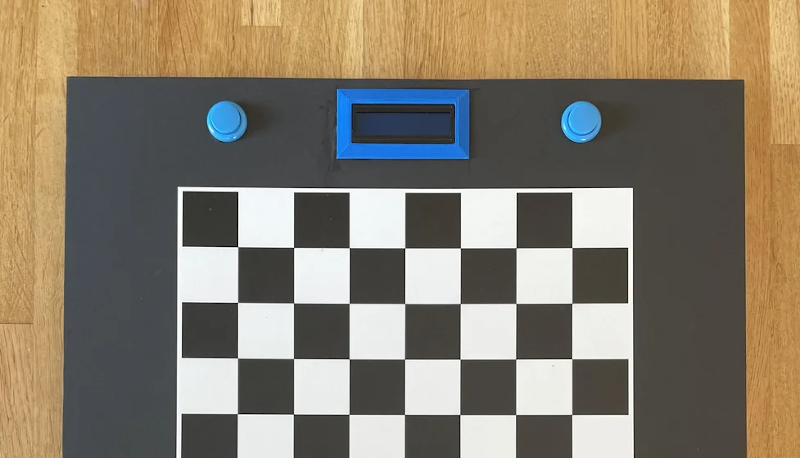
You can play chess just as easily on a $2 set from a thrift store as you can on a $2,000 ornate set from a bespoke retailer. But that doesn’t stop people from building or buying those fancy chess sets. If you’re the DIY type, you may even be interested in an electronic chessboard like this one from the NVE Corporation team, which was made possible by practical magnetic switches.

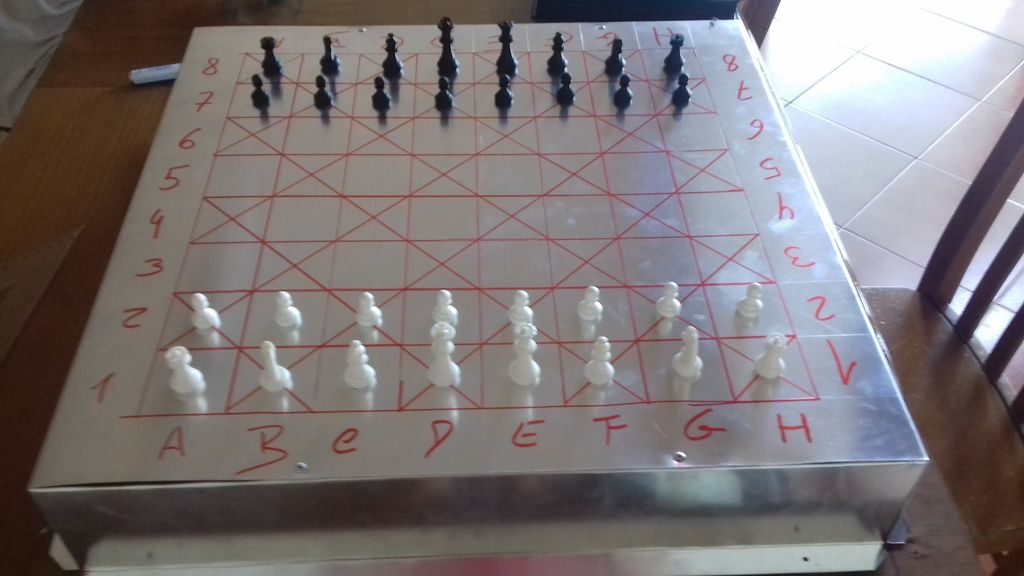
This is an electronic chessboard that registers moves and speaks them out loud. That can make it useful for people who don’t have good eyesight. It also allows for the possibility of recording entire matches on a connected computer. Chessboards like this aren’t uncommon, but this project was simplified by the use NVE’s GMR magnetic switch sensors. Those detect the presence of magnets in the bases of the chess pieces, with enough tolerance to account for variation in placement and board thickness.

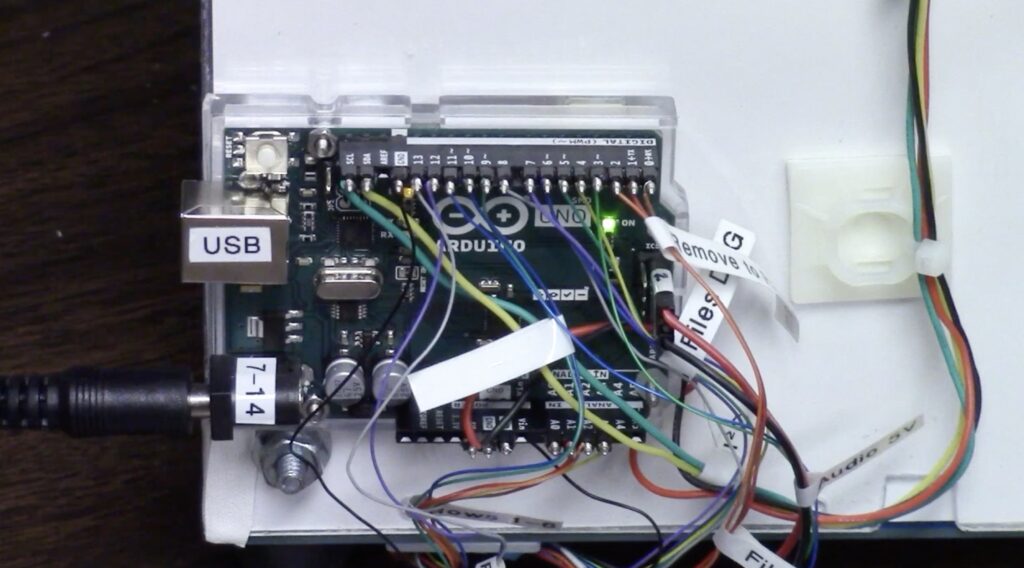
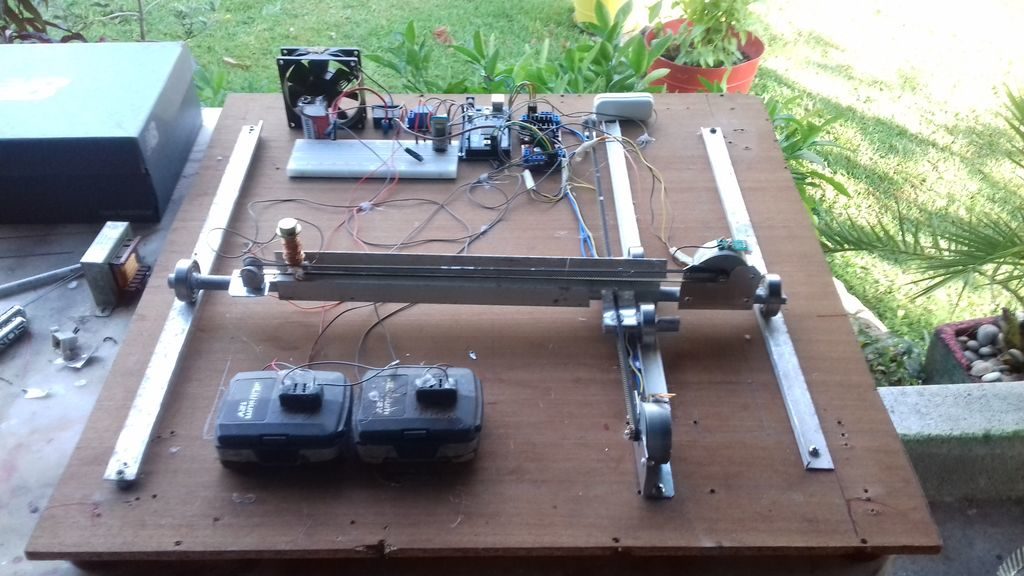
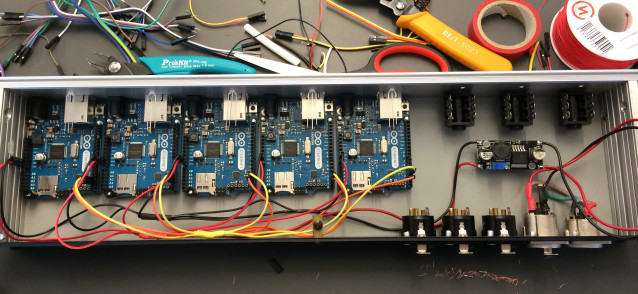
An Arduino UNO R3 board monitors all 64 of those switches through a matrix similar to keyboard. When a player picks up a piece, the Arduino notes the square that changed states. Then, when the player puts down the piece, the Arduino records that square, too. It can then output PWM (pulse-width modulation) audio to an amplifier board that says, for example, “B7 to B6” using the Talkie library.

By updating a running log of every piece’s position, it would also be possible for it to instead say “pawn to B6.” But the current implementation doesn’t do so.

The post Practical magnetic switches make this electronic chessboard possible appeared first on Arduino Blog.

If you’ve ever played chess or even checkers, you’ve probably thought about making a board that lets a computer play you without having to enter your moves and look at the board on a screen. [Greg06] not only thought about it, but he built it.

The board looks great and uses foamboard which makes it easy to reproduce. Each piece has a small magnet within and an electromagnet on an XY motion system can selectively pick up and move pieces. In addition, a reed switch under each square can tell if a square is occupied or not.

This system is pretty simple, but it is effective. After all, you know the position of the pieces at the start. So if a bishop leaves a square and a new square gets a piece, you can assume it is the bishop. There is no need to actually distinguish the pieces.

An LCD and some buttons act as a chess clock, and note if a move is illegal. The Arduino has a pretty basic chess algorithm known as Micro Max that runs on the Arduino, but we wondered if you couldn’t connect to a remote computer to get more sophisticated gameplay or even interface to the Internet to play remote humans, something we’ve seen before. You could even adapt it for other input methods.

Consider the game of chess. It’s a game that flexes one’s “mental muscles” rather than relying on brute strength, but if you don’t have the ability to actually move the pieces, things get a bit more challenging. If you’re playing against another human opponent, he or she could move for you based on what you say, but with this chess machine by ‘diyguypt,’ the board does the job for you!

The system uses an Android-based Arduino Voice Control app to take in commands, and passes this information along to the Arduino Mega concealed under the board via an HC-05 Bluetooth module. It then controls a pair of stepper motors to move an electromagnet into place, which pull the pieces across the grid as if by magic! 

Code and build info are available in the project’s write-up, and the two videos below shed a little more light on how it works.

[Diyguypt] may be an altruist to provide the means for people who can’t manipulate chess pieces to play the game. Or he may just have his hands too busy with food and drink to play. Either way, his voice command chessboard appears to work, although it has a lot of moving parts both figuratively and literally. You can check out the video below to see how it works.

The speech part is handled by an Android phone and uses Google’s voice services, so if you don’t want Google listening to your latest opening gambit, you’ll want to pass this one up. The phone uses an app that talks to the Arduino via Bluetooth, which means the Arduino needs a Bluetooth module.

The Arduino controls what amounts to an upside-down 3D printer. Instead of a hot end pointing down, the mechanism has an electromagnet pointing up. A small washer in the base of each chess piece makes it susceptible to the magnet’s motion. The electromagnet is required to let go of a piece before a move to a new position. It is possible that a small servo moving a permanent magnet closer to the board for a move and away from the board to reposition could do the same job, though we suspect that could be tricky.

We’ve seen this before, often with a Harry Potter theme. We sort of prefer a more obvious chess robot, but that’s just us.

We’ve all seen those chess computers that consist out of a physical playing field, and a built-in computer that would indicate where you should put its pieces while inputting the position of your pieces in some way. These systems are usually found in a dusty cardboard box in a back room’s closet, as playing like this is fairly cumbersome, and a lot depends on the built-in chess computer.

This take by [andrei.erdei] on this decades-old concept involves an ATmega328p-based Arduino Pro Mini board, a nice wooden frame, and 4 WS2812-based 65×65 mm RGB 8×8 LED matrices, as well as some TTP223 touch sensors that allow one to control the on-board cursor. This is the sole form of input: using the UP and RIGHT buttons to select the piece to move, confirm with OK, then move to the new position. The chess program will then calculate its next position and indicate it on the LED matrix.

Using physical chess pieces isn’t required either: each 4×4 grid uses a special pattern that indicates the piece that occupies it.  This makes it highly portable, but perhaps not as fun as using physical pieces. It also kills the sheer joy of building up that collection of enemy pieces when you’ve hit that winning streak. You can look at the embedded gameplay video after the break and judge for yourself.

At the core of the chess program is [H.G. Muller]’s micro-Max project. Originally ported to the Arduino Uno, this program outputs the game to the serial port. After tweaking it to use the LED matrix instead, [andrei.erdei] was then faced with the lack of memory on the board for the most common LED libraries. In the end, the FAB_LED library managed to perform the task with less memory, allowing it and the rest of the program to fit comfortably into the glorious 2 kB of SRAM that the ATmega328p provides.

Classic 8-bit chess engines are marvels of software engineering. Ever wonder how they stack up against modern chess software? Check out this article!

If you are a Harry Potter fan, you might remember that one of the movies showed an Isle of Lewis chess set whose pieces moved in response to a player’s voice commands. This feat has been oft replicated by hackers and [amoyag00] has a version that brings together a Raspberry Pi, Arduino, Android, and the Stockfish chess engine in case you want to play by yourself. You can see a video of the game, below.

Interestingly, the system uses Marlin — the 3D printing software — to handle motion using the Arduino. We suppose moving chess pieces over a path isn’t much different than moving a print head. It is certainly a novel use of GCode.

There are a lot of pieces integrated to make this work. There is a Bluetooth connection between the Android and Pi. We saw code in Java, Python, C++, at least. We were sad to read that the team that built it can’t modify it anymore as it was a school project and the parts have been recycled for a new class of students. On the other hand, maybe someone else will make a copy and extend it further.

We are always surprised we haven’t seen more Harry Potter paraphernalia. There was the magic wand at this year’s Superconference. We also liked the Mad Eye Moody. There have been others, of course, but not as many as you’d think given the franchise’s popularity.

[RoboAvatar]’s Chess Robot consists of a gantry-mounted arm that picks up chess pieces and places them in their new location, as directed by the software. The game begins when the human, playing white, makes a move. When a play has been made, the human player presses a button to let the robot to take its turn. You can see it in action in the videos we’ve posted below the break.

Running the robot is an Arduino UNO with a MUX shield as well as a pair of MCP23017 I/O expander chips — a total of 93 pins available! Thanks to all those pins, the Arduino is able to listen to 64 reed switches, one for every square.

The robot detects the human’s move by listening to its reed switches and identifying when there is a change. The gantry consists of X and Y tracks made out of PVC slabs, with half-inch lead screws turned by NEMA-23s and powered by ST-6600 stepper drivers.

Unlike some chess robots that rely on pre-existing software, this one features a custom minimax chess algorithm that [RoboAvatar] coded himself. It consists of Python scripts run on a computer, which interacts with the Arduino via a serial connection. In the second video, he explains how his algorithm works. You can also download the Arduino and Python files from [RoboAvatar]’s GitHub repository.

You’d be surprised how many chess-playing robots we’ve published, like the ChessM8 robot and this voice-controlled chess robot.


Filed under: Arduino Hacks

Unsatisfied with the present options for chess computers and preferring the feel of a real board and pieces, [Max Dobres] decided that his best option would be to build his own.

Light and dark wood veneer on 8mm MDF board created a board that was thin enough for adding LEDs to display moves and for the 10mm x 1mm neodymium magnets in the pieces to trip the reed switches under each space. The LEDs were wired in a matrix and connected to an Arduino Uno by a MAX7219 LED driver, while the reed switches were connected via a Centipede card. [Dobres] notes that you’ll want to test that the reed switches are positioned correctly — otherwise they might not detect the pieces!

A small LCD screen and four buttons also connect to the Arduino for configuring options a number of options, computer difficulty, and play styles, while a Raspberry Pi acts as the main computer.

The Raspberry Pi is using ChessBoard 2.05 as a rule set with consideration for special moves (such as en passant and castling). It’s currently unsupported but used with permission by its creator, John Eriksson. The chess program Stockfish is the actual engine; be sure to adjust the skill of the AI, as it defaults to an ELO of 2600! Unfortunately, it’s a rather finicky program, only running on Python 2.7. If that doesn’t appeal to you, [Dobres] has provided a nice list of other options to help you with your own build.

He has recently updated his design and done away with the need for the Arduino in the process which — especially if you use the Pi Zero — drops the cost of this project significantly. That should leave you with enough room in your budget to build a robot to make the moves for you!

[via Max Dobres]


Filed under: Arduino Hacks, Raspberry Pi
Mar
16

Lonely? Build Yourself a Chess Robot!

arduino hacks, chess, chess robot, computer chess, hackaday.io Comments Off on Lonely? Build Yourself a Chess Robot! 

[Oriol Galceran] has constructed an interesting robotic chess player for his end of school project. It’s called the ChessM8, and is an impressive feat considering [Oriol] is only 17!  He’s using an Arduino Mega that connects to the host PC via a Python script.

The AI can be any chess engine that uses the Universal Chess Interface protocol, which [Oriol] points out that most of them do.  We’ve seen other chess robots here before, along with others that you can play on your wall and uses Nixie Tubes. But [Oriol’s] build is the largest of them all.

He says there’s a network of REED switches under the chess board to detect when a piece is present or not. It would be interesting to know how he dealt with debouncing issues, and if Hall Effect sensors might have been a better choice. Let us know in the comments how you would detect the chess piece.

And be sure to check out the video below to see the chess robot in action.


Filed under: Arduino Hacks
Aug
28

Video mixing chess games on tv in Norway using Ethernet Shield

arduino, chess, ethernet, Featured, games, Norway, shield, Tv Comments Off on Video mixing chess games on tv in Norway using Ethernet Shield 

heidi-638x422

Heidi Røneid with an Arduino Ethernet microprocessor. (Photo: Tore Zakariassen, NRK)

When The Norwegian Broadcasting (NRK) planned the television broadcast of the Chess Olympiad 2014 in Tromsø, Norway, they encountered a challenge: how to mix video, graphics and the results of many ongoing chess games simultaneously, requiring 16 cameras for the games going on at the same time?

montering_i_boks-638x294

On their blog you can find a long and nice post about how they found the solution using Arduino Uno, Arduino Ethernet Shield and the library for Arduino to control such Atem switchers written by Kasper Skårhøj:

At first, the idea was to use a computer with a webcam for each of the 16 games, then mix video images, background animation and results in software on each of them.

Afterwards the finished mix of images would be streamed to separate channels in our web player, so that the online audience would be able to choose which game they wanted to follow. This solution would also provide our outside broadcasting van (OB van) with 16 finished video sources composed of video, graphics and results. This would make the complex job of mixing all video signals much easier.

After thorough thinking we came to the conclusion that for our web-audience, it would be better to skip the stream of individual games, and spend our resources on building websites that could present all games in the championship via HTML in real time. This would also give the audience the opportunity to scroll back and forth in the moves and recall all the previous games in the championship. We started working on it immediately, and you can find the result on our website nrk.no/sjakk.

parti_strt-638x358


  • Newsletter

    Sign up for the PlanetArduino Newsletter, which delivers the most popular articles via e-mail to your inbox every week. Just fill in the information below and submit.

  • Like Us on Facebook