Posts | Comments

Planet Arduino

Archive for the ‘persistence of vision’ Category

The human brain and eyes are imperfect, so your visual perception has a limited “frame rate.” That is somewhere between 30 and 60 frames per second (fps). Most films are 24fps, which is part of the reason they don’t quite look like real life. Once you reach the upper limits of the human visual frame rate, you begin to perceive moving objects like solid blurs. This small rotating display harnesses that effect and utilizes a CD drive motor to do so.

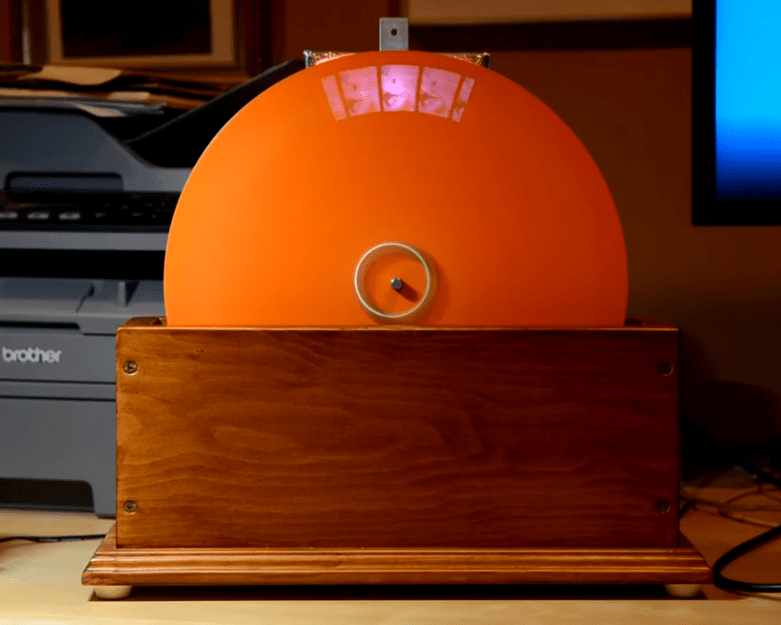
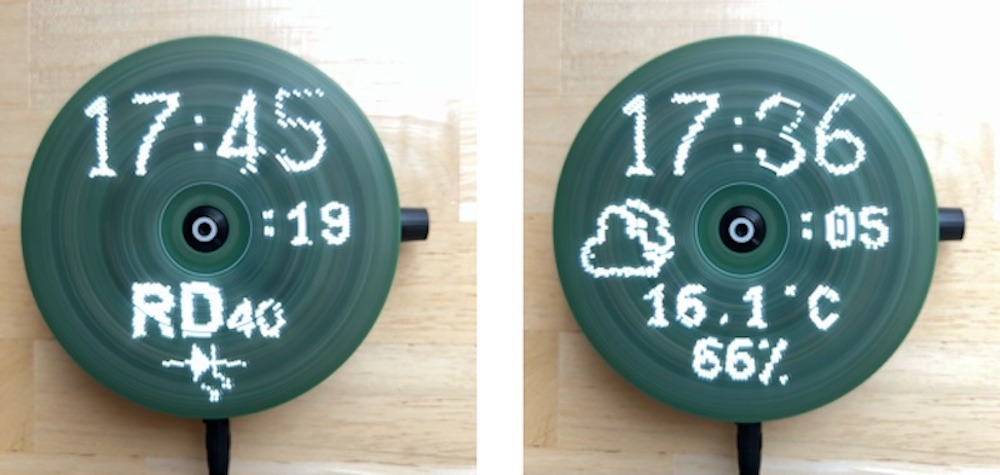
A PoV (persistence of vision) display like this one relies on your low frame rate perception. It is just a spinning disk with two lines of LEDs. But if it spins fast enough, it can blink those LEDs at certain angles and you will perceive a solid spot of light at each of those points. When the timing is right, it can create the appearance of graphics like alphanumeric characters or simple pictures. In this case, it reveals the weather and the time (in analog or digital style).

An Arduino Nano board controls the 40 LEDs, while an ESP8266 ESP-01 module tells it what image to show based on time and weather data pulled from the internet via Wi-Fi®. Those mount onto a custom circular PCB spun by a small CD drive motor. Because that PCB spins, it would have been difficult to run wires for power. So this takes advantage of wireless power transfer through coils on that primary PCB and a secondary PCB underneath that exists purely for that purpose.

This is a clever design, because it keeps the cost and complexity down. But the results are still quite impressive!

The post Small PoV display uses CD drive motor for high-speed rotation appeared first on Arduino Blog.

Believe it or not, the Mickey Mouse clip used for this demonstration is actually in the public domain.

The earliest televisions used a spinning disk technology called the Nipkow disk, which is exactly what [Science ‘n’ Stuff] recreated with their Arduino-based mechanical color television (video link, also embedded below.) The device reads video and audio from an SD card, and displays the video using a precisely-timed RGB LED visible through a perforated spinning disk. The persistence of vision effect results in a video that is small, relative to the size of the disk, but perfectly watchable. A twist is that the video is in color!

A Nipkow disk is a fairly simple and electromechanical device that relies on timing; something a modern microcontroller and RGB LED is perfectly capable of delivering. In this device, the holes in the disk create 32 vertical scanlines with 96 “pixels” making up each of those lines. Spinning disk technology was always limited to being monochromatic, but in this implementation, each “pixel” is given its own unique color by adjusting the RGB LED accordingly.

The first video shows off the device and demonstrates it working; note that it may look like there are multiple little screens, but the center one can be thought of as the “true” display with the others essentially being artifacts due to light leakage. If you’re interested in the nuts and bolts of exactly how a Nipkow disk works, then the second video is what you’ll be more interested in, because it goes through all the details of exactly how everything functions.

Another neat thing about Nipkow disks is that image acquisition is really not much more complex than image display.

[via Arduino Blog]


Just as we are driven today to watch gifs that get better with every loop, people 100+ years ago entertained themselves with various persistence of vision toys that used the power of optical illusions to make still images come to life. [jollifactory] recently recreated one of the first POV devices — the phenakistoscope — into a toy for our times.

The original phenakistoscopes were simple, but the effect they achieved was utterly amazing. Essentially a picture disk with a handle, the user would hold the handle with one hand and spin the disk with the other while looking in a mirror through slits in the disk. Unlike the phenakistoscopes of yore that could only be viewed by one person at a time, this one allows for group watching.

Here’s how it works: an Arduino Nano spins a BLDC motor from an old CD-ROM drive, and two strips of strobing LEDs provide the shutter effect needed to make the pictures look like a moving image.The motor speed is both variable and reversible so the animations can run in both directions.

To make the disks themselves, [jollifactory] printed some original phenakistiscopic artwork and adhered each one to a CD that conveniently snaps onto the motor spindle. Not all of the artwork looks good with a big hole in the middle, so [jollifactory] created a reusable base disk with an anti-slip mat on top to spin those.

If you just want to watch the thing in action, check out the first video below that is all demonstration. There be strobing lights ahead, so consider yourself warned. The second and third videos show [jollifactory] soldering up the custom PCB and building the acrylic stand.

There are plenty of modern ways to build old-fashioned POV toys, from all-digital to all-printable.

The human body does plenty of cool tricks, but one of the easiest to take advantage of is persistence of vision (POV). Our eyes continue to see light for a fraction of a second after the light goes off, and we can leverage this into fun blinkenlight toys like POV staffs. Sure, you can buy POV staffs and other devices, but they’re pretty expensive and you won’t learn anything that way. Building something yourself is often the more expensive route, but that’s not the case with [shurik179]’s excellent open-source POV staff.

There’s a lot to like about this project, starting with the detailed instructions. It’s based on the ItsyBitsyM4 Express and Adafruit’s Dotstar LED strips. You could use the Bluetooth version, but it’s already quite easy to load images to the staff because it shows up as a USB mass storage device. We like that [shurik179] added an IMU and coded the staff so that the images look consistent no matter how fast the staff is spinning. In the future, [shurik179] might make a Bluetooth version that’s collapsible. That sounds like quite the feat, and we can’t wait to see it in action.

As cool as it is to wave a POV staff around, there’s no real practical application. What’s more practical than a clock?

[Alex] needed a project for his microcomputer circuits class. He wanted something that would challenge him on both the electronics side of things, as well as the programming side. He ended up designing an 8 by 16 grid of LED’s that was turned into a game of Tetris.

He arranged all 128 LED’s into the grid on a piece of perfboard. All of the anodes were bent over and connected together into rows of 8 LED’s. The cathodes were bent perpendicularly and forms columns of 16 LED’s. This way, if power is applied to one row and a single column is grounded, one LED will light up at the intersection. This method only works reliably to light up a single LED at a time. With that in mind, [Alex] needed to have a very high “refresh rate” for his display. He only ever lights up one LED at a time, but he scans through the 128 LED’s so fast that persistence of vision prevents you from noticing. To the human eye, it looks like multiple LED’s are lit up simultaneously.

[Alex] planned to use an Arduino to control this display, but it doesn’t have enough outputs on its own to control all of those lights. He ended up using multiple 74138 decoder/multiplexer IC’s to control the LED’s. Since the columns have inverted outputs, he couldn’t just hook them straight up to the LED’s. Instead he had to run the signals through a set of PNP transistors to flip the logic. This setup allowed [Alex] to control all 128 LED’s with just seven bits, but it was too slow for him.

His solution was to control the multiplexers with counter IC’s. The Arduino can just increment the counter up to the appropriate LED. The Arduino then controls the state of the LED using the active high enable line from the column multiplexer chip.

[Alex] wanted more than just a static image to show off on his new display, so he programmed in a version of Tetris. The controller is just a piece of perfboard with four push buttons. He had to work out all of the programming to ensure the game ran smoothly while properly updating the screen and simultaneously reading the controller for new input. All of this ran on the Arduino.

Can’t get enough Tetris hacks? Try these on for size.


Filed under: Arduino Hacks, led hacks
Sep
04

What Everyone Needs: An Eight-Foot LED Light Staff

arduino, Electronics, General, LED, persistence of vision, pov, RGB Comments Off on What Everyone Needs: An Eight-Foot LED Light Staff 

Yep, that's a light staff - 'Darth Maul Urges  Intensifies'Hackaday.io blogger 'Risknc' updates his Light Staff prototype, much to the excitement of the LARPing community. It is a 8-foot staff filled with High Intensity LEDs that put on quite a show.

Read more on MAKE


  • Newsletter

    Sign up for the PlanetArduino Newsletter, which delivers the most popular articles via e-mail to your inbox every week. Just fill in the information below and submit.

  • Like Us on Facebook