Posts | Comments

Planet Arduino

Archive for the ‘accessibility’ Category

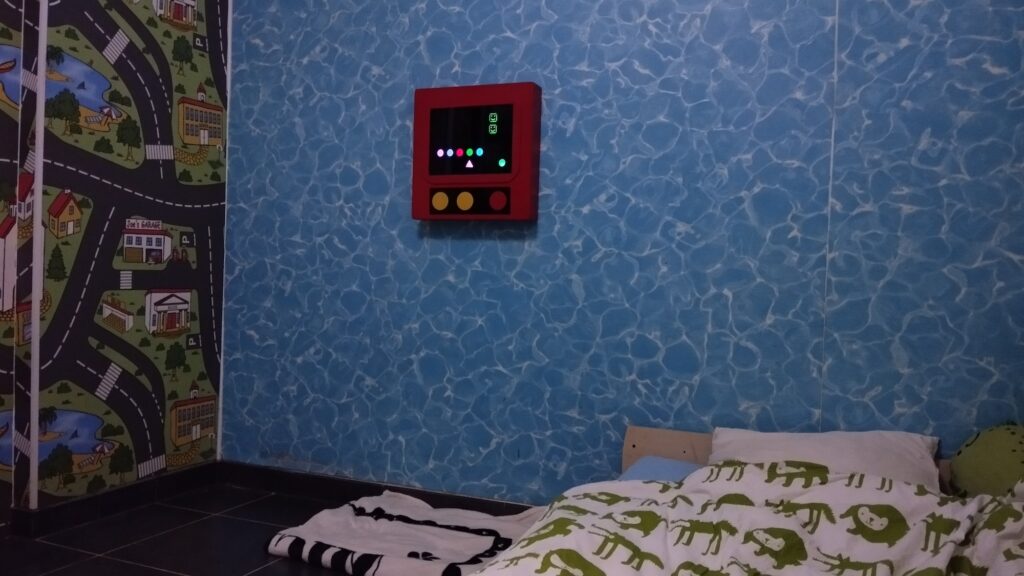
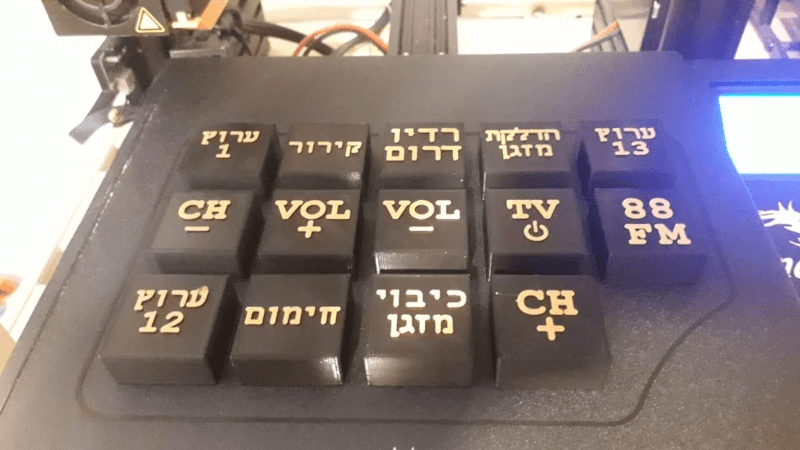
While many of the things we interact with every day have become more usable by people with disabilities, the kitchen remains as one important area of our lives that still lacks many accessibility features. One of these commonplace appliances is the coffee maker and its array of small buttons or even a touchscreen that can be hard to see/touch. Orlie on Instructables has developed a set of wireless buttons and an accompanying receiver that translate simple actions into an easy, end-to-end brewing experience.

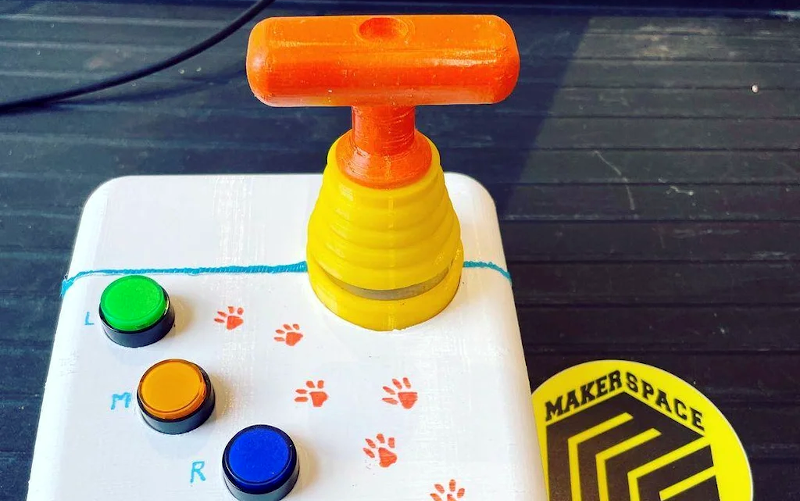
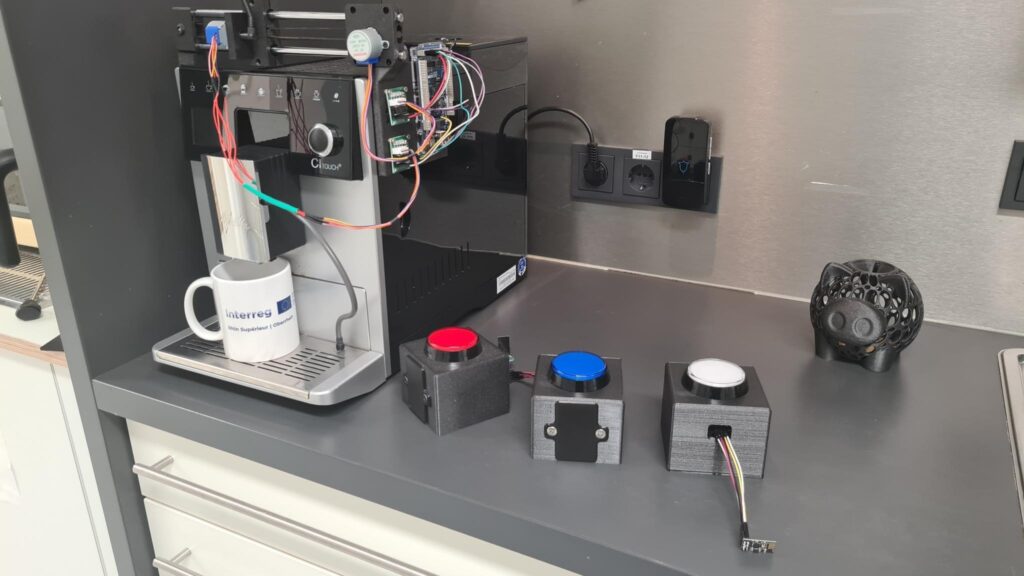
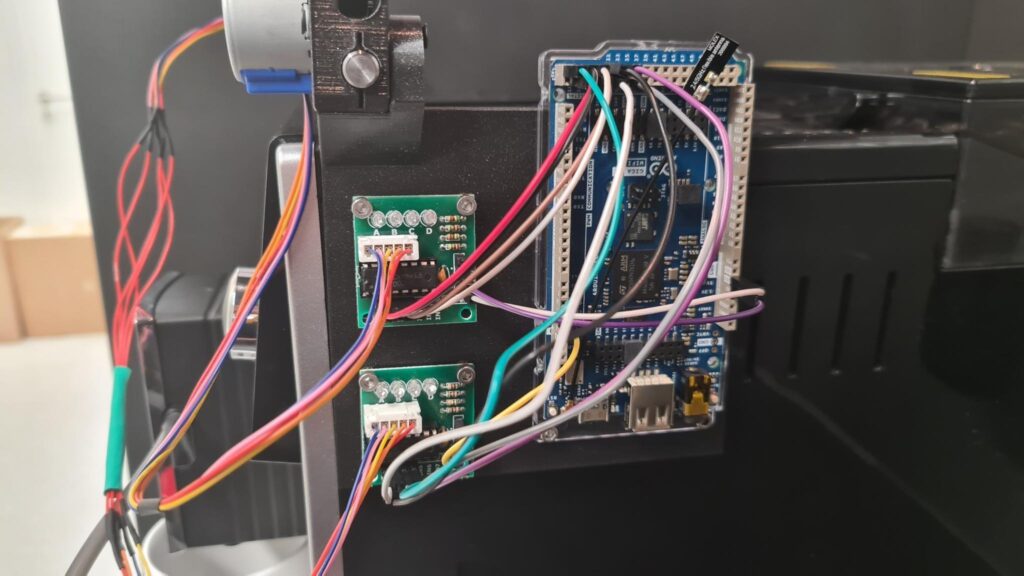
Each button started as a custom 3D-printed shell with compartments for a AA battery holder, large arcade button, and the perfboard that also contained the ESP8266 microcontroller. In this system, the ESP8266 communicates with the Arduino GIGA R1 WiFi board via Wi-Fi and an MQTT message broker running on a host PC. This enables each button to be assigned a unique message that dictates the desired task to be performed.

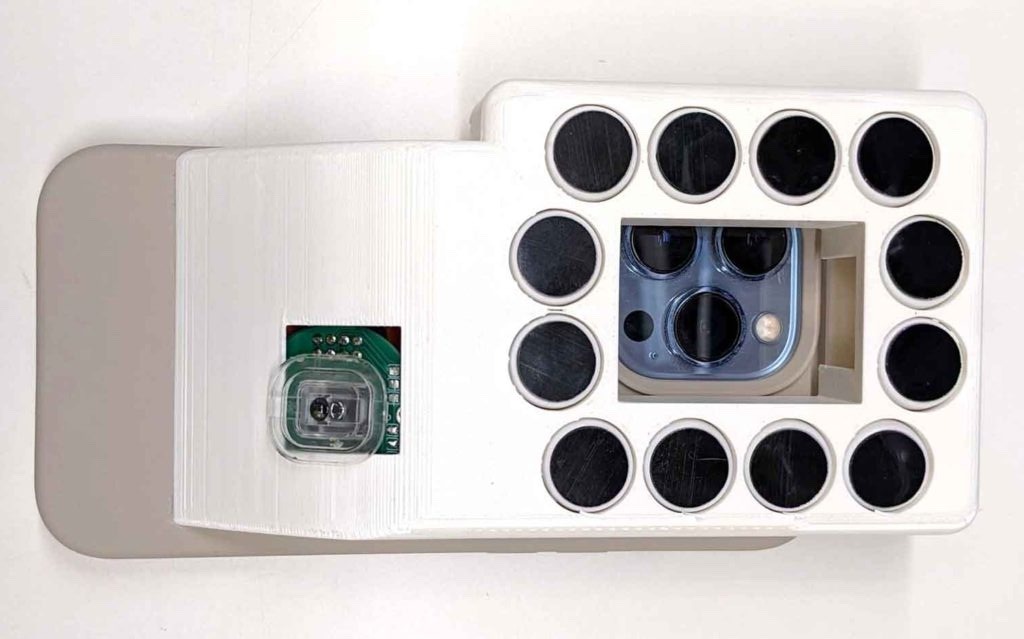
At the coffee maker, the GIGA R1 WiFi was wired into a pair of ULN2003 stepper motor driver modules that move a gantry across a set of linear rails and eventually push the corresponding buttons once the correct position has been reached. Ultimately, this allows for those with less mobility and/or dexterity to select what they want from anywhere in the house — all over Wi-Fi.

To see how this project was built in greater detail, you can read Orlie’s write-up here on Instructables.

The post This Arduino GIGA R1 WiFi project turns a coffee maker into a more accessible appliance appeared first on Arduino Blog.

As a society, we have decided to enact some measures to make our world more accessible to those with disabilities. Wheelchair ramps, for example, are often legal requirements for businesses in many countries. But we tend to drop the ball when it comes to things aren’t necessities. For instance, entertainment options are an afterthought much of the time. That’s why Alain Mauer developed this LED gaming platform for people with special needs.

This device offers a lot of flexibility so that builders can tailor it to a specific individual’s own needs and tastes. Mauer designed it for his son, who is 17 years old and lives with non-verbal autism. Entertainment options intended for neurotypical people don’t engage the teen, but toys designed for children fail to hold his interest for long. This game, dubbed “Scott’s Arcade,” is simple to understand and interact with, while still offering a lot of replayability. It is also durable and able to withstand rough handling.

Scott’s Arcade consists of a “screen” made up of individually addressable RGB LEDs and a faceplate with shape cutouts that act as masks for the LEDs. An Arduino Nano controls the lights and responds to presses of the large buttons beneath the screen. It can trigger sound effects through a DFRobot DFPlayer Mini MP3 player as well.

Mauer programmed a few simple games for the device, such as a matching game that challenges the player to find the circle of the same color as the triangle. When they succeed, they’re rewarded with fanfare sound effects and flashing lights. Makers can also program their own games to suit the players’ abilities and interests. 

The post A gaming platform tailored to those with special needs appeared first on Arduino Blog.

Modern devices rely heavily on touchscreens because they allow for dynamic interfaces that aren’t possible with conventional tactile buttons. But those interfaces present an issue for people with certain disabilities. A person with vision loss, for example, might not be able to see the screen’s content or its virtual buttons at all. To make touchscreens more accessible, a team of engineers from the University of Michigan developed this special phone case called BrushLens.

This case expands a smartphone to add a matrix of actuators or capacitive touch simulator pads. The former work with all forms of touchscreens (including resistive), while the latter only work with capacitive touchscreens — though those are the most common type today. The smartphone’s own camera and sensors let it detect its position on a larger touchscreen, so it can guide a user to a virtual button and then press that button itself.

The prototype hardware includes an Arduino Nano 33 IoT board to control the actuators and/or capacitive touch points. It receives its commands from the smartphone via Bluetooth® Low Energy.

For that to work, the smartphone must understand the target touchscreen and communicate the content to the user. That communication is possible using existing text-to-voice techniques, but analyzing target touchscreens is more difficult. Ideally, UI designers would include some sort of identifier so the user’s smartphone can query screen content and button positions. However, that is an added expense and would require rebuilds of existing interfaces. For that reason, BrushLens includes some ability to analyze touchscreens and their content.

This is a very early prototype, but the concept has a great deal of potential for making a world full of touchscreens more accessible to those living with disabilities.

Image credit: Chen Liang, doctoral student, University of Michigan’s Computer Science and Engineering

The post Tapping without seeing: Making touchscreens accessible appeared first on Arduino Blog.

We enjoy access to cheap stuff because of the mass market for things like mice, keyboards, and cell phones. But if you need a device that doesn’t have mass appeal, you will have to pay a lot more if you can find it at all. However, with modern techniques like 3D printing and Arduino-like microcontrollers being cheap and simple to use, you now have the option to build that special one-of-a-kind device. Case in point: [Davy’s] mouse for people who have brain or nervous system disorders. This particular device is helping a 6-year-old who can’t manipulate a normal mouse.

The device uses an Arduino Pro and an MPU-6050 accelerometer and gyroscope. The original design uses machined aluminum, but 3D printing should work, too. There’s something wrong with the link to the design files in the post, but it is easy to find the correct link.

If you do 3D print a similar enclosure, you might consider using heat-set threaded inserts instead of tapping the holes. They work great, are easy to install, and seem to be a bit more robust than trying to thread plastic. Then again, threaded plastic isn’t as bad as you might think.

There are, of course, many ways you could make this work, and besides, every special user will be a little different. But what a great feeling to help someone be able to do what most people take for granted.

If you are lucky, you’ve never experienced the heartbreak of watching a loved one lose their ability to do simple tasks. However, as hackers, we have the ability to customize solutions to make everyday tasks more accessible. That’s what [omerrv] did by creating a very specific function remote control. The idea is to provide an easy-to-use interface for the most common remote functions.

This is one of those projects where the technology puzzle is now pretty easy to solve: IR remotes are well-understood and there are plenty of libraries for recording and playing back signals. The real work is to understand the user’s challenges and come up with a workable compromise between something useful and something too complex for the user to deal with.

Fortunately, with all the prototyping tools readily available now, it is easy to experiment with different setups to see what would work best. Larger keys? Color coding? A different arrangement of buttons? All of those things are easy to experiment with and, of course, what works for one person might not work for another. Even given time, it is possible that different configurations will work better or worse for the same person.

It isn’t likely that you’d duplicate [omerrv’s] remote directly. It may not work for your purpose. But it is a good inspiration on how we can use our ability to create customized hardware to improve the quality of life for those who need help.

We’ve seen similar projects — each one is a bit different. We wonder if old-fashioned remotes with their natural limitations would be a bit easier for people to handle?

For those with certain physical restrictions, interfacing with a computer can be a difficult task. As a possible solution, Shu Takahashi and Pato Montalvo have come up with the Magpie MIDI hands-free interface. The adaptive tool, inspired in part by a harmonica, has 13 air holes that enable its user to “sip” and “puff” all 26 letters of the alphabet.

The Magpie MIDI also features an integrated joystick and potentiometer, allowing it to function as a USB mouse for navigating a computer screen, as a MIDI controller, and even as a gaming device. Everything is controlled by an Arduino Leonardo, and uses a CD74HC4067 multiplexer to accommodate the available inputs.

More info on this amazing assistive technology project can be found in Takahashi’s tutorial, as well as the video below.

Magpie MIDI is an affordable adaptive tool that enables cerebral palsy patients and others with muscle control disabilities to express themselves in new ways. Meant to be easily customizable to meet different needs of varying degrees of disabilities, every aspect of hardware and software is open-source. The device offers new means for cerebral palsy patients and alike to express their creativity in areas of computer games, music, and writing.

If you have a serious visual impairment, using a computer isn’t easy. [Dhiraj] has a project that allows people fluent in Braille to use that language for input. In addition to having a set position for fingers, the device also reads the key pressed as you type. With some third party software it is possible to even create Word documents, according to [Dhiraj].

You can see the finished product in the video below. This is one of those projects where the idea is the hardest part. Reading six buttons and converting them into characters is fairly simple. Each Braille character uses a cell of six bumps and the buttons mimic those bumps (although laid out for your fingers).

Our thoughts are that it might be nice to have some tactile feedback on the first switch since the intended users probably can’t see the switches. Perhaps the audio sounds a little rough, but that could have been the speakers. Maybe also a dedicated spacebar and an easier way to select letters vs figures without moving your hands might be nice, too. None of that would be hard to fix.

The code was quite simple, though we can see that you might get some false keystrokes. Every 250 milliseconds the Arduino reads the seven input switches (the seventh switch is the letters/figures select). Then a giant if statement decodes the letter. Just stylistically, we would have probably built a number and used it to select from an array, as with 7 switches it would consume just 128 bytes. More importantly though we would probably wait for at least one on to off transition to start the decoding. The switches are active high, so we’d probably write something like this:

unsigned code,oldcode;
code=oldcode=0;
do {
   oldcode=code;
   code=read_button_code();  // get current code
   } while (oldcode<=code);
// process oldcode

If this looks confusing, try a few examples (you can do that online, too). At first, the oldcode is zero so code will never be less than that (note the integers are unsigned). As long as bits keep getting set, code will be greater than or equal to oldcode. However, if any bit goes from 1 to zero then the total magnitude of code must be less than oldcode. That triggers the processing. Of course, you might also want to debounce the switches in read_button_code to make sure you have a stable input, too.

Still, what a great and useful idea it is, and one easy enough to build on the original design. We’ve seen a Braille tablet before. If you have some spare space on your next PCB, you could always replace some community signs.

Central Florida Maker groups use their diverse skills to create an interactive Bumblebee costume in only 3 weeks for a Magic Wheelchair recipient.

Read more on MAKE

The post Watch These Makers Transform a Wheelchair into an Interactive Bumblebee Costume appeared first on Make: DIY Projects and Ideas for Makers.

A variety of accessibility devices were on display at Maker Faire Bay Area 2016. Photo by Hep SvadjaWilliam Gerrey and Dr. Joshua Miele made the Blind Arduino Project to help those in the blind community expand their STEM and Maker education.

Read more on MAKE

The post Blind Arduino Project Proves You Don’t Need to See to Build Electronics appeared first on Make: DIY Projects and Ideas for Makers.

ZarrarWinsCalifAbu Zubair developed a toy to help his son with fine motor skills. Now this toy is helping many more children with autism.

Read more on MAKE

The post Father Creates an Interactive Toy that Hones Fine Motor Skills for Son with Autism appeared first on Make: DIY Projects and Ideas for Makers.


  • Newsletter

    Sign up for the PlanetArduino Newsletter, which delivers the most popular articles via e-mail to your inbox every week. Just fill in the information below and submit.

  • Like Us on Facebook