
03
Kit review – Altronics/SC PIC Logic Probe Kit
altronics, chip, K2587, kit, kit review, logic, logic probe, pic, probe, review, silicon, SMT, soldering, test equipment, tronixstuff Comments Off on Kit review – Altronics/SC PIC Logic Probe Kit
Introduction
Every month Australian electronics magazine Silicon Chip publishes a few projects, and in this quick kit review we’ll look at an older but still current example from September 2007 – the 3-state PIC Logic Probe Kit. This is an inexpensive piece of test equipment that’s useful when checking digital logic states and as a kit, a challenging hand-soldering effort.
Assembly
The kit is packaged in typical form, without any surprises:

As mentioned earlier this kit is an interesting challenge due to the size of the PCB and the use of surface-mount components. The designer’s goal was to have the entire unit fit inside a biro housing (without the ink!). Thus the entire thing is using SMT parts.
Thankfully the LEDs are packaged individually into labelled bags, as alone they’re identical to the naked eye. Although the kit wasn’t expensive, it would have been nice for one extra component of each type – beginners tend to lose the tiny parts. The cost could perhaps be offset by not including the usual solder which is too thick for use with the kit.

Nevertheless with some care assembly can begin. After cleaning the PCB with some aerosol cleaner, it was tacked it to the desk mat to make life a little easier:

If you want one of those rulers – click here. Before building the kit it occurred to me that the normal soldering iron tip would be too large, so I ordered a tiny 0.2mm conical tip for the Hakko:

The tip on your average iron may be too large, so take this into account when trying to hand solder SMT components. The instructions include a guide on SMT hand-soldering for the uninitiated, well worth reading before starting.
Moving forward, soldering the parts was a slow and patient process. (With hindsight one could use the reflow soldering method to take care of the SMT and then carefully fit the links to the PCB). The instructions are quite good and include a short “how to solder SMT” guide, a PCB layout plan:

… along with an guide that helps identity the components:

When soldering, make sure you have the time and patience not to rush the job. And don’t sneeze – after doing so I lost the PIC microcontroller for a few moments trying to find where it landed. Once the LEDs have been soldered in and their current-limiting resistors, it’s a good time to quickly test them by applying 5V and GND. I used the diode test feature of the multimeter which generates enough current to light them up.
Due to the PCB being single-sided (!) you also need to solder in some links. It’s best to do these before the button (and before soldering any other parts near the link holes), and run the wires beneath the top surface, for example:

… and after doing so, you’ll need more blu-tack to hold it down!

One of the trickiest parts of this kit was soldering the sewing needle at the end of the PCB to act as the probe tip – as you can see in the photo below, solder doesn’t take to them that well – however after a fair amount it does the job:

At this point it’s recommended you solder the wires to the PCB (for power) and then insert the probe into the pen casing. For the life of me I didn’t have a spare pen around here so instead we’re going to cover it in clear heatshrink. Thus leaving the final task as soldering the alligator clips to the power wires:

Operation
What is a logic probe anyway? It shows what the logic level is at the probed point in a circuit. To do this you connect the black and red alligator clips to 0V and a supply voltage up to 18V respectively – then poke the probe tip at the point where you’re curious about the voltage levels. If it’s at a “high” state (on, or “1″ or whatever you want to call it) the red LED comes on.
If it’s “low” the green LED comes on. The third (orange) LED has two modes. It can either pulse every 50 mS when the logic state changes – or in “latch mode” it will come on and stay on when the mode changes, ideal for detecting infrequent changes in the logic state of the test point.
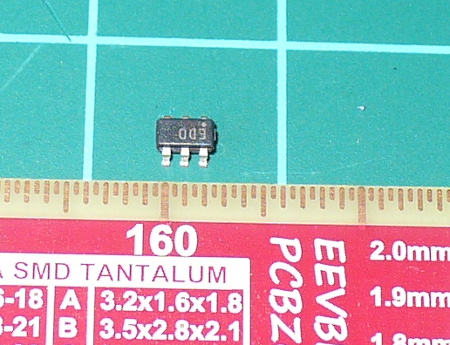
The kit uses a Microchip PIC12F20x microcontroller, and also includes the hardware schematic to make a basic RS232 PIC programmer and wiring instructions for reprogramming it if you want to change the code or operation of the probe.
Conclusion
The PIC Logic Probe is a useful piece of equipment if you want a very cheap way to monitor logic levels. It wasn’t the easiest kit to solder, and if Altronics revised it so the PCB was double-sided and changed the parts layout, there would be more space to solder some parts and thus make the whole thing a lot easier.
Nevertheless for under $17 it’s worth it. You can purchase it from Altronics and their resellers, or read more about it in the September 2007 edition of Silicon Chip. Full-sized images available on flickr. This kit was purchased without notifying the supplier. And if you made it this far – check out my new book “Arduino Workshop” from No Starch Press.

In the meanwhile have fun and keep checking into tronixstuff.com. Why not follow things on twitter, Google+, subscribe for email updates or RSS using the links on the right-hand column? And join our friendly Google Group – dedicated to the projects and related items on this website. Sign up – it’s free, helpful to each other – and we can all learn something.
The post Kit review – Altronics/SC PIC Logic Probe Kit appeared first on tronixstuff.


