One way of communicating with autistic and non-verbal people is through the use of a Picture Exchange Communication System or PECS board, which they can use to point out what they need or want throughout the day. However, the commercial versions of these boards have their share of problems — they’re expensive, and they’re fairly rigid as far as the pictures go. [Alain Mauer] has created an open-source PECS board that is far more personalized, and has audio to boot.
The number one requisite here is sturdiness, as [Alain]’s son [Scott] has already smashed two smartphones and a tablet. [Alain] went with a laser-cut MDF enclosure that should last quite a while. Inside is an Arduino Pro Mini and a DF Player Mini that plays corresponding clips from a micro SD card whenever [Scott] presses a button on the 16-key copper foil capacitive keypad. This PECS board is smart, too — it will sound a turn-me-off reminder after a few minutes of inactivity, and issue audible low battery warnings.
So far, [Scott] is responding better to photographs of objects than to drawings. Watch him interact with the board after the break.
There’s a brand new device-to-device communication feature available now in the Arduino IoT Cloud. It’s something we’ve been working on for a long time. So we’re excited to see how it’ll add a whole new connected dimension to your Arduino projects.
What is “Device-to-Device”? Communication?
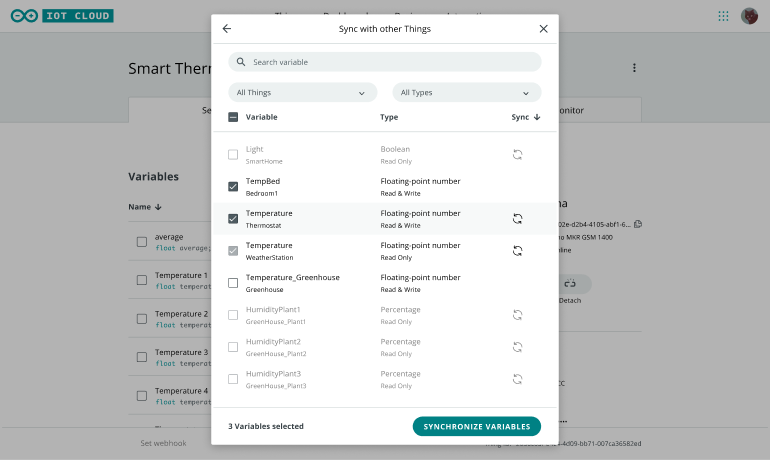
Internally we’ve been looking at this feature as “device-to-device” communication. It will allow your Arduino devices to send wireless messages to each other, without writing a single line of code or spending time with radio modules and network protocols.
Using this feature you can link variables of the same data type between two or more cloud-enabled devices. For example, one button could set three smart bulbs to the same color. Or you could turn on a heater when temperature sensors in your room or outside in your weather station drop below a certain level. Being able to sync variables gives you an intelligent way to control multiple devices very easily.
Whether you use an Oplà IoT Kit, a MKR WiFi 1010, a Nano 33 IoT or an (upcoming!) Nano RP2040 Connect, you can configure everything from the web interface. After configuration, any changes you make to variables on one device will be reflected promptly on the other(s). This creates a seamless, powerful and secure two-way communication with almost no effort on your part, and no code required. The Arduino IoT Cloud handles authentication, security, network disruptions and any other tricky parts.
What Does This Mean For Your Projects and Devices?
It means there are lots of options with thing-to-thing communication (also known as variable synchronization):
Collect sensor readings from remote devices.
Actuate devices remotely. For instance, pressing a button on one Arduino turns on an LED or motor on another.
Create a distributed algorithm where multiple devices collaborate with each other.
Are you thinking about home automation? Interactive installations? Monitoring and controlling machines from a wireless panel? This powerful new feature makes all those things easy to achieve for makers of all abilities.
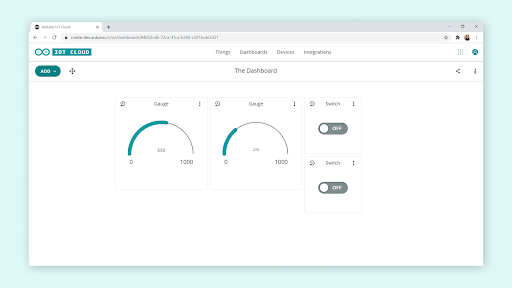
Combined with IoT Cloud’s dashboards this delivers a powerful new way to build incredible automations with minimal (if any) changes. Furthermore, it gives you smartphone control of your connected boards via the existing Arduino IoT Remote iOS and Android apps.
If you want to be one of the first to try it out, grab an Arduino IoT Cloud subscription. After that, just make sure you’re signed up to the Arduino newsletter to hear about other new features.
If you find yourself glued to social media and also wish to know Morse code… we can think of no better invention to help hone your skills than the Twitter Telegraph. This vintage to pop culture mashup by [Devon Elliott] is a recent project that uses a sounder from the 19th century to communicate incoming tweets with dots and dashes.
Back in the day when everyone was connected by wire, the sounder was a device on the receiving end of the telegraph which translated the incoming signal to an audible clicking. Two tall coils sat with a metal tab teetering between them. When electricity surged into one of the coils it would magnetize, pulling the tab downward in a pattern which mimicked the incoming current sent from the other end. [Devon] decided to liberate the sounder from its string-and-two-can origins and use a more modern source of input. By adding a FONA board which comes equipped with a SIM card, the device was capable of connecting and receiving data from the Internet. An Arduino is responsible for taking the data received and translating it into Morse code using the Mark Fickett’s Arduinomorse library, and then sending it out through an I/O pin to the sounder itself to be tapped.
The finished project is connected to a cellular network which it uses to receive SMS messages and tweets. By mentioning the handle @ldntelegraphco you can send the Twitter Telegraph your own message which will be tapped in code for everyone in the vicinity to hear… which is worth giving a try for those of you curious types. Lastly, if you have an interest in taking a look at the code for your own use, it is available on [Devon’s] github.
As seasoned data-travelers, we’re used to wielding the internet to send messages and communicate to others without any limitations. No one has to be stranded on a figurative island blowing smoke signals… unless of course they wanted to be. What [Harm Alexander Aldick] has done with his project “Lorem Ipsum”, is create a situation where others can only communicate to him through a sort of message in a bottle. The bottle in this case is an electronic widget.
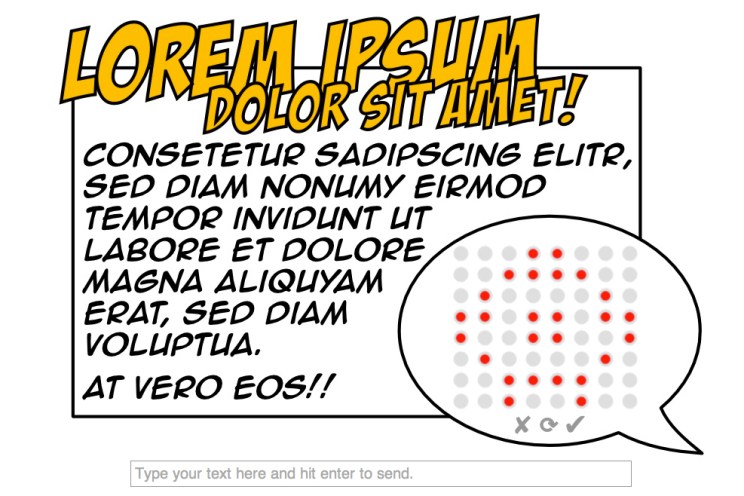
In this social experiment, [Harm] has stationed a small Ikea picture frame at his desk, which shows images and text sent to him in real-time from others in the world. With an Arduino as the brain, a small 8×8 LED matrix mounted at the bottom right of the frame displays the data received by means of an ethernet module. Anyone can use his web interface to modify the pixels of the matrix on a virtual version of the installation. Once sent, the message is transmitted through an IPv6 internet connection and is translated to UDP which the unit is controlled by.
[Harm]’s project investigates how people react when given the chance to send a message in complete anonymity to someone they don’t know… in of all things, the form of something as limited as 64 pixels. The project name “Lorem Ipsum” refers to the filler text used in graphic design to hold the place of what would otherwise be more meaningful information, so that it doesn’t detract from the experience of viewing the layout. Curious about what sort of ‘graphical experience’ I would come up with myself, I took a shot at punching away at [Harm’s] GUI. I got momentarily lost in turning the little red dots on and off and eventually turned out this little ditty:
It was supposed to be something of a triangle, yet turned into a crop circle… or pronged nipple. After it was sent, I wondered whether or not [Harm] actually saw it. In the case that he did, I can only imagine what I communicated to our fellow hacker abroad with my squall of dots. All of these thoughts though are the whole point of the project. Awesome work!
Planet Arduino is, or at the moment is wishing to become, an aggregation of public weblogs from around the world written by people who develop, play, think on Arduino platform and his son. The opinions expressed in those weblogs and hence this aggregation are those of the original authors. Entries on this page are owned by their authors. We do not edit, endorse or vouch for the contents of individual posts. For more information about Arduino please visit www.arduino.cc
You are currently browsing the archives for the communication category.