Posts | Comments

Planet Arduino

Archive for the ‘Arduino IDE’ Category

The Arduino IDE is the well-known software we all use to program our boards. Its development started in 2005 based on the graphical interface of the Processing project and has never stopped since. During these years, countless hours of development by the Arduino team with the help of a vibrant community made the Arduino IDE the de facto standard for electronics prototyping. Thanks to an extensible framework based on modular board support packages, the IDE supports more than 1,000 official and non-official boards; it’s translated in 66 languages, mentioned by more than 3,000 books, and is still growing: during the last year, it was downloaded more than 39 millions of times. More than ever.

First off, a big thank you to the Arduino community that makes development possible with donations and — even more important — by buying original Arduino boards: we use your money to pay the developers that work daily on the Arduino open source software for the benefit of everyone. Keep supporting our work!

The path from a simple IDE to an advanced IDE

While the Arduino IDE provides a simple and clear interface that is ideal for the novice users, the more advanced users often report that the editing capabilities are a bit limited compared to modern editors. This includes features like code indentation, block folding, auto-closing brackets, regular expression search and replace, comment toggling. In addition to this, many users have been asking for live debugging, i.e. the ability to run code on an attached board and stop it at a given line to check the contents of variables, memory and registers.

The IDE 1.x is developed in Java, and its monolithic codebase makes it difficult to implement such features. Java is also becoming an obsolete technology for desktop applications and is being phased out by newer operating systems and app stores, which forces us to spend time on working around compatibility issues.

In 2018 we started to refactor the toolchain by announcing a big game changer: arduino-cli, the Arduino command line tool written in Golang that exposes all the core functionalities of the IDE, providing advanced users with a flexible tool they can integrate into their professional IDE of choice. Since then, we maintain and improve arduino-cli on a daily basis (try it now if you haven’t!).

In 2019 we announced the alpha release of a new IDE built on top of arduino-cli and based on a modern software stack (Theia and Electron) under the code name of “Arduino Pro IDE” and we got a lot of positive feedback about it. 2020 has been a busy development year, and a dedicated team of developers has been working behind the scenes to bring the new IDE from a proof-of-concept to a fully functional tool.

The time has come: please welcome the Arduino IDE 2.0 (beta)

We’re pleased to announce that as of today the Arduino IDE 2.0 beta is available for download and its code repositories become open source. It carries a modern editor and provides a better overall user experience thanks to a responsive interface and faster compilation time. Don’t be afraid of trying it today: the upgrade will be frictionless as the interface will look very familiar. But let’s see some of the goodies you’ll find.

While typing, the editor suggests the autocompletion of variables and functions according to the libraries you included:

When right-clicking on a variable or a function, a contextual menu will provide navigation shortcuts to jump to the line (and file) where they are declared:

See this page to learn more about the new editing tools.

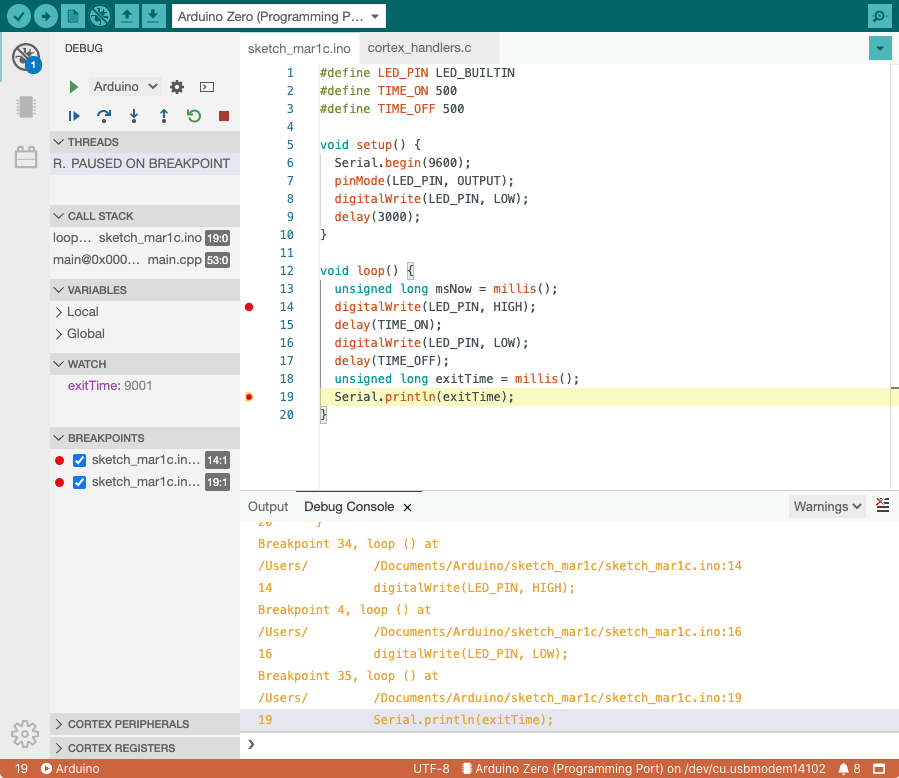
But there’s another big feature in the new IDE: a live debugger that allows you to run your code interactively on a board and inspect its execution without writing tens of “Serial.println()” statements. Just fire the debug panel, set breakpoints where you want to pause the execution and inspect the content of variables. Oh, you can even change the content of variables on the fly and resume execution!

As of today, the debugger supports all the Arduino boards based on the SAMD and Mbed platforms (MKR family, Nano 33 IoT, Nano 33 BLE, Portenta, Zero). Maintainers of Arduino cores for third-party boards can add support for debugging by adding the relevant configuration parameters; a technical guide for this is coming. You’ll need to connect a debugging probe such as the Segger J-link to the JTAG pins on the board and you’ll be ready to go.

The new IDE is based on the Eclipse Theia framework, which is an open source project based on the same architecture as VS Code (language server protocol, extensions, debugger). The front-end is written in TypeScript, while most of the backend is written in Golang.

Try it now!

We need your help to test the new IDE. We want to make it perfect and bug-free, so do not hesitate to download it now and join the discussion in the forum!

It is pretty well-known that I’m not a big fan of the Arduino infrastructure. Granted, these days you have more options with the pro IDE and Platform IO, for example. But the original IDE always gives me heartburn. I realized just how much heartburn the other day when I wanted to something very simple: increase the receive buffer on an ATmega32 serial port. The solution I arrived at might help you do some other things, so even if you don’t need that exact feature, you still might find it useful to see what I did.
Following this experience I am genuinely torn. On the one hand, I despise the lackluster editor for hiding too much detail from me and providing little in the way of useful tools. On the other hand, I was impressed with how extensible it was if you can dig out the details of how it works internally.

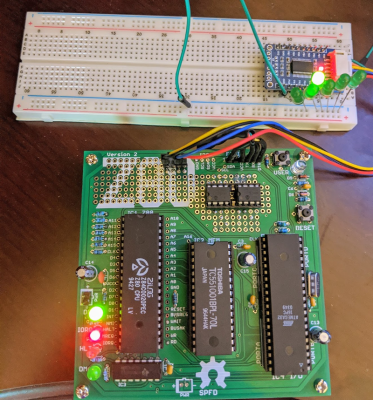
First, you might wonder why I use the IDE. The short answer is I don’t. But when you produce things for other people to use, you almost can’t ignore it. No matter how you craft your personal environment, the minute your code hits the Internet, someone will try to use it in the IDE. A while back I’d written about the $4 Z80 computer by [Just4Fun]. I rarely have time to build things I write about, but I really wanted to try this little computer. The parts sat partially assembled for a while and then a PCB came out for it. I got the PCB and — you guessed it — it sat some more, partially assembled. But I finally found time to finish it and had CP/M booted up.

The only problem was there were not many good options for transferring data back and forth to the PC. It looked like the best bet was to do Intel hex files and transfer them copy and paste across the terminal. I wanted better, and that sent me down a Saturday morning rabbit hole. What I ended up with is a way to make your own menus in the Arduino IDE to set compiler options based on the target hardware for the project. It’s a trick worth knowing as it will come in handy beyond this single problem.

The Issue: Arduino Serial Buffer Size Limit

I won’t bore you with the details about getting the board to work since you will only care if you have one. Details are available in a discussion on Hackaday.io, if you really want to follow it. But the upshot was that for XModem transfers, [Just4Fun] felt like the default Arduino serial buffer wasn’t big enough to be reliable. It did seem to work with the default 64-byte buffer, but XModem sends more data than that and it would be easy to imagine it getting overrun.

How hard can it be to update the buffer? In one way, it is trivial. In another way, it is very difficult because the tools want to help you so badly.

Tool Chain

The little computer project uses a real Z80 chip and uses an ATMega32A for almost all the support functions. It generates the clock, acts like a serial port, acts like a disk drive, and so on. However, the ATMega32 doesn’t directly have Arduino IDE support so you have to install a toolchain for it. The project called for MightyCore so that’s what I used.

The libraries for hardware serial were all set up using #define statements to allow you to adjust the buffer sizes. By default, if you haven’t set up anything, you get a default based on the amount of RAM your processor provides:


#if !defined(SERIAL_TX_BUFFER_SIZE)
#if ((RAMEND - RAMSTART) < 1023)
#define SERIAL_TX_BUFFER_SIZE 16
#else
#define SERIAL_TX_BUFFER_SIZE 64
#endif
#endif
#if !defined(SERIAL_RX_BUFFER_SIZE)
#if ((RAMEND - RAMSTART) < 1023)
#define SERIAL_RX_BUFFER_SIZE 16
#else
#define SERIAL_RX_BUFFER_SIZE 64
#endif
#endif

Making the Change

So this is easy, right? Just define those symbols before HardwareSerial.h loads. Uh oh. That file is loaded by Arduino.h. The IDE wants to add that to your program and it forces it to be first. There seems to be some IDE versions that check if you already included it so they don’t include it twice, but version 1.8.5 didn’t seem to do that. Maybe I can add some options in the preferences to pass to the compiler. Nope. Not via the IDE, anyway.

Not that I didn’t try a lot of things. It was tempting, of course, to simply change the core libraries. But that’s bad. You might want the defaults later. If you update the tool chain, you’ll lose your updates. I wanted to avoid that. Some people on the Internet suggested making a copy of the platform files and modifying those. Still not ideal.

Test Your Assumptions With Custom Error Reporting

I could tell things I tried were not working because I would put #if statements and #error statements temporarily in HardwareSerial.cpp. For example:

#if SERIAL_RX_BUFFER_SIZE==256
#error 256
#endif

Now if a compile causes an error 256, I know I was able to set the size. If not, then the system was resisting my changes.

Compromise: Adding Menu Options At the Board Level

I really wanted a way to make a change just in my project and set the serial buffer sizes. I failed at that. What I did do was make a modification to the boards.txt provided by Mighty Core. Yes, I will have to watch for upgrades overwriting my changes, but they are simple and it will be obvious that it is missing.

The reason it will be obvious is that I created a menu for the IDE that only appears when using ATMega32 for Mighty Core. This menu lets you select a few preset buffer sizes.

There were three parts to making this work:

  1. You have to tell the IDE you have a menu item and what it looks like.
  2. The new item needs to set some compiler options.
  3. Because the existing system also sets some compiler options, you have to make sure not to clobber them.

The first part is easy. The boards.txt file was (for me) in ~/.arduino15/packages/MightyCore/hardware/avr/2.0.5/boards.txt. Near the top there’s a list of menu keys and I added mine to the end:


# Menu options
menu.clock=Clock
menu.BOD=BOD
menu.LTO=Compiler LTO
menu.variant=Variant
menu.pinout=Pinout
menu.bootloader=Bootloader
menu.SerialBuf=Serial Port Buffers (RX/TX)

Next, I moved down the file and added my menu before the existing LTO menu option for the ATMega32:


32.menu.SerialBuf.disabled=Default
32.menu.SerialBuf.disabled.compilerSB.c.extra_flags=
32.menu.SerialBuf.disabled.compilerSB.cpp.extra_flags=

32.menu.SerialBuf.SB64=64/64
32.menu.SerialBuf.SB64.compilerSB.c.extra_flags=-DSERIAL_RX_BUFFER_SIZE=64 -DSERIAL_TX_BUFFER_SIZE=64
32.menu.SerialBuf.SB64.compilerSB.cpp.extra_flags=-DSERIAL_RX_BUFFER_SIZE=64 -DSERIAL_TX_BUFFER_SIZE=64

32.menu.SerialBuf.SB128=128/128
32.menu.SerialBuf.SB128.compilerSB.c.extra_flags=-DSERIAL_RX_BUFFER_SIZE=128 -DSERIAL_TX_BUFFER_SIZE=128
32.menu.SerialBuf.SB128.compilerSB.cpp.extra_flags=-DSERIAL_RX_BUFFER_SIZE=128 -DSERIAL_TX_BUFFER_SIZE=128

32.menu.SerialBuf.SB12864=128/64
32.menu.SerialBuf.SB12864.compilerSB.c.extra_flags=-DSERIAL_RX_BUFFER_SIZE=128 -DSERIAL_TX_BUFFER_SIZE=64
32.menu.SerialBuf.SB12864.compilerSB.cpp.extra_flags=-DSERIAL_RX_BUFFER_SIZE=128 -DSERIAL_TX_BUFFER_SIZE=64

32.menu.SerialBuf.SB256=256/256
32.menu.SerialBuf.SB256.compilerSB.c.extra_flags=-DSERIAL_RX_BUFFER_SIZE=256 -DSERIAL_TX_BUFFER_SIZE=256
32.menu.SerialBuf.SB256.compilerSB.cpp.extra_flags=-DSERIAL_RX_BUFFER_SIZE=256 -DSERIAL_TX_BUFFER_SIZE=256

32.menu.SerialBuf.SB25664=256/64
32.menu.SerialBuf.SB25664.compilerSB.c.extra_flags=-DSERIAL_RX_BUFFER_SIZE=256 -DSERIAL_TX_BUFFER_SIZE=64
32.menu.SerialBuf.SB25664.compilerSB.cpp.extra_flags=-DSERIAL_RX_BUFFER_SIZE=256 -DSERIAL_TX_BUFFER_SIZE=64

32.menu.SerialBuf.SB25632=256/32
32.menu.SerialBuf.SB25632.compilerSB.c.extra_flags=-DSERIAL_RX_BUFFER_SIZE=256 -DSERIAL_TX_BUFFER_SIZE=32
32.menu.SerialBuf.SB25632.compilerSB.cpp.extra_flags=-DSERIAL_RX_BUFFER_SIZE=256 -DSERIAL_TX_BUFFER_SIZE=32

Menu Structure

You can see that the 32.menu object groups all the items together for this processor. The next part is our menu key (SerialBuf). After that is a unique key for each memory item. It is important that you don’t reuse these. So, for example, if you have two SB64 keys only one is going to work.

If you stop at that key and put an equal sign you can assign the menu item the text you want to display. For example “Default” or “64/64.” You can also extend the key with a property and that property will be set if the option is active.

So, for example, if you select 256/256 then the compilerSB.c.extra_flags property will get set. I made that name up, by the way, and you’ll see why in a minute.

Peaceful Coexistence

There is no property called compilerSB.c.extra_flags. The correct property is compiler.c.extra_flags. However, the Mighty Core LTO option uses the same key. That’s why it was important that the new menu appears first and also that it sets a fake property. Then the LTO code needs a slight modification:


# Compiler link time optimization
32.menu.LTO.Os=LTO disabled
32.menu.LTO.Os.compiler.c.extra_flags={compilerSB.c.extra_flags}
32.menu.LTO.Os.compiler.c.elf.extra_flags=
32.menu.LTO.Os.compiler.cpp.extra_flags={compilerSB.cpp.extra_flags}
32.menu.LTO.Os.ltoarcmd=avr-ar

32.menu.LTO.Os_flto=LTO enabled
32.menu.LTO.Os_flto.compiler.c.extra_flags={compilerSB.c.extra_flags} -Wextra -flto -g
32.menu.LTO.Os_flto.compiler.c.elf.extra_flags=-w -flto -g
32.menu.LTO.Os_flto.compiler.cpp.extra_flags={compilerSB.cpp.extra_flags} -Wextra -flto -g
32.menu.LTO.Os_flto.ltoarcmd=avr-gcc-ar

The big change is that each set of flags adds to whatever the new menu set in its custom property. This way, all the flags get put into the correct property, compiler.c.extra_flags.

I set up error traps to catch all the cases to make sure they were being set right. In addition, after removing those traps, I could see my memory usage go up accordingly.

Customize

Of course, you can modify the parameters if you want something different. You could also use this trick to set other parameters before the Arduino.h file takes over. There’s some documentation about how to set up the platform definitions, including boards.txt.

It would have probably been better for me to make a custom boards.txt file with the same information in it but then I’d need to take the rest of Mighty Core with me. Instead, I just keep a copy of the file called boards.txt.custom and if my menu disappears, I just have to compare that file with the boards.txt file to see what changed.

Of course, if you don’t have to support people using the IDE, maybe just give it up. The Pro IDE is better, even if it does have some shortcomings. Plus there’s always Platform.io.
Today, we are excited to announced the arrival of the Arduino IDE 1.8.12.

Wow! Another release just after two weeks, you ask?

Well, we fixed some serious bugs related to the compiler, and more importantly, we had to take a step back with respect to the transition to the new Java Virtual Machine from OpenJDK. Since we had received so many reports from our users, we decided to do a release with the old JVM in order to have a bit more time to properly handle those issues and at the same time guarantee a better experience to our users.

As usual, if you are curious, you can find the full changelog and contributors in the release notes here.

We’re excited to announce that Arduino IDE 1.8.11 is here!

In addition to the usual load of bugfixes and small improvements under the hood, the latest version includes:

  • Improved support for Mac OS X (the app is now notarized and strictly follows the latest OS X recommended security guidelines)
  • A “send text” command within the serial plotter (so you can interact with the board while plotting data!)
  • Better sketch build time
  • Updated AVR core and WiFi firmware

As always, we must thank our amazing community for their incredible support and contributions. The complete list of changes and contributors can be found in the full changelog.

Live from Maker Faire Rome on Saturday, October 19th at 16.00 CET, Massimo Banzi and Luca Cipriani will push the button to release the new Arduino Pro IDE (alpha) — watch this space.

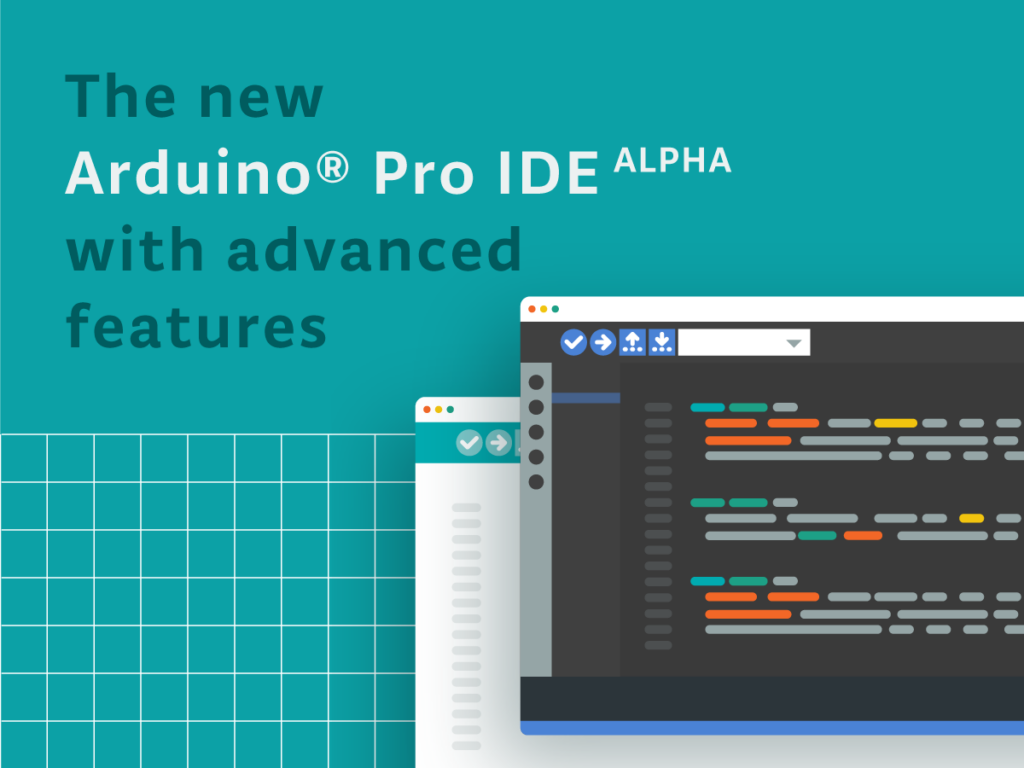
The hugely popular Arduino IDE software is easy-to-use for beginners, yet flexible enough for advanced users. Millions of you have used it as your everyday tool to program projects and applications. We’ve listened to your feedback though, and it’s time for a new enhanced version with features to appeal to the more advanced developers amongst you.

We are very excited to be releasing an “alpha” version of a completely new Development Environment for Arduino, the Arduino Pro IDE. 

The main features in this initial alpha release of the new Pro IDE are:

  • Modern, fully featured development environment 
  • Dual mode, classic mode (identical to the classic Arduino IDE) and pro mode (file system view)
  • New Board Manager 
  • New Library Manager
  • Board List
  • Basic auto completion (Arm targets only)
  • Git integration
  • Serial Monitor
  • Black theme

But the new architecture opens the door to features that the Arduino community have been requesting like these that will be following on soon:

  • Sketch synchronisation with Arduino Create Editor
  • Debugger
  • Fully open to third party plug-ins 
  • Support for additional languages than C++

The new Arduino Pro IDE is based on the latest technologies as follows: 

Available in Windows, Mac OSX and Linux64 versions; we need your help in improving the product. Before releasing the source code to move out of the alpha, we would greatly appreciate your feedback. Like all things in the Arduino community, we grow and develop together through your valued contributions. Please test the Arduino Pro IDE to it’s breaking point, we want to hear all the good and bad things you find. We’re open to recommendations for additional features, as well as hearing about any bugs you may find – there’s bound to be a few as it is an alpha version afterall!

Versions (released from 16.00 CET on Saturday, October 19th)

Arduino Pro IDE Windows v0.0.1-alpha.preview

Arduino Pro IDE OSX v0.0.1-alpha.preview

Arduino Pro IDE Linux v0.0.1-alpha.preview

So give it a go and let us know of any feature requests or bugs at: https://github.com/arduino/arduino-pro-ide/issues

For those of you who love and cherish the classic Arduino IDE, don’t worry it will continue to be available forever.

Hey Arduiners,

Today we are releasing IDE 1.8.10 and you should try it because it’s awesome! With the support of our incredible community, we’ve been improving a lot of (small and not so small) things.

Besides taking a look at the complete changelog, we’d like to point out one outstanding contribution that we received during this dev cycle.

Our friend Joe Wegner from APH reached out to us with a very clear plan on how to improve the IDE’s accessibility with some very convenient patches. With the help of co-founder Tom Igoe and ITP alumnus and research resident Jim Schmitz, we’ve started targeting some of the most problematic components that used to interact badly with screen readers (popups, links, lists not entirely navigable by keyboard) while also adding a plethora of accessibility descriptions to components that were basically hidden for blind and visually impaired users.

To keep things clean, Wegner added a checkbox under Preference panel to enable some particular optimizations for screen readers (like transforming links into buttons so they can be reached using the TAB key).

We hope it is the start of a lasting collaboration to make Arduino truly available for everyone willing to learn and hack with us.

The holidays are over and we’re back at work, so it’s time to clean up the house. To get ready for autumn, our amazing dev team has decided to devote an entire week to resolve as many of the open issues on the Arduino IDE repository and related projects (cores, libraries, etc.) as possible.

Starting this Monday, the dev team will be going through the open issue log — analyzing requests, fixing them where immediately possible, and in some cases, reaching out to the original submitter to establish if they are still seeing an issue or if it can be closed out. If you do receive such a notification in your GitHub account (with a subject starting with [arduino/Arduino] …), please help us help you by responding accordingly.

Big thanks to all of you who’ve contributed in the past and continue to submit the issues you find within the Arduino IDE for resolution. We appreciate your support and acknowledge your patience while waiting for them to be fixed.

Let’s watch that open issue counter fall by the day!

Over the last several months, [Aaron Christophel] has been working on creating a custom firmware for cheap fitness trackers. His current target is the “D6 Tracker” from a company called MPOW, which can be had for as little as $7 USD. The ultimate goal is to make it so anyone will be able to write their own custom firmware for this gadget using the Arduino IDE, and with the release of his new Android application that allows wirelessly flashing the device’s firmware, it seems like he’s very close to realizing that dream.

Previously, [Aaron] had to crack open the trackers and physically connect a programmer to update the firmware on the NRF52832-based devices. That might not be a big deal for the accomplished hardware hacker, but it’s a bit of a hard sell for somebody who just wants to see their own Arduino code running on it. But with this new tool, he’s made it so you can easily switch back and forth between custom and original firmware on the D6 without even having to take it off your wrist.

After the break, you can see the video that [Aaron] has put together which talks about the process of flashing a new firmware image. It’s all very straightforward: you simply pick the device from the list of detected BLE devices, the application puts the tracker into bootloader mode, and then you select the DFU file you want to flash.

There are a couple of ready-made firmwares you can put on the D6 right now, but where’s the fun in that? [Aaron] has put together a customized version of the Arduino IDE that provides everything you need to start writing and flashing your own firmware. If you’ve ever dreamed about creating a wearable device that works exactly the way you want, it’s hard to imagine a cheaper or easier way to get in on the action.

When we last heard from [Aaron] earlier this year, he was working on the IWOWN I6HRC tracker. But it looks like the availability of those devices has since dried up. So if you’re going to try your hand at hacking the MPOW D6, it might be wise to buy a few now while they’re still cheap and easy to find.

Today we’re very excited (and a bit nervous) to announce the new development cycle of the Arduino IDE.

As you may have noticed, we’ve been continuously removing functionality from the Java package, and migrating them to a collection of external tools. We began this project by moving the build logic to arduino-builder, which now also powers the Arduino Create infrastructure.

We think that this split will keep the tools manageable, while giving a chance for third parties to integrate them into their products without the burden of a full-blown IDE.

Moreover, we are introducing another couple of tools:

One is arduino-cli, which we’ll uncover in the next few weeks as soon it comes out of pre-pre-alpha stage.

The other is arduino-preprocessor, which supersedes ctags in the sketch preprocessing phase. Moving to a different tool has been a necessary step for many reasons, the most important being the ctags’ limited parsing of complex C++ sketches.

arduino-preprocessor is based on libclang, statically compiled for zero dependencies execution; it uses clang’s superpowers to extract the prototypes we need, directly from the AST. As a (really nice) side effect, this engine can even be used for context-aware completion, probably the most required feature from the beginning of Arduino.

Since we’re unveiling such a big feature, it will surely impact the overall performance. To avoid keeping it out-of-tree for too long, we decided to open the beta branch.

This branch will be a playground for new ideas and implementations, including more collaborators with push powers. The branch has just been populated with all the IDE-related pull requests scheduled for the next release.

The beta branch is quite peculiar as well, because precompiled binaries generated from this branch will be available directly from the arduino.cc download page. We noticed that nightly (or hourly) builds are insufficient to spot a whole class of bugs, which may harm non-developers, users with non-latin charsets, and so on.

Being marked as experimental, the beta branch will not be ready for large-scale deployment (although it will probably be okay for everyday use); thus, we won’t provide a Windows exe or a signed OSX app. However, we hope that many people will test it and report bugs and impressions, so we can merge it safely into master in the near future.

A short curated list of the beta branch’s improvements over the latest 1.8.x IDE:

  • Initial support for autocompletion (activate it using CTRL+space)
    • Attention: Launching for the first time is quite slow and will freeze the UI. Don’t worry, simply wait for it to unstick.
  • Initial work on daemonized builder (using file watchers, will be able to spot if compilation can be avoided, partially or totally).
  • AVR core has been moved to its own repo.
  • Tabs are scrollable. 🙂
  • The serial monitor is html-aware and clickable (if steady).
  • Initial work on Library dependencies UI.
  • Initial work on Hi-DPI support on Linux.
  • Find/replace window is always on top of its own editor window.
  • Library/Board manager show buttons on mouseover.

In case you haven’t noticed, our team has just released Arduino IDE 1.8.5This time the changelog is fairly small, as it mainly solves a (rather important) problem being encountered by macOS users who just updated to High Sierra (10.13).

If you are not using English as system language, any version of Arduino you launch will lack the menu in the system bar. Every Java application is experiencing the same problem, so it will probably be solved by Apple in the near future.

In the meantime, IDE 1.8.5 recognizes when the menu bar is not being displayed and replaces it with a Windows-style one. It may not be the prettiest thing, but at least it works!

If you want to recover the old menu bar while keeping the whole system in your normal language, you can issue a single command on Terminal:

defaults write cc.arduino.Arduino AppleLanguages '(en)'


Thank @AdrianBuza for the workaround. Issuing this command will make Arduino IDE in English, however you can still change the language under “Preferences” without losing the macOS integration.


  • Newsletter

    Sign up for the PlanetArduino Newsletter, which delivers the most popular articles via e-mail to your inbox every week. Just fill in the information below and submit.

  • Like Us on Facebook