Posts | Comments

Planet Arduino

Archive for the ‘LED Lighting’ Category

Congratulations! You finally have a garage to call your own and you’re ready to turn it into the workshop of your dreams. But before you go on a shopping spree in Home Depot’s tools section, you may want to consider upgrading from that single dim lightbulb to more substantial lighting — otherwise, you’ll never find the screws you drop on the ground. LeMaster Tech can help with his great video on installing DIY voice-controlled smart LED lighting.

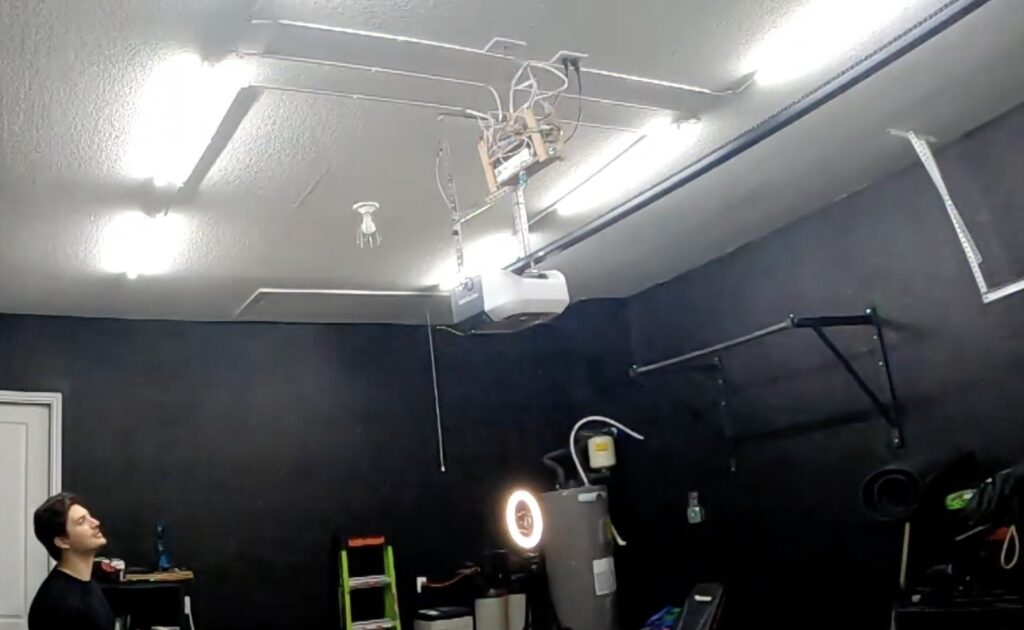
LeMaster Tech’s primary goal was simply to increase the brightness in the garage. He took the route that gives the best bang for the buck: LED tubes. Those are similar in form factor to fluorescent light tubes, but they can put out more lumens with fewer watts and they tend to last a lot longer. They also don’t need expensive and bulky ballasts. LeMaster Tech installed several of those on the ceiling of his garage, then took things to the next level.

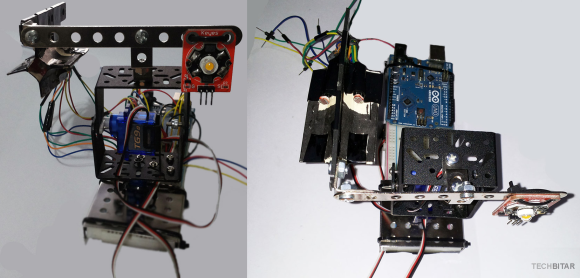
These LED light tubes work with standard household mains AC power, so they can be wired like regular light bulbs. But instead, LeMaster Tech made them smart by wiring them through a relay board controlled by an Arduino UNO Rev3 board. That lets the Arduino safely switch each light tube on and off. LeMaster Tech gave it the ability to do that in response to voice commands by adding a DFRobot Gravity voice recognition module. That handy module works entirely offline and uses a simple AI to recognize spoken words. It has 121 built-in words and supports 17 custom words, so LeMaster Tech was able to tailor it to his needs.

Now he can switch the lights with a simple voice command and even activate pre-programmed effects, like flashing the lights. 

The post Upgrade your shop with voice-controlled smart LED lighting appeared first on Arduino Blog.

LED accent lighting is very trendy right now, as it can add quite a lot of visual interest to a room without introducing clutter. But commercial products are often either very expensive or subpar in quality and capability. Fortunately for makers, this kind of project is perfect for a DIY weekend build. One great option is Nancy’s HEXA LEDs, which are gorgeous, affordable, and controllable via Bluetooth®.

Nancy’s design work here is fantastic and HEXA LEDs look awesome. As the name suggests, they’re hexagonal arrangements of LEDs. They’re modular, which gives the builder the freedom to create whatever pattern they like. It is even possible to have HEXA LEDs flow from a wall onto the ceiling or around a corner to an adjacent wall. An Android app (sorry, no iOS app available) lets the user control the LED effects, animations, and colors.

To create your own HEXA LEDs decor, you will first need to decide on the pattern you want. From there, you can 3D-print all the required parts. Those include the supports that mount to the wall, the diffusers that cover the LEDs, the electronics housing, and so on. The brain of the system is either an Arduino Nano or a Nano Every board. An HC-06 module allows for communication with the Android app. Illumination comes from strips of WS2812B individually addressable RGB LEDs. Proper power distribution is critical and becomes more complex as you add more LEDs, so be sure to follow Nancy’s instructions carefully.

If you want LED wall art that will wow your visitors, then you don’t need to look any further.

The post HEXA LEDs make Bluetooth-controlled accent lighting affordable appeared first on Arduino Blog.

Reading is big in Québec, and [pepelepoisson]’s young children have access to a free mini library nook that had seen better days and was in dire need of maintenance and refurbishing. In the process of repairing and repainting the little outdoor book nook, he took the opportunity to install a few experimental upgrades (link in French, English translation here.)

The mini library pods are called Croque-Livres, part of a program of free little book nooks for children across Québec (the name is a bit tricky to translate into English, but think of it as “snack shack, but for books” because books are things to be happily devoured.)

After sanding and repairs and a few coats of new paint, the Croque-Livres was enhanced with a strip of WS2812B LEDs, rechargeable battery with solar panel, magnet and reed switch as door sensor, and a 3.3 V Arduino to drive it all. [pepelepoisson]’s GitHub repository for the project contains the code and CAD files for the 3D printed pieces.

The WS2812B LED strip technically requires 5 V, but as [pepelepoisson] found in his earlier project Stecchino, the LED strip works fine when driven directly from a 3.7 V lithium-polymer cell. It’s not until around 3 V that it starts to get unreliable, so a single 3.7 V cell powers everything nicely.

When the door is opened, the LED strip lights up with a brief animation, then displays the battery voltage as a bar graph. After that, the number of times the door as been opened is shown on the LED strip in binary. It’s highly visual, interactive, and there’s even a small cheat sheet explaining how binary works for anyone interested in translating the light pattern into a number. How well does it all hold up? So far so good, but it’s an experiment that doesn’t interfere at all with the operation of the little box, so it’s all good fun.

modularLED2Honeycomb patterns inspired the design behind this light fixture. The modular design means the shape can be reconfigured.

Read more on MAKE

The post Illuminate Your Walls with Beehive-Inspired Modular Lighting appeared first on Make: DIY Projects and Ideas for Makers.

DarbinOrvar_LED03Watch Darbin Orvar create a modern-looking light fixture that uses high powered LEDs for a dimmable effect.

Read more on MAKE

The post Darbin Orvar: Construct a Beautiful, Dimmable LED Light Fixture appeared first on Make: DIY Projects, How-Tos, Electronics, Crafts and Ideas for Makers.

Akiba of Freaklabs helped design sequenced lighting like those used in the Wreaking Crew Orchestra shows.Akiba of Freaklabs helped design sequenced lighting like those used in the Wrecking Crew Orchestra shows

Read more on MAKE

The post How to Sequence LEDs to Music: A Tutorial by Freaklabs appeared first on Make: DIY Projects, How-Tos, Electronics, Crafts and Ideas for Makers.

PETT Plant DeluxeEver wish you could synchronize your brainwaves with an otherworldly luminescent plant from the comfort of your own room?

Read more on MAKE

The post This Trippy Arduino-Powered “Plant” Trains Your Brain appeared first on Make: DIY Projects, How-Tos, Electronics, Crafts and Ideas for Makers.

3DPClock-5Building your own clock is practically a rite of passage as a Maker. 3D-print this Arduino-based desktop clock with a jumbo seven-segment LED display that glows from within.

Read more on MAKE

The post 3D Print a Supersized Seven-Segment Clock appeared first on Make: DIY Projects, How-Tos, Electronics, Crafts and Ideas for Makers.

Feb
24

LuxBlaster: Blast a Beam of Light at the Most Intense Light Source

arduino, arduino hacks, automatic lighting, automobile, headlight, headlight hack, LED Lighting Comments Off on LuxBlaster: Blast a Beam of Light at the Most Intense Light Source 

HighBeams

[Hazim] wrote in to tell us about his project that teaches inconsiderate drivers a lesson! Well, theoretically. The LuxBlaster is a spot light which points towards the most intense light source.

The idea is that you can blast drivers who do not turn their high-beams off with a reverse high-beam of your own. It is very important to note that this should never be used, as [Hazim] also clearly states. While this project is meant to prove that it can be done (a “what if”) project, it has two components that are very well done and can easily be used in different projects: the Arduino controlled spotlight and the light intensity tracker.

What would you use an Arduino controlled spotlight for? Smart lighting? What about a light source tracker? Let us know in the comments.


Filed under: Arduino Hacks


  • Newsletter

    Sign up for the PlanetArduino Newsletter, which delivers the most popular articles via e-mail to your inbox every week. Just fill in the information below and submit.

  • Like Us on Facebook