Posts | Comments

Planet Arduino

Archive for the ‘Blynk’ Category

No matter who you are,  you produce garbage of some kind or another. Two students decided they wanted to create a smart garbage can that could alert them when the can is full or even when it is stinky.

We will go on on the record: we didn’t know that an alcohol sensor could tell if your garbage is stinky, so if that works, that’s a new one on us. However, it makes a certain kind of sense because garbage ferments. We thought garbage smelled because of hydrogen sulfide and methane.

Trash cans have a tough life, so if you really want to duplicate this, you’ll probably want to mount things a bit more securely. The software, however, runs everything through a cloud service and from there can use Blynk for a phone app and IFTTT to ship things to a spreadsheet, should you care to track your garbage history statistics.

You can see in the video this is a small proof of concept can. We almost want to build one just to see if the sensor really knows when the can is smelly.

Granted, the project may not be the most practical, but it is amazing how easy it is now to build devices with a high degree of connectivity thanks to the wealth of inexpensive boards and services available.

This isn’t the first time we’ve seen Blynk. For that matter, it isn’t even our first smart trash can.

Feel like taking a long walk, but can’t be bothered with carrying your drinks? Have no fear, this  “Follow Me” Cooler Bot is here!

Really just a mobile platform with a cooler on top, the robot connects to smartphone via Bluetooth, following it using GPS. Making the platform involves a little woodworking skill, and an aluminium hub with a 3D-printed hub adapter connects the motors to a pair 6″ rubber wheels with a swivel caster mounted at the rear. A pocket in the platform’s base houses the electronics.

The Arduino Uno — via an L298n motor driver — controls two 12V DC, brushed and geared motors mounted with 3D printed brackets, while a Parallax PAM-7Q GPS Module in conjunction with an HMC 5883L compass help the robot keep its bearing. A duo of batteries power the motors and the electronics separately to prevent  any malfunctions.

Controlling the platform is done on an Android smartphone using Blynk. Ease of use and the ability to set basic commands to be sent to the robot over a desired connection type made it ideal for this helpful little ‘bot.

There isn’t anything more complicated going on — like obstacle avoidance or sophisticated pathfinding — so you kinda need a clear line between you and the cooler. Still, beverage storage is a great feature to add to you tag-along robot companion. It seems to work just fine.


Filed under: Arduino Hacks, gps hacks, robots hacks

We’ve covered the Sonoff a few times–a very inexpensive box with an ESP8266, a power supply, and an AC relay along with a way to tap into a power cord. Very inexpensive means $5 or $6. The supplied software will work with several systems (including, recently, Alexa). But what self-respecting hacker wants to run the stock firmware on something with an ESP8266 inside?

[Tzapu] certainly didn’t. But he also knew he didn’t want to start from scratch every time he wanted to deploy a switch. So he built SonoffBoilerplate and put the code on GitHub. The code manages taking configuration (including network settings) using a web-portal, can update itself over the air, and integrates with Blynk and MQTT. If you don’t like that code base, there are other choices including one that has a failsafe reconfiguration mode.

You do have to solder a header to the board to reflash it. Since all of these provide for updating over the air, you could probably press fit the header just to get the initial flash, if you like.

Of course, if you want you can totally reprogram it, too. Or use the stock firmware and control it like all the normal people do.

If you plan to use Blynk, we’ve covered it before. For that matter, we’ve talked about MQTT, too. You can see more details about Sonoff, including a quick reveal of the insides, in the video below.


Filed under: Arduino Hacks, wireless hacks

Last time, I talked about how my storage situation and my cheap nature led me to build an RC joystick controller with a cell phone app and an ESP8266. The key to making this easy was to use the GUI builder called Blynk to make a user interface for an Android or Apple phone. Blynk can communicate with the ESP8266 and makes the project relatively simple.

ESP8266 and Arduino IDE

The ESP8266 Blynk code is straightforward. You do need to set up the Arduino IDE to build for the ESP8266. That can vary by board, but here’s the instructions for the board I was using (from Adafruit; see below).

adaesp

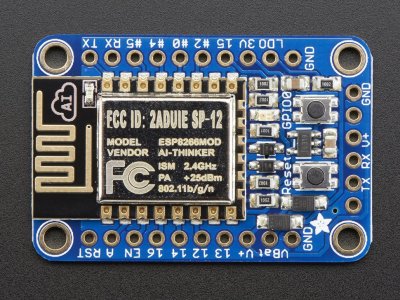
Depending on the type of ESP8266 device you are using, you may need a 3.3 V serial cable or some other means of getting the firmware into the device. For the Adafruit device I had, it has a 5 V-tolerant serial connection so a standard USB to serial dongle plugs right in. There’s also two switches on my device. To get into bootload mode, you have to push the one button down, hold it, and then press the reset button. Once you release the reset button you can release the other button. The red LED half-glows and the device is then waiting for a download.

Otherwise, things are just like usual with the Arduino IDE. You do have to be aware of what objects are available on the ESP8266 as opposed to a regular Arduino. There are some subtle differences, too. For example, the EEPROM object has some extra methods because the ESP8266 emulates an EEPROM (more on that later).

Virtual Pins and Processing

If you are getting started, you can just make a simple user interface with a push button and wire it to an LED on the board. That’s the Blynk “hello world” program. But for the joystick there are a few other considerations.

Instead of wiring a widget to a physical pin, you can use a virtual pin. Your program can then read and write these virtual pins easily. A “pin” in this context could be a bit, a number, or even a string.

To handle a virtual pin write (for example, a button push or a slider changing value), you write a function using the BLYNK_WRITE macro. For example:

// Flip S1
BLYNK_WRITE(V5)
{
if (!param.asInt()) return;
s1flip=!s1flip;
updates1();
updateEE();
}

The framework will call this code when the associated virtual pin (V5) changes. One word of caution: a button press gets two calls; one for the press and one for the release. You need to test the value if you want to only act on one or the other. That’s why the first line tests for the parameter value of zero and returns, thus ignoring the button release.

In addition to asInt() you can convert the parameter to other types, including float (asFLoat), double (asDouble), and string (asStr).

The BLYNK_READ macro lets you provide code that will run with the framework wants to read a virtual pin (that is, send data from the embedded system back to the phone). You can also call Blynk.virtualWrite to immediately update the value of a virtual pin.

The Code

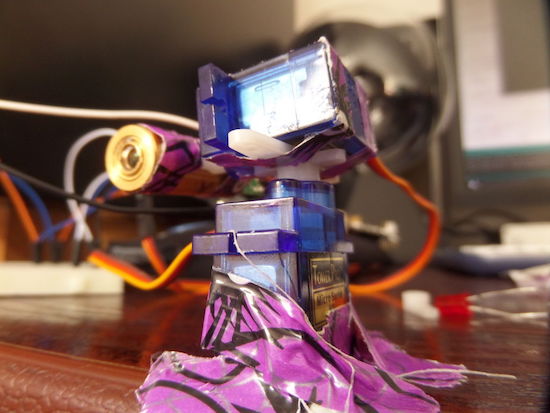
You can find the code on GitHub. It is quite straightforward: Two Servo objects control the pulse output. Their duration is set by virtual pins from Blynk. Because the joystick is set to output the microsecond count directly, there’s not much to that.

To make things more interesting, I arranged for buttons that could flip the X and Y axis and also reflect either axis (that is, invert the axis so instead of reading 1000-2000, it reads 2000-1000). Each of those is just a button push that calls a BLYNK_WRITE function. There’s a line of code that makes the buttons only operate on one of the two events you get from a button push and release.

Of course, once you can configure the joystick (including a recenter option), it is a pain to lose the configuration on each restart. So I decided to allow writing the configuration to EEPROM. That was the start of a lot of trouble.

EEPROM Issues

The ESP8266 doesn’t have a true EEPROM. But the Arduino software emulates it with flash. When you want to use the EEPROM you have to inform the library how much memory you will use. It reads that memory from flash into a buffer. From that point on, all your EEPROM changes occur in the buffer. When you are done, you call end or commit and the library determines if you made changes. If you did, an entire flash page is erased and rewritten. If you call commit, you can make more changes (which then need to be written). If you call end, you are done.

By itself, that wouldn’t be a problem. However, watching the output on a scope, I noticed that when I would change configuration, sometimes–and only sometimes–the servo outputs would stall. The ESP8266 was still operating because the buttons that light LEDs would still work. I finally realized that any button that called for a EEPROM commit might hang the servo output. It wasn’t all the time, or even most of the time, but it was often enough to be annoying.

I tried a lot of things. Nothing completely fixed it. I finally resolved to have a “save” button so at least you know you might crash when you press it. Searching the Internet, this is a common problem. Since the simple code works, it seems as though the EEPROM code is disabling whatever timer interrupt the Servo object uses or not resetting the servo timer.

In the end, it mostly works, but any time you hit the save button, there’s a risk the servo output will die until the watchdog timer kicks in and resets the device.

Network Trickery

Of course, the ESP8266 has my local WiFi SSID and password plugged into it. You can set one up to act like a lot of modern devices where if it can’t connect it acts as its own access point so you can configure it. You could also just set it up as an AP and connect to it, assuming you can work out the Internet routing to get to the Blynk servers.

The problem is, I took the device into the office to show it off and realized that while my phone could connect to the corporate network, the ESP8266 wasn’t set up for it. I wasn’t carrying enough stuff to reprogram the device, but a solution dawned on me: I configured the hotspot on my phone to mimic the WiFi at home. With the same SSID and password, the joystick connected. Granted it was a little circuitous for the Blynk app to send data to the remote server, which sent it back to the phone which then routed it to the joystick, but it did work.

Final Analysis

Overall, using Blynk was pretty easy and worked pretty well. The EEPROM glitch didn’t seem to be a Blynk issue, so I can’t fault it for that. There were a few rough edges, though. For example, the LED buttons were inverted, but there was no simple way I could find to invert the operation of the buttons. That is, the buttons were on to send a high even thought that extinguishes the LEDs.

Using their server introduces some lag, but not nearly like I feared. If you have security concerns, you can run your own server, although I have not tried that. You still need “energy” for the app, though. I couldn’t decide how I felt about that. I understand that one has to make a living, and the joystick project fit in the free limits after all.

The other thing that would have been super would have been to be able to put the Blynk user interface in a browser. Blynk supports JavaScript, but as far as I can tell only as a remote platform, not as a host for the GUI. I understand that might cut into their revenue model, but it sure would be handy.

Speaking of which, you can field the Blynk embedded side into a lot of devices ranging from Arduinos, to MBed boards, to Raspberry PIs. You can connect via Ethernet, WiFi, Bluetooth, USB, and you can add your own connection methods.

This project didn’t even scratch the surface of the widgets you can use with Blynk. You can send e-mail, show video from a streaming server (like a web camera), or post to Twitter. There are gauges and sliders and lots of other things I didn’t need for the joystick.

If you don’t like Blynk, there are other options, although none of them struck me as quite as complete. For example, a quick scan of the Google Play Store shows quite a few similar apps. If you start weeding out the ones that won’t run on all the different platforms or work with Apple phones, you get a much shorter list. If you have experience–good or bad–with a different app, post in the comments.

Of course, you can always build your own phone app and communicate via standard networking. That’s actually not as hard as it sounds, but it isn’t as easy as using a tool like Blynk, either. Custom code can optimize what you are most worried about and will do exactly what you want. On the other hand, it would be a lot of work to support many different platforms, work on Google and Apple phones, and so on. For your application, though, that might not be as important as the control over the functions. That’s your call.


Filed under: Arduino Hacks, Featured, phone hacks

We’ve already seen an Altoids tin enhanced with a laser for your cat’s entertainment, so why not a yogurt tub?

If you’re looking for a way to keep your kitty busy, but would rather not actually have to get up and wave a laser around, this setup allows you to use the Blynk app to turn on and manipulate a laser right from your phone.

Keeping things simple, the enclosure for this project is a yogurt tub, and the laser manipulator is two Arduino-driven servos stuck together with tape. A computer provides power as well as Wi-Fi control, though with a Wi-Fi shield and battery it should be able to be used independently.

Now obviously the end result isn’t the most practical device you’ll ever build, but this was a great way for me to learn the fundamentals of programming Arduino and it can help you to learn too.

Looking for a new way to play with your feline friend? You can check out the project’s Instructables page, as well as the recent Altoids tin laser assembly here.

With three kids, including himself, [Dave] faced the very real likelihood of someone absent-mindedly leaving the garage door open and being robbed blind. Rather than installing some plebeian solution, he compiled a feature list. And what a feature list it is!

The garage door needed to notify him of its status with strategically placed LEDs around the house, and give him full control on his devices. He wanted to open and close it using his existing key-code entry system. Lastly, it would be extra-cool if he could add some biometrics to it; in this case, a fingerprint sensor.

The core hardware is the staple Arduino augmented with a fingerprint module, a touch screen, some vitamins, and a WiFi break-out. He also worked up some casings in tinkercad: one for the indoor hardware, another with a flip cover for the outdoor fingerprint scanner.

We think [Dave] has accomplished what he set out to. We can just picture the would-be-thief staring at the finger print scanner and moving their operation one house over where the world is simpler. Video after the break.


Filed under: Arduino Hacks, home hacks

App development is not fun for everyone, and sometimes you just want to control a device from your phone with minimal work. Blynk appears to be a fairly put-together library for not only hooking up any Arduino or esp8266 to a phone through WiFi, but also through the net if desired.

Install the app onto your iPhone or Android device. Install the libraries on your computer. Next, modify your Arduino source to either pass direct control of a pin to Blynk, or connect Blynk to a virtual pin inside your code for more advanced control. If you want to go the easy route, create an account, log into the app, and drag and drop the interface you’d like. If the idea of letting some corporation host your Arduino project sends shivers down your spine, there is also an option to host your own server. (Editorial snark: Yes, it requires a server. That’s the cost of “simplicity”.)

There have been a few times where we’ve wished we could add app control to our projects, but installing all the libraries and learning a new language just to see a button on a screen didn’t seem worth it. This is a great solution. Have any of you had experience using it?


Filed under: Arduino Hacks, Cellphone Hacks

Introduction

There are many ways of remotely-controlling your Arduino or compatible hardware over the Internet. Some are more complex than others, which can be a good thing or a bad thing depending on your level of expertise. Lately we’ve become more interested in this topic and have come across Blynk, which appeared to be a simple solution – and thus the topic of our review.

What is Blynk?

From their website: “Blynk is a Platform with iOS and Android apps to control Arduino, Raspberry Pi and the likes over the Internet. It’s a digital dashboard where you can build a graphic interface for your project by simply dragging and dropping widgets. 

It’s really simple to set everything up and you’ll start tinkering in less than 5 mins. Blynk is not tied to some specific board or shield. Instead, it’s supporting hardware of your choice. Whether your Arduino or Raspberry Pi is linked to the Internet over Wi-Fi, Ethernet or this new ESP8266 chip, Blynk will get you online and ready for the Internet Of Your Things.” Here is the original launch video:

Blynk started off as an idea, and raised initial funding through Kickstarter – which was successful and the system has now launched. Blynk comprises of an app on your smartphone (Android or iOS) inside which you can add widgets (controls) to send commands back to your development board (Arduino etc.).

For example, you can add a switch to turn a digital output on or off. Furthermore, data from sensors connected to the development board can be send back to the smartphone. The data passes through the Blynk Cloud server, or you can download and run your own server on your own hardware and infrastructure.

How much does it cost?

Right now (September 2015) the Blynk system is free. We downloaded the app and experimented without charge. We believe that over time there will be payment required for various functions, however you can try it out now to see if Blynk suits your needs then run with it later or experiment with other platforms.

Getting Started

Well enough talk, let’s try Blynk out. Our hardware is an Android smartphone (the awesome new Oppo R7+) for control, and a Freetronics EtherTen connected to our office modem/router:

blynk etherten tronixstuff

You can also use other Arduino+Ethernet combinations, such as an Arduino Uno with an Ethernet shield. First you need to download the app for your phone – click here for the links. Then from the same page, download the Arduino library – and install it like you would any other Arduino library.

For our first example, we’ll use an LED connected to digital pin 7 (via a 560 ohm resistor) shown above. Now it’s time to set up the Blynk app. When you run the app for the first time, you need to sign in – so enter an email address and password:

blynk tronixstuff 1

Then click the “+” at the top-right of the display to create a new project, and you should see the following screen:

blynk tronixstuff 2

You can name your project, select the target hardware (Arduino Uno) – then click “E-mail” to send that auth token to yourself – you will need it in a moment. Then click “Create” to enter the main app design screen. Next, press “+” again to get the “Widget Box” menu as shown below, then press “Button”:

blynk tronixstuff 3

This will place a simple button on your screen:

blynk tronixstuff 4

Press the button to open its’ settings menu:

blynk tronixstuff 5

From this screen you can name your button, and also determine whether it will be “momentary” (i.e., only on when you press the button) – or operate as a switch (push on… push off…). Furthermore you need to select which physical Arduino pin the button will control – so press “PIN”, which brings up the scrolling menu as shown below:

blynk tronixstuff 6

We set ours to D7 then pressed “Continue”. Now the app is complete. Now head back to your computer, open the Arduino IDE, and load the “Arduino_Ethernet” sketch included with the library:

blynk example sketch tronixstuff

Then scroll down to line 30 and enter the auth key that was sent to you via email:

blynk example sketch tronixstuff auth key

Save then upload the sketch to your Arduino. Now head back to your smartphone, and click the “Play” (looks like a triangle pointing right) button. After a moment the app will connect to the Blynk server… the Arduino will also be connected to the server – and you can press the button on the screen to control the LED.

And that’s it – remote control really is that easy. We’ve run through the process in the following short video:

Now what else can we control? How about some IKEA LED strips from our last article. Easy… that consisted of three digital outputs, with PWM. The app resembles the following:

blynk tronixstuff ikea dioder

… and watch the video below to see it in action:

Monitoring data from an Arduino via Blynk

Data can also travel in the other direction – from your Arduino over the Internet to your smartphone. At the time of writing this (September 2015) you can monitor the status of analogue and digital pins, and widgets can be added in the app to do just that. They can display the value returned from each ADC, which falls between zero and 1023 – and display the values in various forms – for example:

blynk sensors tronixstuff

The bandwidth required for this is just under 2 K/s, as you can see from the top of the image above. You can see this in action through the video below:

Conclusion

We have only scratched the surface of what is possible with Blynk – which is an impressive, approachable and usable “Internet of Things” platform. Considering that you can get an inexpensive Android smartphone or tablet for under AU$50, the overall cost of using Blynk is excellent and well worth consideration, even just to test out the “Internet of Things” buzz yourself. So to get started head over to the Blynk site.

Jul
06

BlynkRGBBlynk is a new platform that allows you to build interfaces for controlling and monitoring your projects from your iOS and Android device.

Read more on MAKE

The post Control an Arduino with Your Smartphone via Blynk appeared first on Make: DIY Projects, How-Tos, Electronics, Crafts and Ideas for Makers.


  • Newsletter

    Sign up for the PlanetArduino Newsletter, which delivers the most popular articles via e-mail to your inbox every week. Just fill in the information below and submit.

  • Like Us on Facebook